This site contains affiliate links to products. We may receive a commission for purchases made through these links.
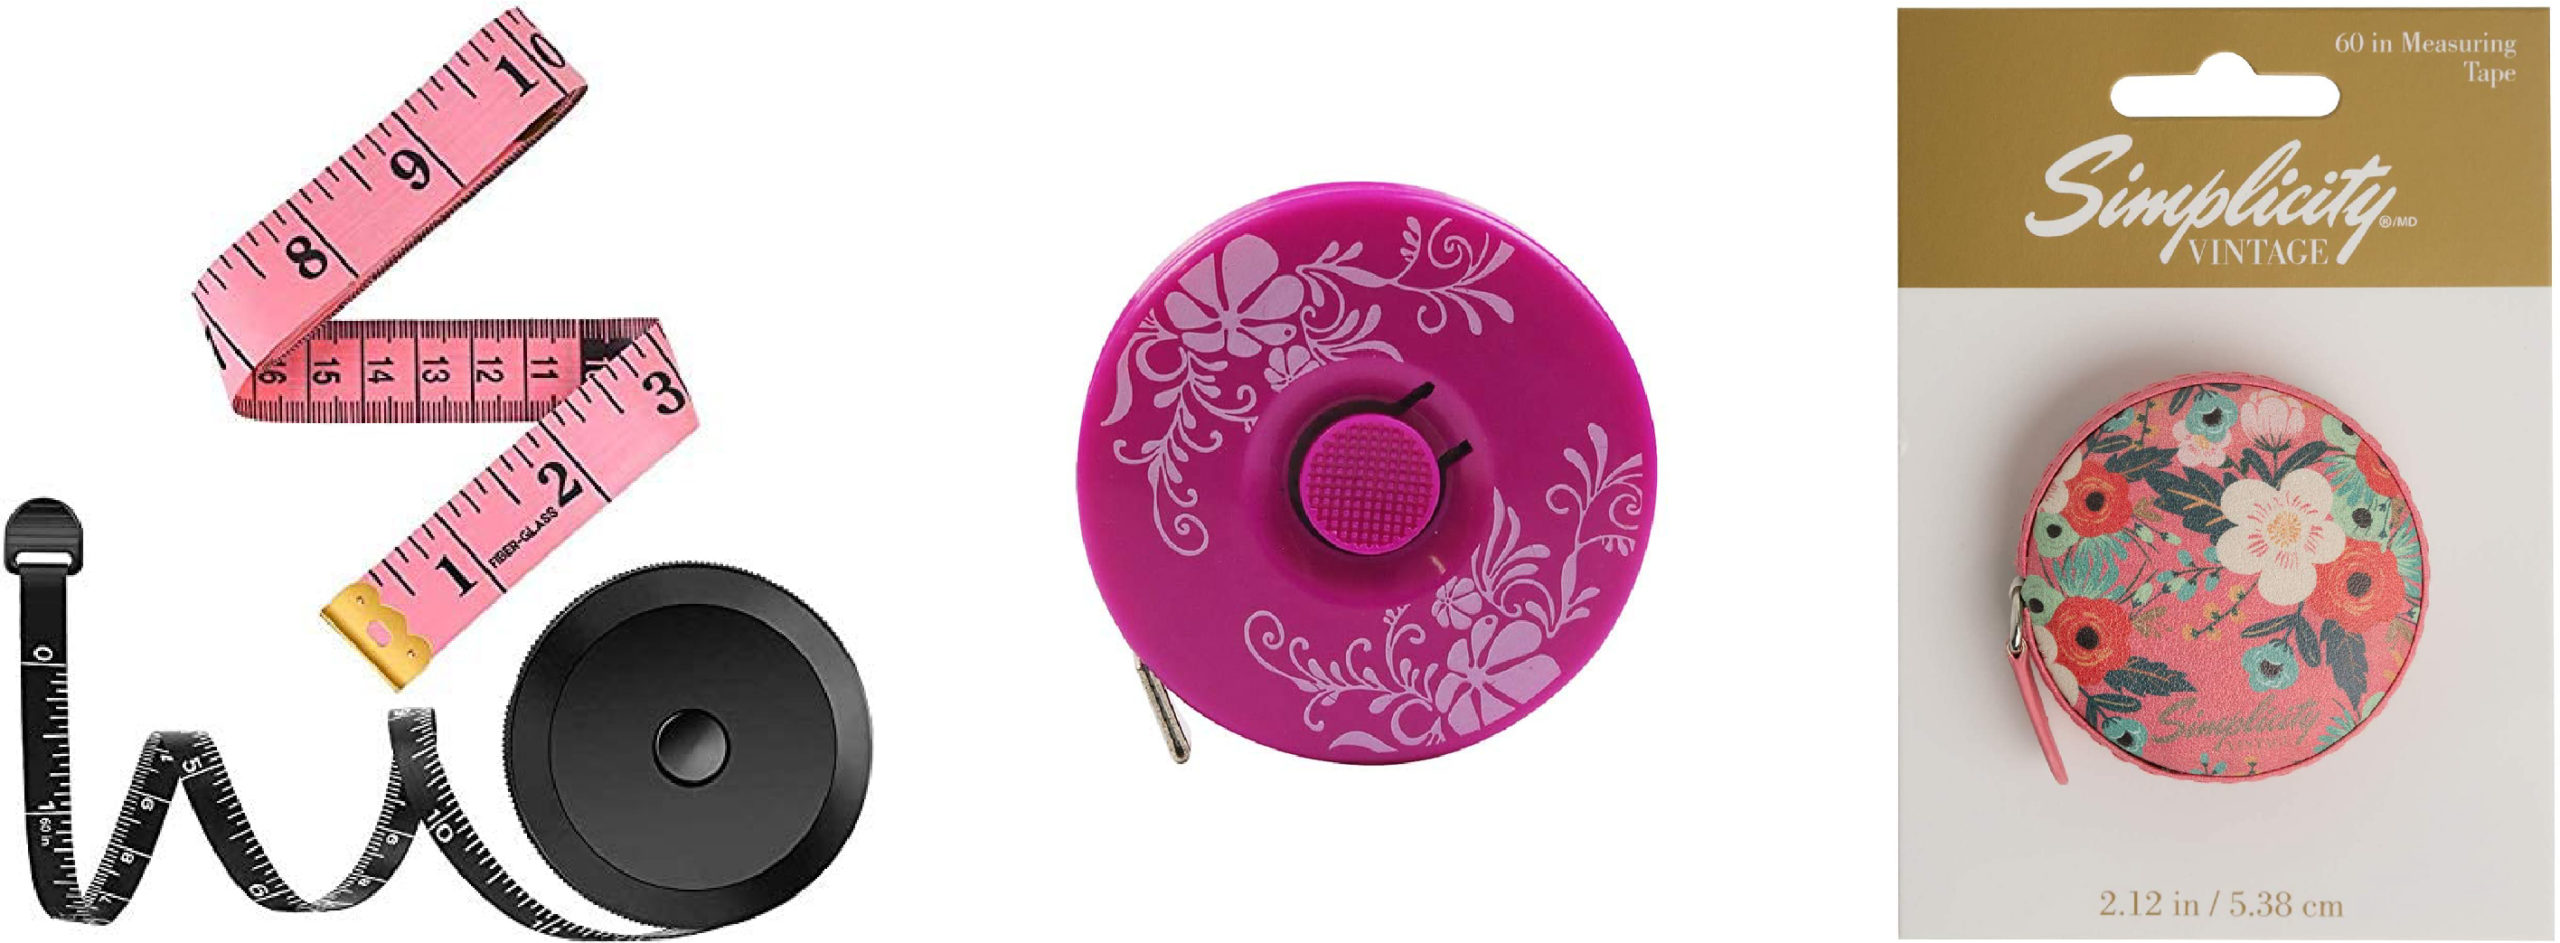
|Measuring Tape Set|Purple Tape Measure|Vintage Floral Tape Measure|
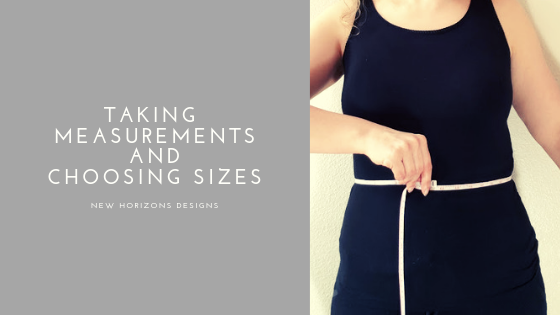
Taking Measurements and Choosing Sizes
Hi! This is Manda from MeadowSews and today I’m here to talk about one of the small steps in sewing that can make a big difference in your finished garments: taking measurements and choosing the right size for a perfect fit! We’ll also talk a little about common adjustments you might like to make.
One of my very favorite things about sewing is being able to fit clothes to my body, instead of trying to fit my body to off-the-rack, standard-sized clothes! New Horizons has more sizes than ready to wear clothes do, which results in each size being a more accurate fit for the measurements it is designed for. This is why taking accurate measurements can be so helpful in getting a perfect fit!
Some measurement tips: when you’re measuring, wear a thin shirt or tank top and the bra or undergarments you plan to wear with the finished garment. Before you start, compare your cloth tape measure to a ruler and make sure it’s accurate, cloth ones can get stretched out after a while! Keep the measuring tape level and firmly against your body, but not pulled taut. Some of the measurements may be easier if you have a friend who can help, but if not, you can take them yourself with no problems! If you need to, tie a string around yourself and then measure the string, holding it in place with tape if it slips. Do what you have to do to get the measurements you need!
One last thought, as a gentle reminder: the numbers on the tape do not define you. These are just your physical boundaries, used to coax cloth to do your bidding and wrap you in beauty.
Let’s begin!
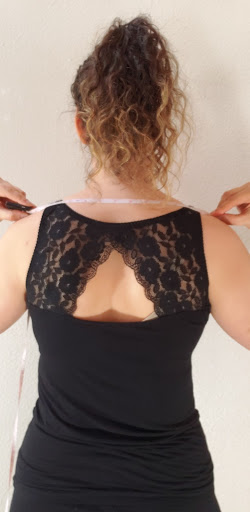
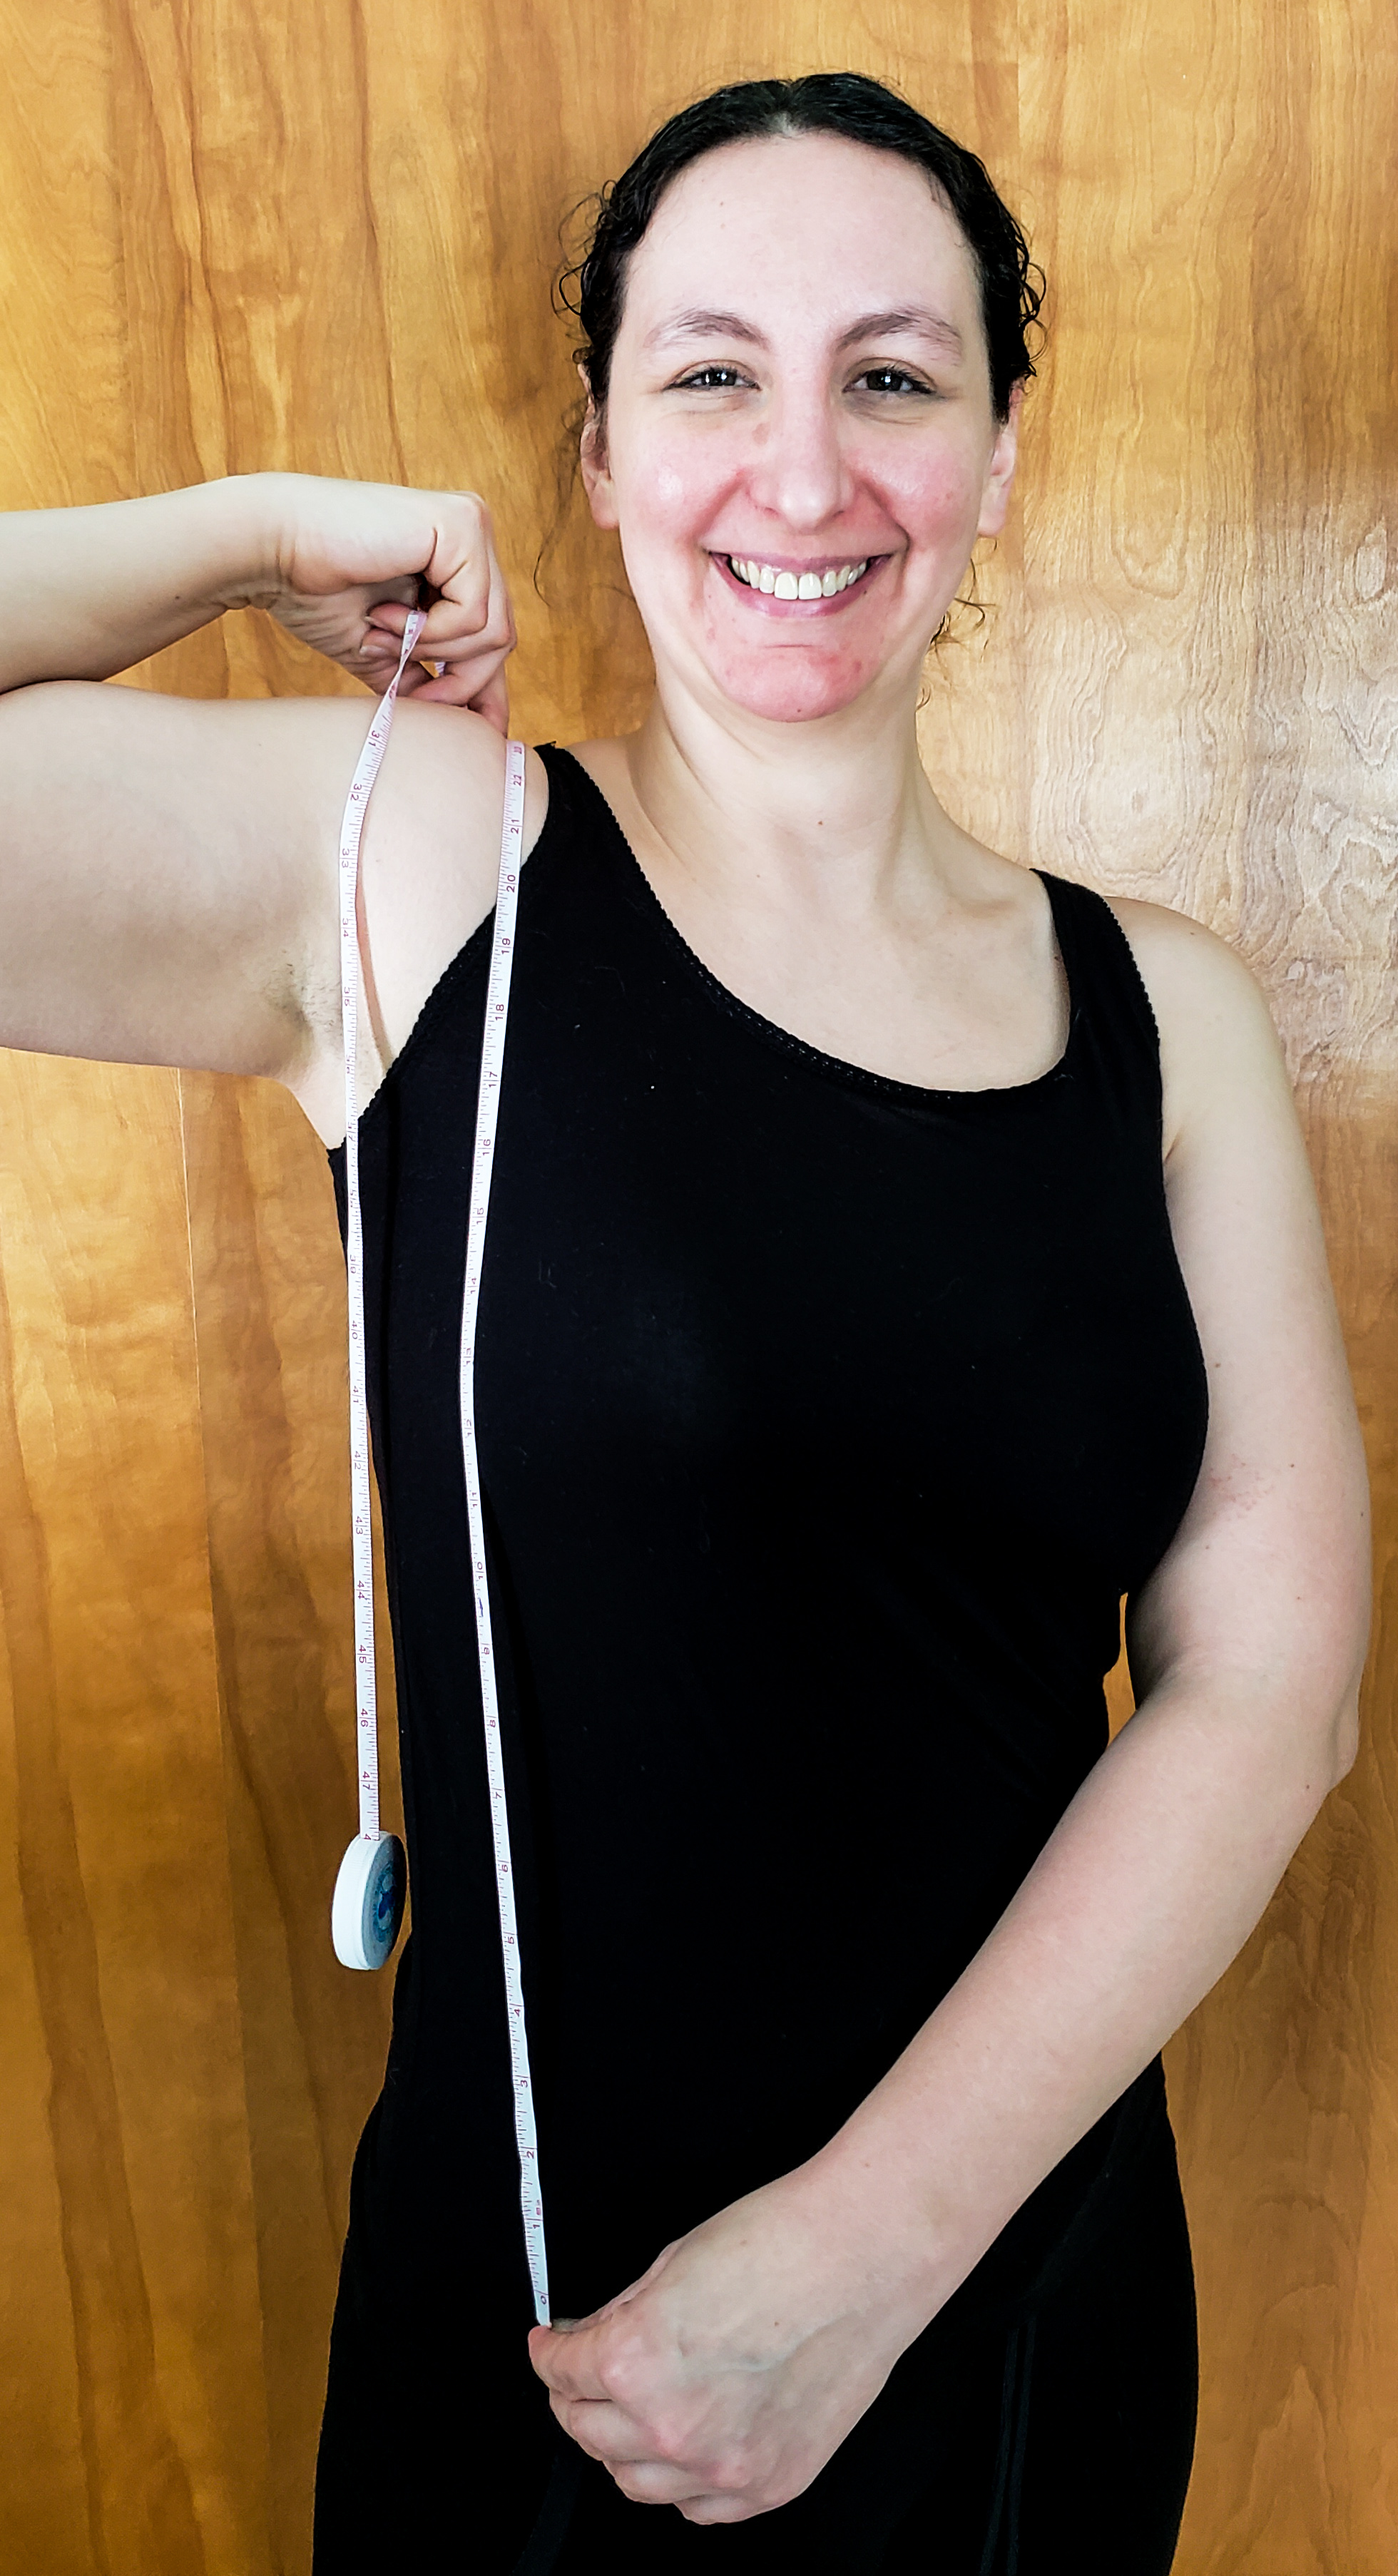
I like the start at the top and go down, so let’s start with your shoulders! Shoulder Width (SW) is measured from the edge of one shoulder, over the neck bone at the top of the neck, and to the edge of the other shoulder. To ensure you’re at the edge, raise your arm about halfway to your front and feel for a little depression there. Measure from the depression on one side to the depression on the other.
For women’s measurements, next up is High Bust! Wrap the tape under your arms and above your bust. Try to relax your arms and breathe normally.
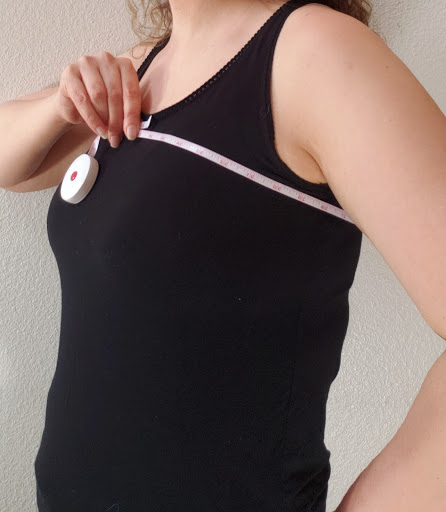
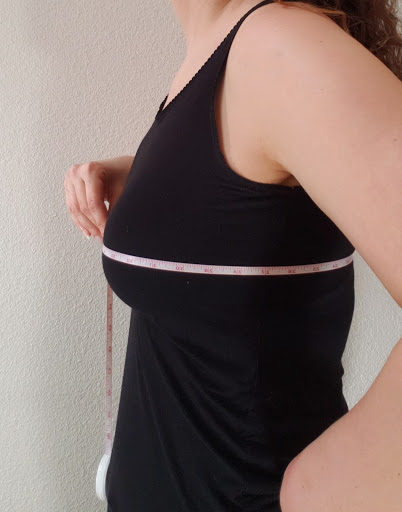
Next is Bust. Measure around the fullest part of your bust, keeping the tape level all the way around.
For men and children, you will use Chest measurements instead of Bust and High Bust. Measure around the fullest part of the Chest.
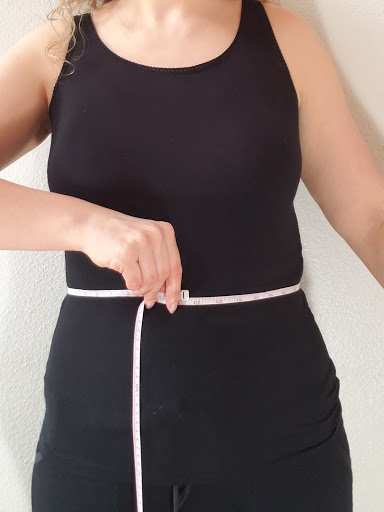
Next measure your natural Waist at the smallest part of your midsection. If it’s difficult to decide where that is, tie a string around your waist and bend back and forth, and the string will settle at the smallest part!
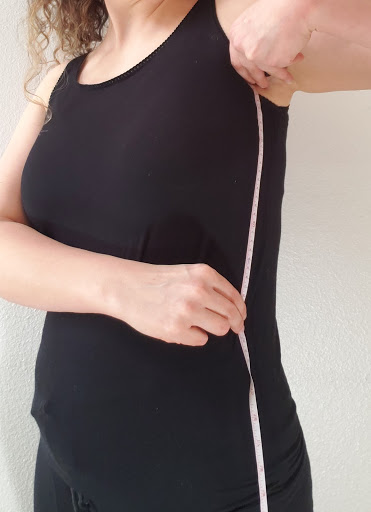
While you are measuring your waist, mark the point where you measured and measure the length from your armpit down to there, with your arm relaxed. This is your Side Waist length and ensuring that the waist of a pattern hits at your waist is a great way to make sure patterns fit you well!
Next on the way down is High Hip. This is around your hip bones, and many people wear their pants about here.

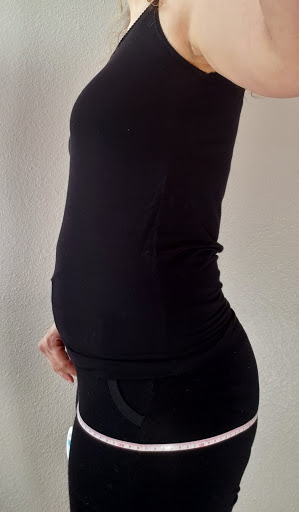
Hip is measured at the fullest or largest part, which is often further down than your hips, around your booty!
The Length of the finished item for tops is measured from your shoulders to where the hem will fall.
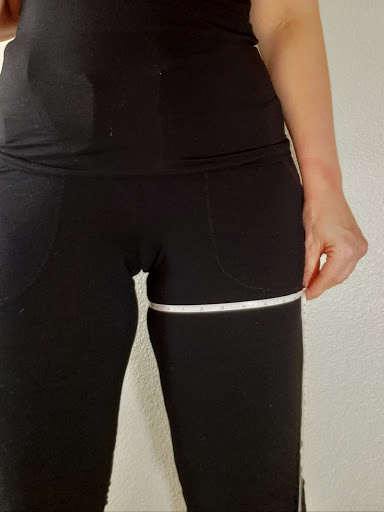
Your Thigh measurement is around the fullest part of your thigh.
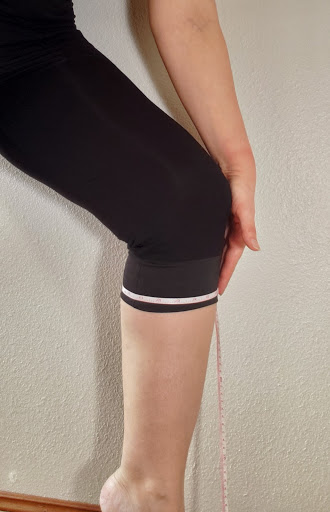
Your Calf measurement is around the fullest part of your calf.
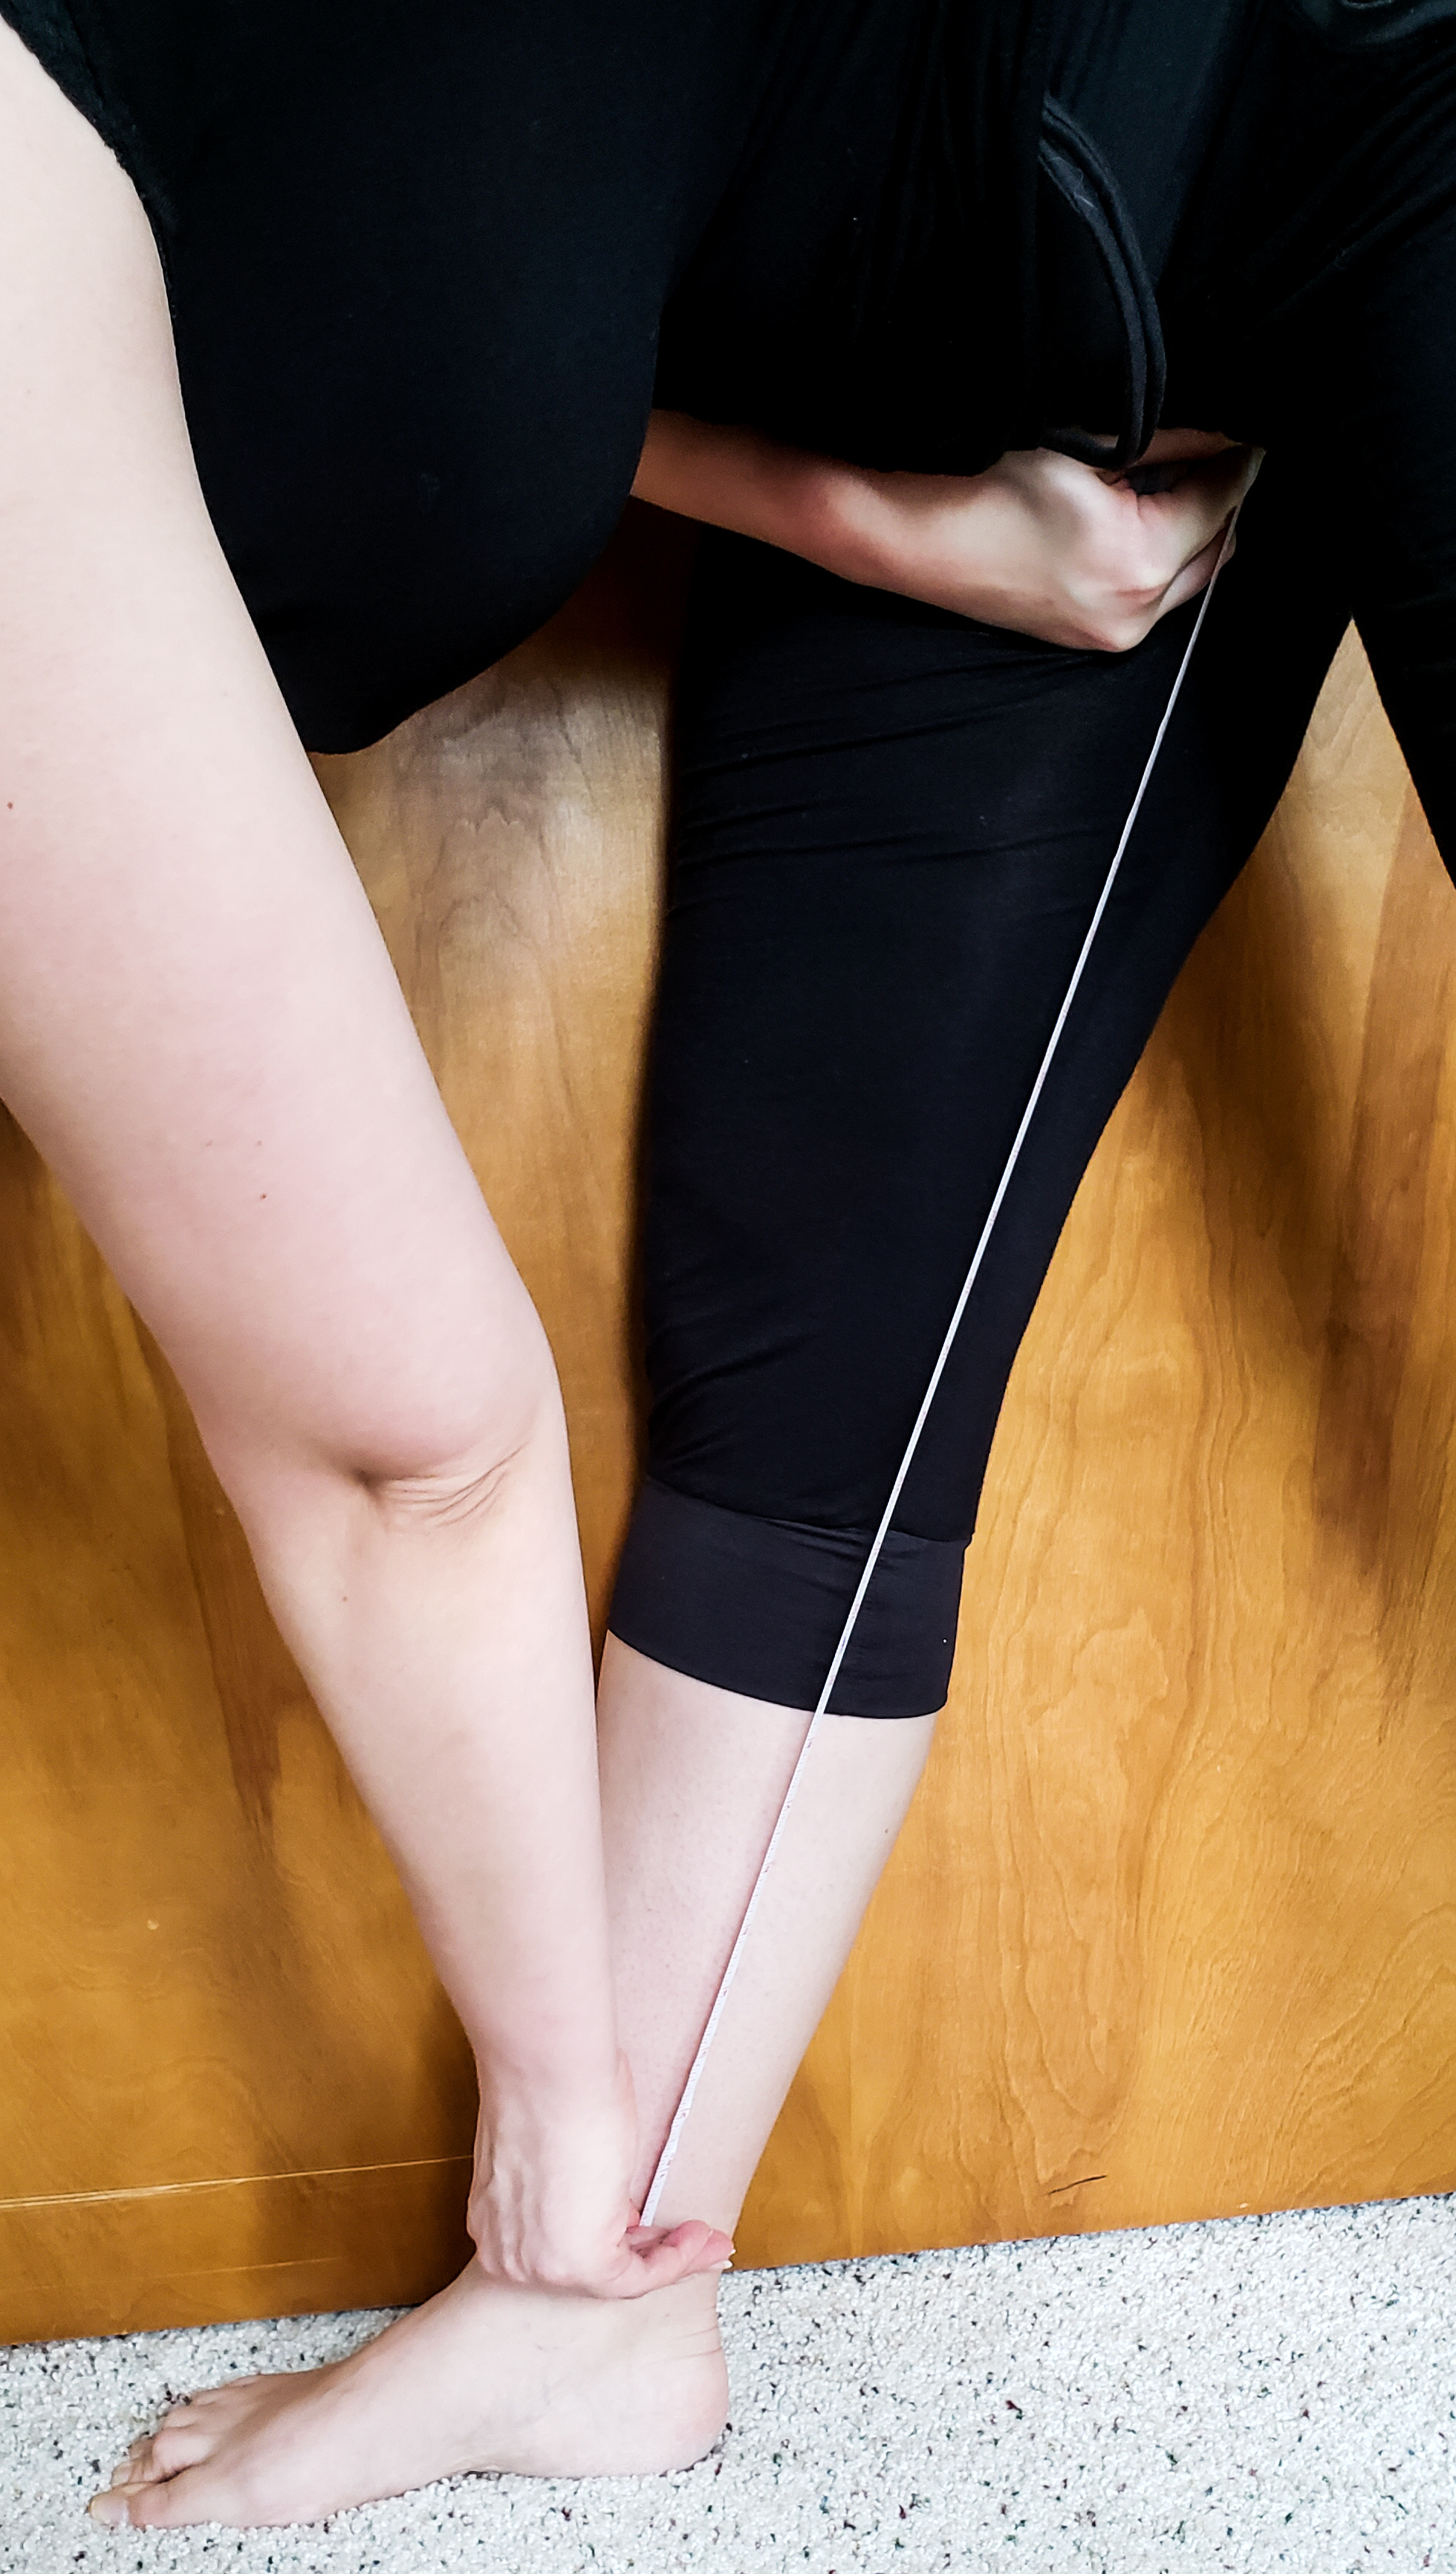
Measure your Inseam from your crotch to where you want the hem of your pants to be. This will vary depending on the pants! Caritas are designed to sit at your ankle, so the pattern includes 3 Inseam lengths, while Portlanders are designed to pool on the floor (and keep your feet warm!) so they have a 33” inseam.
Now that you have your measurements, let’s look at choosing a size! The size chart for each pattern is listed on the pattern’s webpage, as well as in the pattern itself. For women, it will look something like this:
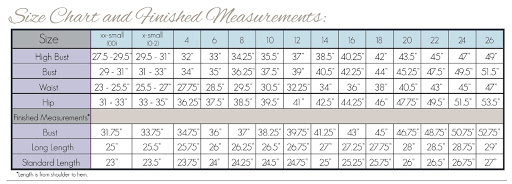
For tops and dresses, start by comparing your High Bust measurement to your Bust measurement. New Horizons drafts for a 2-3” difference between Upper Bust and Bust, which is a B/C sewing cup size. If your measurements are more than 2-3” different, use your High Bust to choose your size and complete a Full Bust Adjustment (FBA). If they are less than 2” different, use your High Bust to choose your size and complete a Small Bust Adjustment (SBA).
If your High Bust and Bust are within 2-3”, choose your size based on your Bust.
If your measurements fall in between two sizes, you can choose to use the smaller one for a slimmer fit or the larger one for more ease.
Now compare your Waist and Hips measurements to the chart. If they fall into the same size as your Bust, continue on with that size. If they are in different sizes, grade from your Bust to the sizes your Waist and Hips measure into.
If you are grading, you can also compare your High Hip measurement to the below chart.


Lastly, compare your Shoulder Width (SW) to the below chart. If your SW corresponds to a different size than your bust, grade from the size for your SW at the top of the shoulders to the size for your bust about halfway down the armscythe, on both the front and back bodice pattern pieces.


For men and children, use the Chest measurement to determine the base size and grade for Waist and Hips in the same way.
For pants, you will do much the same process, but use your Hips measurement to determine your size, and then grade for your Waist, Thigh, and Calf as needed. For the Caritas and Portlanders, you may choose to use the front and back leg pattern pieces which correspond to your Hip measurement, and the waistband that corresponds to your Waist measurement.
If your High Hip measurements are more than 3.5” different than your Hips for size XXS-18, or 1.5” for sizes 20-26, use your Bust measurement size and measure for a Full Seat Adjustment. Directions for that are here.
Finally consider if you would like to grade for height! Children’s heights are listed in their patterns corresponding to their sizes. Women’s patterns are drafted for a height of 5’5” and men’s for 6’0”. You can add or subtract ½” to the pattern for every 1” of height difference from the drafted heights for tops and pants at their lengthen/shorten lines. For dresses, you would add or subtract ½” above the waist and ½” below the waist for every 1” of height difference. More information in Tips for Lengthening and Shortening Patterns.
Especially for fitted patterns and dresses which flare out at the waist, make sure the distance from the underarm to the natural waist matches your Side Waist measurement. New Horizons drafts for an 8” Side Waist, so add or subtract length if needed for yours, remembering the seam allowances!
It is very common to grade between all kinds of sizes and do adjustments and add or subtract height! This is how we get a pattern to fit perfectly. Once you have the pattern piece graded to your exact fit, when you put on the garments you make from it you can feel them “snap” into place. It’s worth taking the time to measure carefully and grade as needed!
For more help on grading sizes we have a blog specifically on that here!
Thank you so much for reading and happy sewing!


This Post Has 6 Comments
Pingback: Taking Measurements and Choosing Sizes! – Meadow Sews
Pingback: The Bellevue Top! – Meadow Sews
Pingback: Full Bust Adjustment For Knit Fabric - New Horizons Designs
Pingback: Full Bust Adjustment For Knit Fabric - PatternNiche.com
Pingback: Quick and Simple Broad Shoulder Adjustment -
Pingback: Quick and Simple Broad Shoulder Adjustment - PatternNiche.com