
Do you love the fit of the Portlanders and the Carita Joggers but need a little more room in the booty? Or help getting rid of those pesky front whiskers? Well have we got a tutorial for you! In this tutorial Amanda is going to show you how to do a crotch and booty depth adjustment. Read on for the details!
Hi! This is Amanda and I’m here to show you how to modify the Carita Joggers or the Portlanders to match your curves!
The Portlanders (and the new Carita Joggers, which feature a very similar fit at the top) are known to have a great fit and be very flattering on a wide range of figures! But if, like me, you happen to fall outside of that range, you may need to modify the pattern a little to get a perfect fit for your body. But the good news is, it’s pretty easy to do!
I do a crotch depth adjustment and then a full seat adjustment. You can do either of these on their own or combine them as I do here!
First, measure! This is easier if you have a friend to help, preferably one who doesn’t mind getting up close and personal! Tie a string around your waist where you want the waistband to meet the pants, (pretty much at your hips) and tie another string around your very upper thigh.
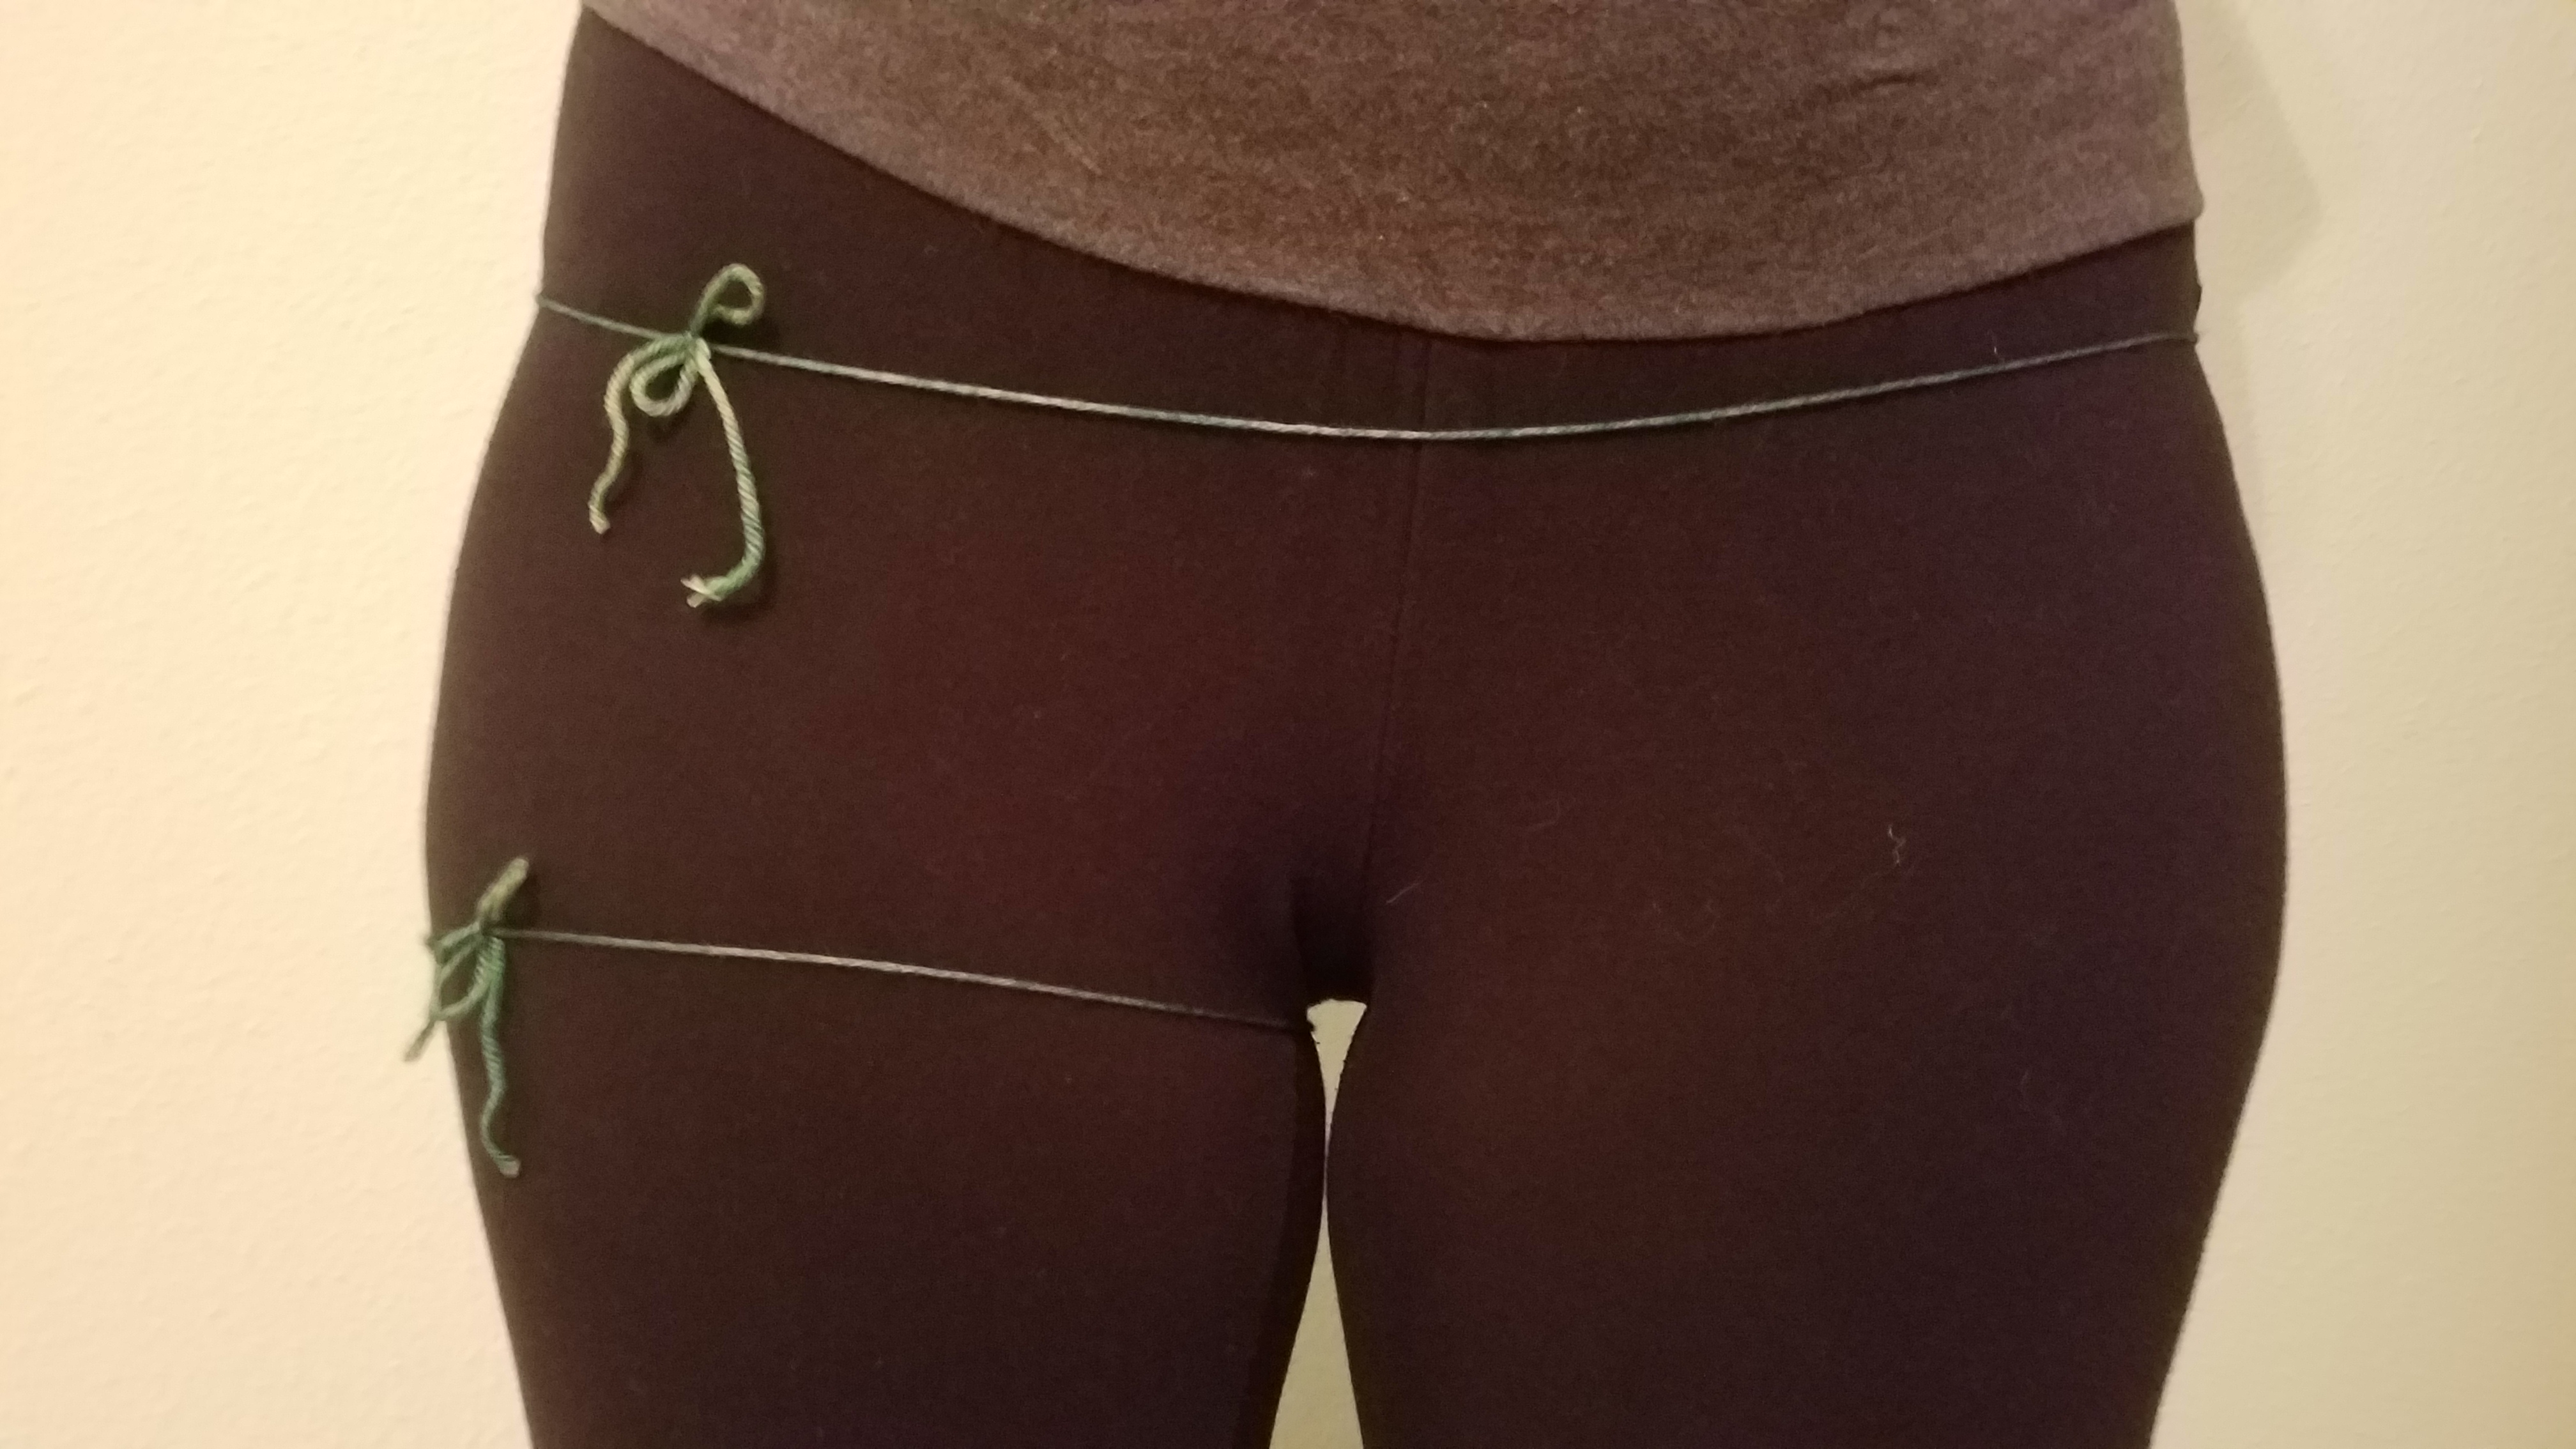
Have your measuring partner measure the distance between the two strings along your hip. This is your Crotch Depth (great name I know!) or CD.
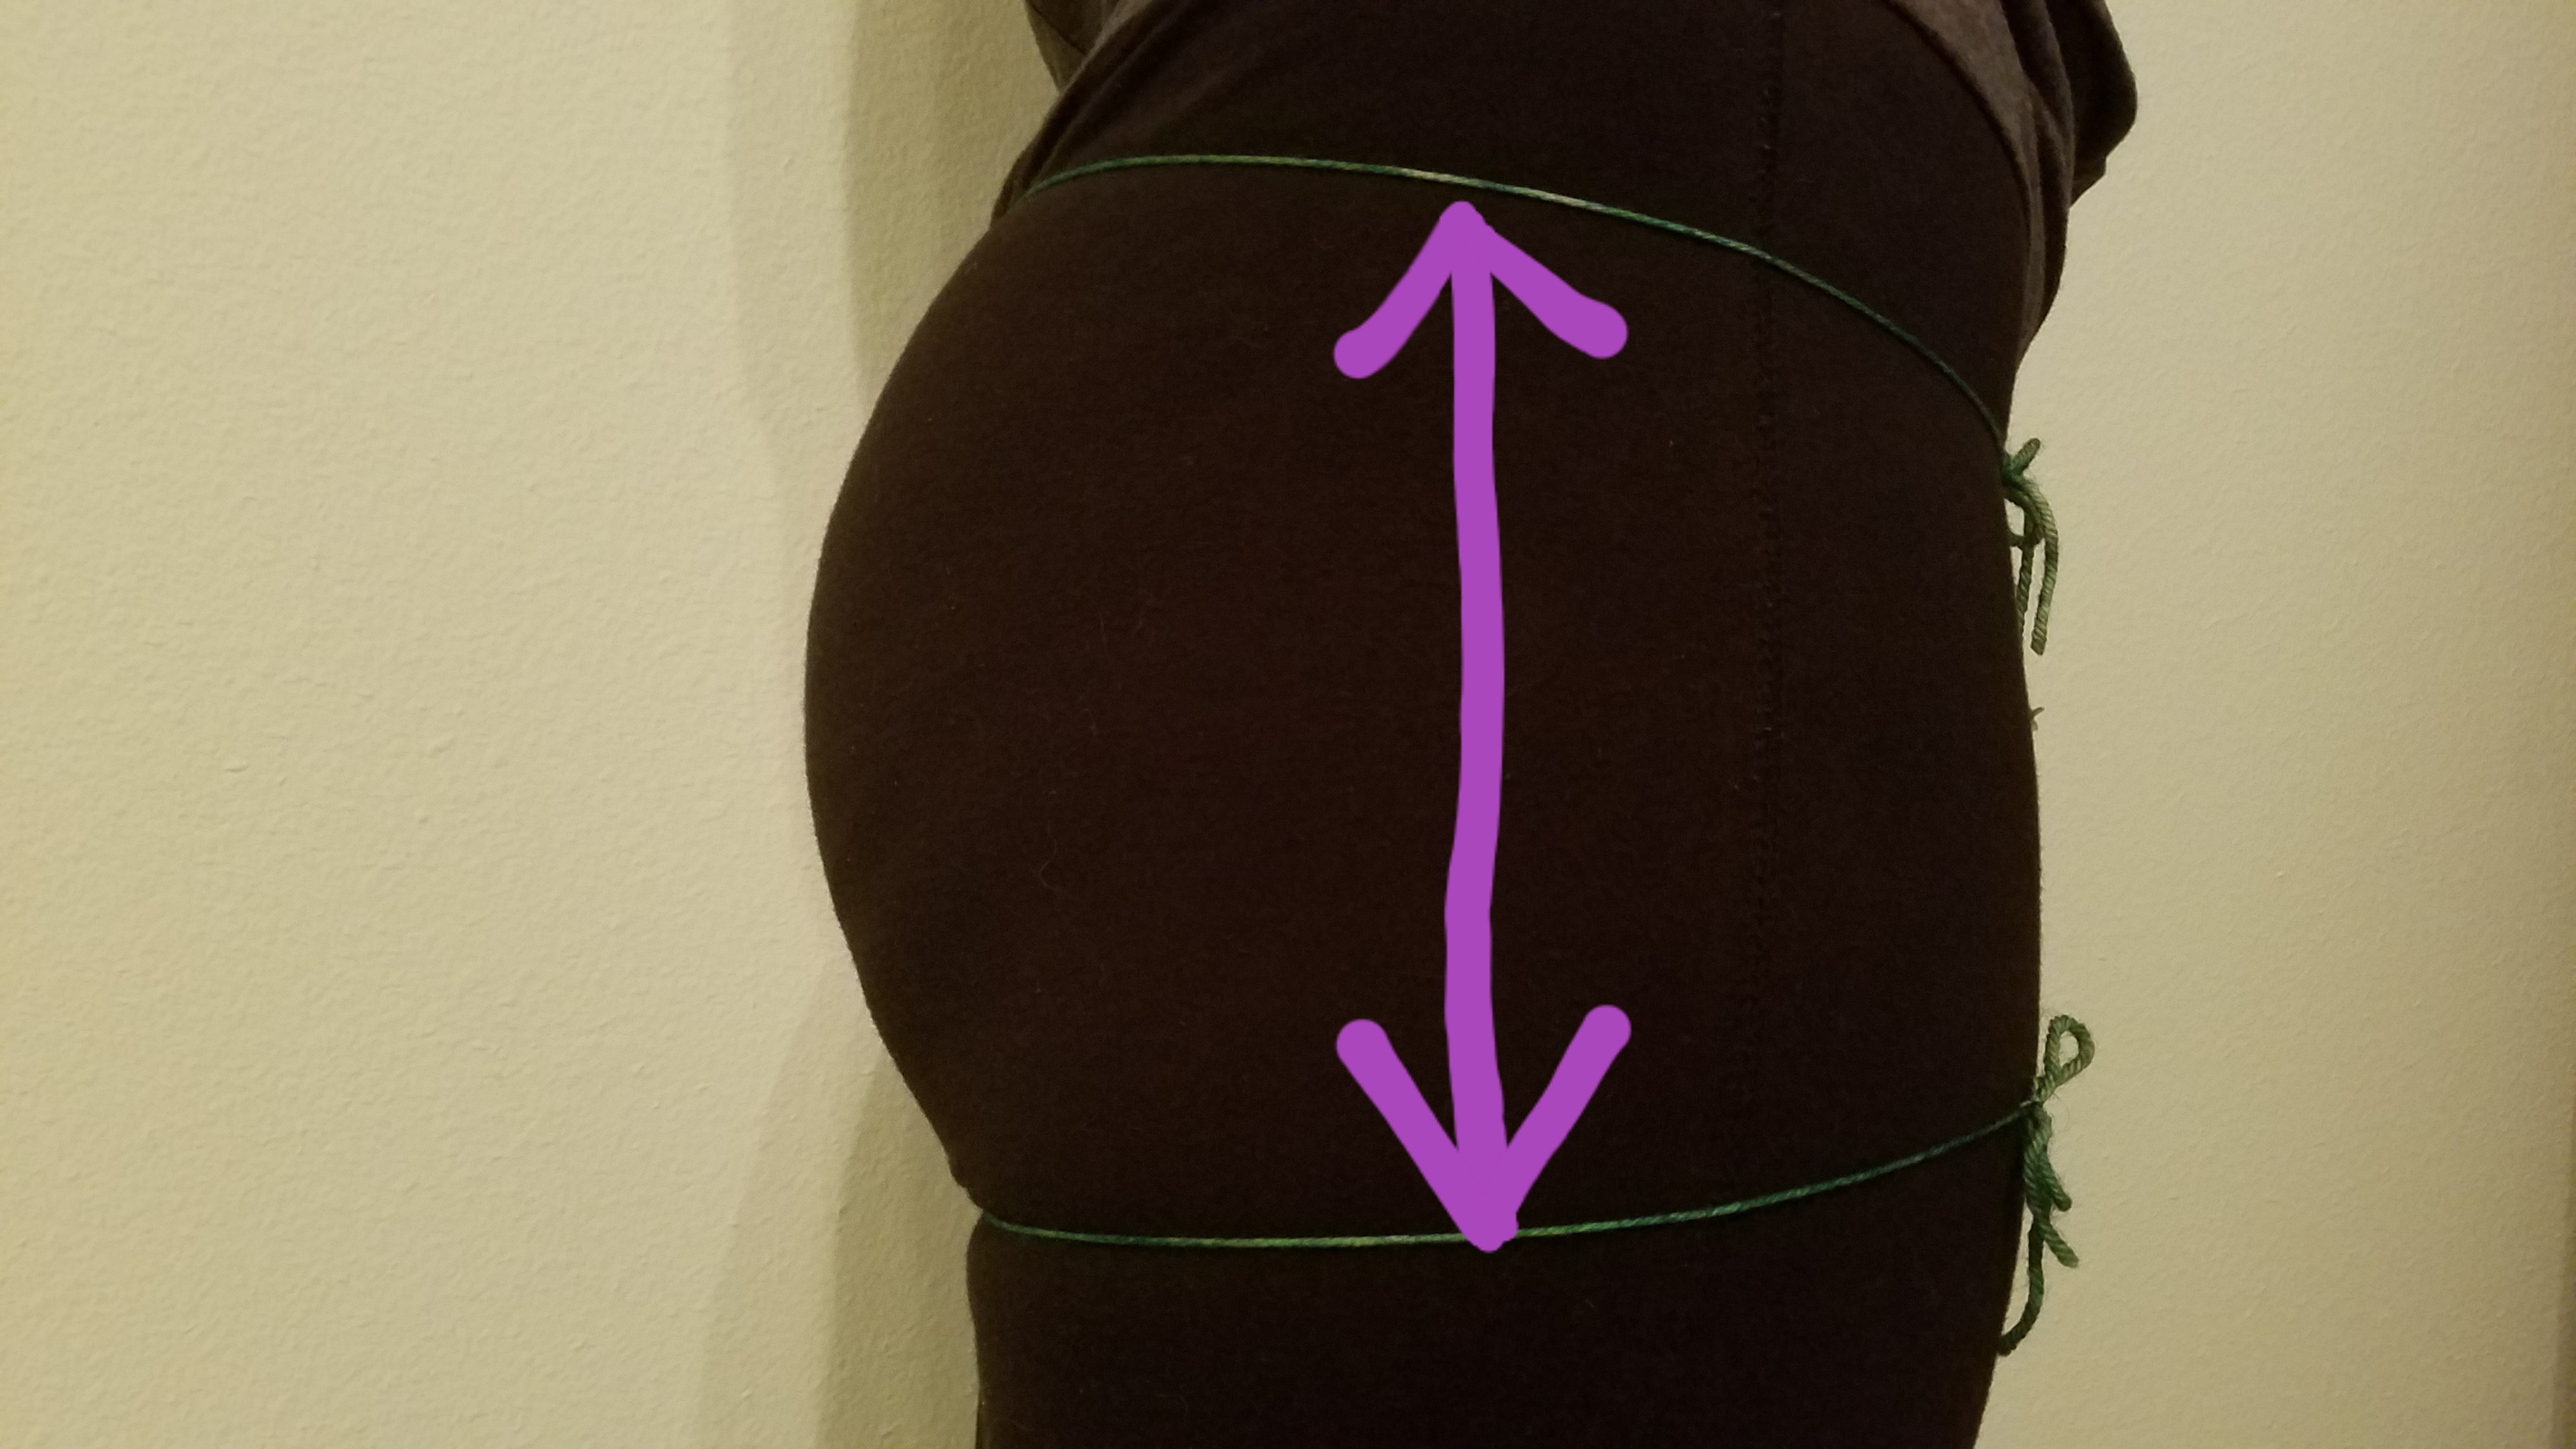
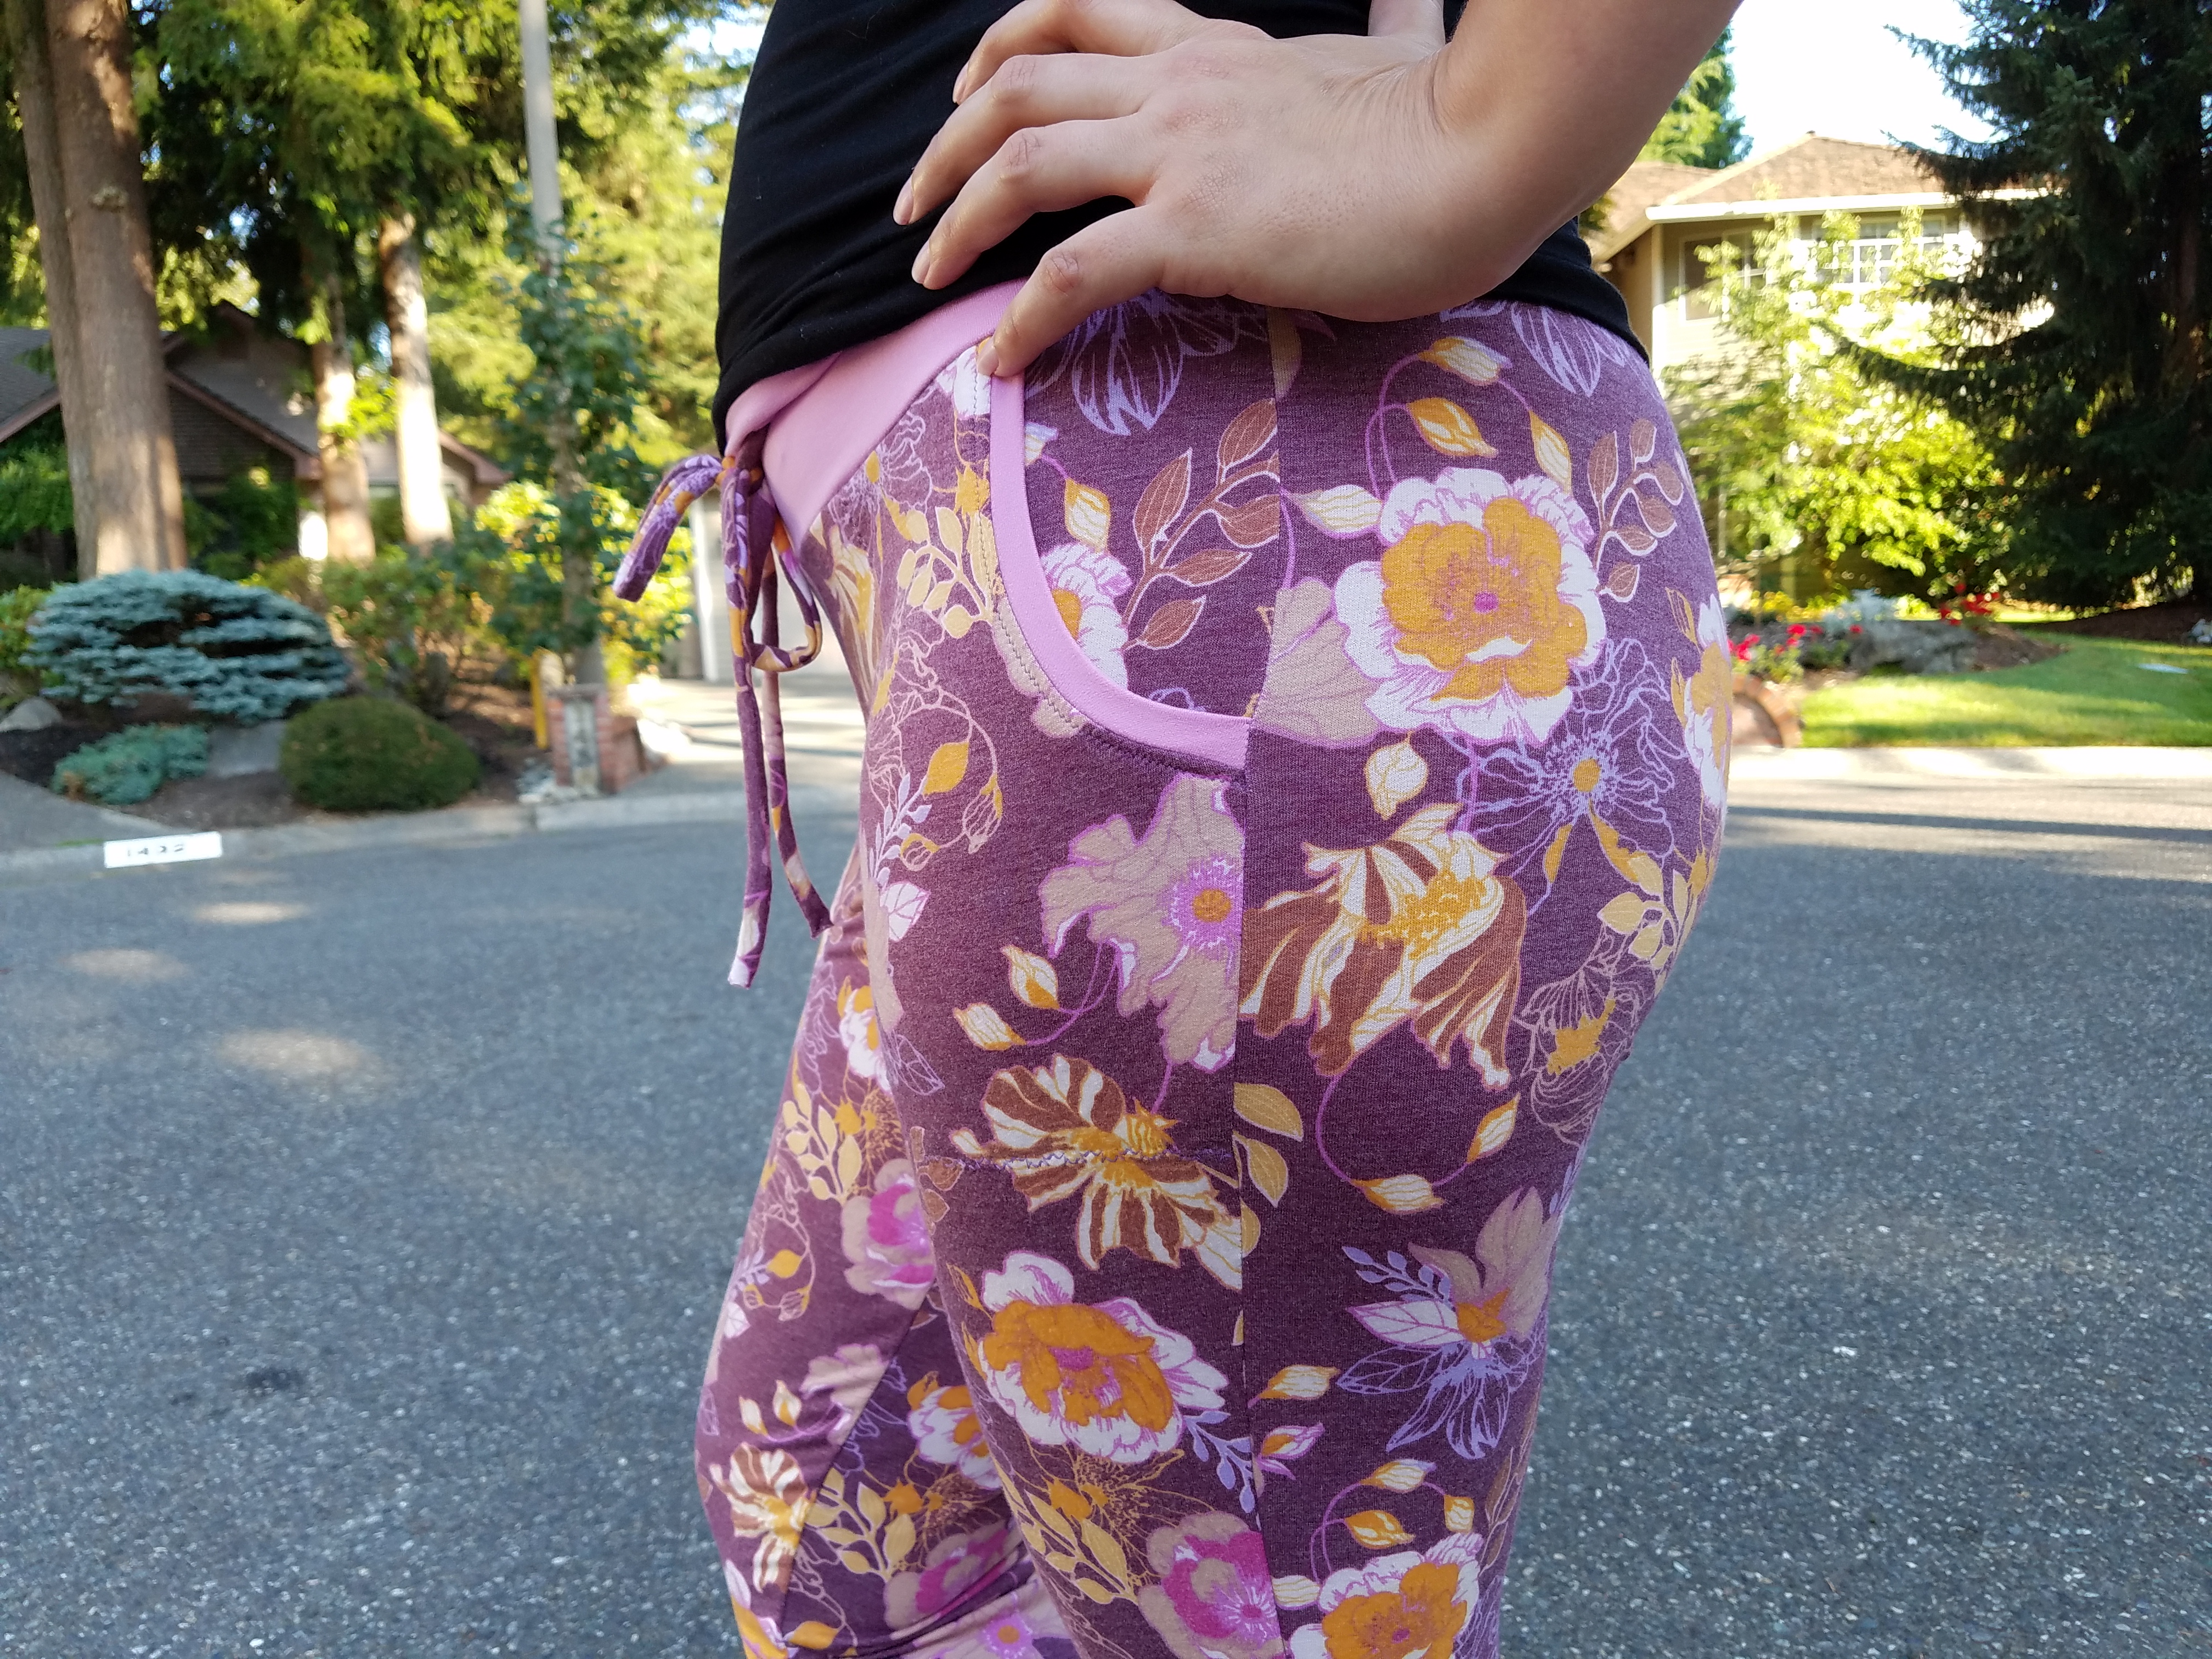
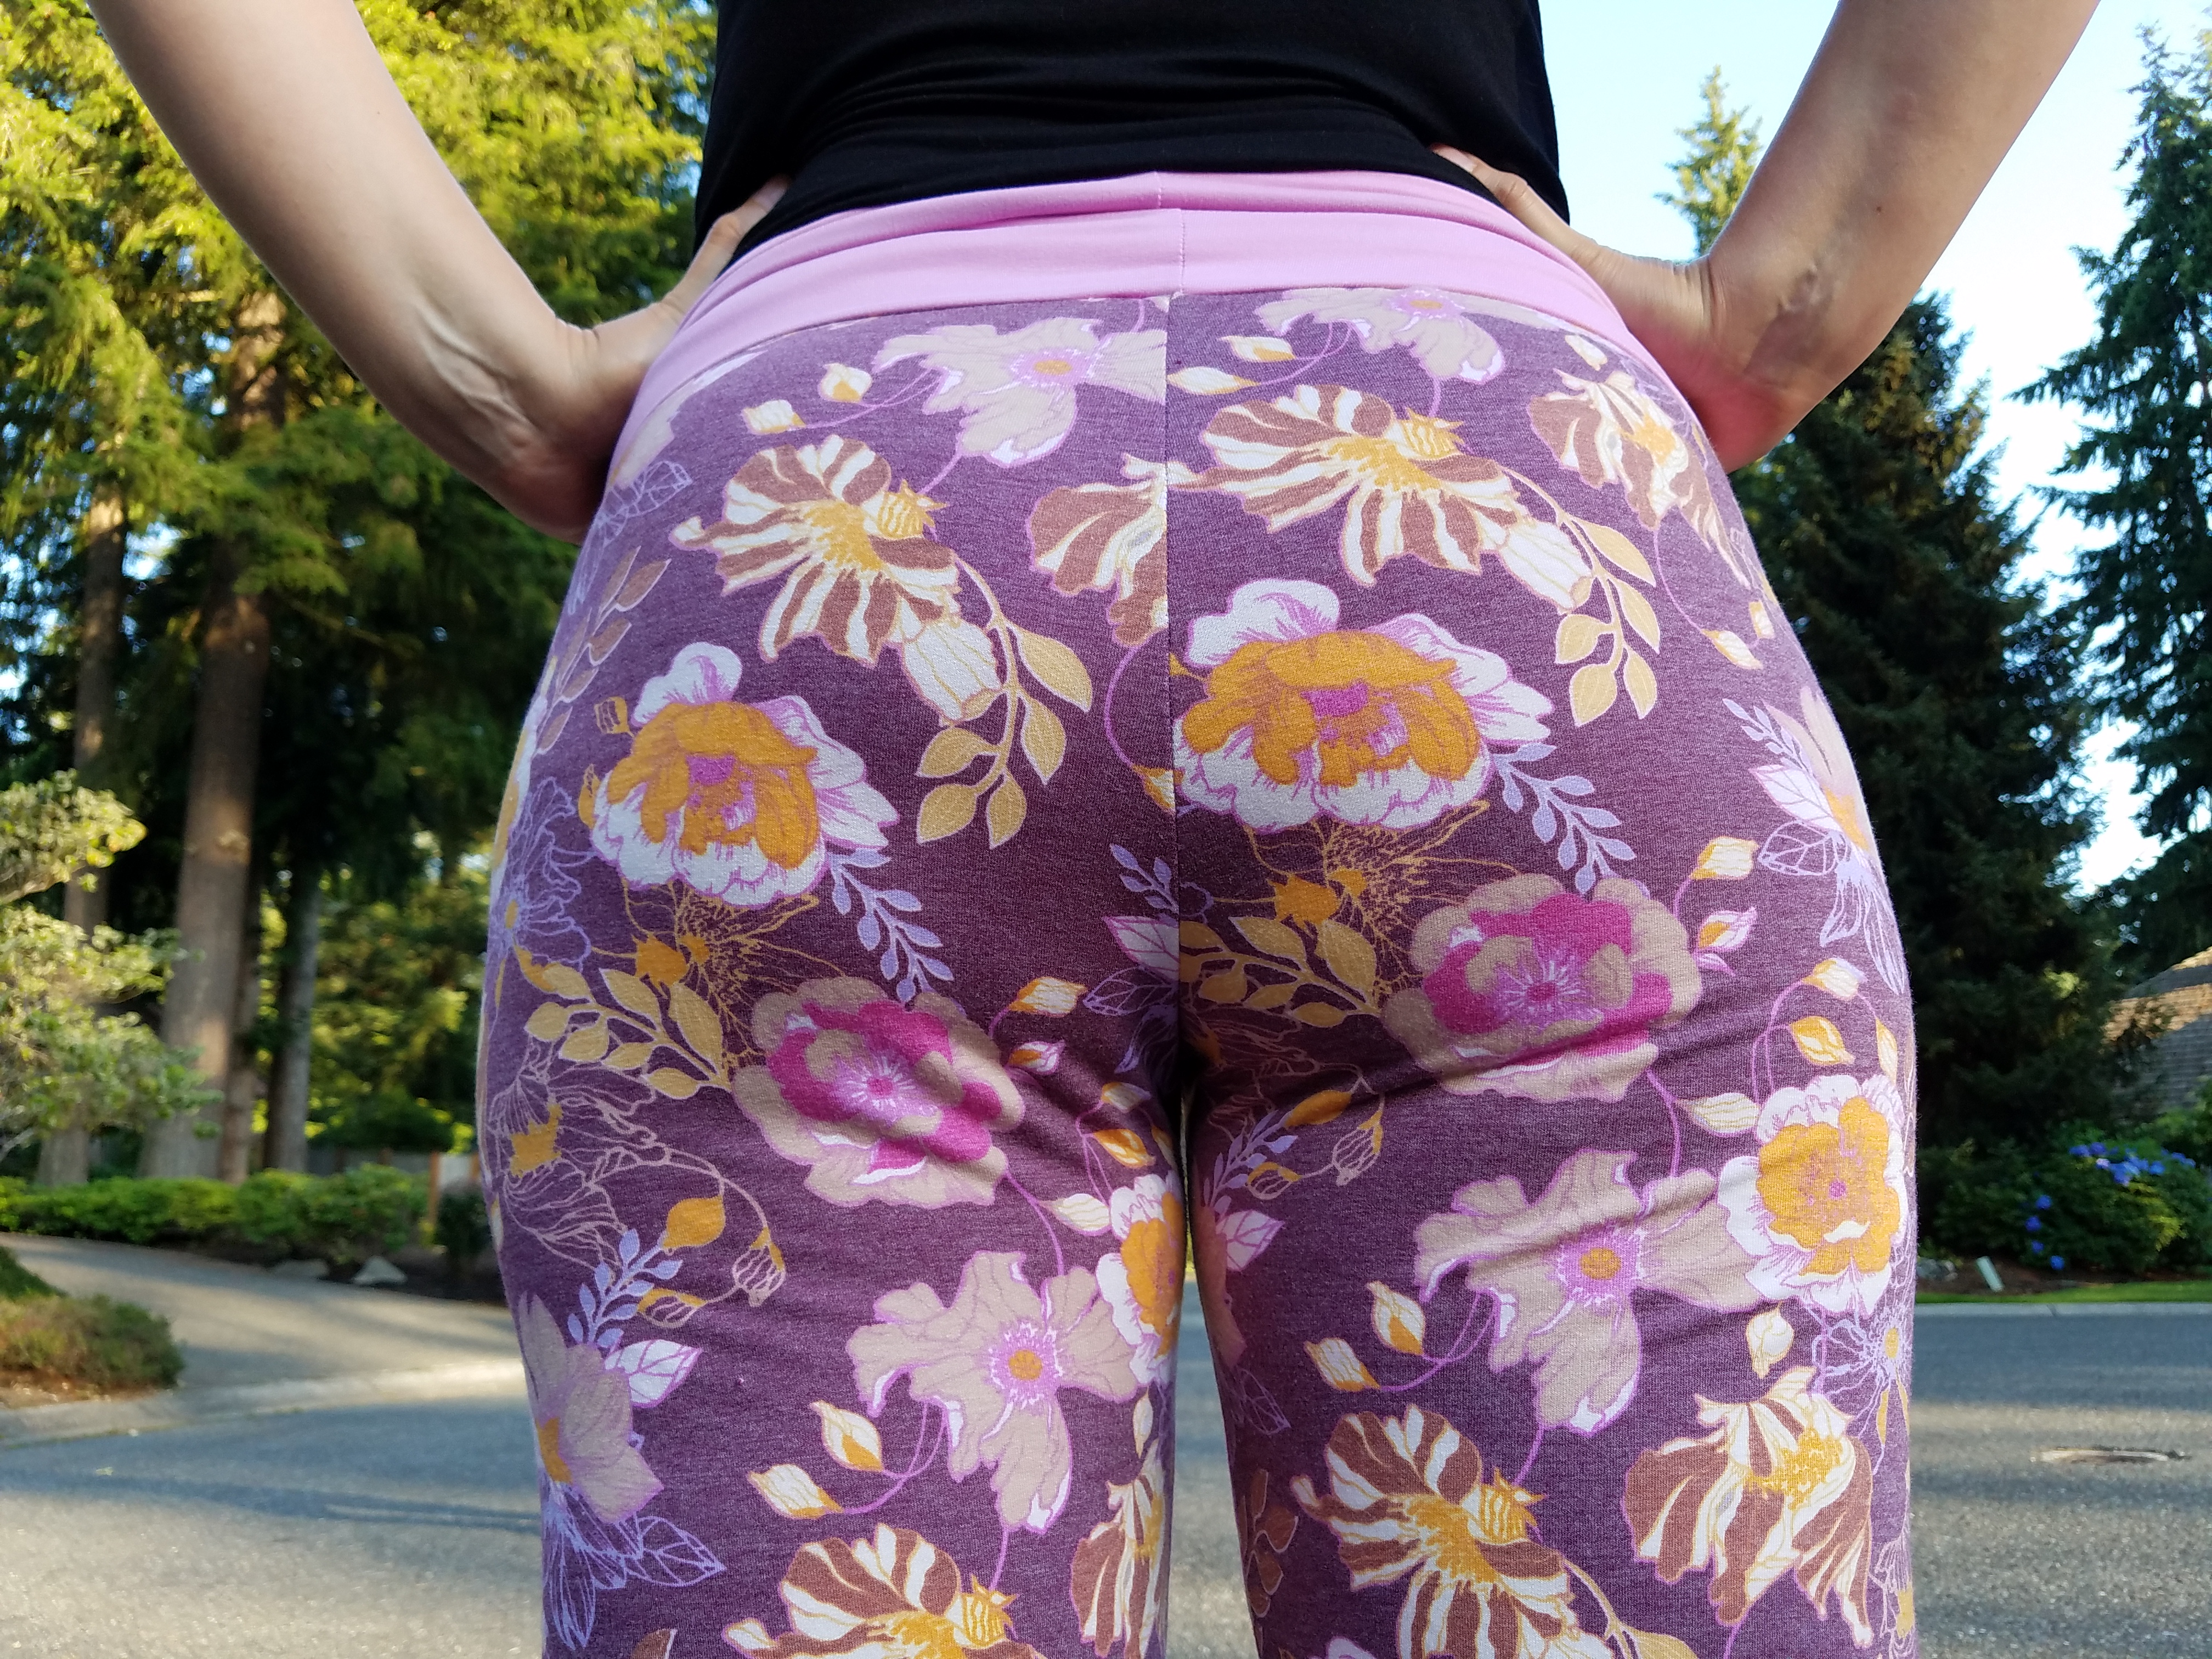
Measure this distance along your seat, about an inch or so away from the vertical seam, and that’s your (for lack of a better name) Booty Depth, BD!
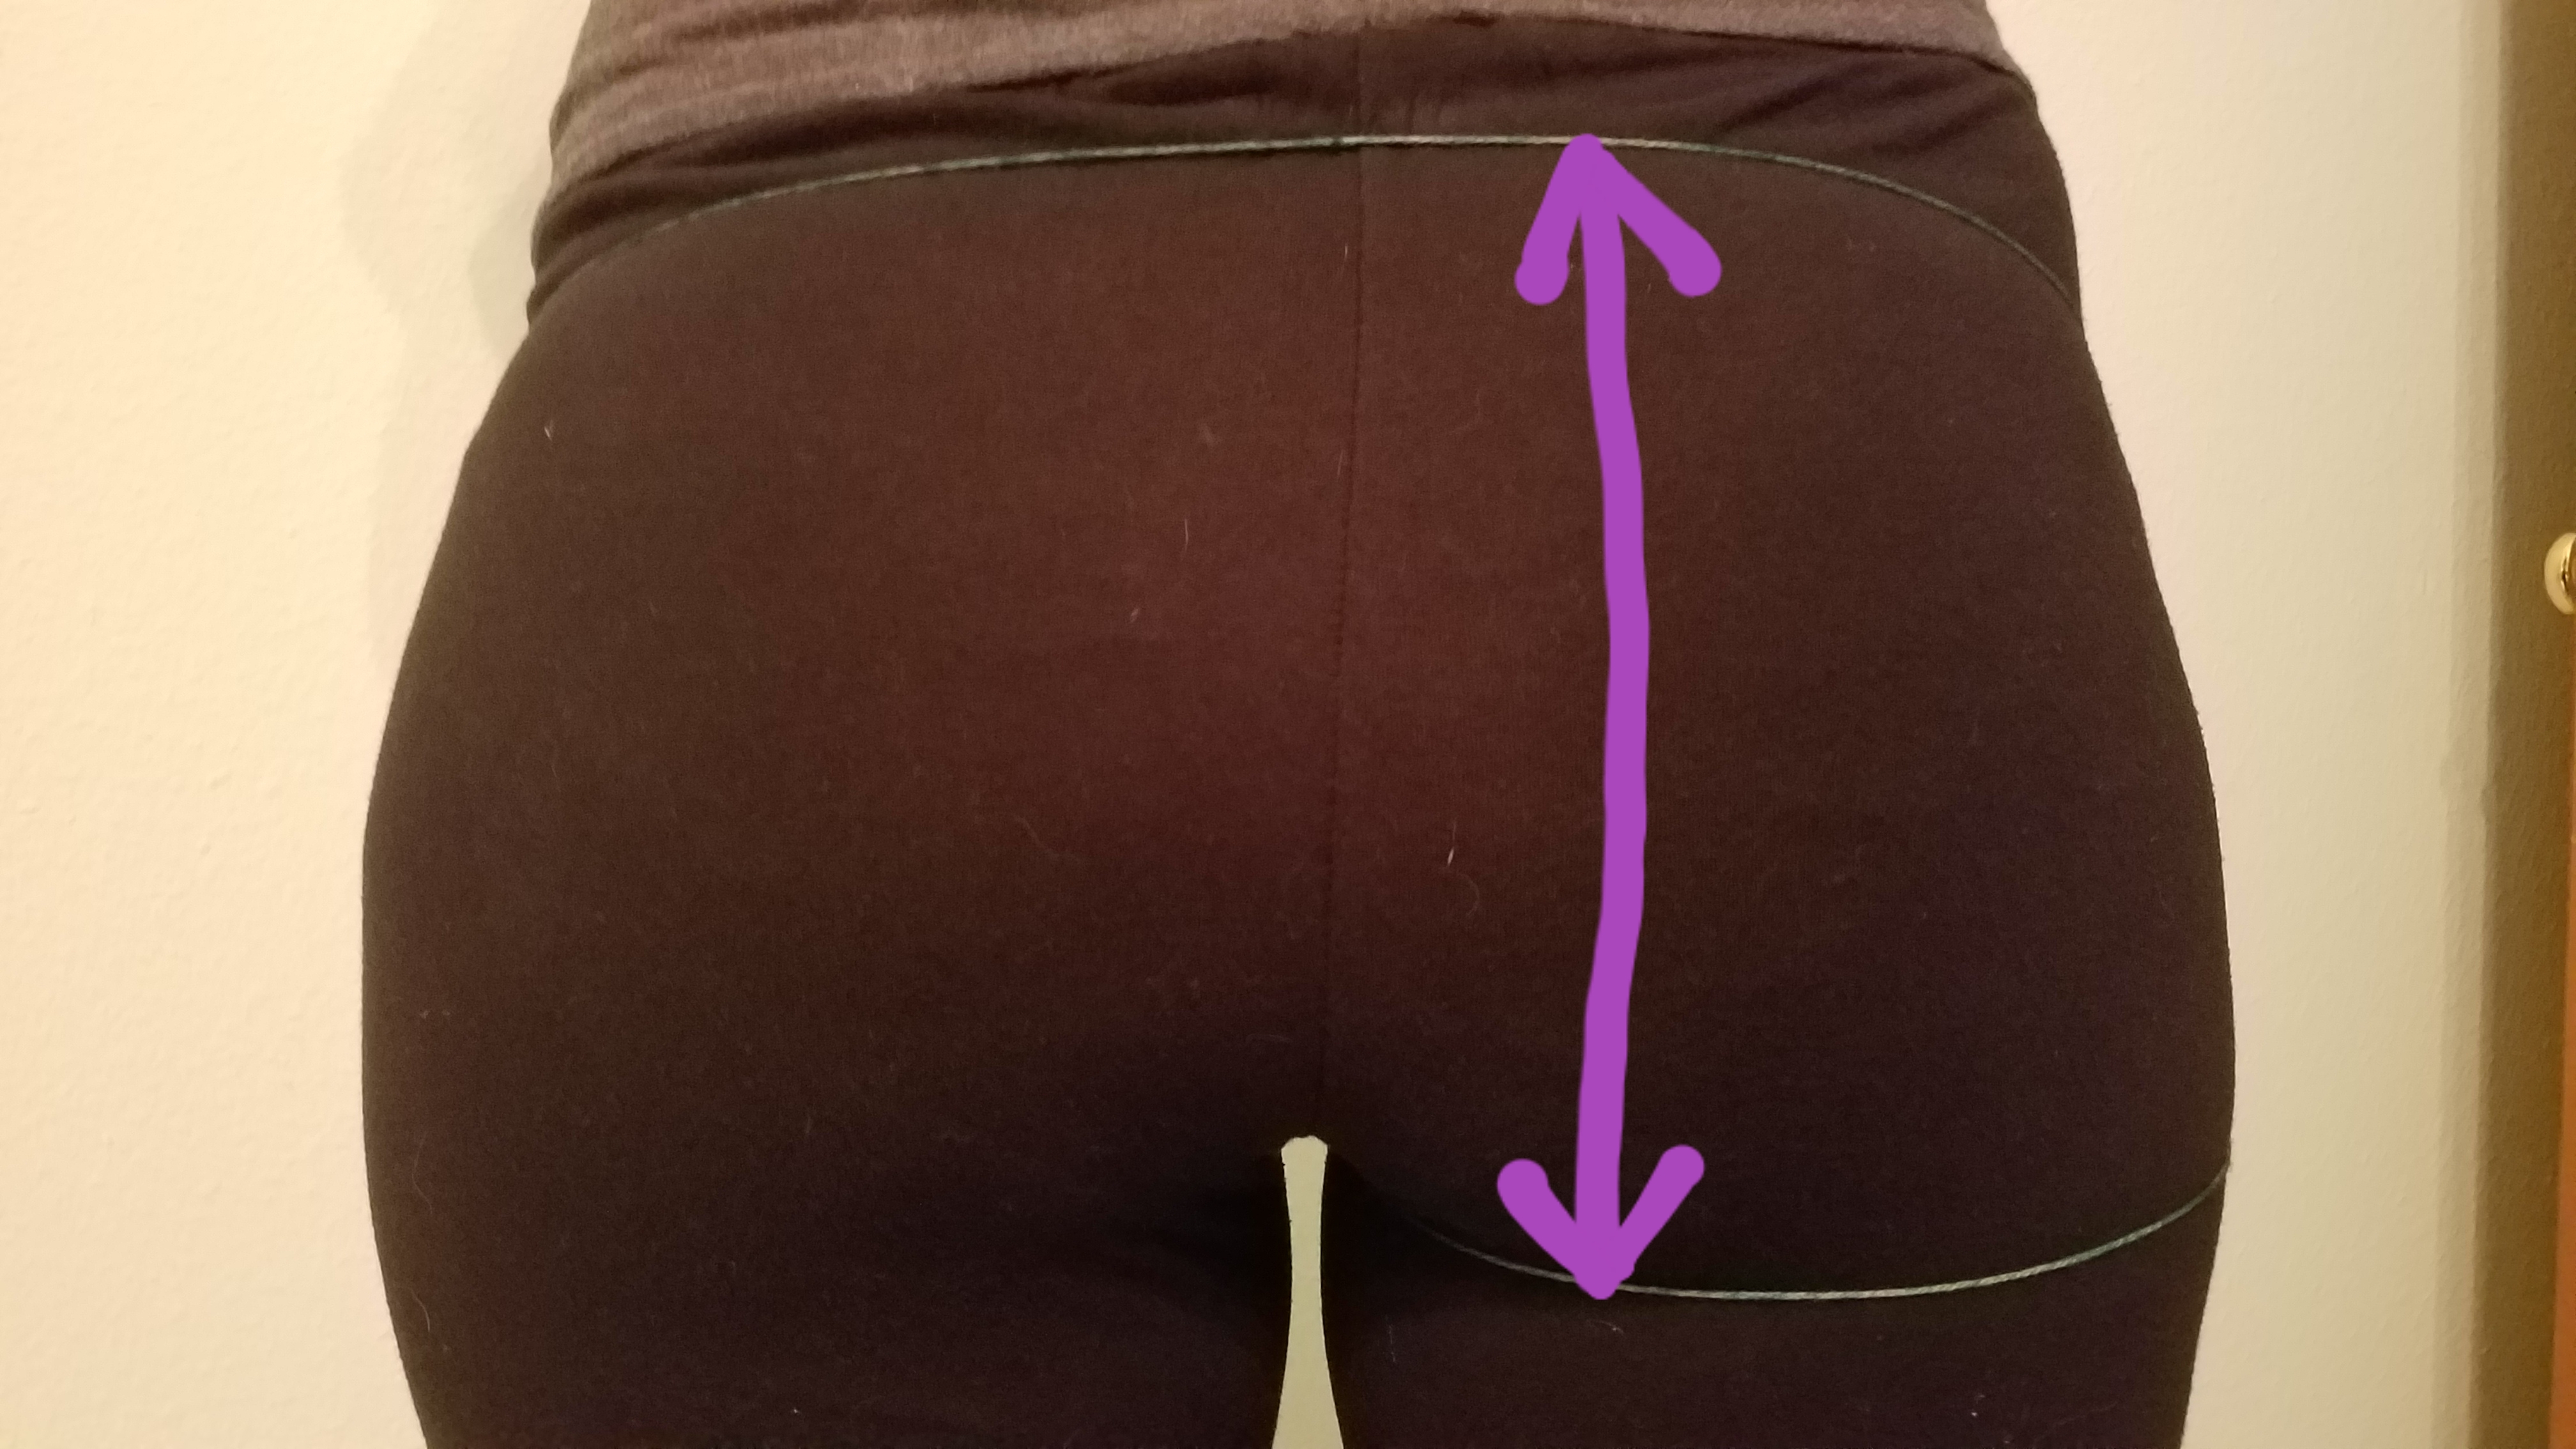
My measurements are CD = 6 inches, BD = 11 inches (I read one blog where the author referred to her bottom as her blessing, which I thought was wonderful! What a nice way to think about your body! So B can stand for Blessing also 🙂 )
Now to the pattern! Print and assemble as usual, and then gather your tools! You will need scissors, tape, a pencil or pen, some scrap paper, and a ruler. If you have a hem gauge and a clear quilting ruler, those are fantastic!
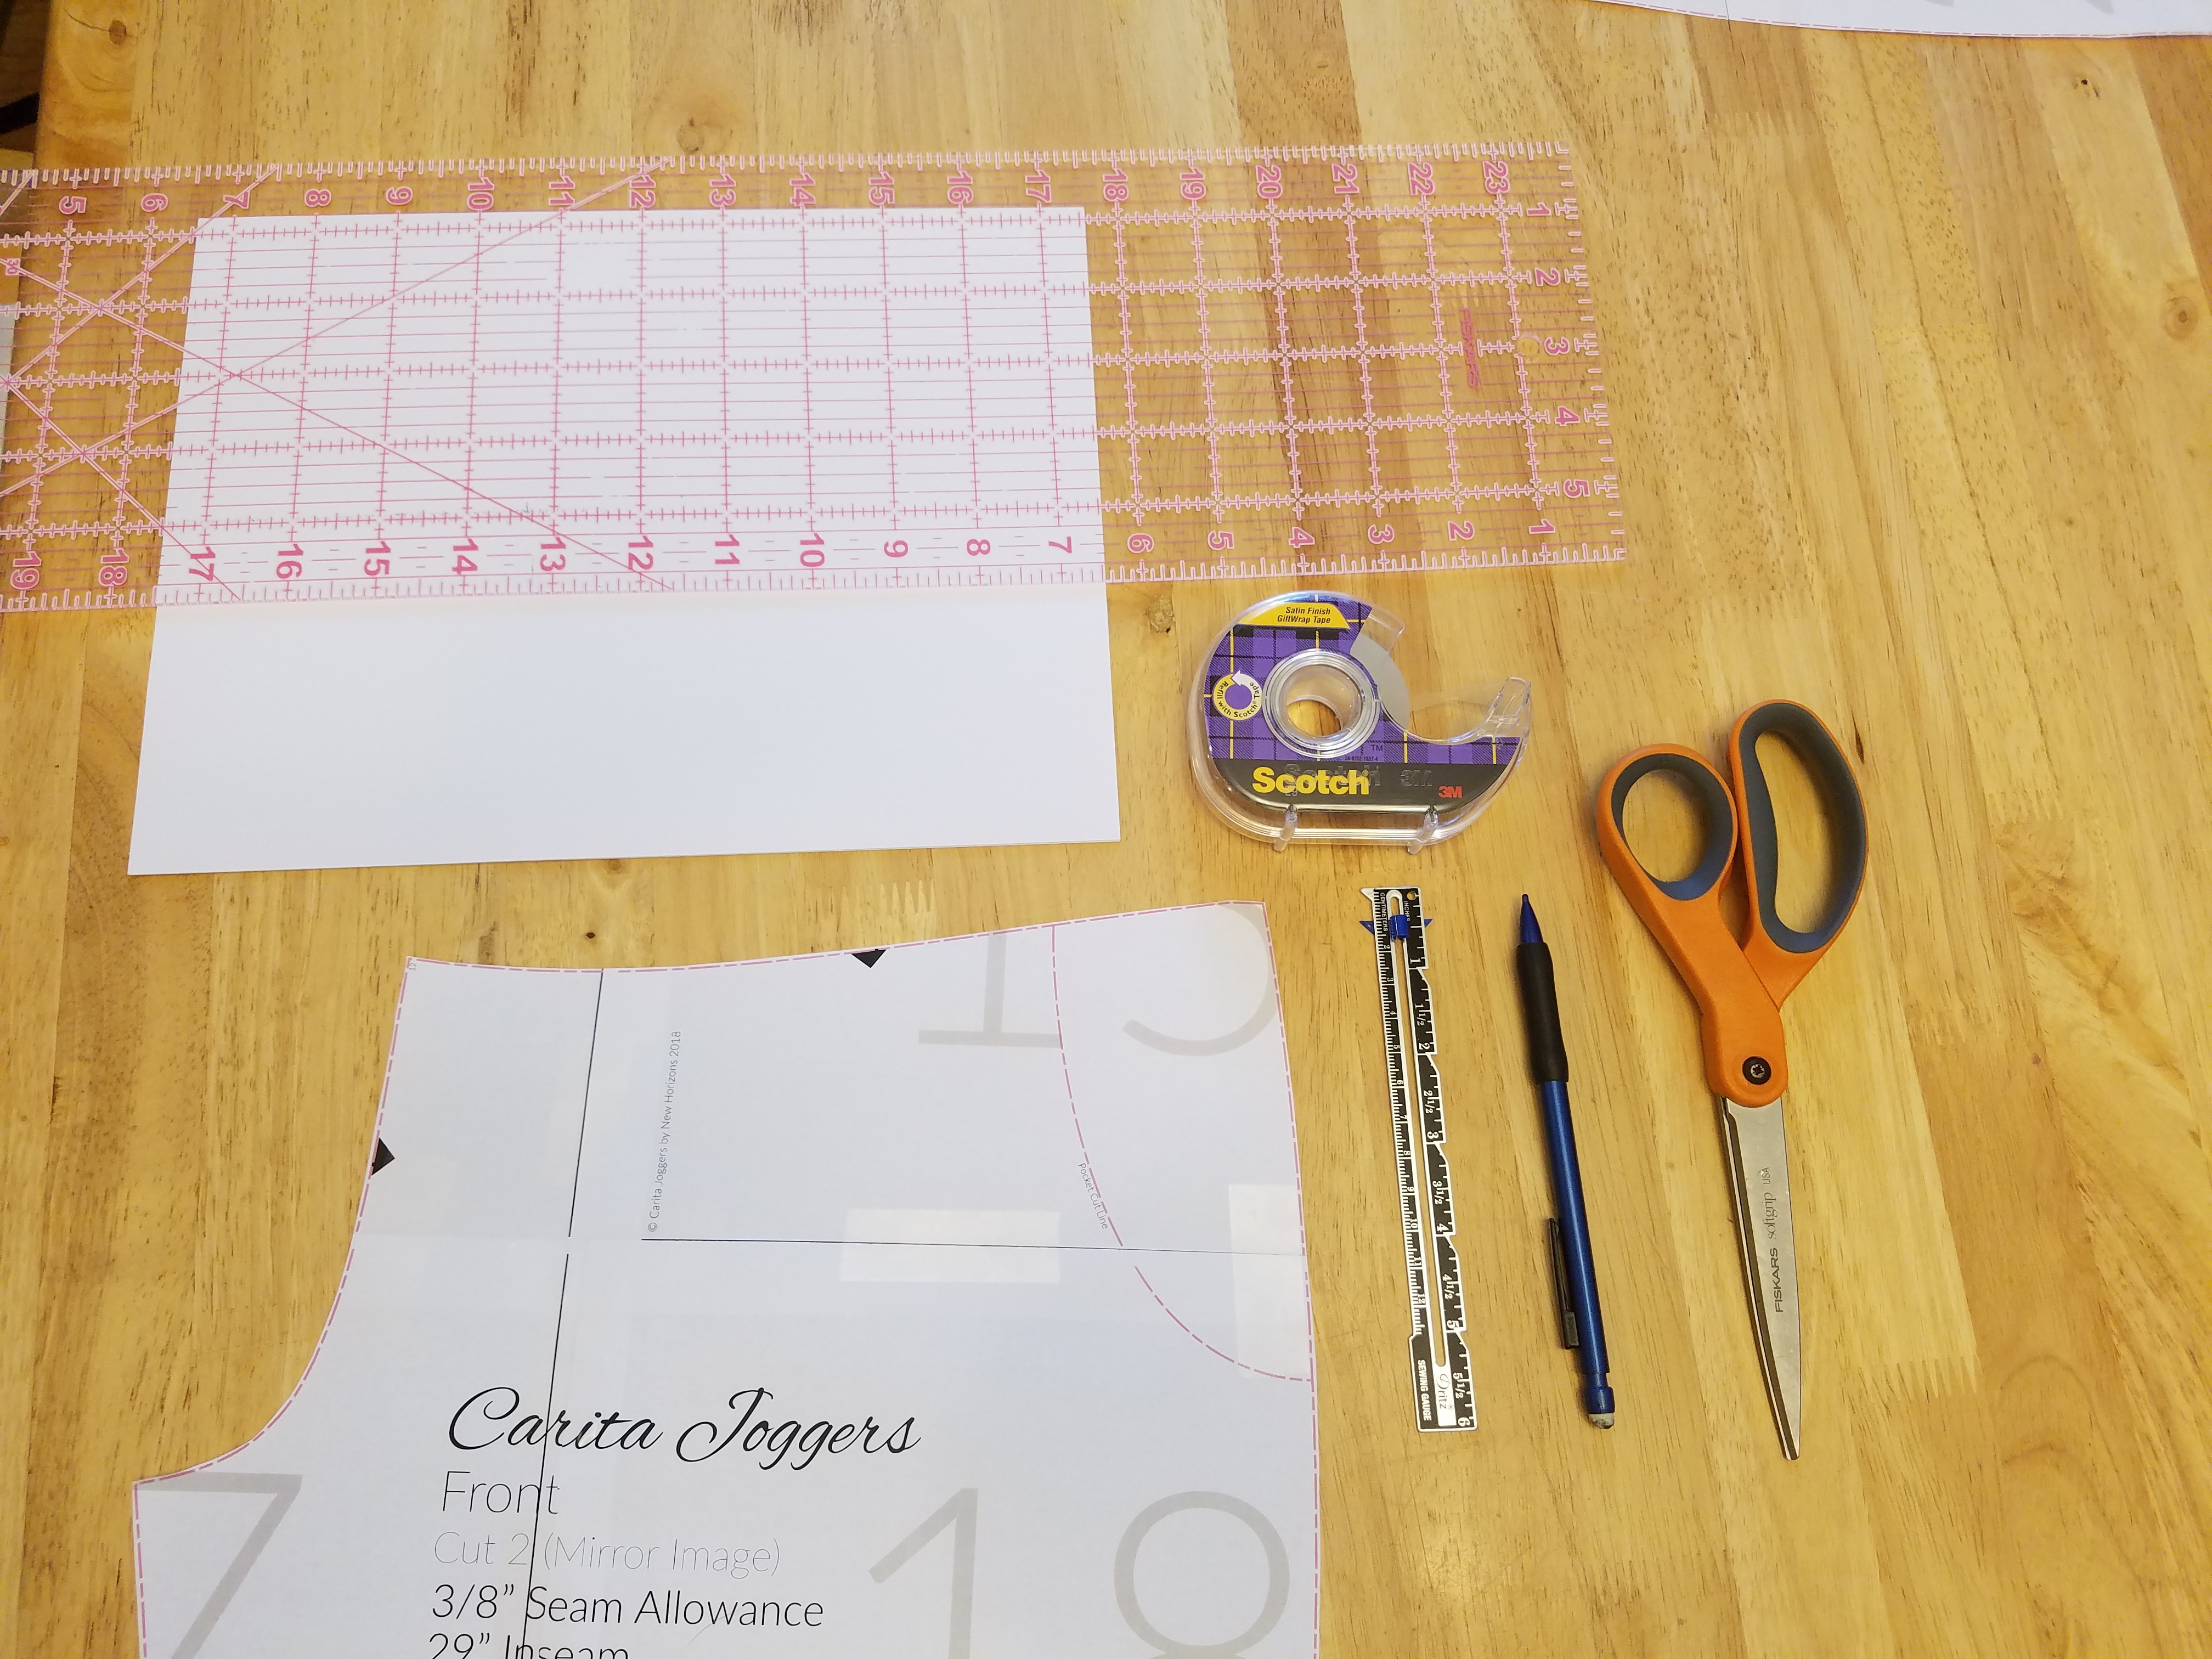
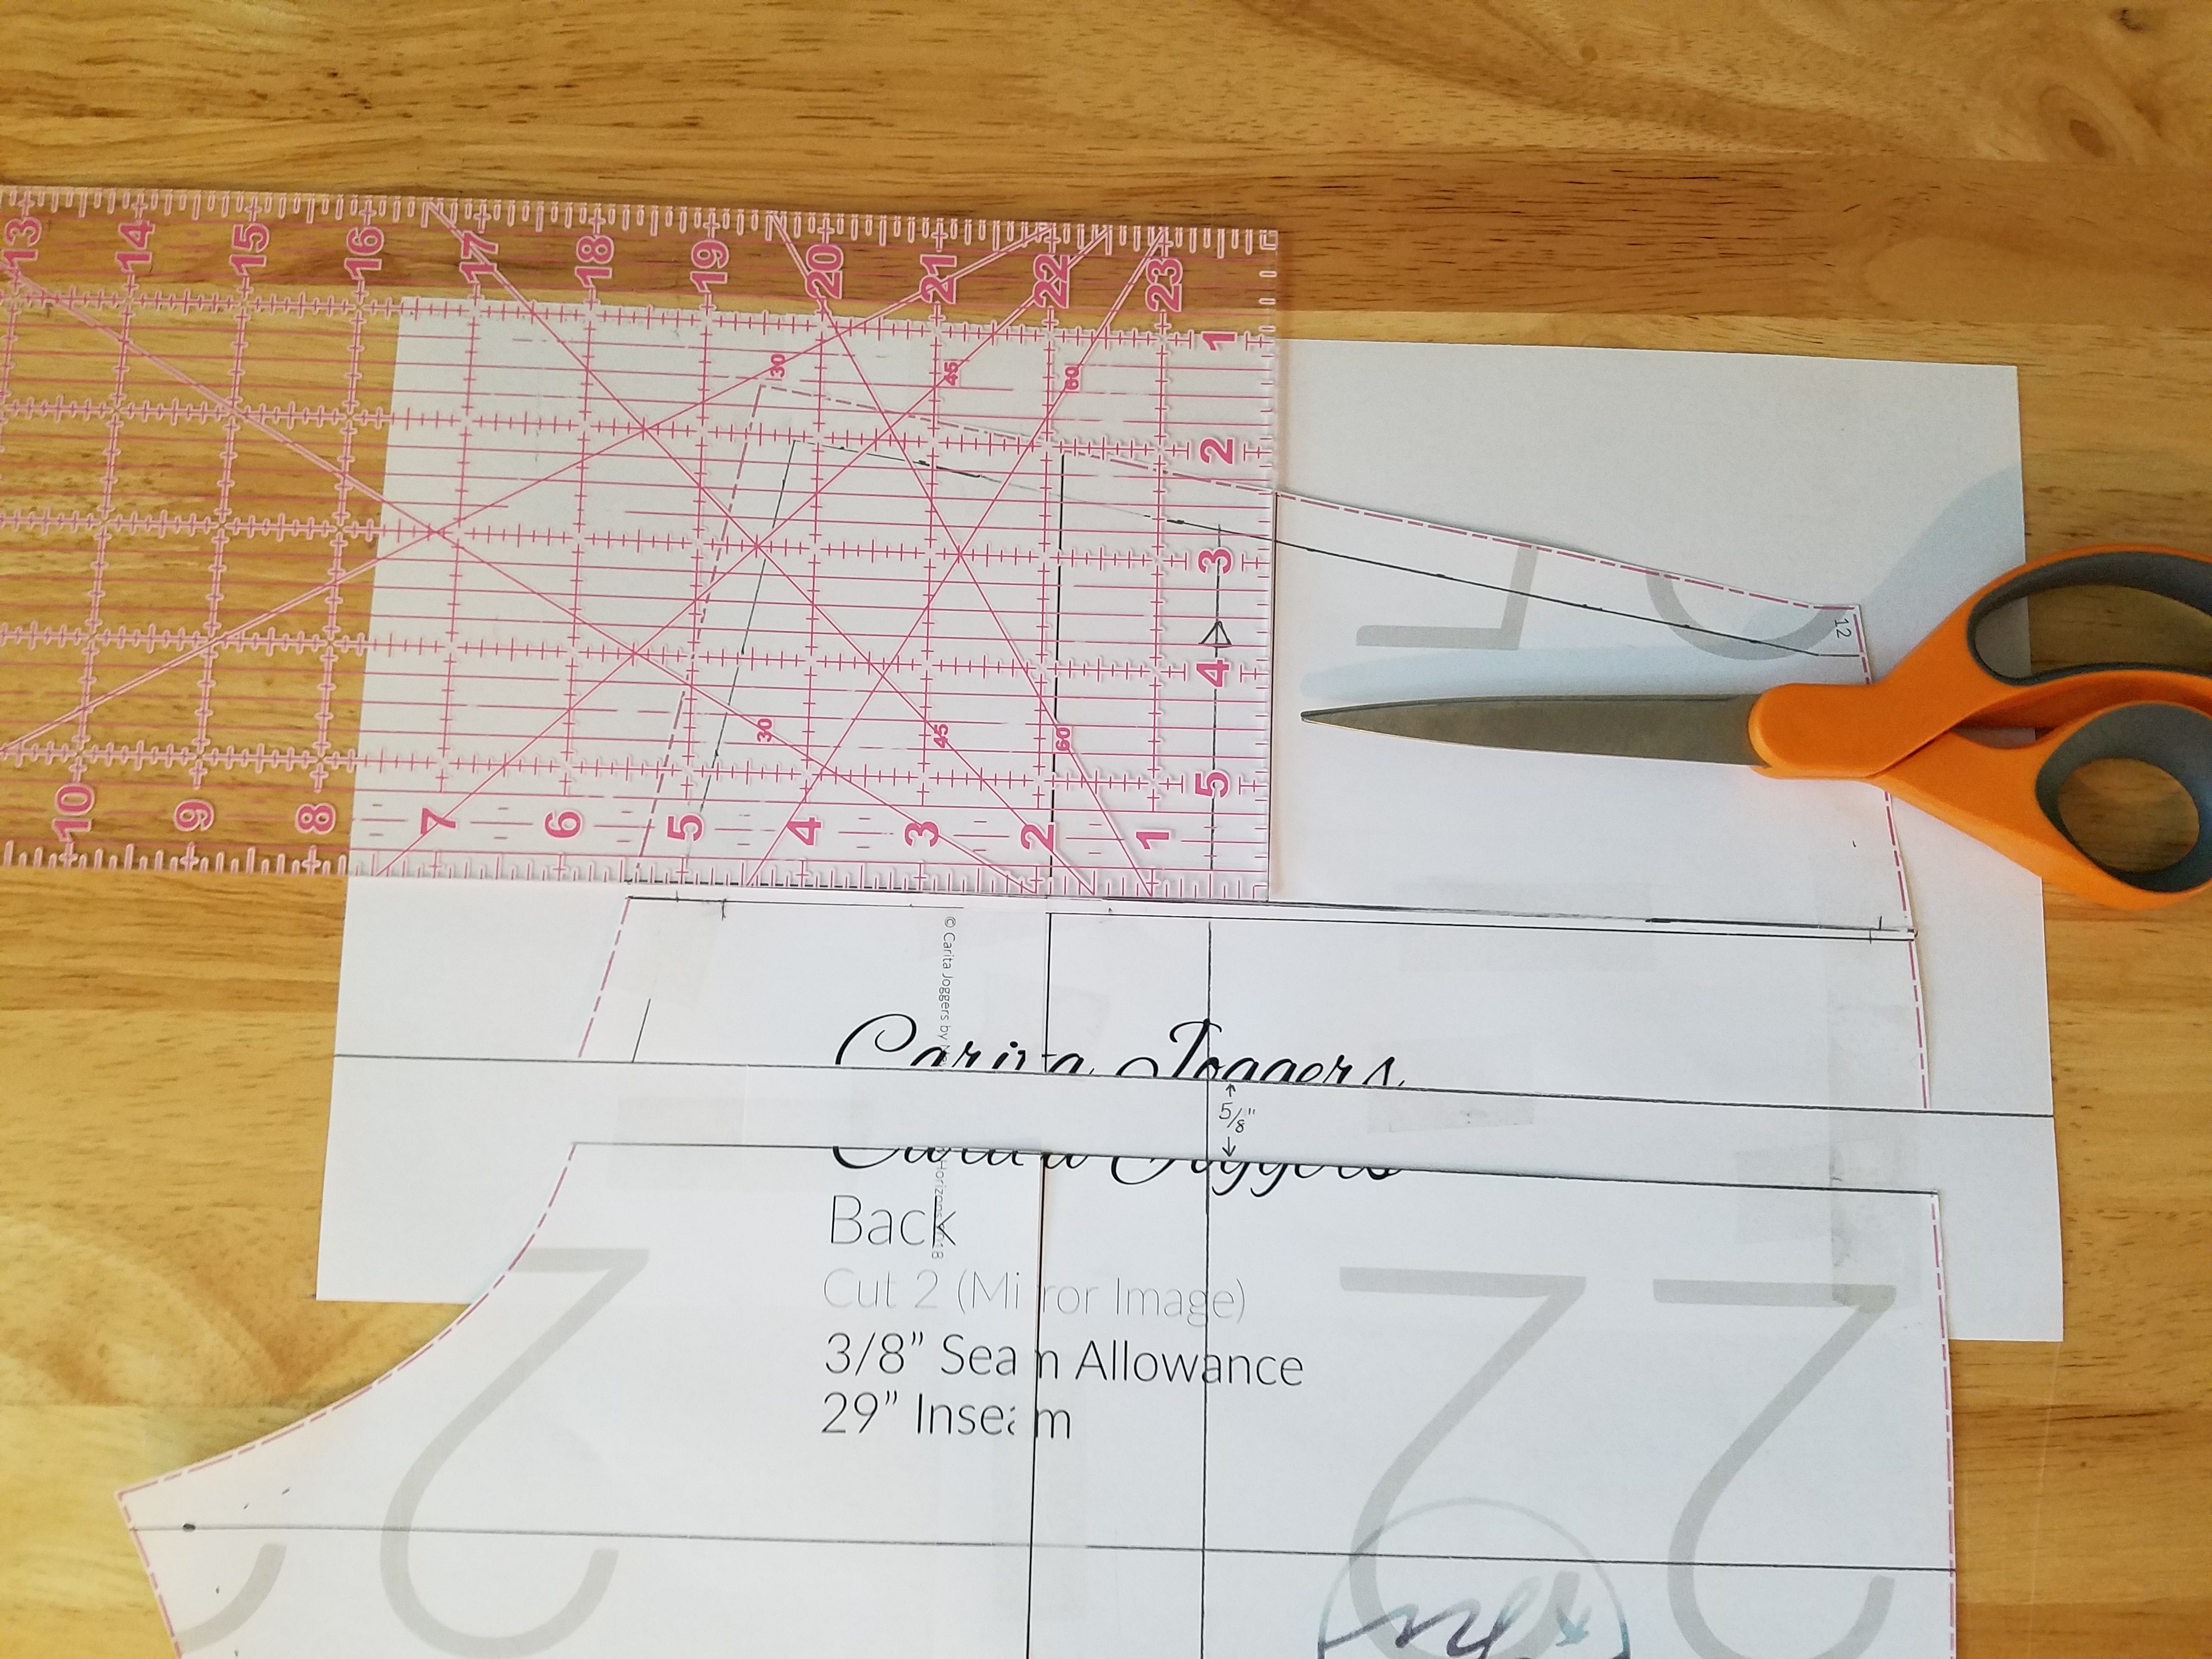
On your front pattern piece, mark your seam allowance (⅜ inch for these patterns) in around the crotch point and the top of the pattern, at the waist.
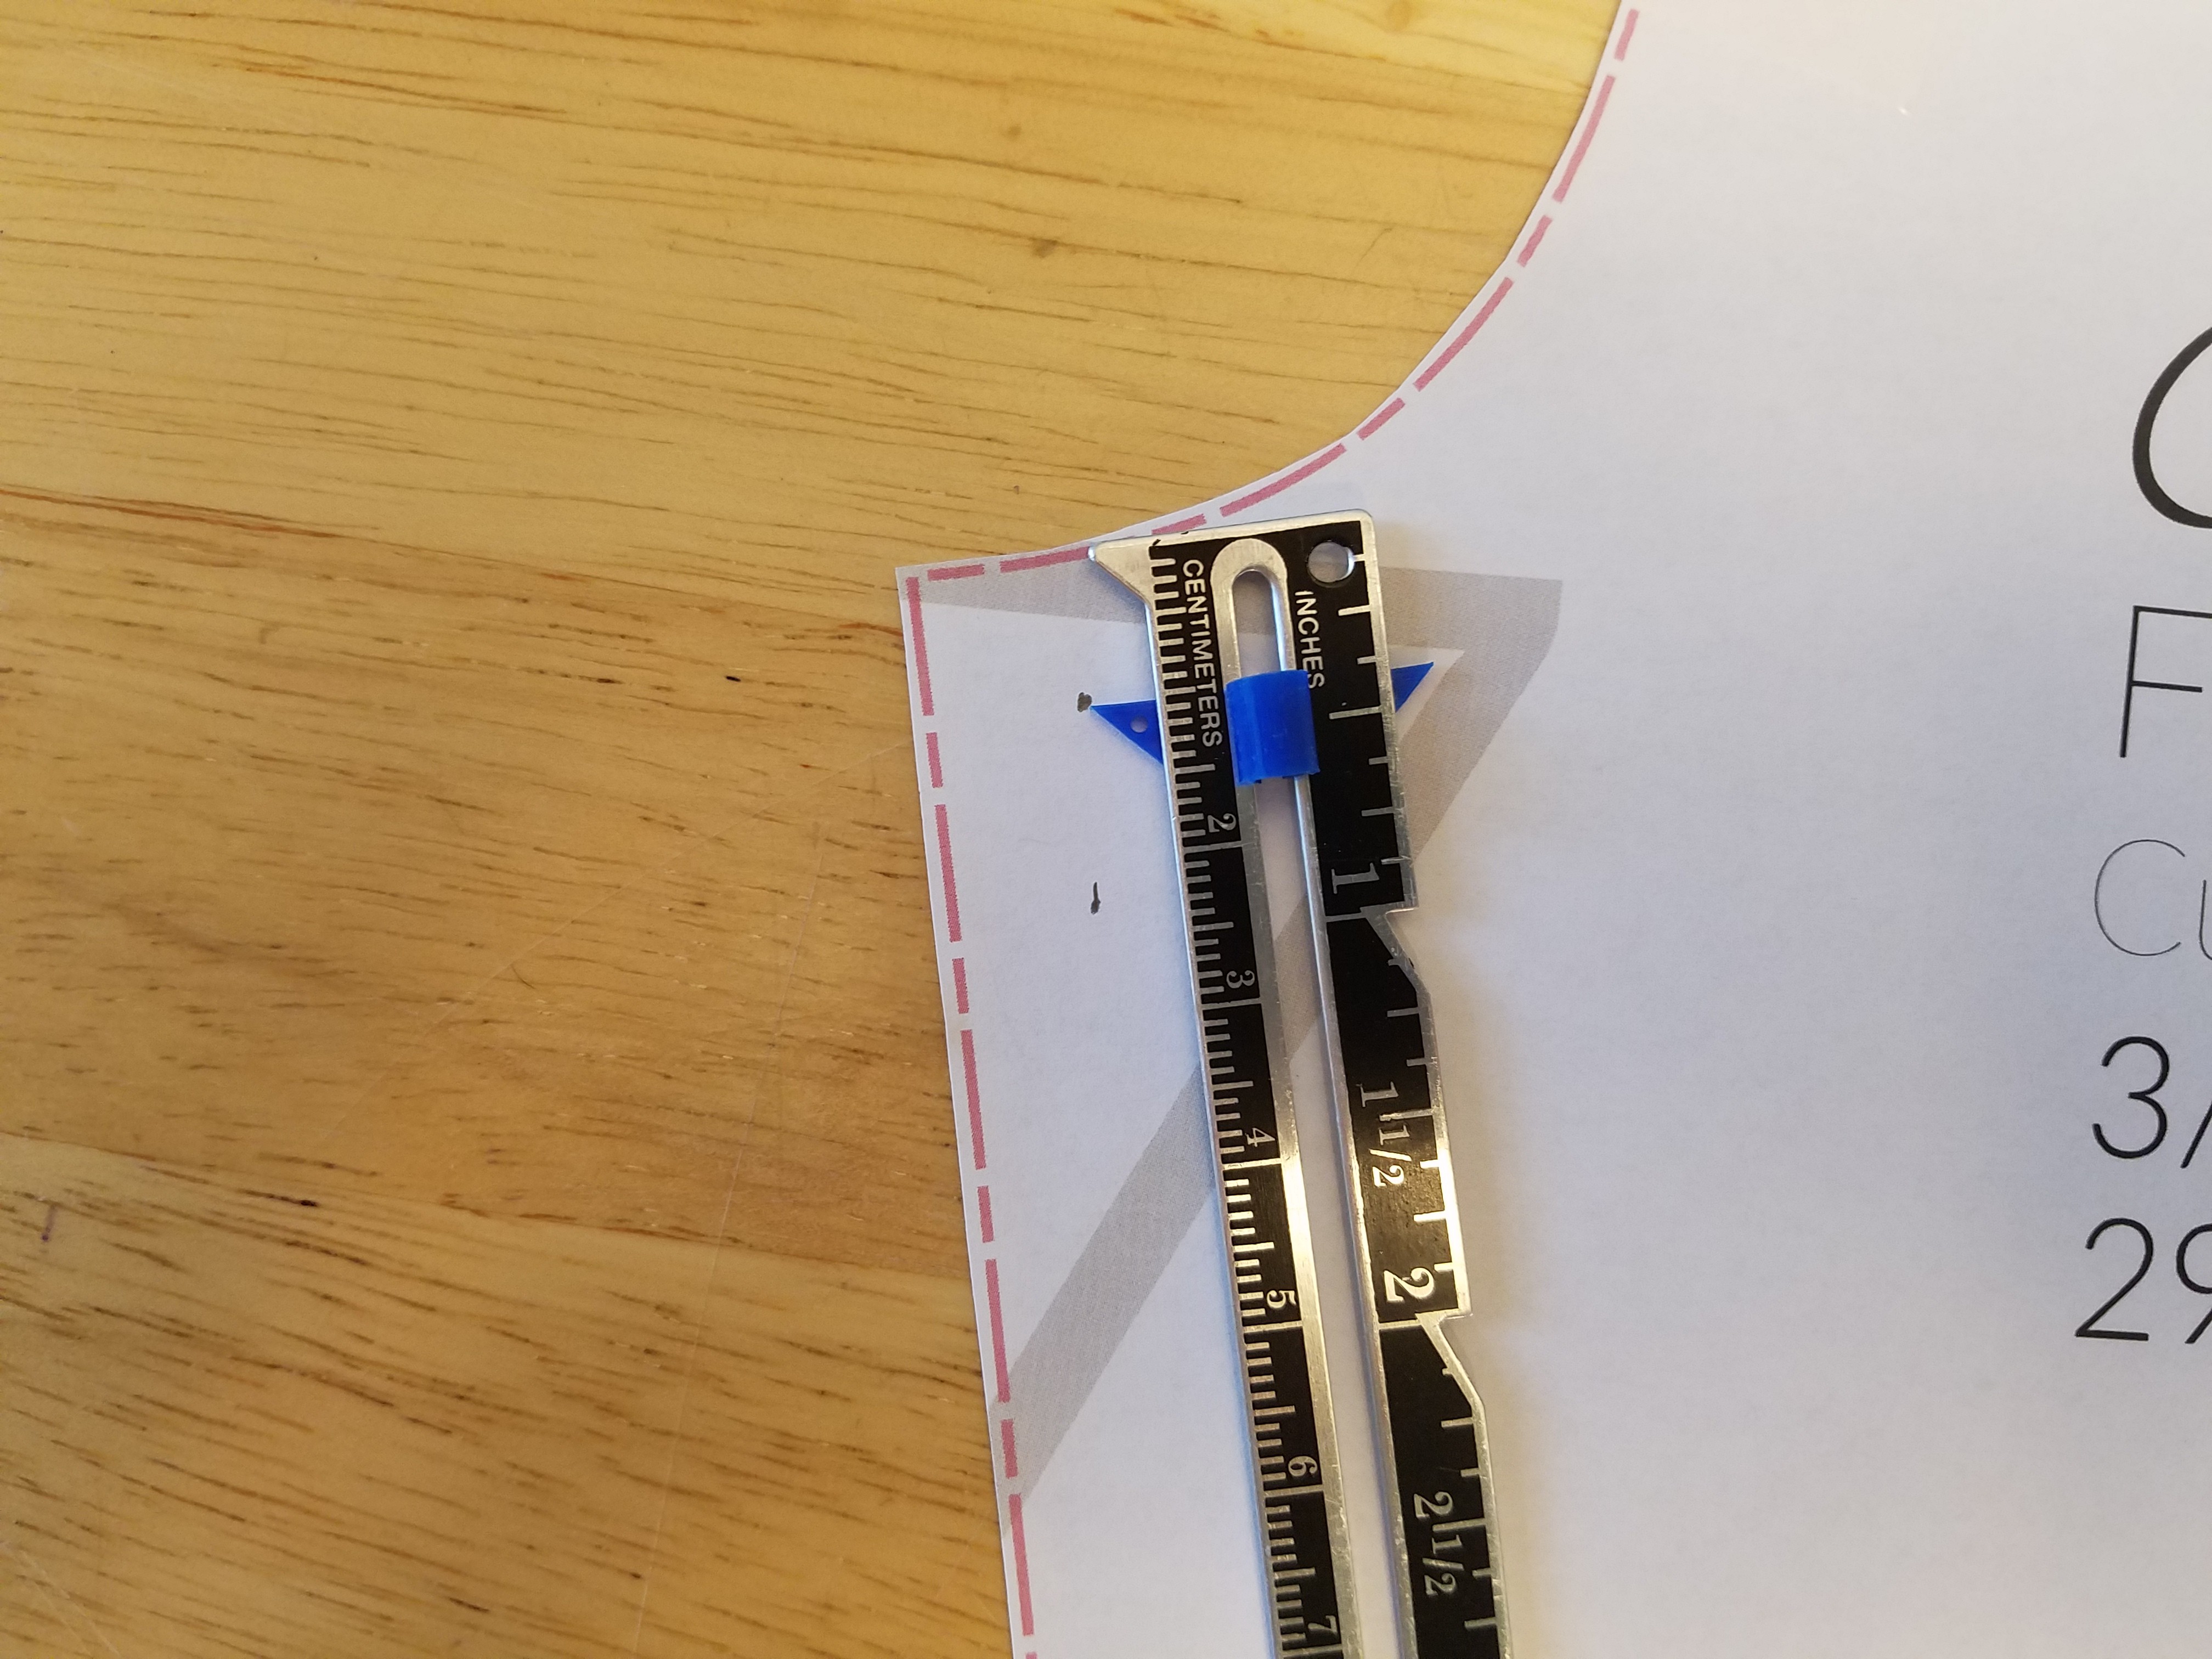
Line up your ruler to the crotch point and draw a line across the pattern, perpendicular to the grain line (and also extend the grain line up to the top of the pattern).

Measuring from this line to the seam allowance at the top gives you the crotch depth the pattern is designed for.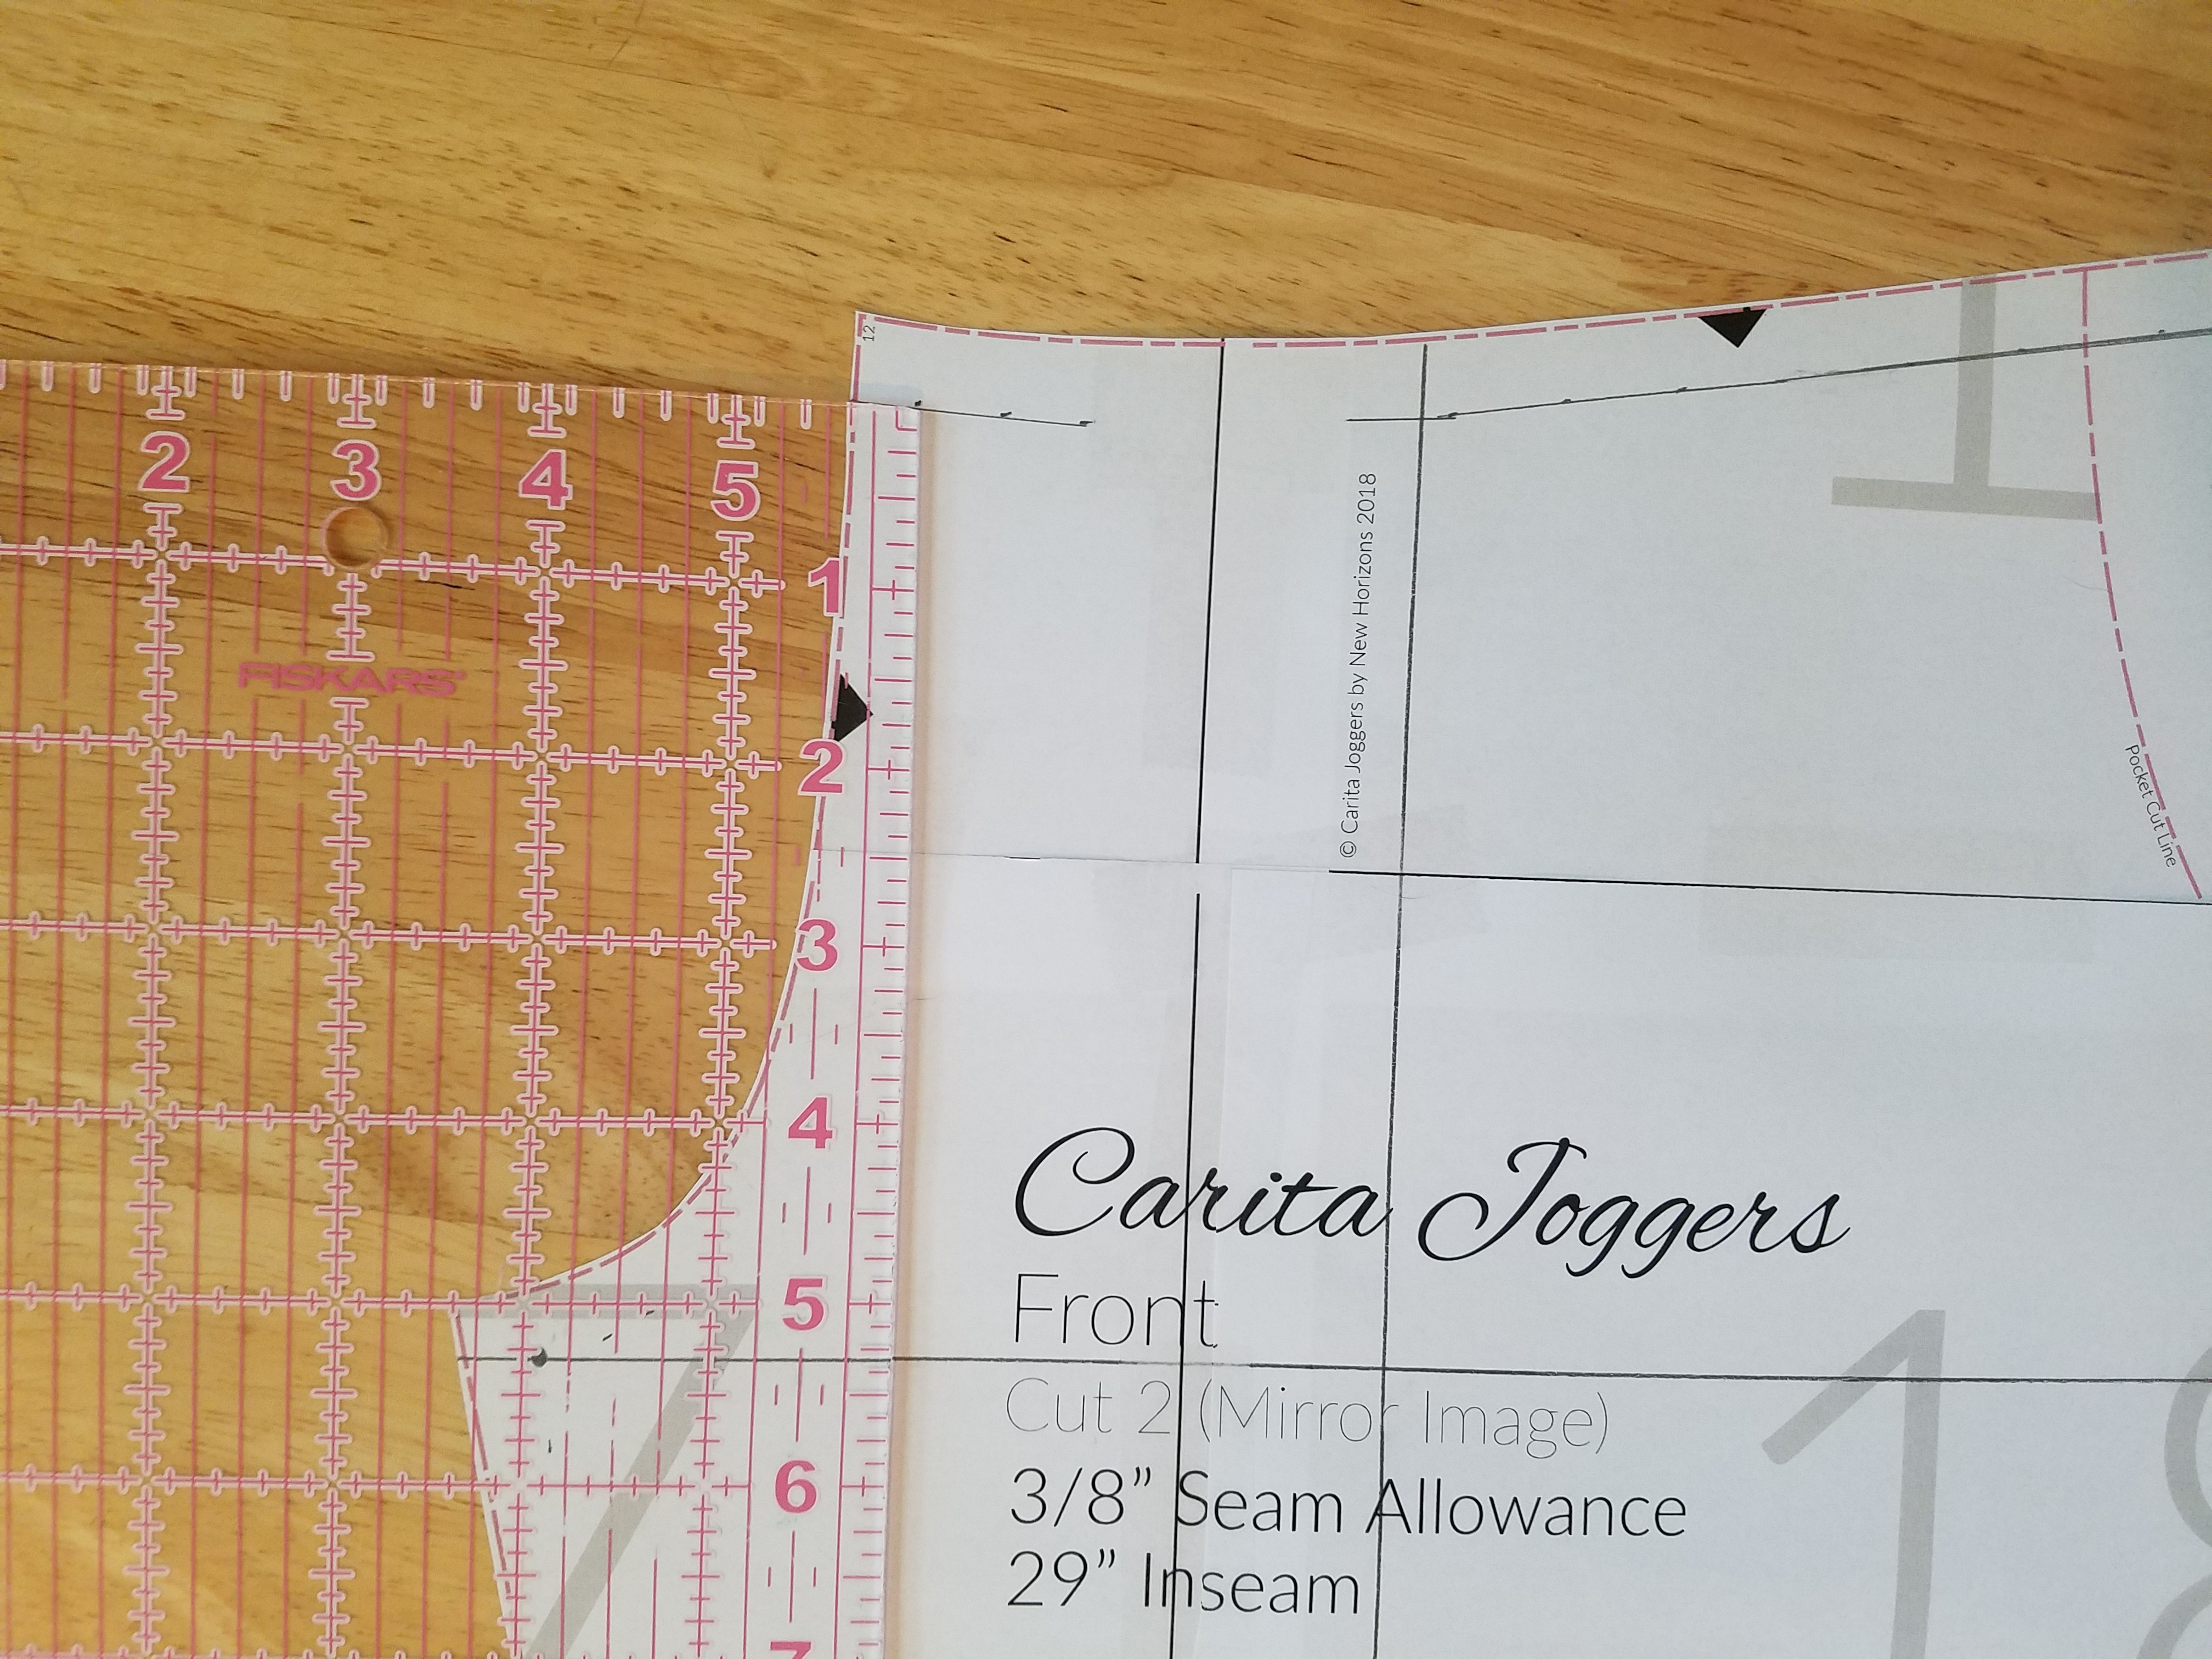
For my size, it’s about 5 3/8 inches. I only need to add 5/8 of an inch to the pattern, but it helps so much!
To add to the crotch depth, go up about 3 inches, to about the middle of the crotch curve, and draw a line across the pattern, again staying perpendicular to the grain line.
Cut that line all the way across. You can make this modification to the pocket at the same time, if you wish! Just lay the pocket on the pattern piece and copy the line over.
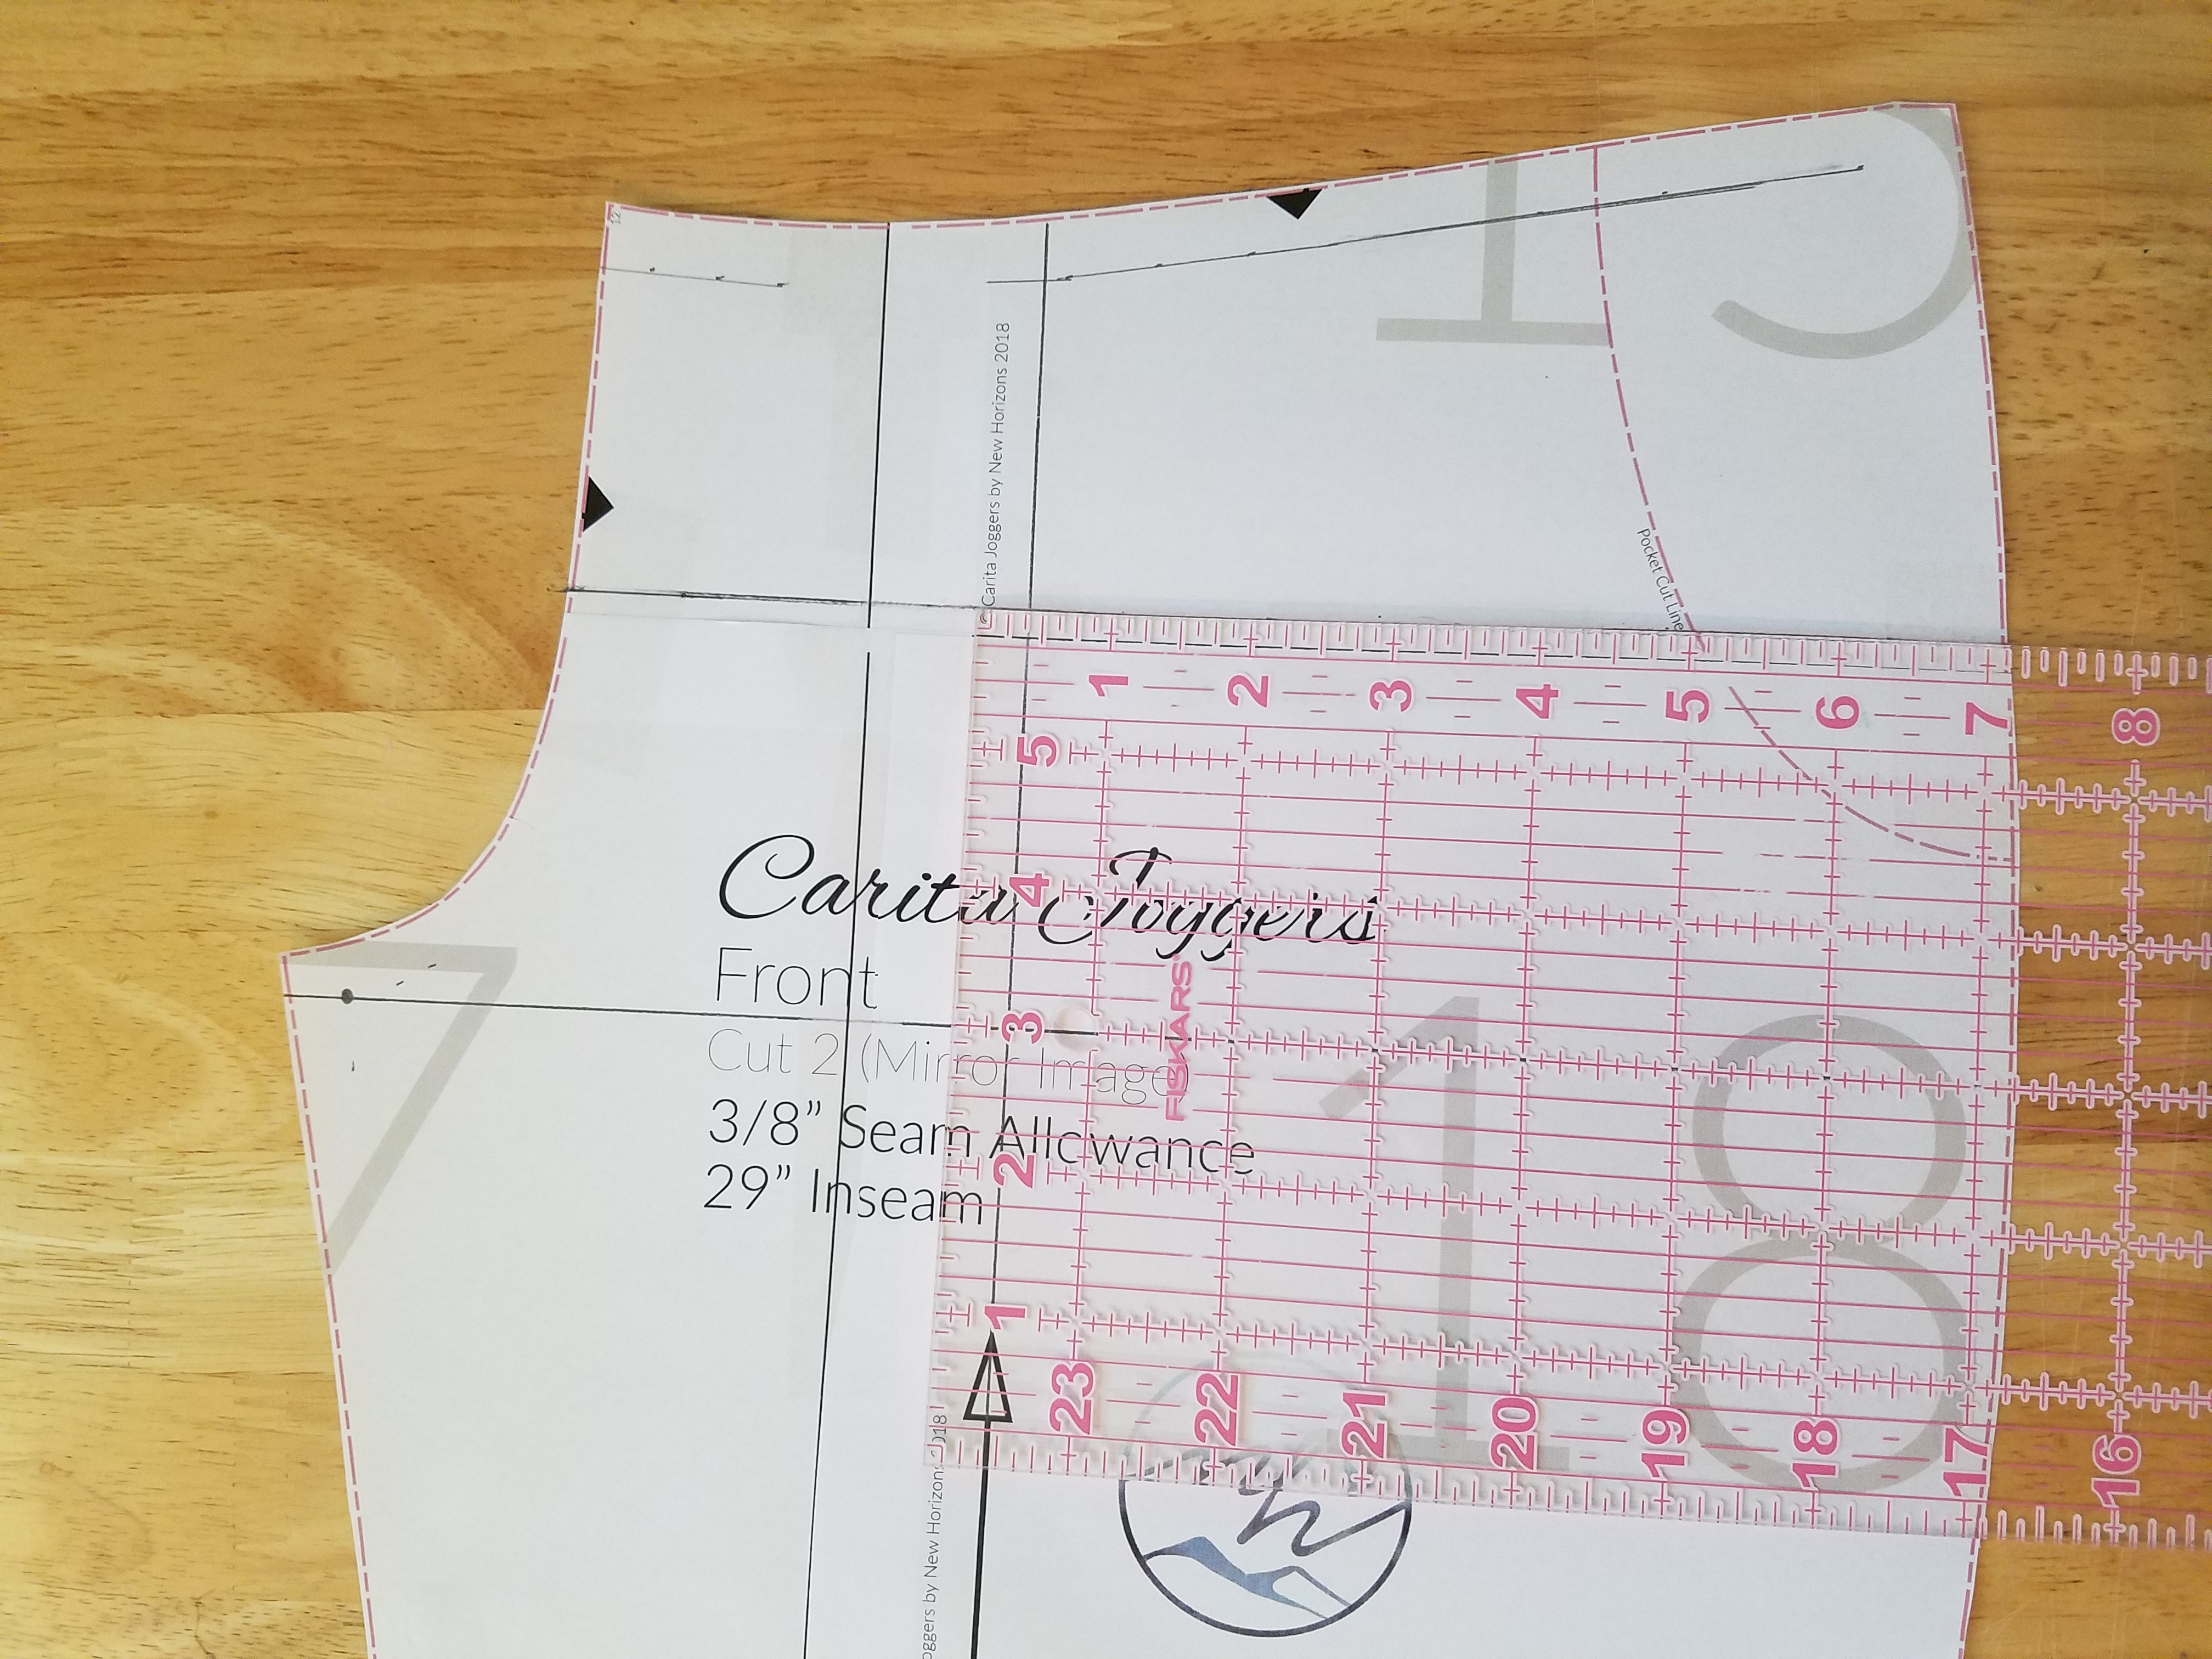
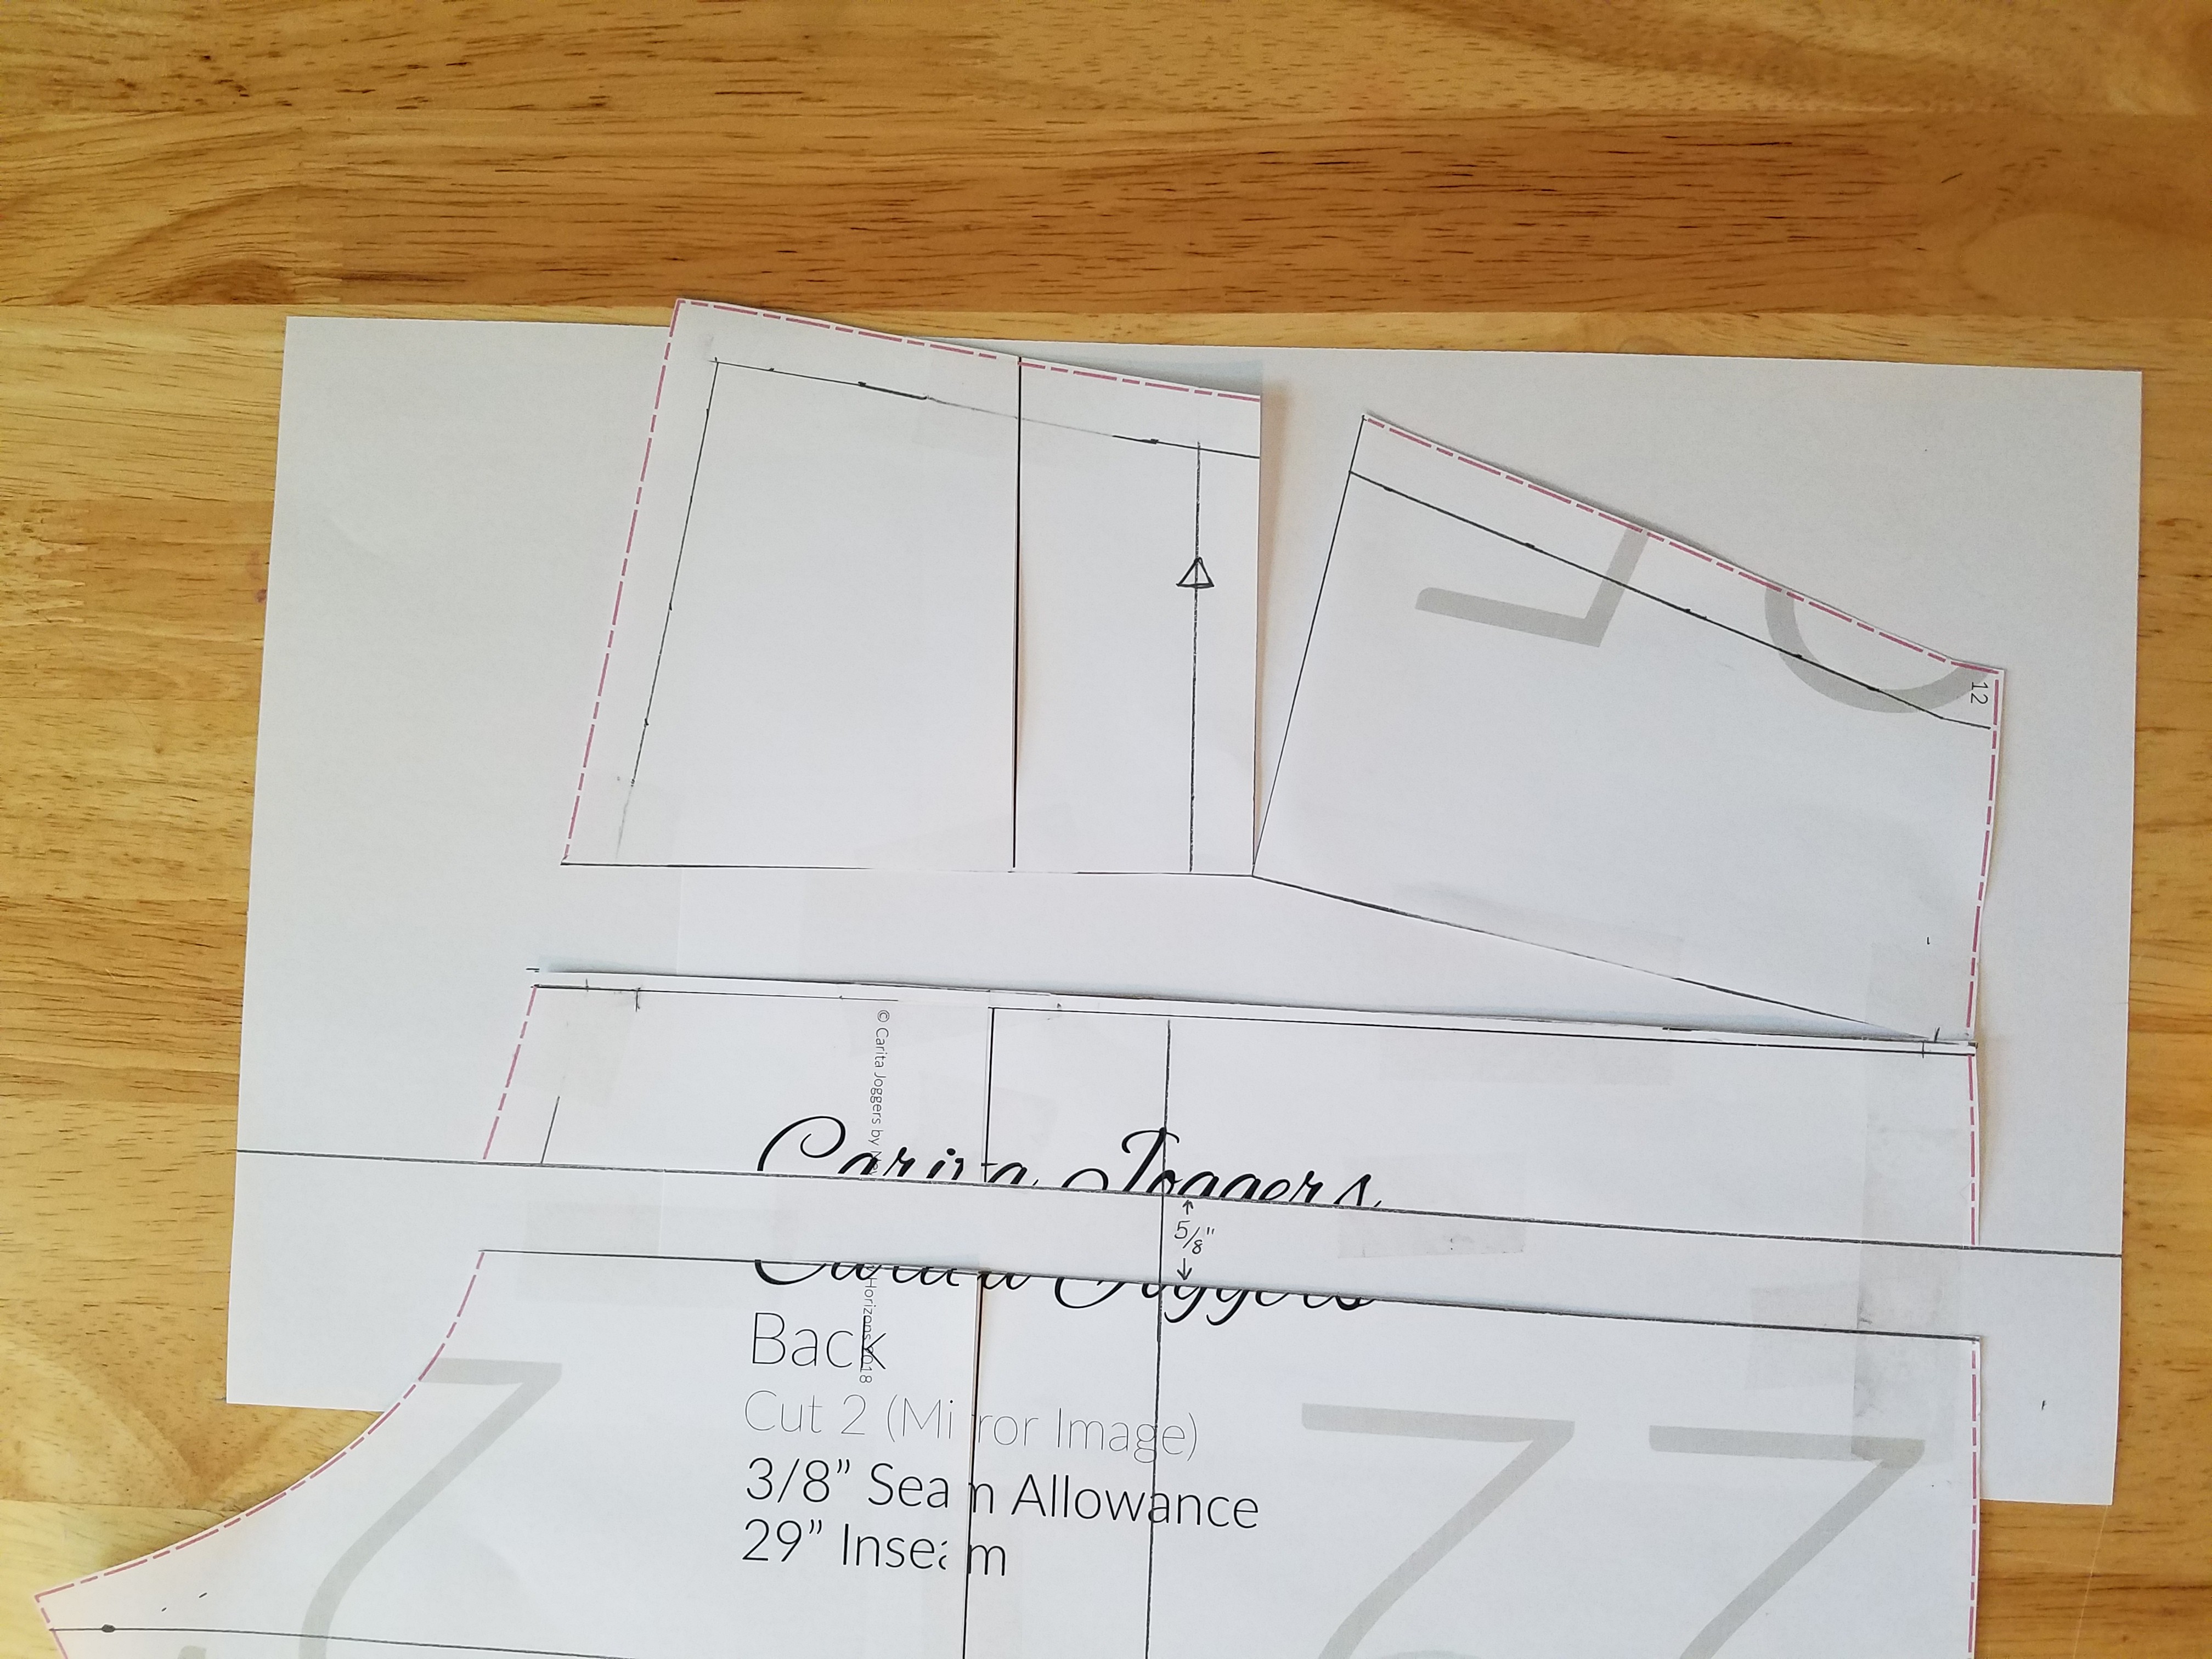
Tape some scrap paper to the back of the pattern pieces and measure the depth you wish to add. Extend the grain line up across the scrap paper too!

Tape the tops of your pattern pieces onto your scrap paper at the new depth lines, taking care to align the grain lines.
Smooth out your curves (a nice time to use a French curve, if you have one!) and cut away the excess scrap paper! And your front is done!

(I also moved the pocket cut line up a bit, though I ended up printing out a new copy of just the top of the front pattern piece, cutting on the pocket cut line, and using that little edge piece for the cut line on my fabric.)
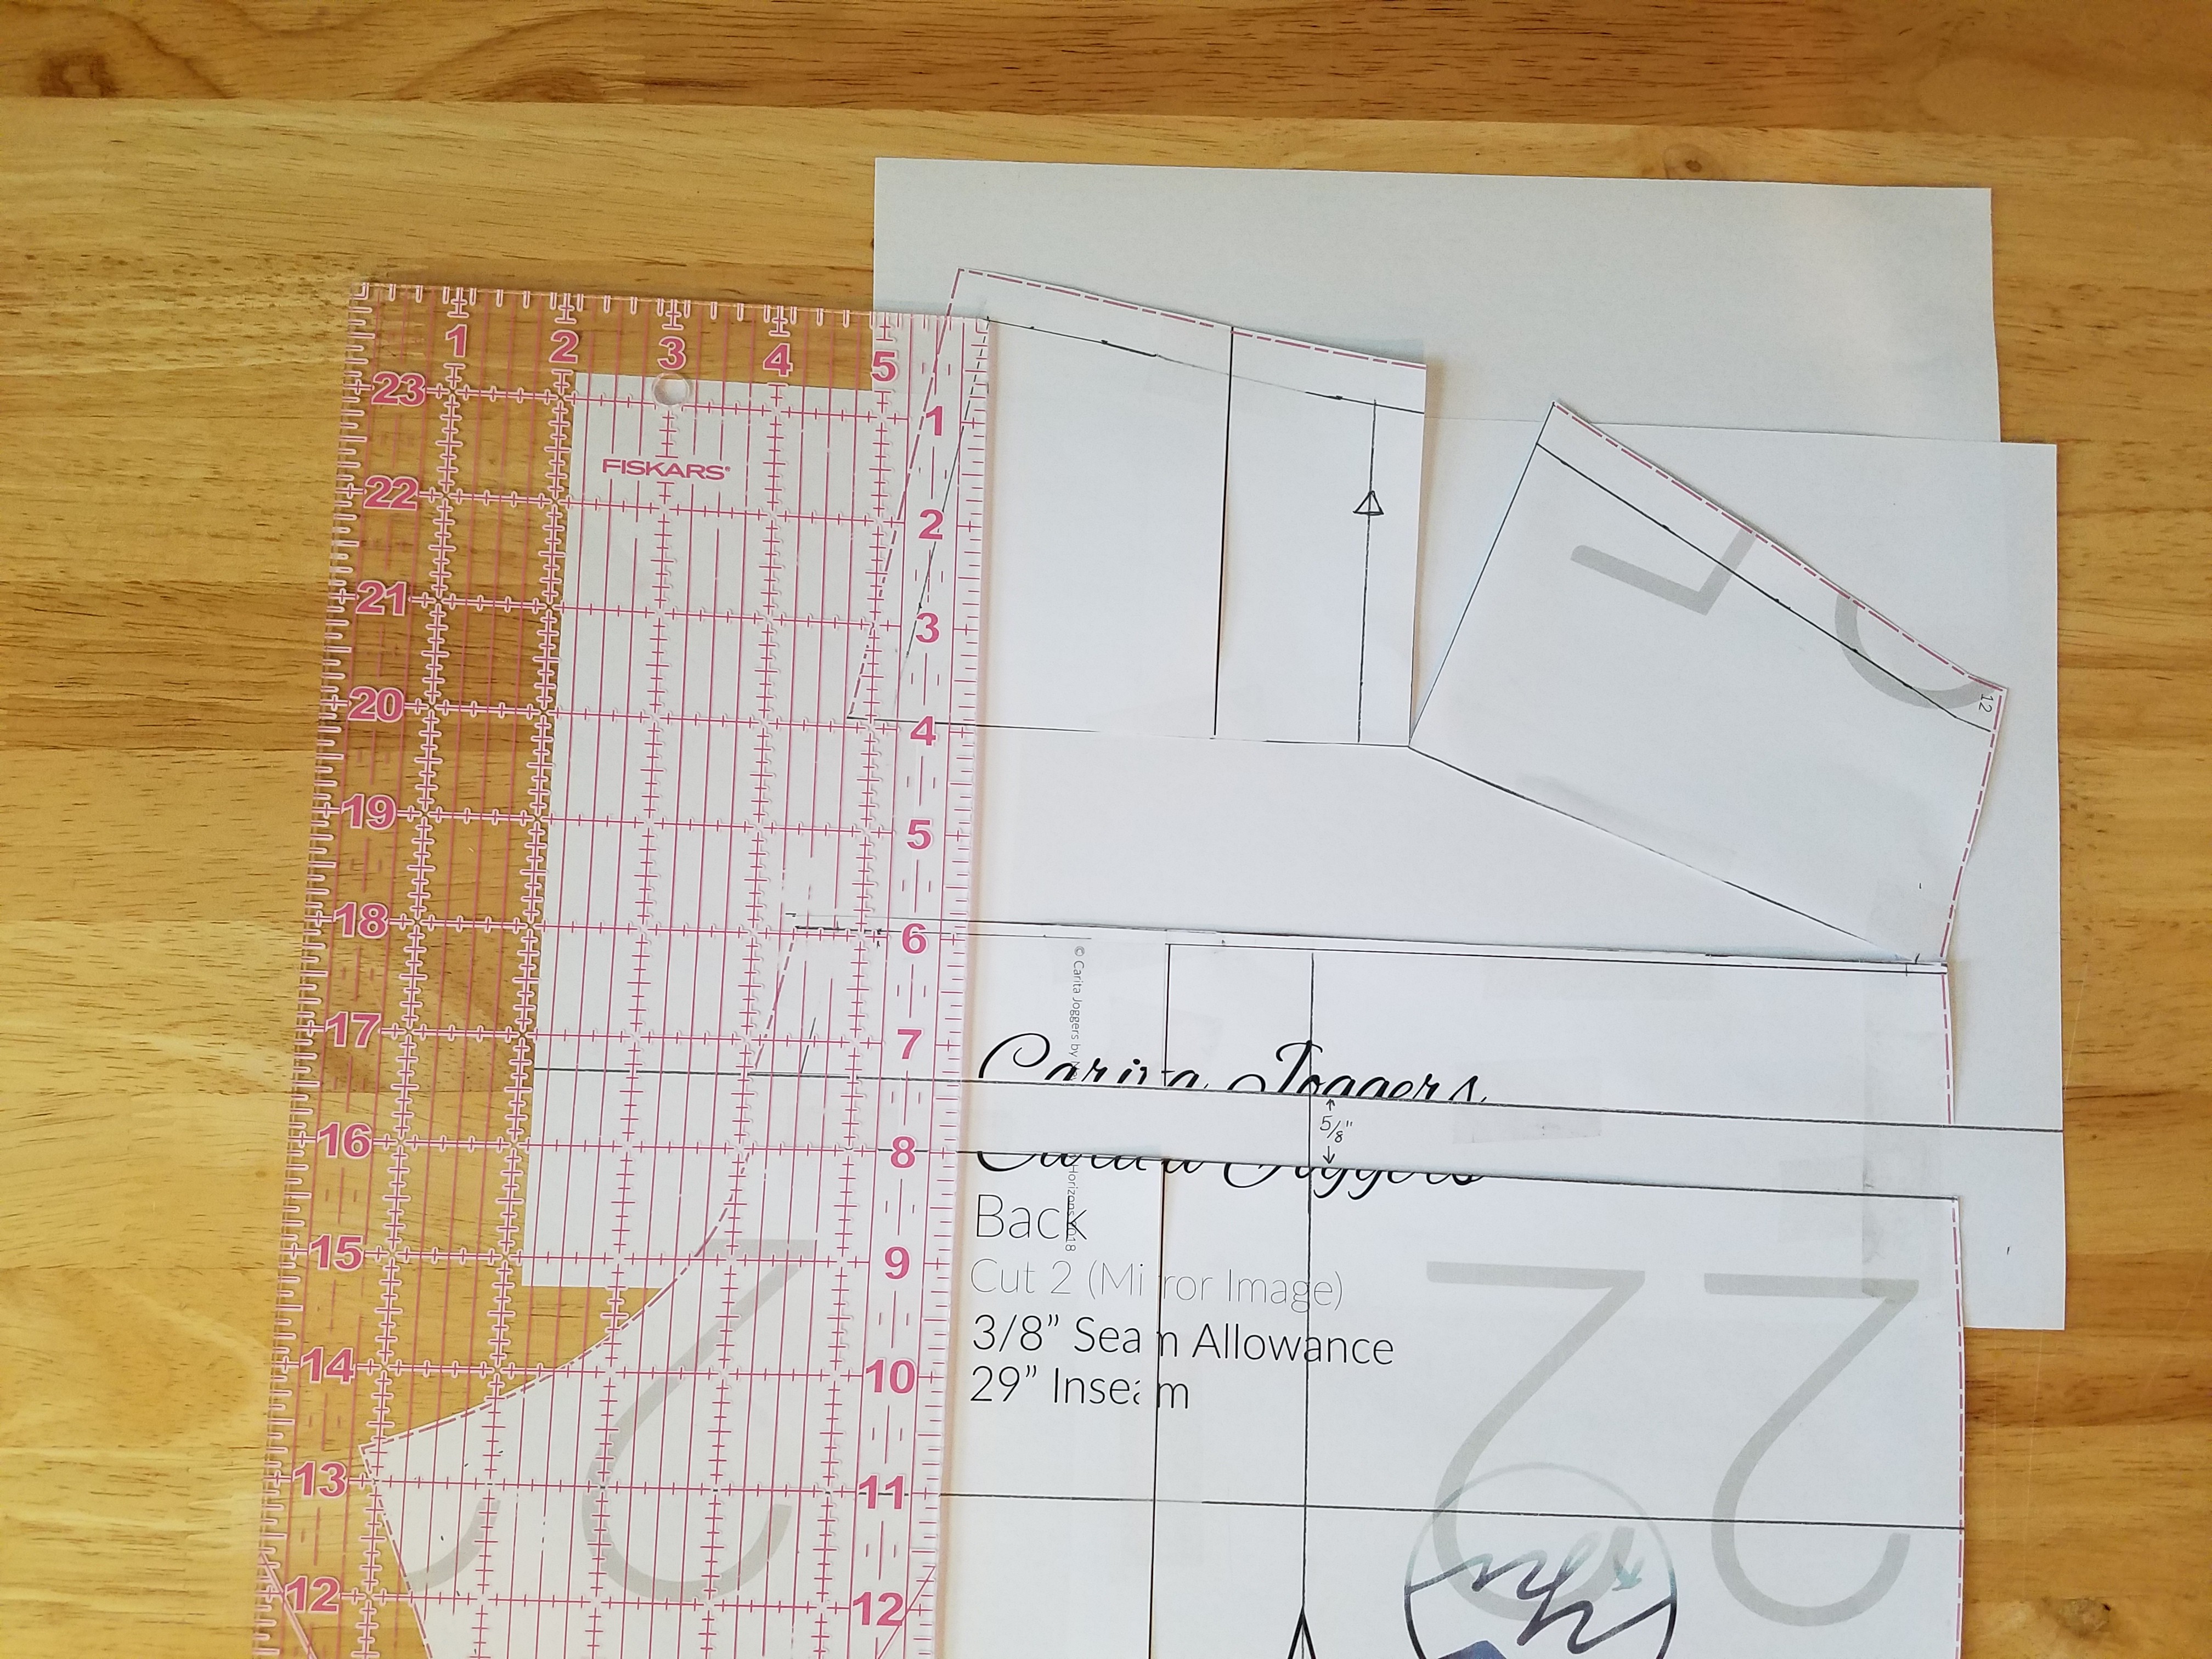
Follow the same steps for the back pattern piece, but don’t tape down the top just yet.
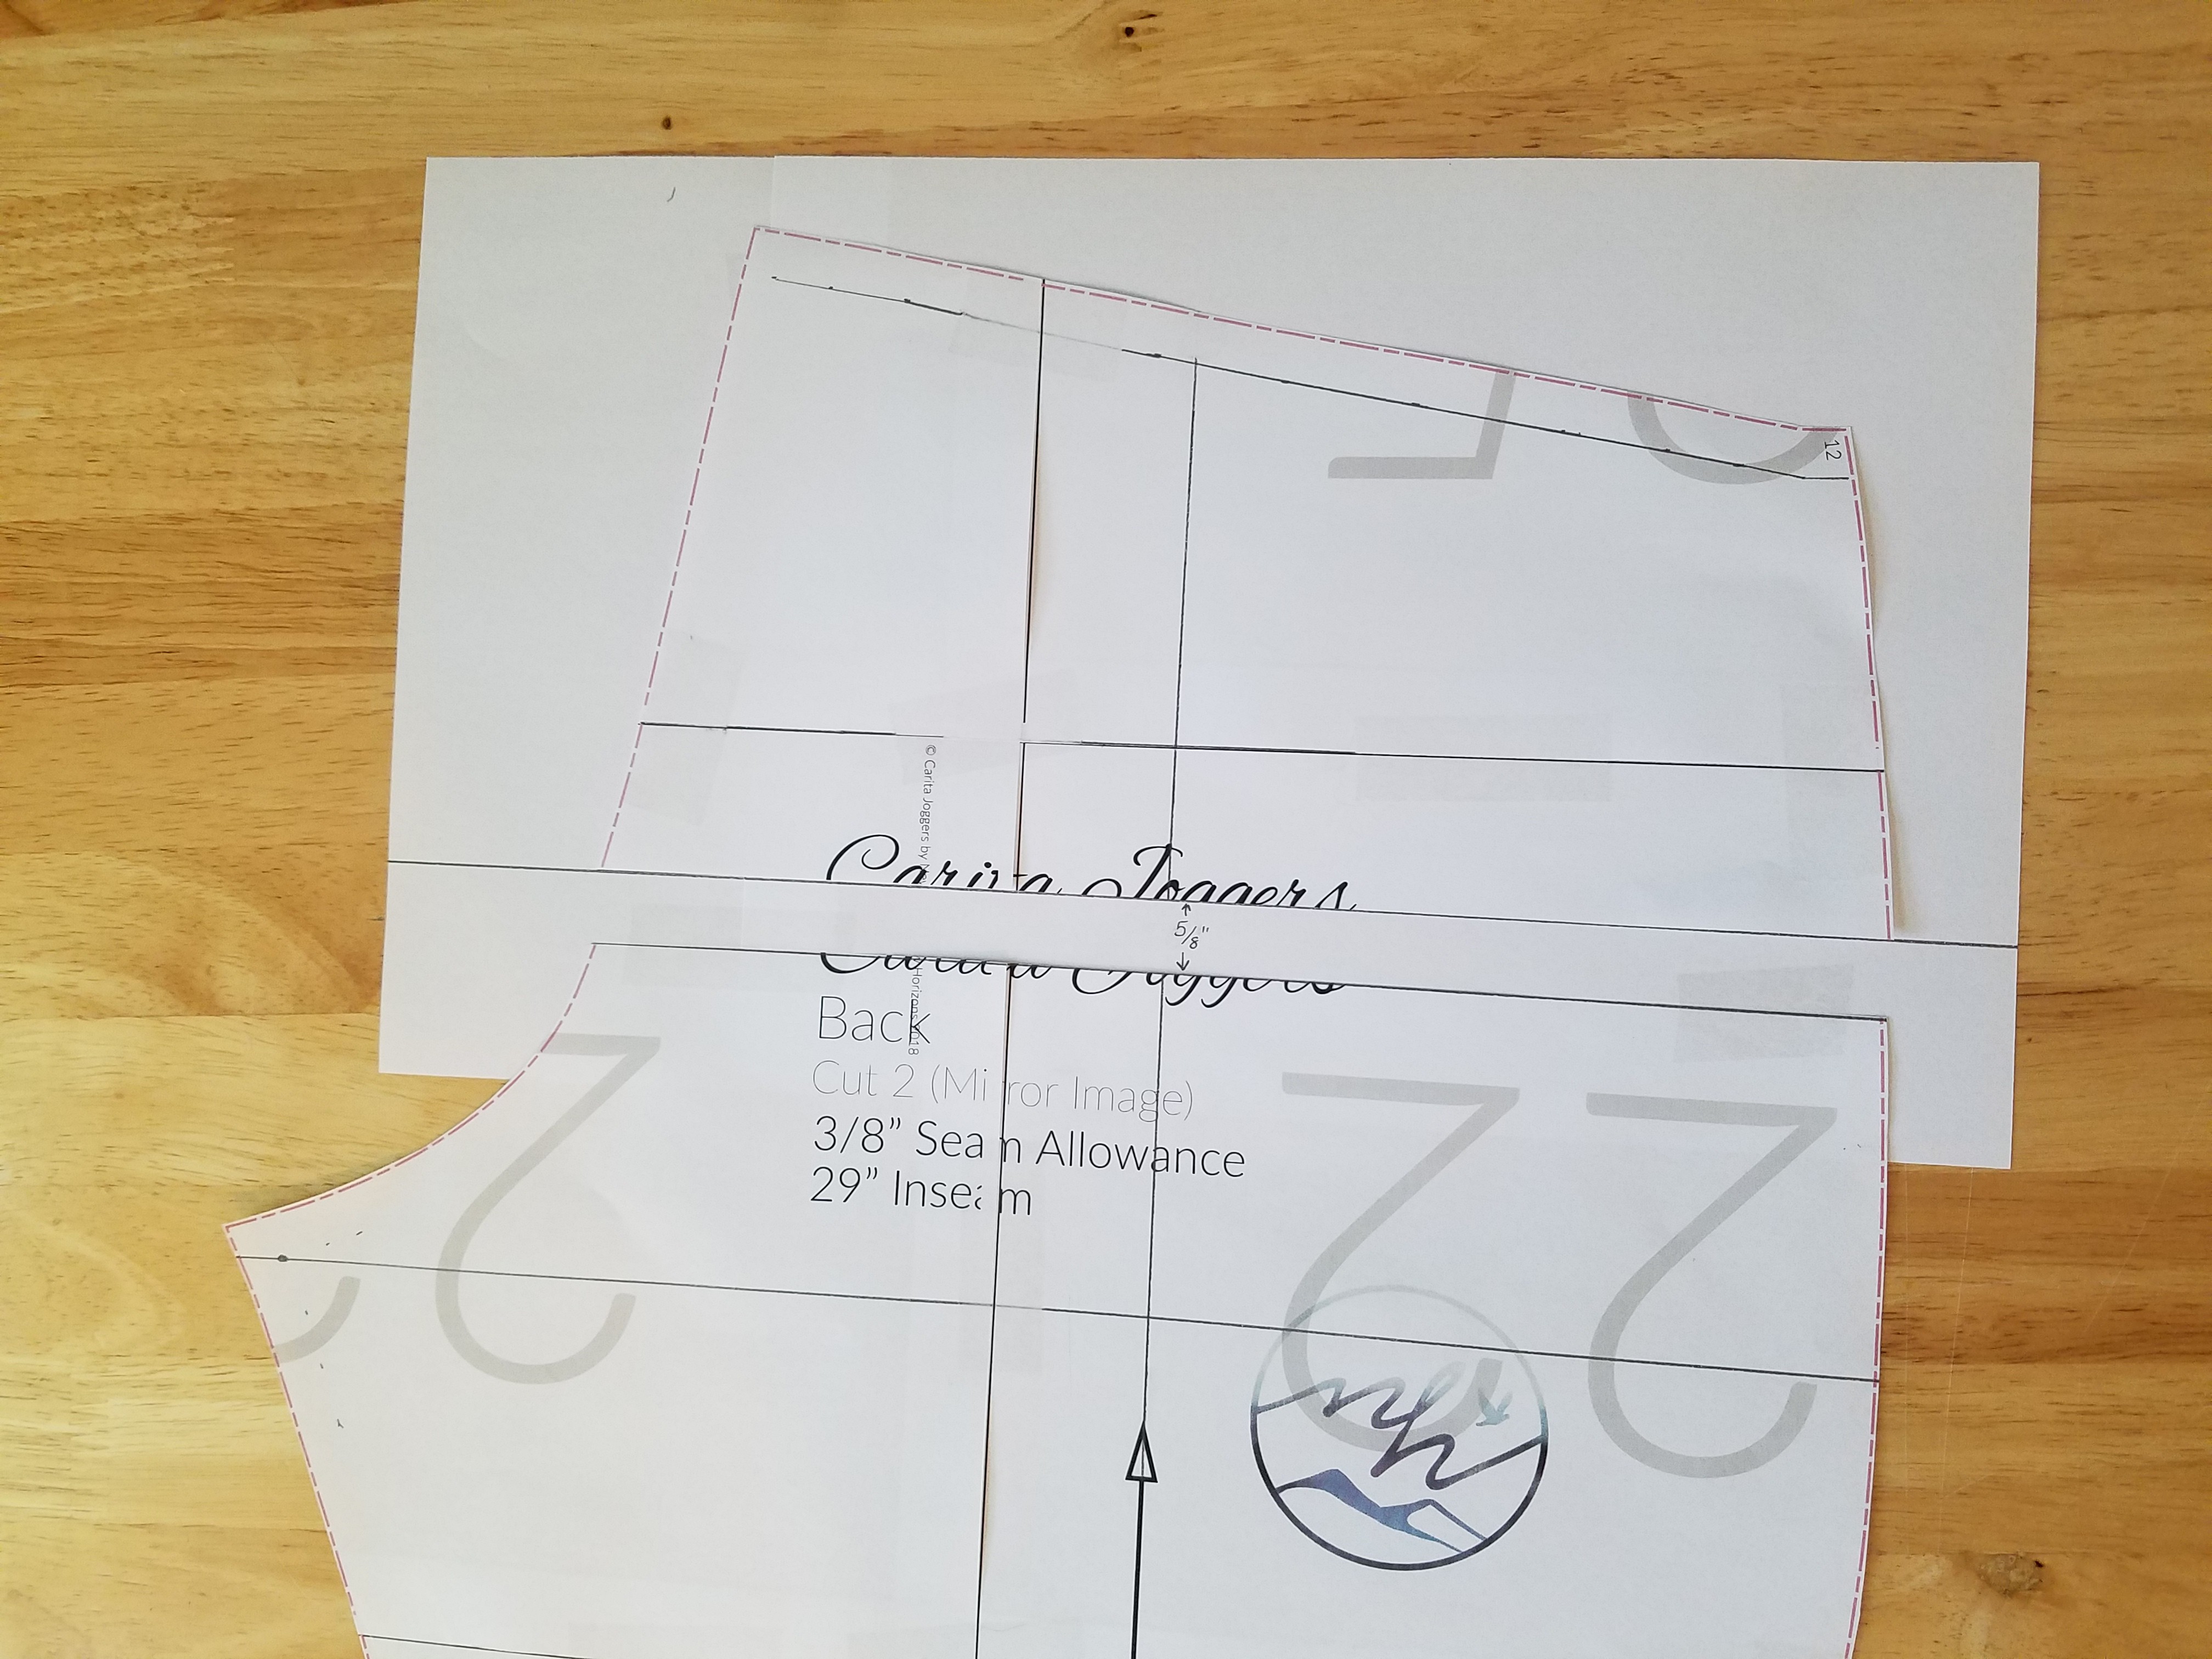
Measure from the crotch point line to the waist line close to the crotch curve.

For my size, the depth is 9 inches. If this fits your booty, you’re all done! But if, like me, you still need a little more room to hold all of your blessings, I like to use the slash and pivot method to add it. It fits a three dimensional shape very well!
To start, draw a horizontal line about an inch and half above your crotch depth adjustment line. Then draw a vertical line down from the top about 5 inches in from the seam adjustment, straight down from the top. These are approximate measurements, you are just aiming to make the lines intersect about where your booty is fullest. (This is another time your booty measuring partner may be able to help out, if they’re so inclined!)
Cut your horizontal line almost all the way across, stopping right before the seam allowance, and then snip the seam allowance from the other side, leaving just a smidge to act as a hinge. Cut the vertical line straight down, again leaving a hinge when you cut it.
Spread the cut lines apart until you match or are close to your measurements, and then tape the pattern piece to your scrap paper.
Smooth out your curves and cut out your pattern.
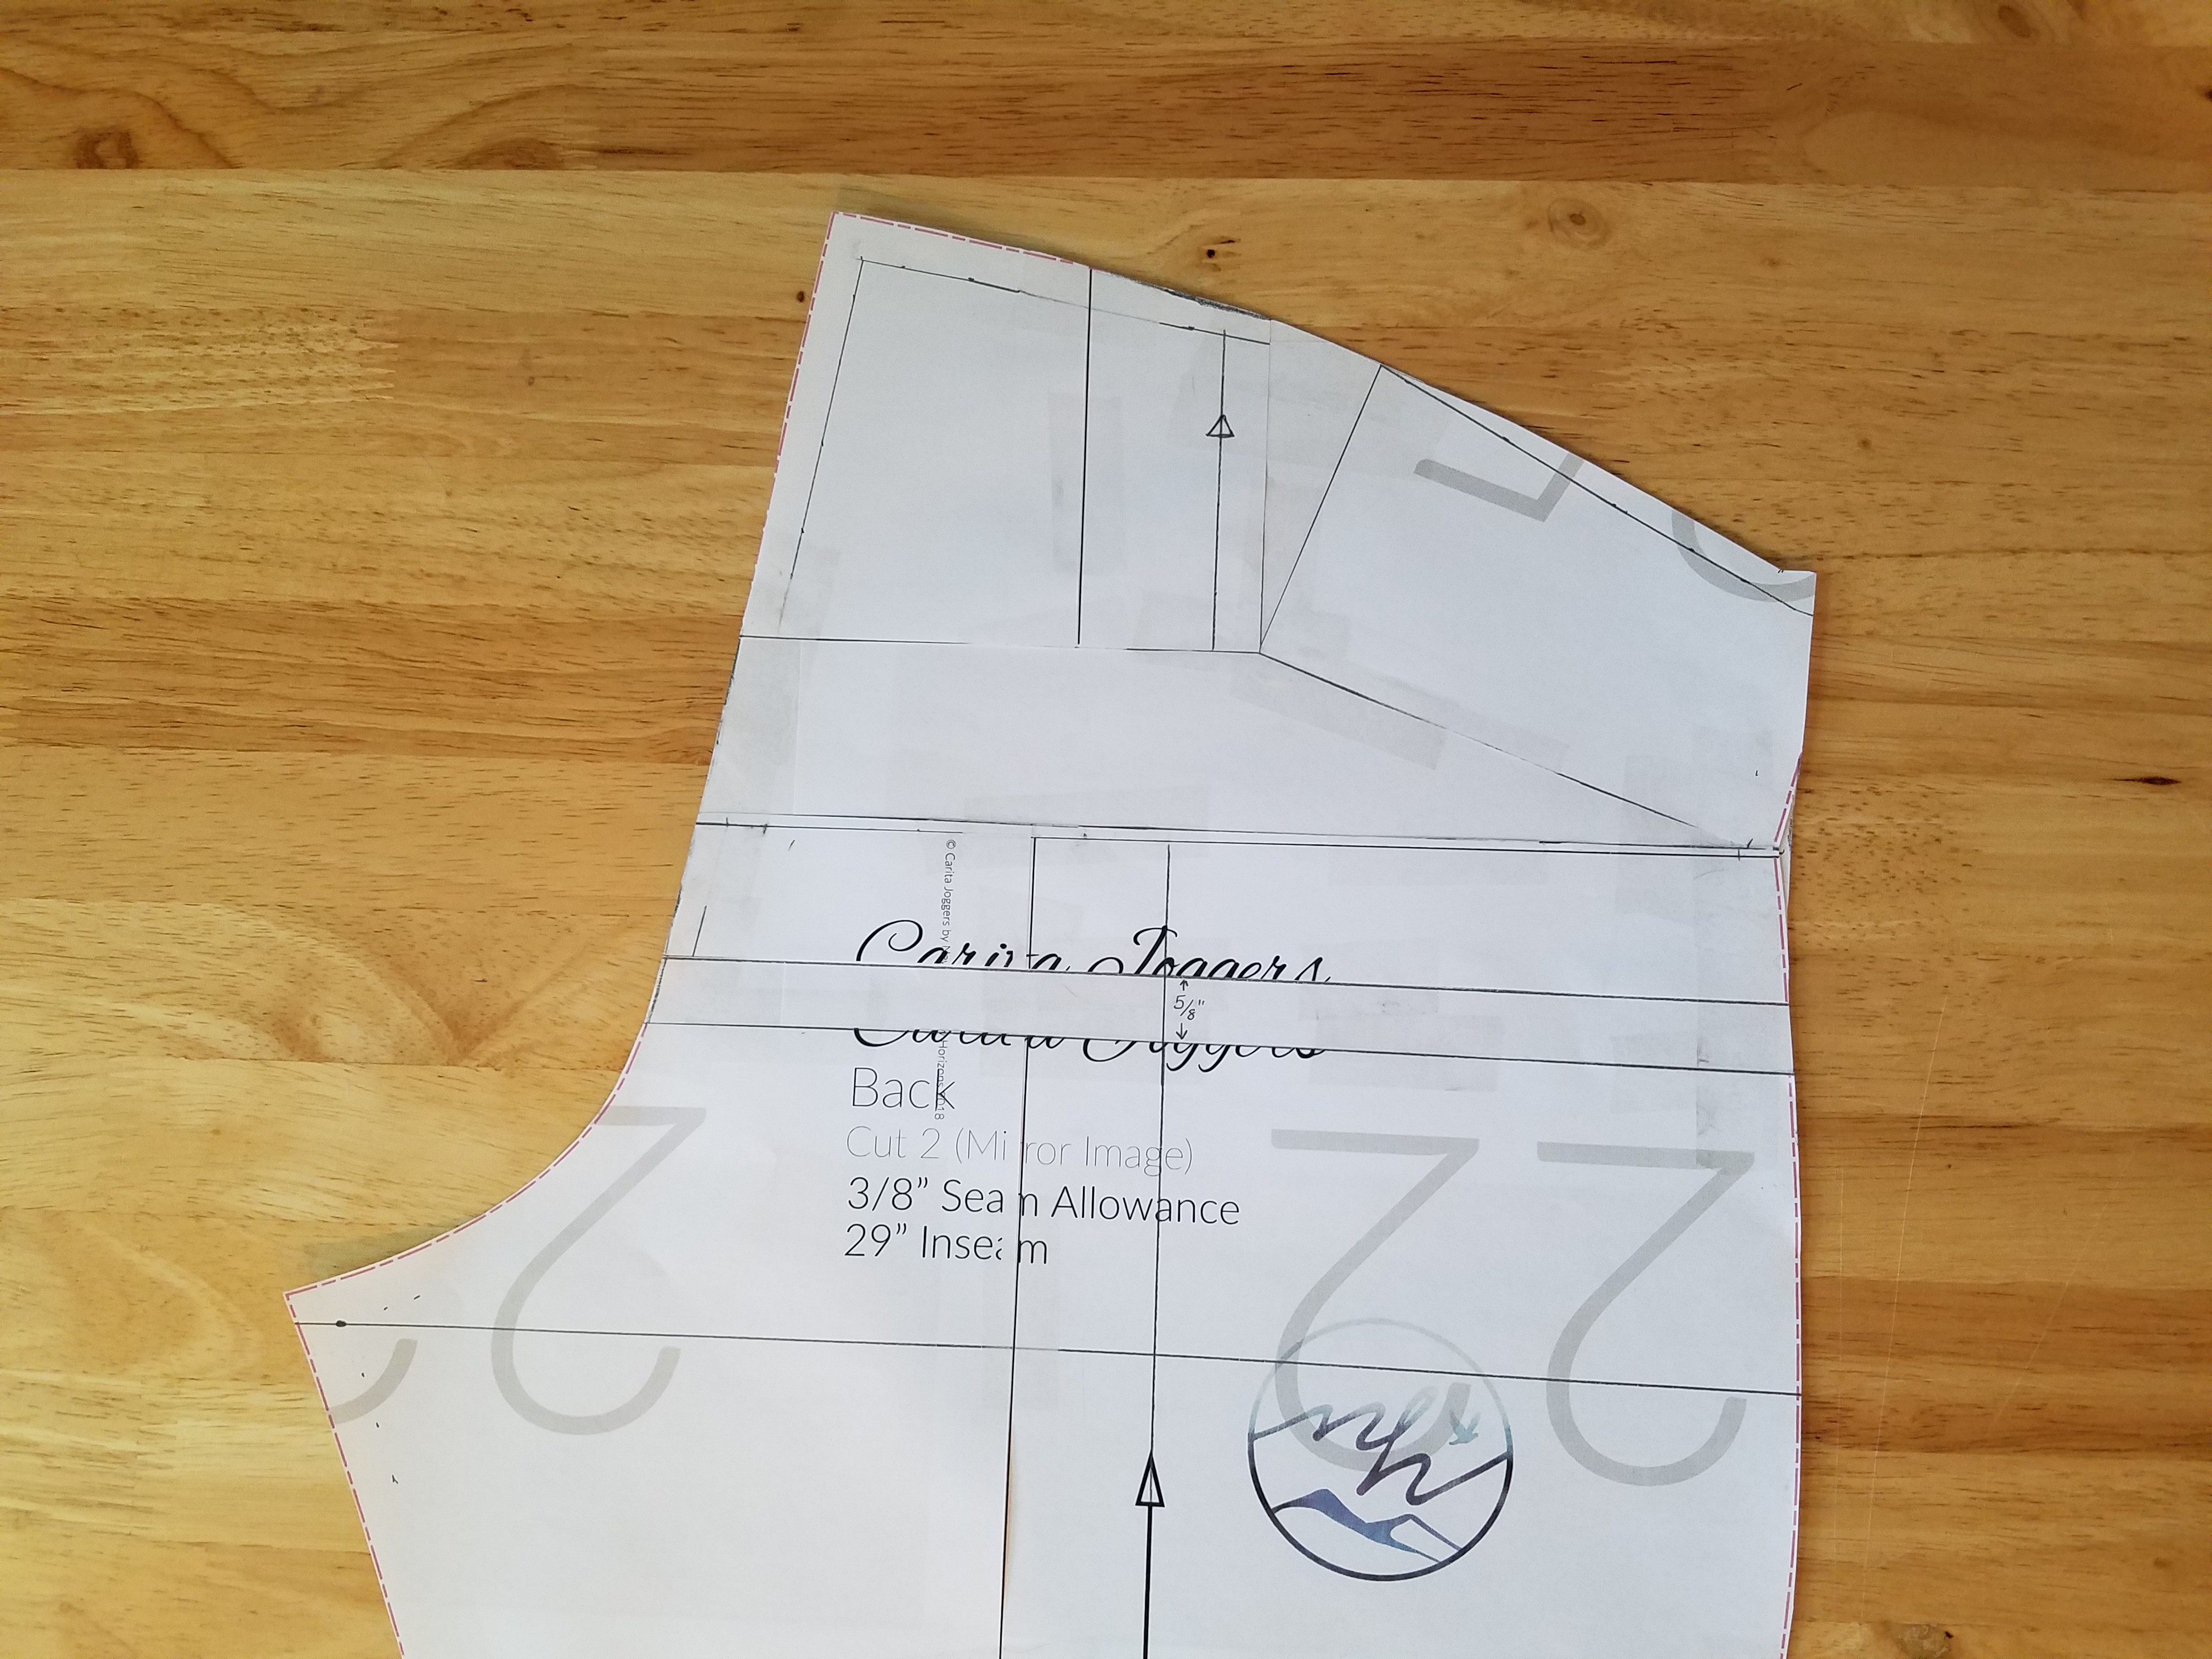
It may look funny while it’s laid out flat but you now have a pattern that is completely customized to your body!


This Post Has 4 Comments
Pingback: Taking Measurements and Choosing sizes - New Horizons Designs
Pingback: Everyday Clothes Patterns for Pajamas – Sew Hard of Hearing
I read crotch & booty depth adjustment document & got all excited. Love rules & measurements vs just guessing. BUT, how do the actual measurements work when using a pattern for knits which I imagine have negative ease??? Or is vertical ease not adjusted for knits?
This blog post is for the Carita Joggers or Portlander Pants which are made for 2 way stretch. You can certainly use 4 way stretch, but this blog post is most helpful when using the 2 way stretch.