Welcome back! I’m Katrina and today we are going to be doing a dart-less small bust adjustment. I am going to be using the FREE Key West Tank pattern but it will work on any tank or set in sleeve pattern. We also have a video and blog post on doing a full bust adjustment here.
What sewing size cup size is the pattern drafted for?
It is important to know what sewing cup size a pattern is drafted for and each company is different. *Note: Sewing cup sizes are different from bra cup sizes. Sewing cup size is the difference between the upper bust measurement and the full bust measurement. With Pattern Niche patterns our sewing cup sizes increase as the sizes get bigger. To tell what the sewing cup size is for your particular size is drafted for take the full bust measurement and subtract the upper bust measurement. This will tell you what cup size you are working with.
Figuring out how much to remove
To figure out how much you are going to remove with your small bust adjustment start off taking your measurements. We have a fantastic blog post and YouTube video if you need help with taking your measurements. You can find that post here. After you have your measurements compare to the size chart. You will want to choose your size based on your upper bust measurement. Figuring out how many inches different your full bust is from the upper bust then compare to the sewing cup size for the pattern. For example, your upper bust measures into a size xs but you have a 1” difference between your upper bust and full bust. Your measurements are 1” smaller than what the pattern is drafted for. That means I will need to subtract 1” total to the bust area. However, the bodice pieces are cut on the fold so you will only need to take out half of the difference needed for your small bust adjustment because it will automatically double when you cut out your fabric.
Adjusting your pattern pieces
I DO NOT grade for the waist or hips yet or make height adjustments yet because the small bust adjustment is going to subtract width and length to your pattern and mess up your wonderful grading. I always make note of how wide the pattern piece is at the waist and the hips before I get started as well.
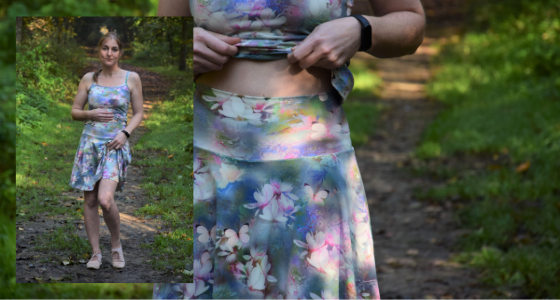
Determining your apex
Before we get started with any adjustments you need to determine where your apex is. The easiest way to do this with knits is to throw on a shirt that is very similar to the pattern you are adjusting and place a piece of tape over your nipple. Take the shirt off and transfer the marking to your pattern piece. Yes, I know there is a more technical proper way to do this but we are making this easy.
Drawing your Small bust adjustment lines
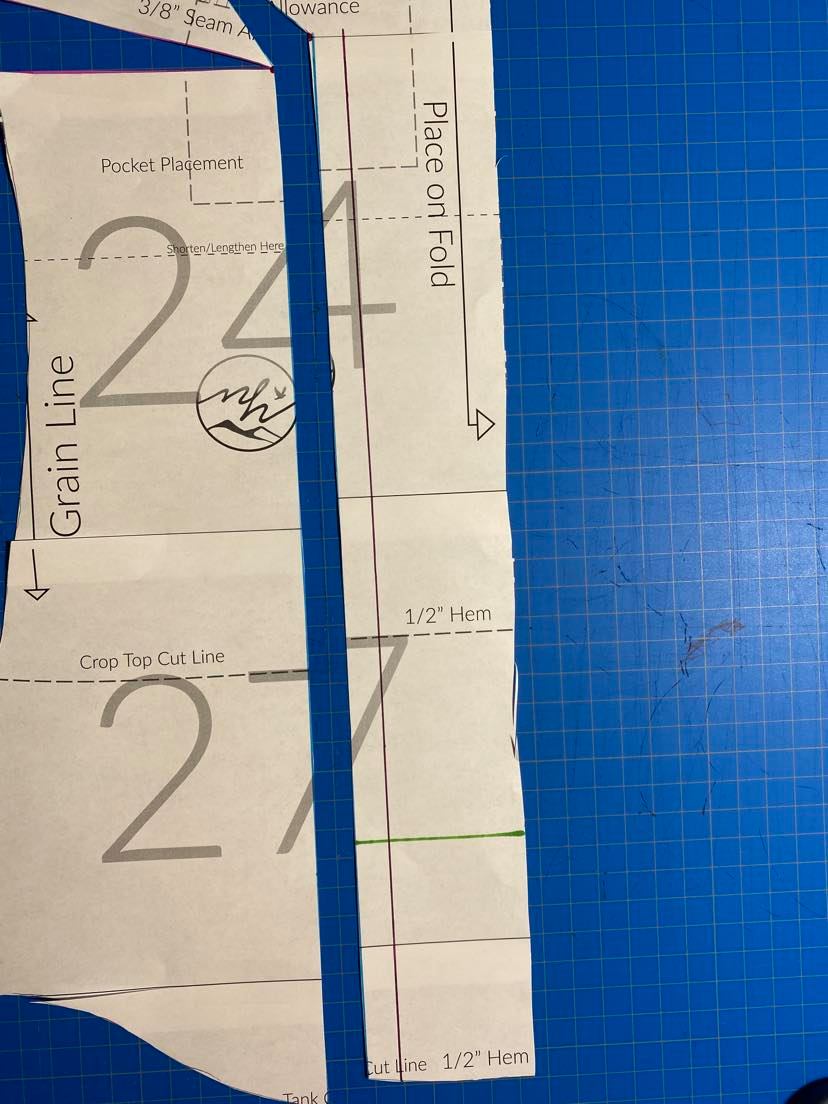
The first thing you will want to do is mark the seam allowance on the armscye. For our patterns that is 3/8”
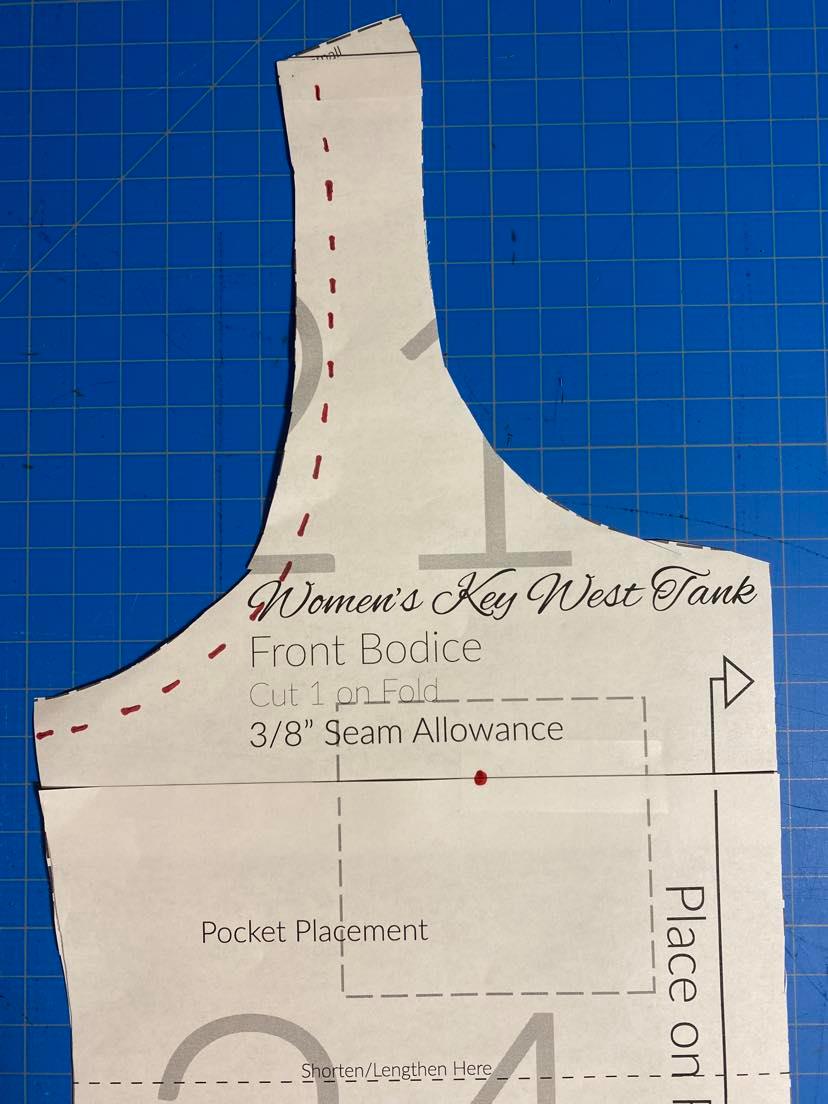
From your apex you will want to draw a line approximately 45 degrees to the armscye and from the apex straight to the bottom hem line.
Starting back at the apex draw a line at a 90-degree angle towards the side seam.
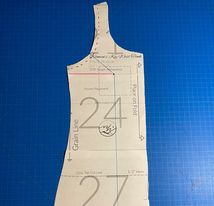
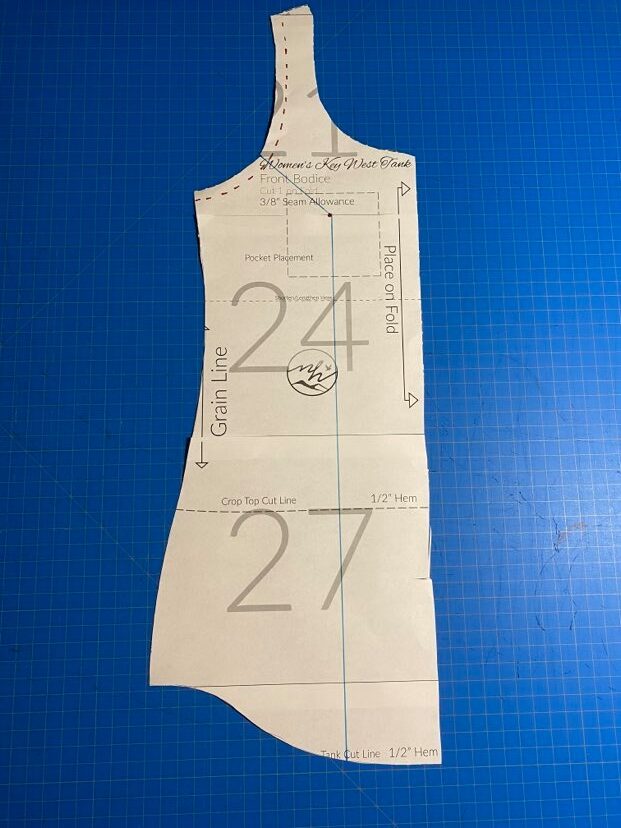
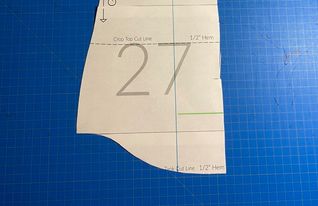
Now a few inches above the hem line draw a line from the center (blue) line 90 degrees toward the center fold line of the pattern.
Cutting into your pattern piece
Let’s get down to actually making some adjustments! Cut the blue line starting at the hem up to the apex and out towards the armscye but not all the way through. Stop at the seam allowance and then from the armscye back towards the apex stopping just short of the seam allowance to create a hinge point.

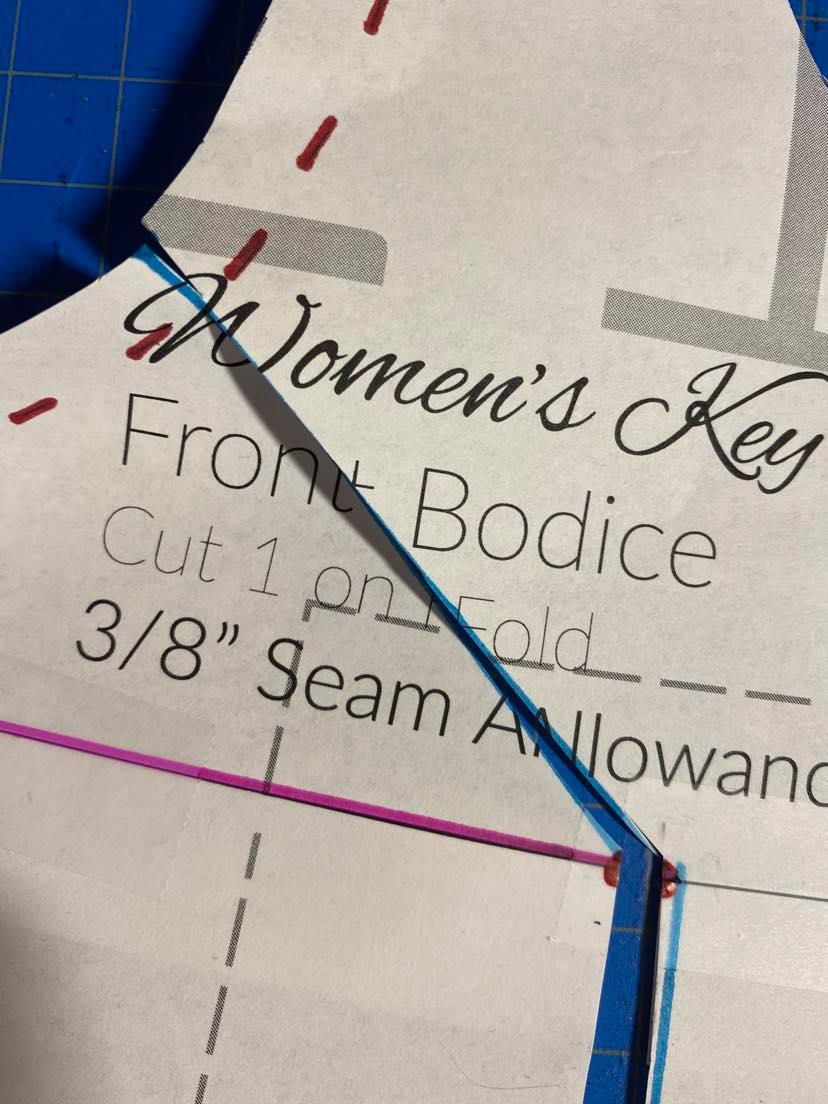
Next, cut from the side seam towards the apex (pink line). Again, you will create a hinge by stopping just shy of cutting all the way through the pattern piece.
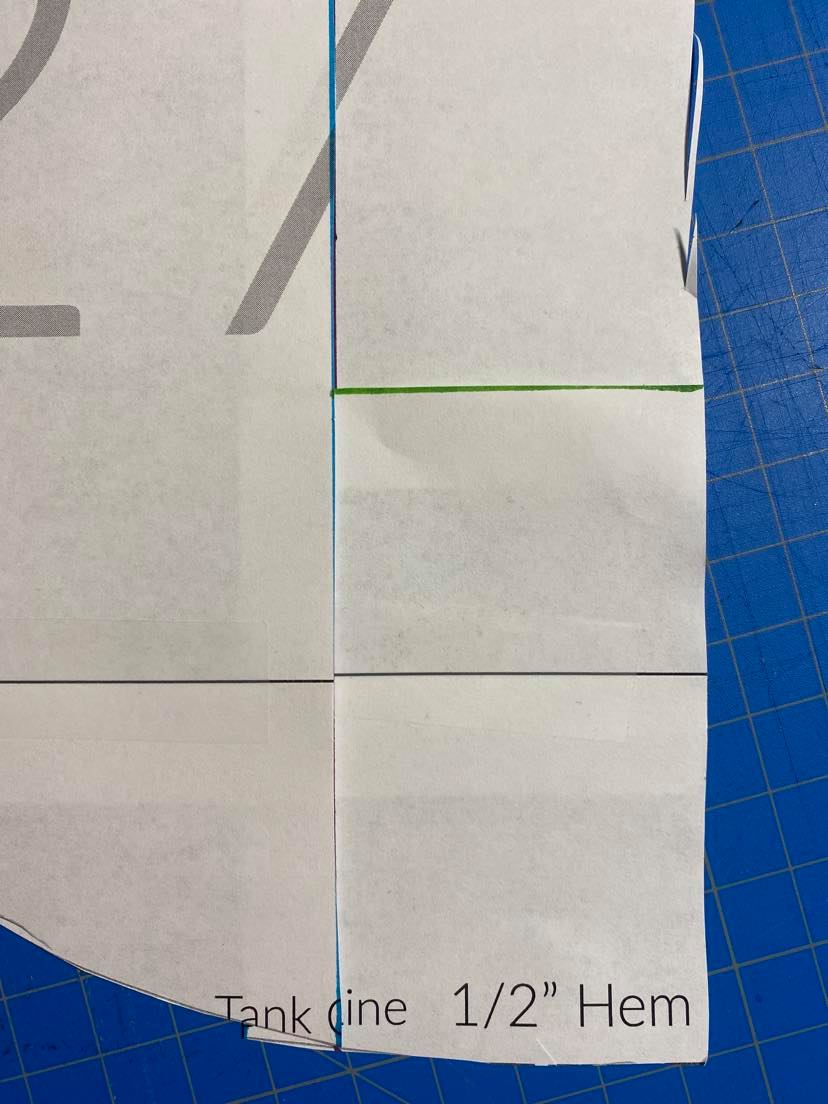
Ignore the green line for now we will get to that later.
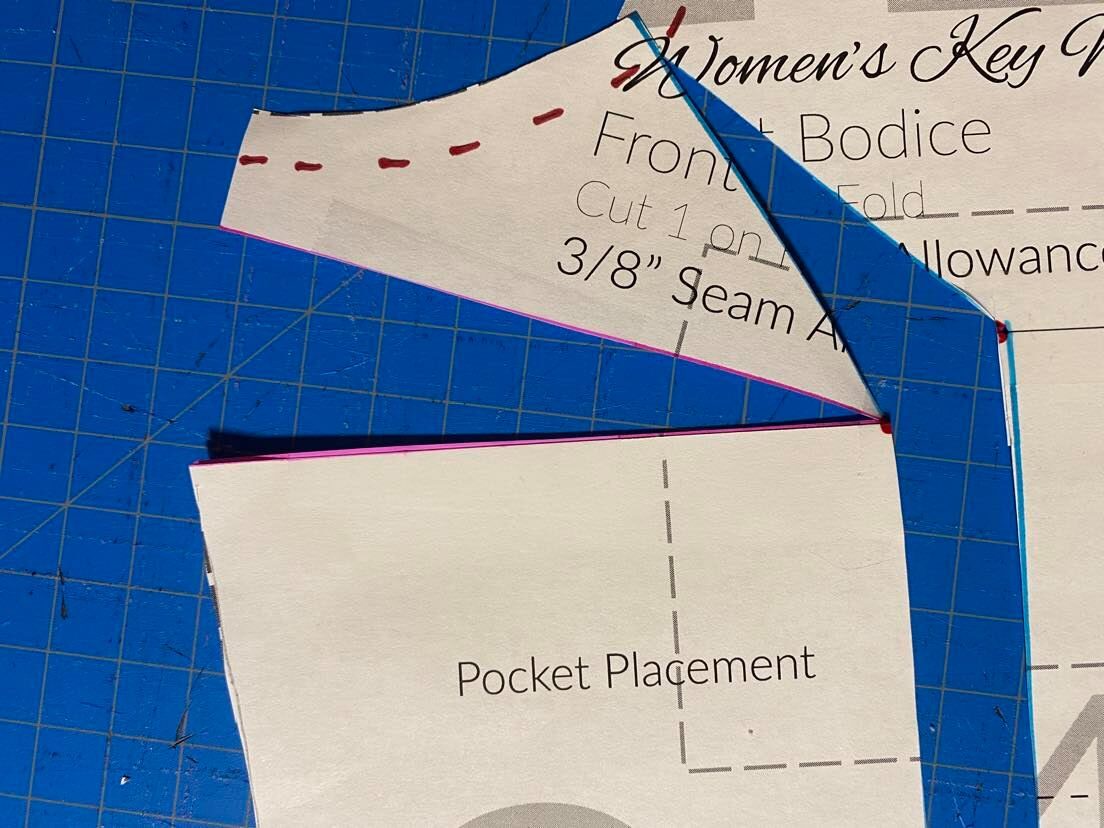
On the right side of the center blue line, you just cut you are going to mark a new line. This will vary depending on how much you need to take away. In our example we determined that we were going to need to take out ½” from our pattern.
Now take the left side of your pattern piece and shift it up and to the right to meet that new center line you just marked out. This is essentially taking out a dart from your pattern.

Depending on how much you may need to smooth out your side seam a little bit.
Now notice how the right side of your pattern piece is longer than the left? This is where that green line comes in handy. Cut all the way across that green line and slide it up to match with your hemline.

Finishing Adjustments
The small bust adjustment does take out length on the front bodice piece. You will need to remove the same amount of length to the back bodice piece or you can add it back in at the lengthen lines. Remember this adjustment took out width in the waist and hips as well. You may need to make adjustments because of this. The easiest way is to have a second pattern piece unaltered and just retrace the proper waist and hip grading smoothly from the bust. Or you can take the amount you took off and follow the side seam adding back to the side.
You are done! I love making adjustments like this when I am sewing because it gives you the perfect fit that you just don’t get from ready to wear clothing.
We would love to see all of your lovely Pattern Niche makes in our Facebook group or tag us on Instagram. #patternniche