Sewing the New United Tee
By Katelynn of Sewing from Scratch on YouTube
*Some links are affiliates
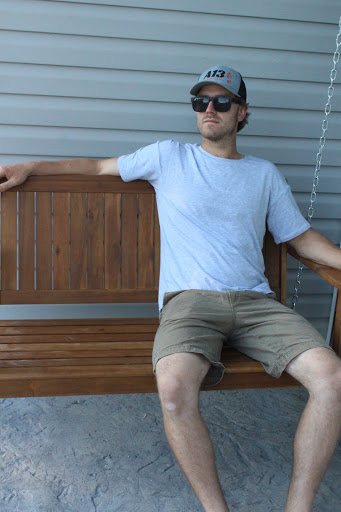
Hey! Today we’re going to sew up the recently released United Tee. This is a simple, loose-fitting tee with a drop shoulder and options for curved or straight hem and crew or scoop necklines. I’m making this shirt for my husband, but I also squeezed in a dress hack for myself!
If you’re more of a visual learner, like me, we do have a video version of this tutorial on our YouTube channel.
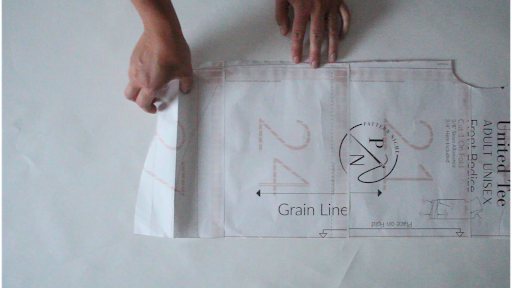
For this top I’m using a nice light bamboo knit I got in a destash. To accommodate the fabric, I’m making the length halfway between the 5’5” and 6’ cut lines. I’ll be making the straight hem, crew neck version and adding in the neckband seam cover. You’ll notice these little diagrams on the pattern pieces to show where your appropriate cut lines are. This makes things really hand and reduces paper waste for multiple pattern pieces. I like to cut around the outer lines and then fold back the areas that I’m not using. Then I can reuse the pattern pieces for the other views.
Cutting Fabric
The first step is to cut out your fabric. The pieces I need are the front, back, neckband, neckband cover and 2 sleeves. The important things here are to make sure you have the right neckband for your neckline choice, and to mark the notches on the front, back and sleeves. I also like to use a blue clip to mark which is the back piece of fabric so it’s easier to see at a glance. You could also use some tape or chalk.

Once you have that done, it’s time to start sewing. Place the front and back pieces RST and sew along the should seams with a ⅜” seam allowance. Find the center of the front and back pieces and mark. Then find the quarter points by matching up the first 2 markings.
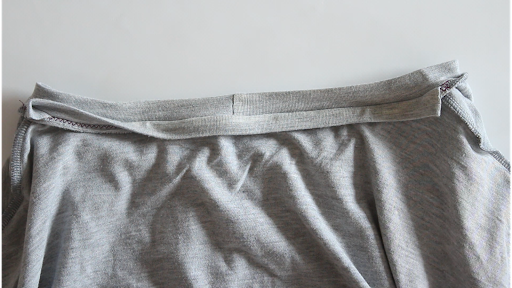
Neckband
Stitch your neckband together and quarter it. Then fold it in half, hot dog bun style, with the right sides out, and align it to the right side of your top and stitch together.

Next is the seam cover. If you’re not doing this option, just hang tight while I explain it – it really doesn’t take long and is a great learning opportunity.
Ok, so if you are doing the seam cover, the first step is to press your piece in half with the right sides out. Again, hot dog bun style. Now take your shirt, inside out, and grab the seam. We’re going to be lining up the raw edge of the seam cover piece to the edge of the neck seam. We want the seam cover to be on the neckband (top) side of the pile, not the shirt bodice side.
Start at one shoulder seam and leave about ½” of the seam cover piece overhanging. Repeat at the other shoulder seam then clip all along to evenly distribute the fabric. Fold those overhanging pieces under to leave a nice clean edge, and stitch this down.

To do so, you’ll want to make sure you’re stitching exactly on top of the original neckline seam. Going too far into the neckband will result in a wonky neck, and going too far into the seam allowance will leave the original seam still showing, defeating the whole purpose.
I don’t recommend using a serger for this part. I first did a zig zag stitch, but didn’t get right on that seam line, so I went over with a straight stitch.This seam is going to stretch, so I don’t think I would do only a regular straight stitch.
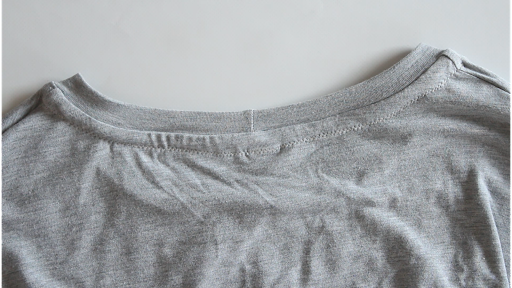
Next flip the seam cover up and away from the neckband, and press well. Fold down towards the shirt bodice and press well. Pin along the edge of the seam cover and stitch down. You can do this from the right side of the bodice, but it likely won’t catch the edge perfectly all the way along. This stitch line will show on the right side, so keep that in mind when choosing your threads
.

Sleeves
Now attach the sleeves RST with the bodice, matching up notches for front and back of sleeves & armholes.

Hem
Before closing up the shirt, I like to do a quick memory hem to make things faster and easier when it’s time to actually hem. To do this, simply press your hems in place and then unfold. Then sew up the side seams and sleeves in one stitch.
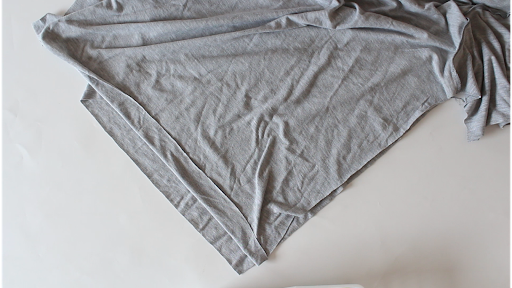
Lastly, hem your sleeves & bottom of your shirt and enjoy!
Quick Bonus
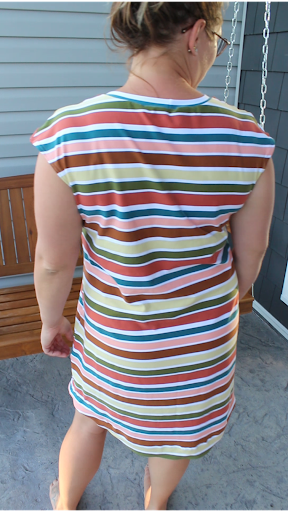
For a quick bonus, I decided to make a dress using the United Tee pattern and this gorgeous deadstock cotton lycra. I sliced the pattern at the lengthen/shorten line and added 21cm. Then I added 6 cm to the width at the bottom and blended that into the side seam, having the narrowest point hit at my natural waist.
I decided to do the curved hem for this one, so I had to move that over 6 cm as well. I also chose not to add the sleeve pieces on to this make, so I just hemmed the dropped shoulder to make a cap-sleeve effect. I think I’ll go in and make some proper inset sleeves, though.
To make things easy for myself, I did a hem facing for the curved bottom. I made a conscious choice not to add pockets, but I might end up adding them in. I just love how simple and easy this is to wear!

Thanks so much for joining me on this tutorial. I hope it helped you out and got you excited to make your United Tee!