
Are you like every average woman and you don’t really fit into “one” size? Do you notice that your measurements are all over the size charts? Do your kids fit into different sizes too for their height and width? You are not alone! I’m Anna and I’m here to talk with you today about grading for you size, and mashing sizes for kids.
Although it might seem intimidating, mashing and grading sizes isn’t really difficult. You only need a few items that you could find around your house, like a pen and a ruler. First you’ll need to print your pattern with all the sizes that you or your child fall into. I’m all over the place with my sizes, so I printed a small, medium, and large. Today I’m using the Key West tank pattern to demonstrate on.

I’m a medium bust, large waist, and small hips, which makes me more of a straight line but that’s just how I am. I’ve gone through the pattern and put a dot on the pattern for the sizes that I am at those particular spots.
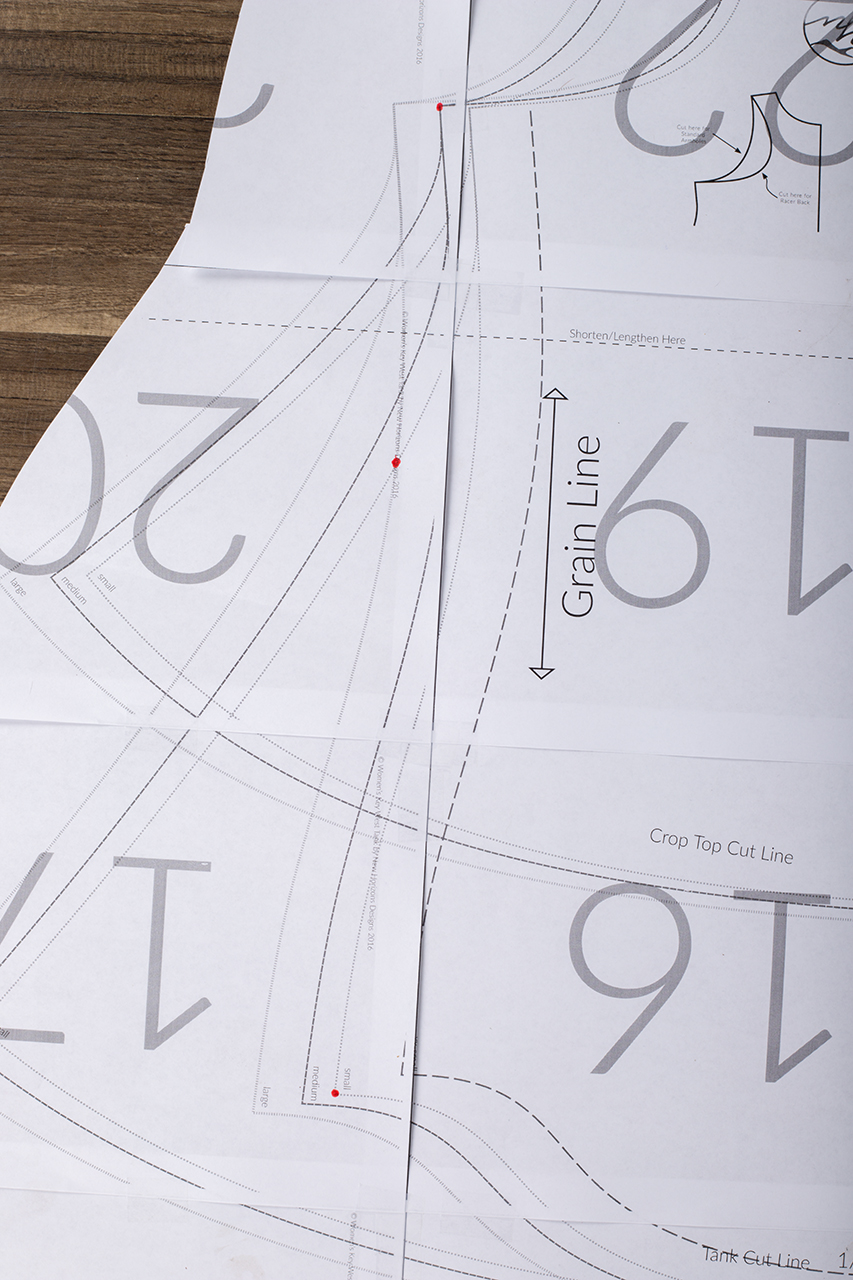
When you’re grading a pattern, you want to make sure that when you’re connecting your dots that it’s a slow and gradual increase/decrease. You don’t want to have a quick and short line going in and out in a small area or your final garment will have jagged seams. To draw your lines between your dots, you can either do it free hand or use a french curve. I did mine free hand at first so you can see and then went back and smoothed my lines with my french curve/sewing ruler.
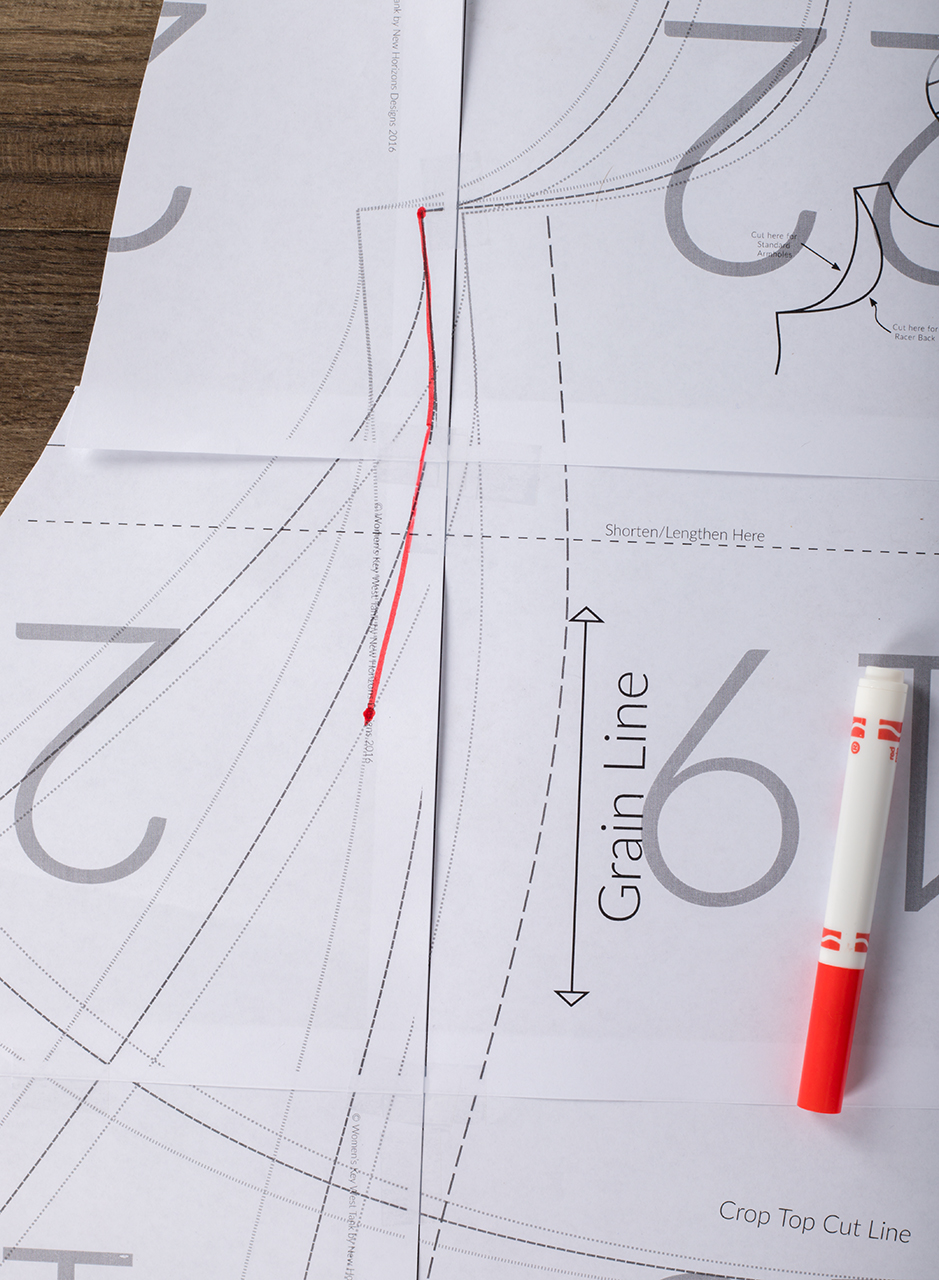
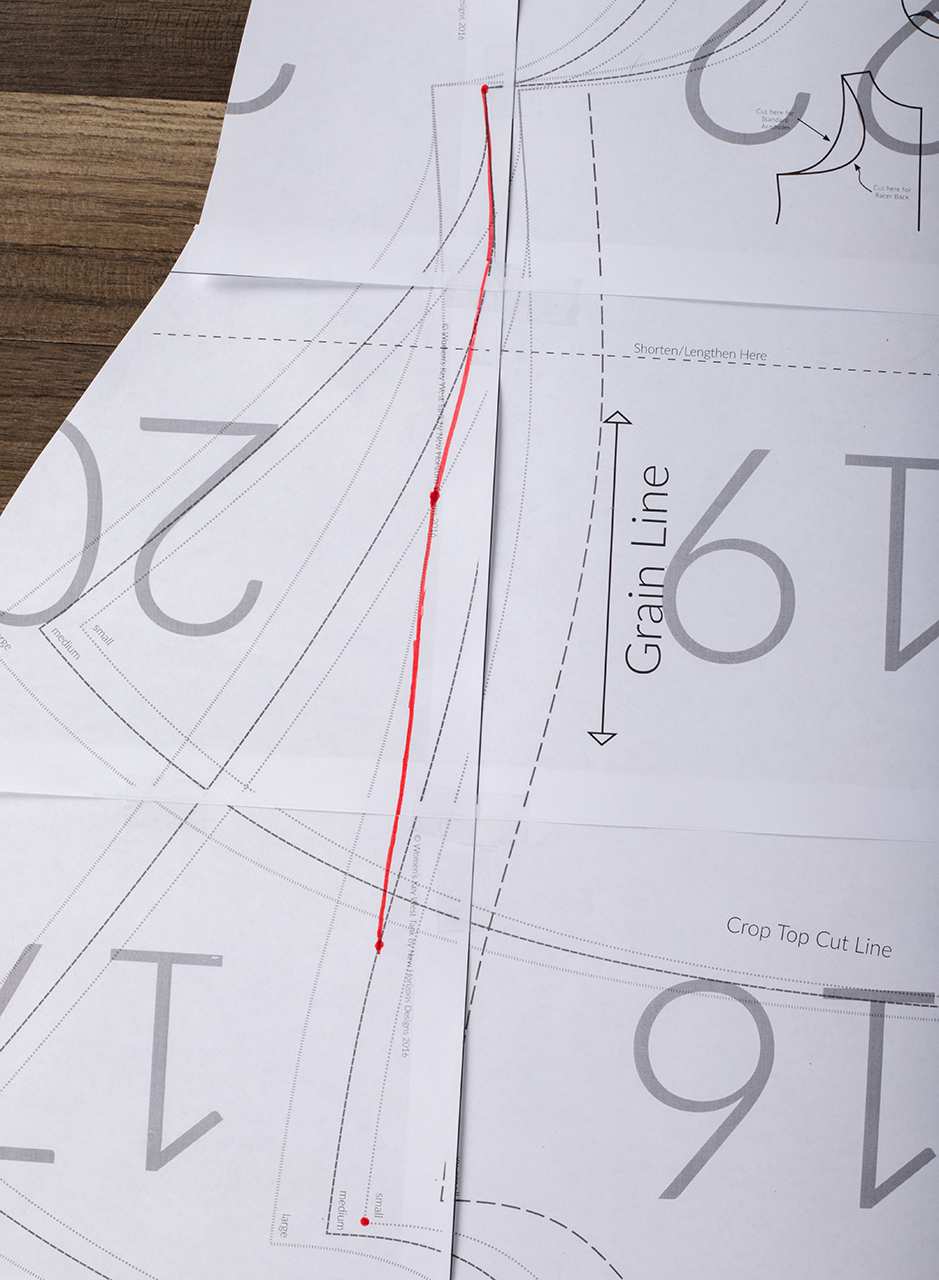
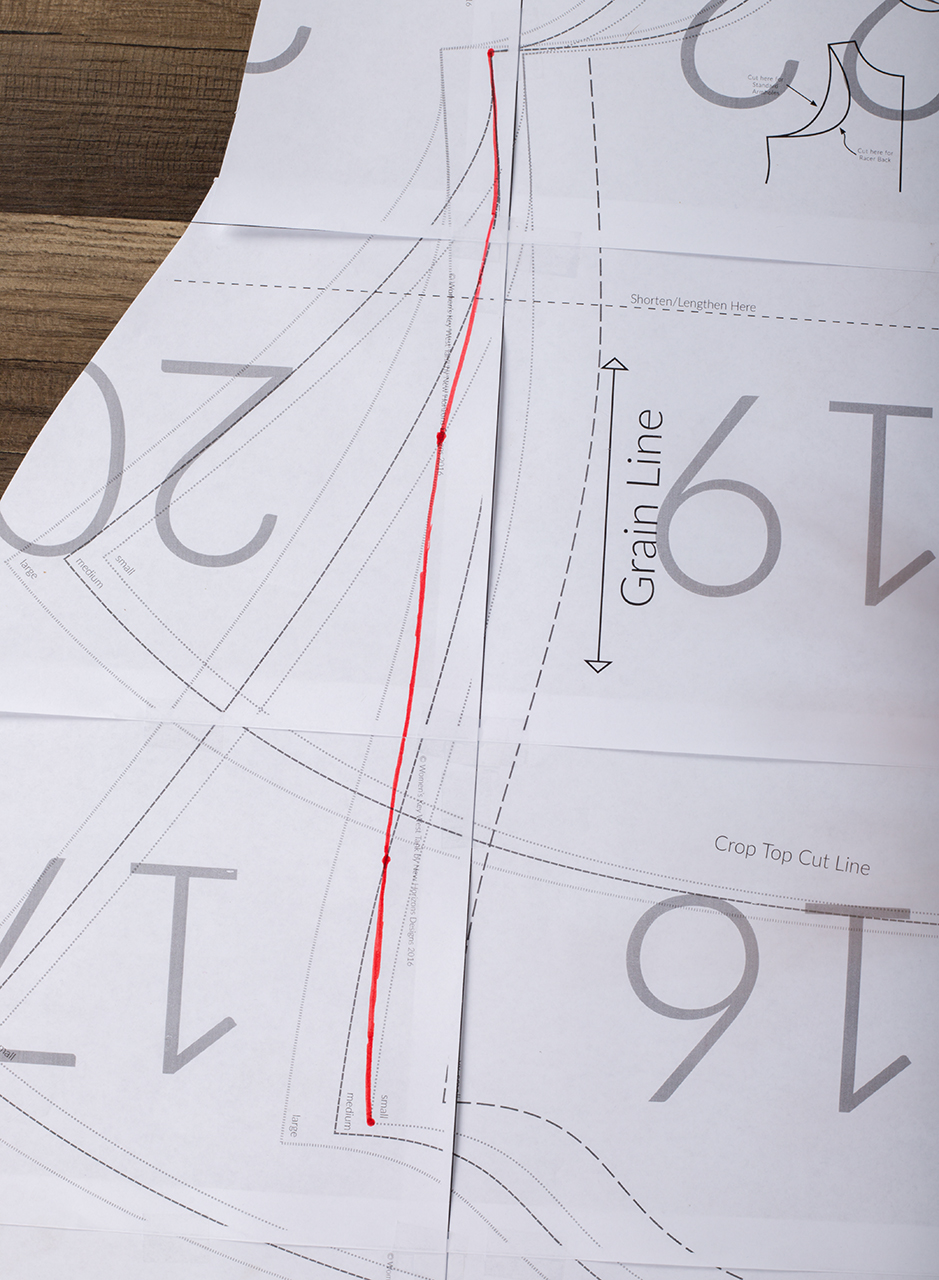
When I use my french curve, I try to make sure and keep the same curve (if possible) in the area that I’m grading.
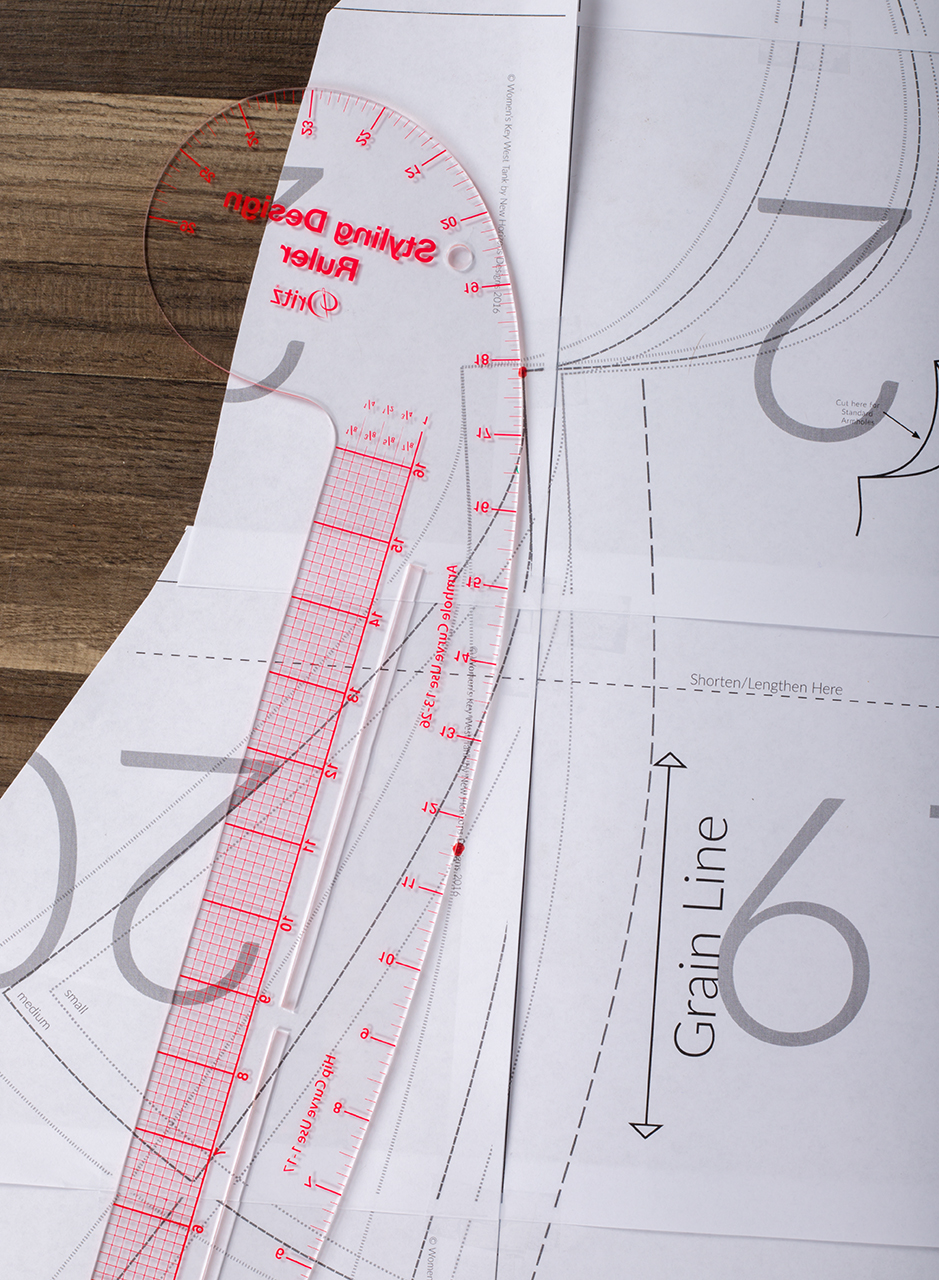

You’ll then follow the neckline and the hemline with the sizes that you ended on at those points. I went ahead and used the medium for the bottom hem, but I’m also 5’7″ so the extra length is needed for me. You’ll need to make sure that you then repeat this with your other bodice piece, or they won’t match up when you go to sew.

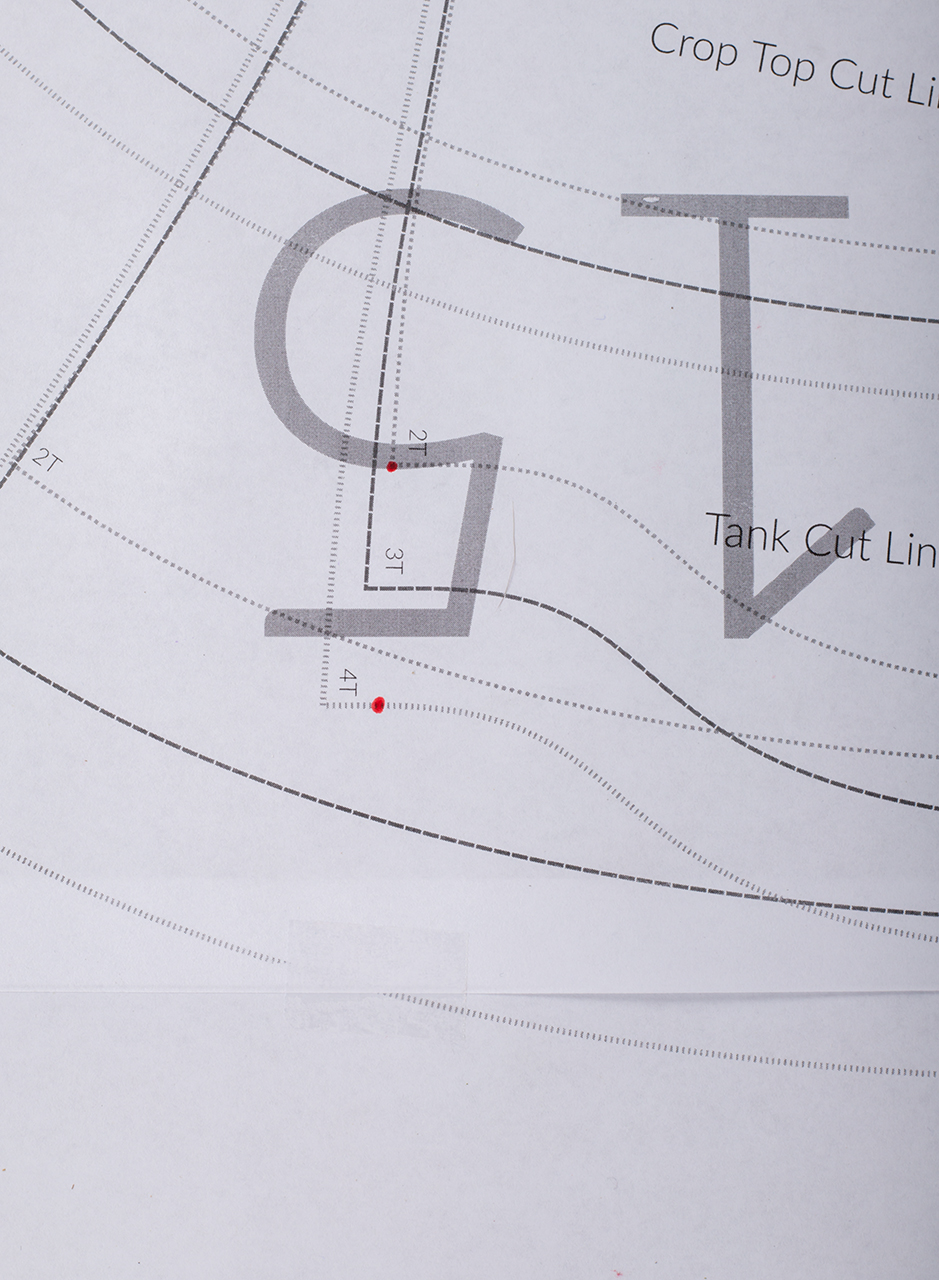
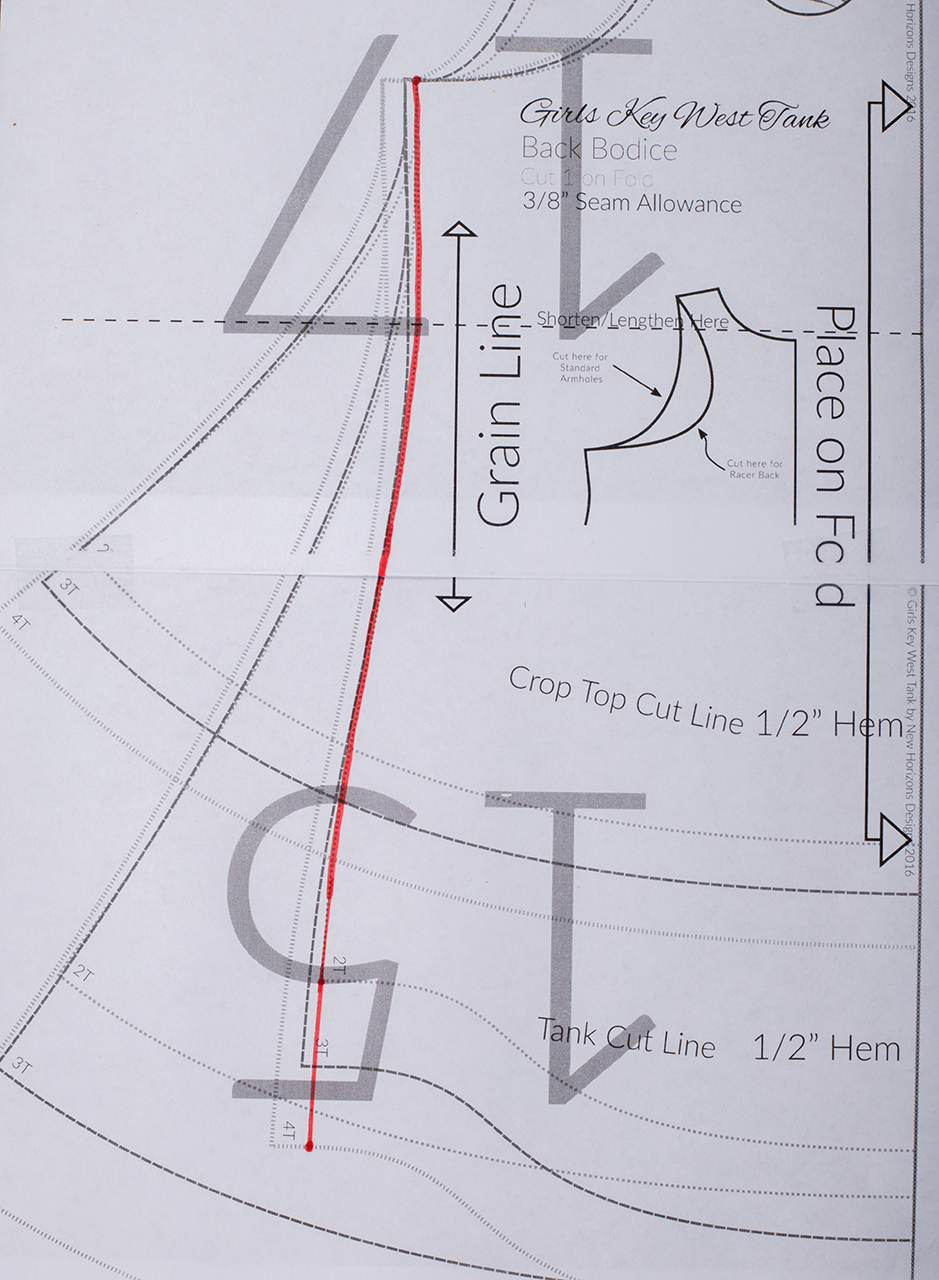
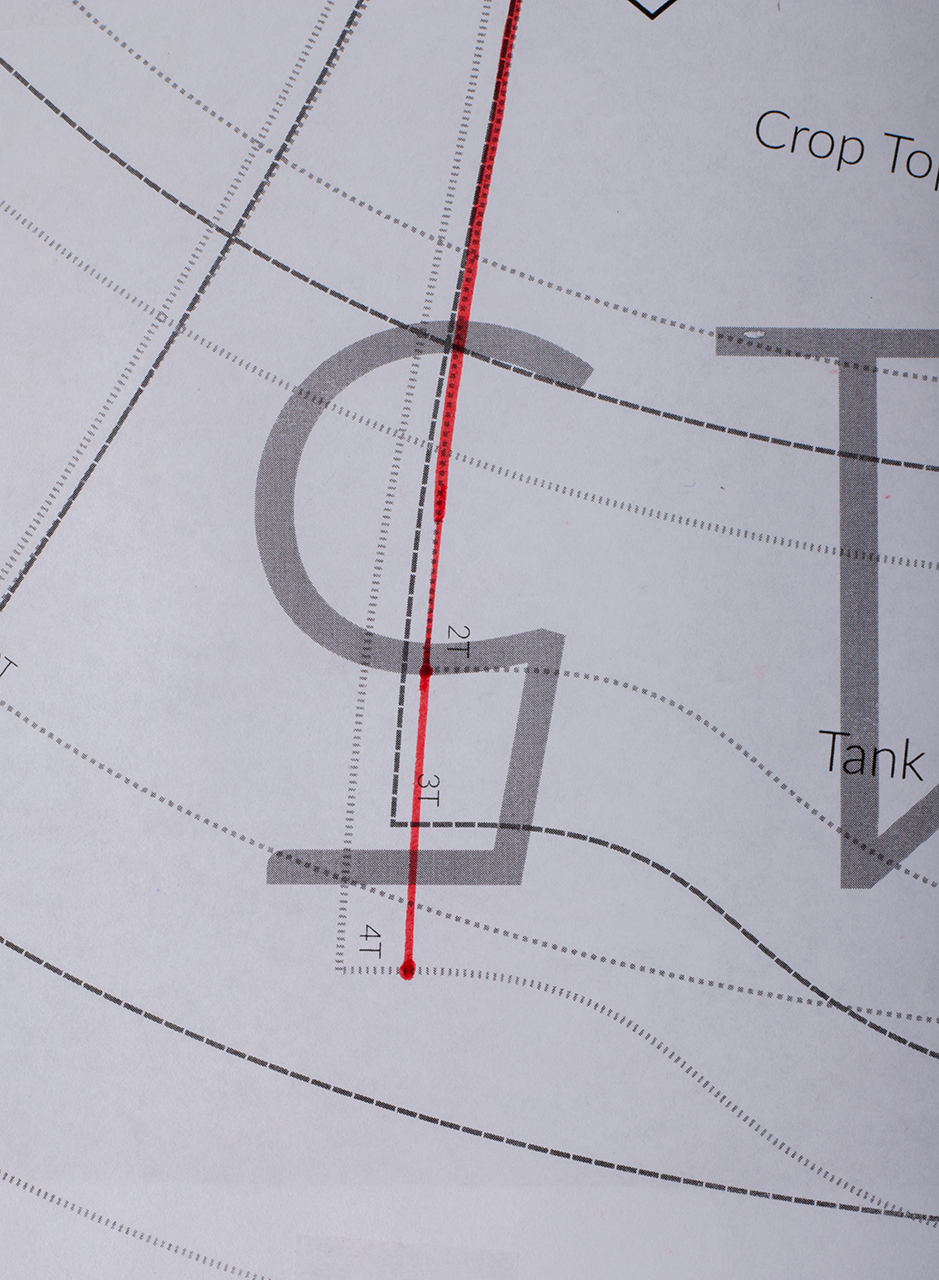
Mashing sizes for the kids is somewhat the same, but you could use two different methods. My daughter is tall and skinny. Currently, she’s a 2T width and a 4T length, so those are the sizes that I’m demonstrating on today. These techniques apply to all sizes though. One way is to measure the height difference between the two sizes and add/subtract this amount using the lengthen/shorten lines on the pattern. Most of our patterns are nested at the armscye and therefore you only need to find the height difference at the shoulder and at the hem line. I used my gauge in these pictures, but any ruler would work. First, I measured the height difference at the hemline. 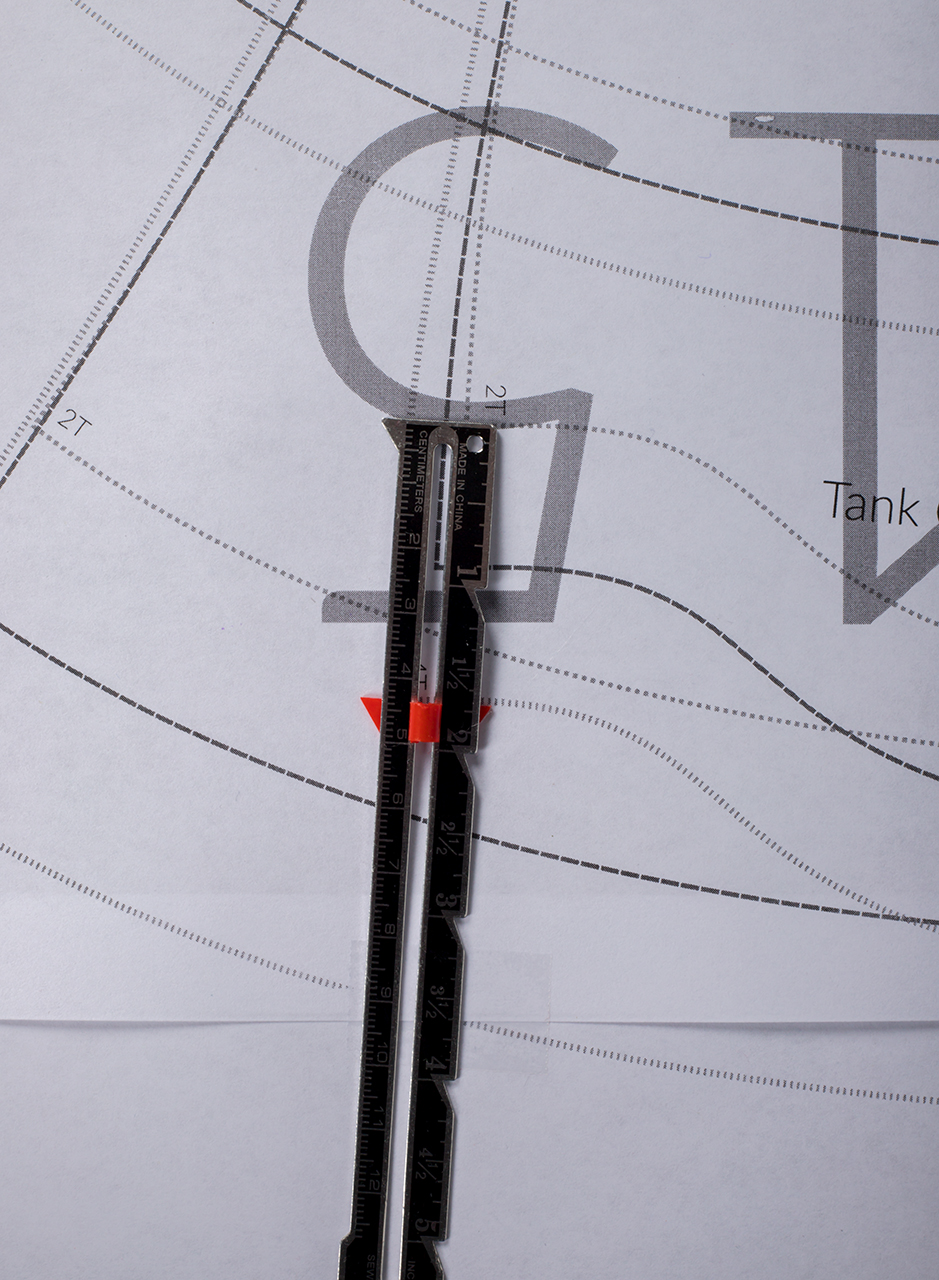
The difference here is about 1.75″. I lined up my red slider at the 4T hemline. Next, I took my ruler and lined it up with the shoulder seam. I lined my red slider at the 4T shoulder seam and then slid it down to the 2T shoulder seam. This way I didn’t have to do any math and could just read the ruler. 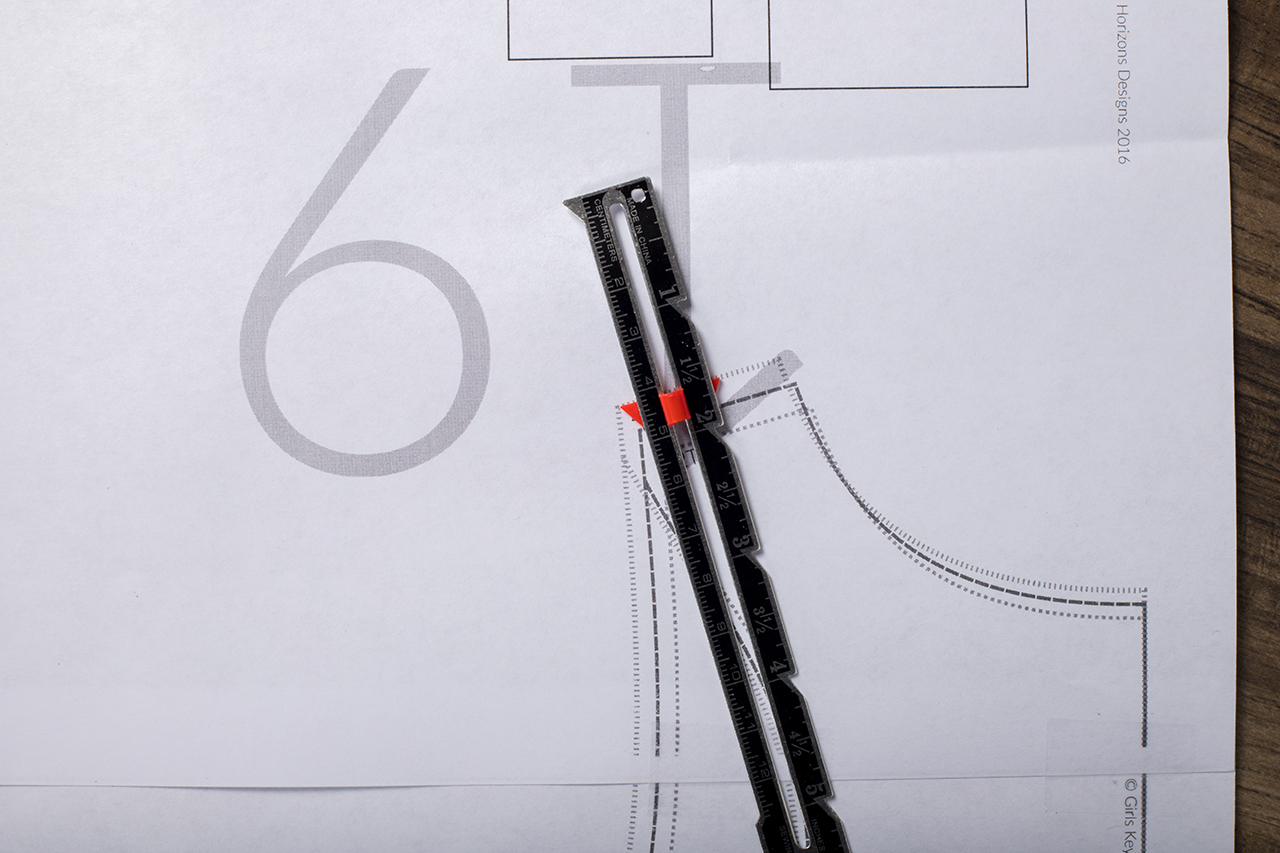

The difference in height is 2 1/8″. I can now cut the lengthen/shorten line on the pattern and spread the pattern apart 2 1/8″, keeping the fold line lined up along the side. 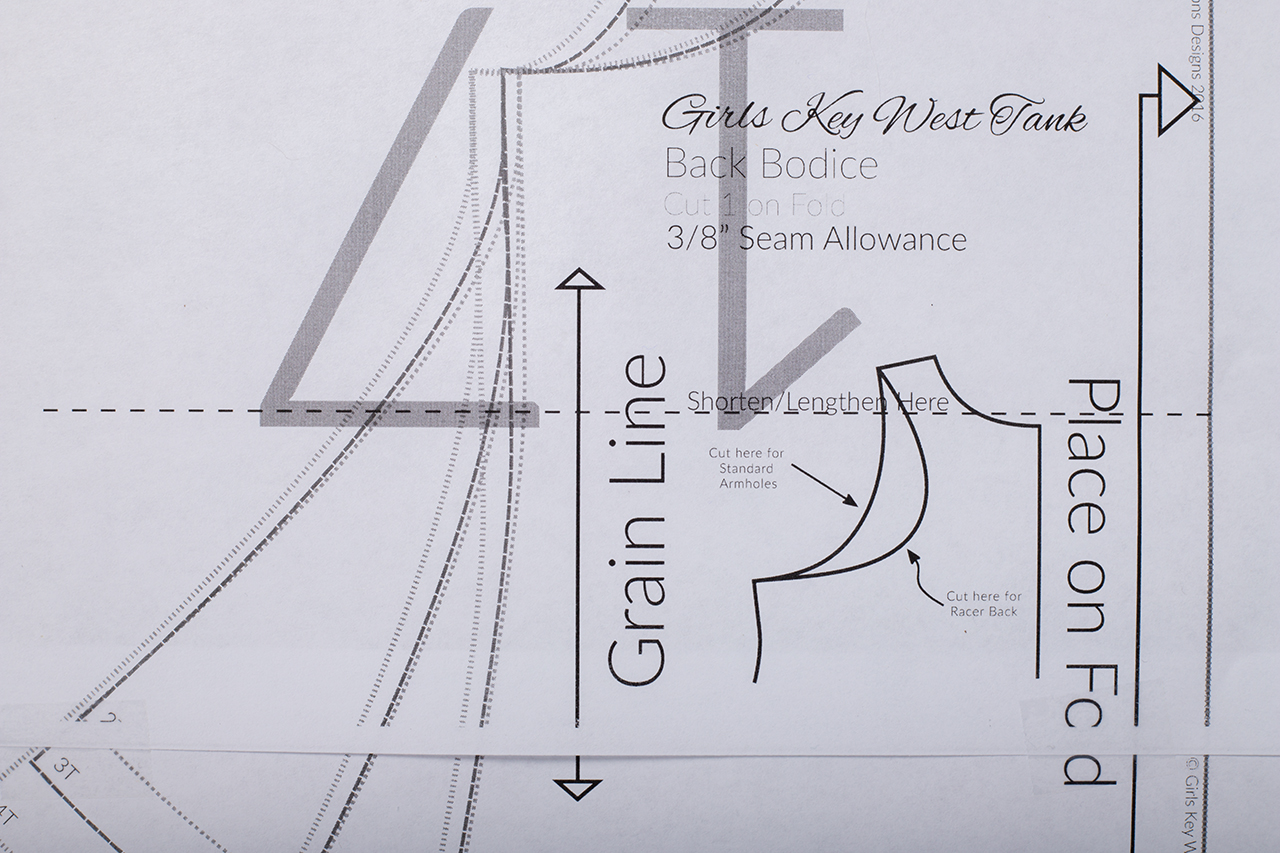
You’ll need to make sure and connect the area that its open with a smooth and gradual line. If you need to shorten the pattern, then you’ll take that height difference and overlap the pattern by that much. Make sure to repeat the same process with the other bodice piece. Now you’ll be able to cut along the width all the way around without having to worry about the height.
Another way is to follow the width that you need and either extend to the length you need, or shorten to the height you need. So for my daughter, I follow along the 2T on the side seam until I get to the bottom hem. I then extend my line down to the 4T hemline. I follow along the 4T hemline to keep the 4T length.

When I reach the armscye, I extend up to the 4T height. I follow along the 4T for the armscye, the shoulder seam, and the neckline. My kids need the wider shoulders and the bigger neckline, since they’re heads and shoulders are still average for their age. 
For the sleeves, I follow the same principles. I do the 2T width for the sleeves, and extend to the 4T for height at the sleeve cap and the sleeve hem.
I hope that you found this tutorial helpful for grading and mashing. If you were ever intimidated to grade between sizes, don’t be! Just make sure that your transition between sizes is slow and gradual. Grading between sizes to fit your measurements will give you the best fit possible. We rarely fit into one size, and grading is essential to getting the perfect fit for you. If you have any questions, feel free to ask here or in our Facebook group.


This Post Has 3 Comments
Pingback: Learning to Sew Knit Garments, Part 3 – PDF Patterns, A Beginners Guide – Creating Ashley
Pingback: Full Bust Adjustment For Knit Fabric - New Horizons Designs
Pingback: Full Bust Adjustment For Knit Fabric - PatternNiche.com