Or read along if you don’t want to watch the video!
This site contains affiliate links to products. We may receive a commission for purchases made through these links.
Brother Serger|Fabric Clips|Scissors||Ruler|Cutting Mat|Rotary Cutter|Pattern Weights|Donut Pattern Weights|Pins and Magnet Holder||Seam Ripper|Measuring Tape|Fabric Marker|
Hello everyone, Katrina here today talking about how to do a full bust adjustment with knit fabric. The first time I was tasked with doing a full bust adjustment I was nervous it was going to be really complicated. Trust me, it isn’t as bad as it seems. In this post I sometimes refer to Full Bust Adjustment as FBA.
Tools needed
- Pattern- I am using the FREE Key West Tank but this will work on any tank or set in sleeve pattern
- Measuring tape to take your measurements
- Scissors, Ruler, Markers or something else to write with
- Paper to make your adjustments. Tracing paper works best
- Tape
- Fabric and notions as recommended in pattern
HOW TO KNOW IF YOU NEED A FULL BUST ADJUSTMENT
If you have a bigger chest area you may notice some signs that you need a FBA. If your shirt fits in the shoulders and neckline than you can have draglines from under the arm towards the bust. This is because the fabric is pulling to fit around your bust. When your shirt fits your full bust than it can cause problems above your bust. Things that you may notice is the shoulders and neckline are too baggy causing it to droop above the bust. Also, the armscye will be too big. This is more noticeable when you are wearing a tank top. Consider how much ease is built in to the pattern when doing a FBA. For a very slim fitting garment you will definitely want to do a FBA but on something like an oversized sweater you may get away with skipping it all together.
What sewing size cup size is the pattern drafted for?
It is important to know what sewing cup size a pattern is drafted for and each company is different. *Note: Sewing cup sizes are different from bra cup sizes. Sewing cup size is the difference between the upper bust measurement and the full bust measurement. New Horizons Designs Drafts for 2 to 3″ difference for our patterns.
New Horizons Sewing Cup Sizes
xx-small to 18, 2″
20-24, 2.5″
26-30, 3″
How much to add
To figure out how much you are going to add to your full bust adjustment start off taking your measurements. We have a fantastic blog post and YouTube video if you need help with taking your measurements. You can find that post here. After you have your measurements compare to the size chart. You will want to choose your size based on your upper bust measurement. Figure out how many inches different your full bust is from the upper bust then that compares to the sewing cup the pattern is drafted for. For example, my upper bust measures into a size 22 but I have a 3” difference between my upper bust and full bust. My measurements are ½” bigger than what the pattern is drafted for. That means I will need to add ½” total to the bust area. However, the bodice pieces are cut on the fold so you will only need to add half of the difference needed for your full bust adjustment because it will automatically double when you cut out your fabric. For the purpose of this blog post I will add 1” to the full bust adjustment so it is easier to see. *NOTE: if the amount you will need to add to your FBA is more than 1.5” a method called the Y Dart Method will work better for you.
Adjusting your pattern pieces
I always start off with any height adjustments before I start the FBA. You can adjust for height after as well that is just my preference. But I DO NOT grade for the waist or hips yet because the full bust adjustment is going to add width to your pattern and mess up your wonderful grading. I always make note of how wide the pattern piece is at the waist and the hips before I get started. Lucky for me I have to grade out my hips so the FBA normally works out in my favor and I don’t need to do any further grading at the end. If your hips and waist fall into the same size or smaller than your upper bust measurement you may need to grade back down after the FBA is complete. This is where taking note of the pattern width is important.
Determining your apex
Before we get started with any adjustments you need to determine where your apex is. The easiest way to do this with knits is to throw on a shirt that is very similar to the pattern you are adjusting and place a piece of tape over your nipple. Take the shirt off and transfer the marking to your pattern piece. Yes, I know there is a more technical proper way to do this but we are making this easy.
Drawing your adjustment lines
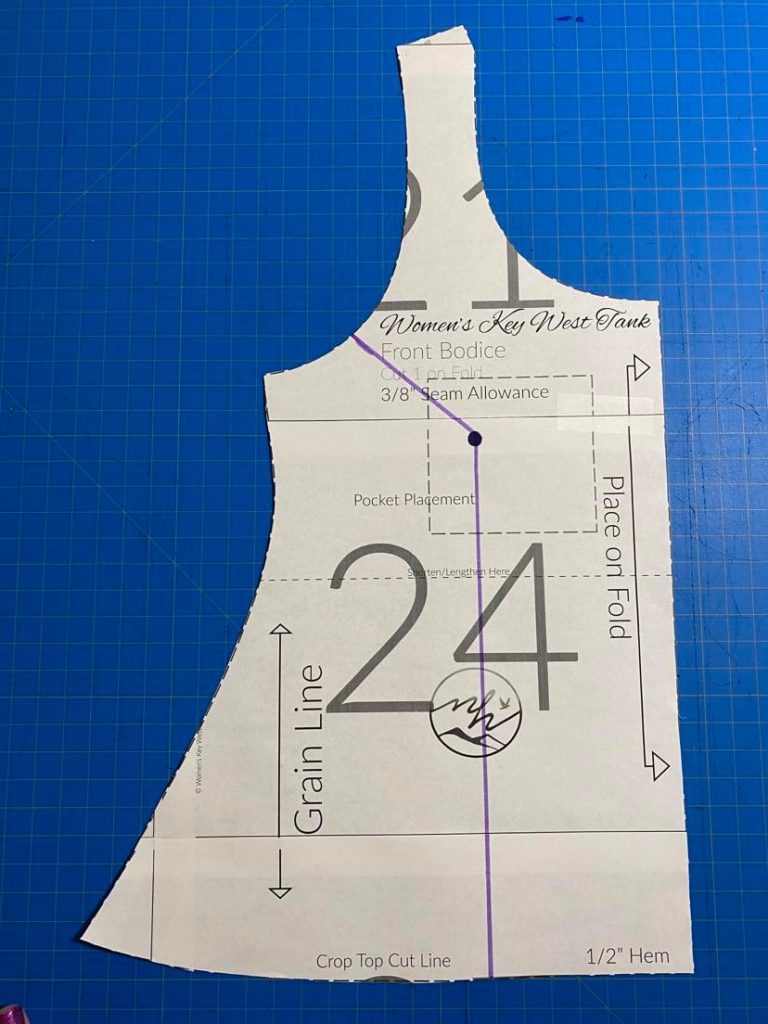
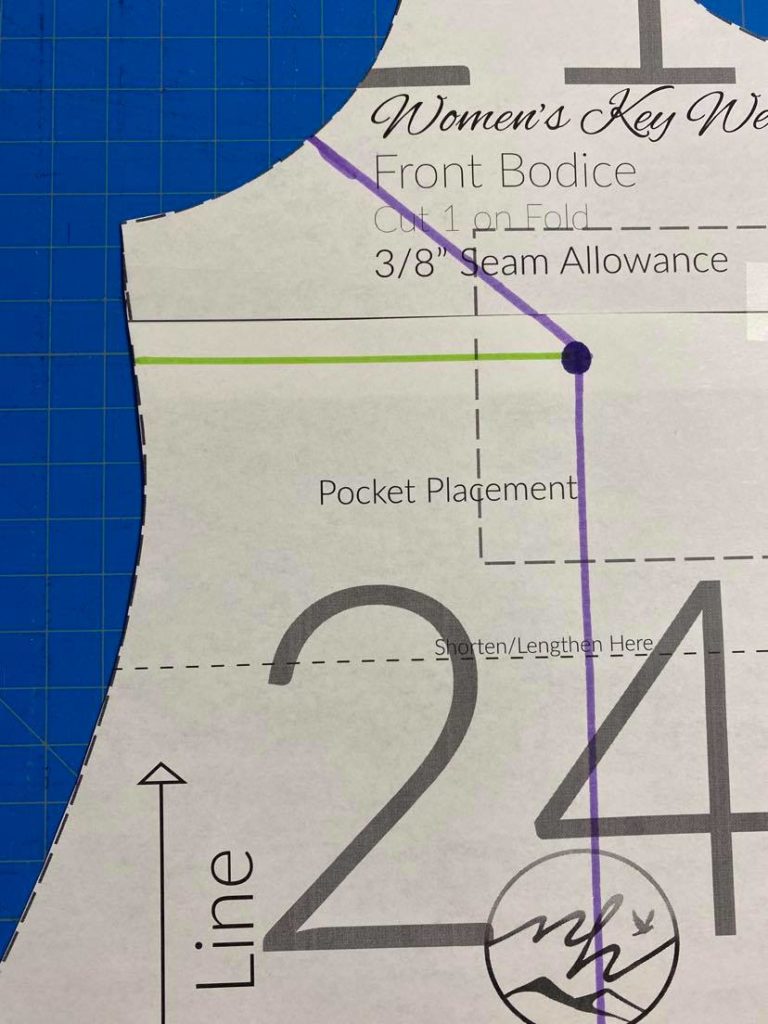
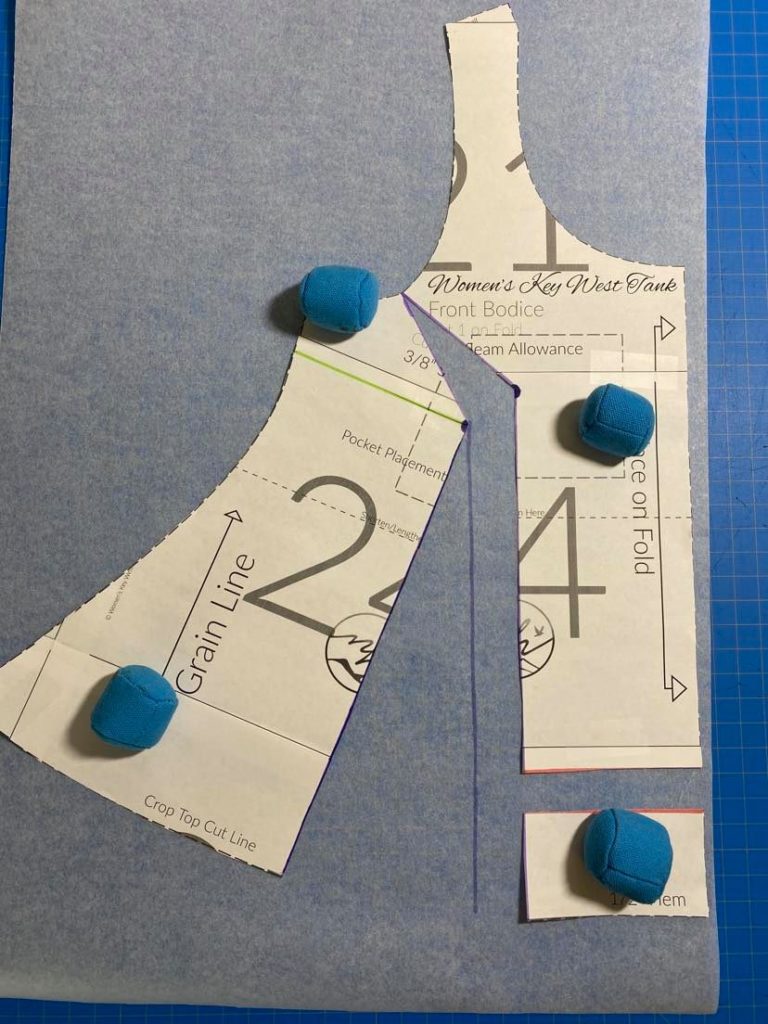
From your apex you will want to draw a line approximately 45 degrees to the armscye and from the apex straight to the bottom hem line.
Starting back at the apex draw a line at a 90-degree angle towards the side seam.
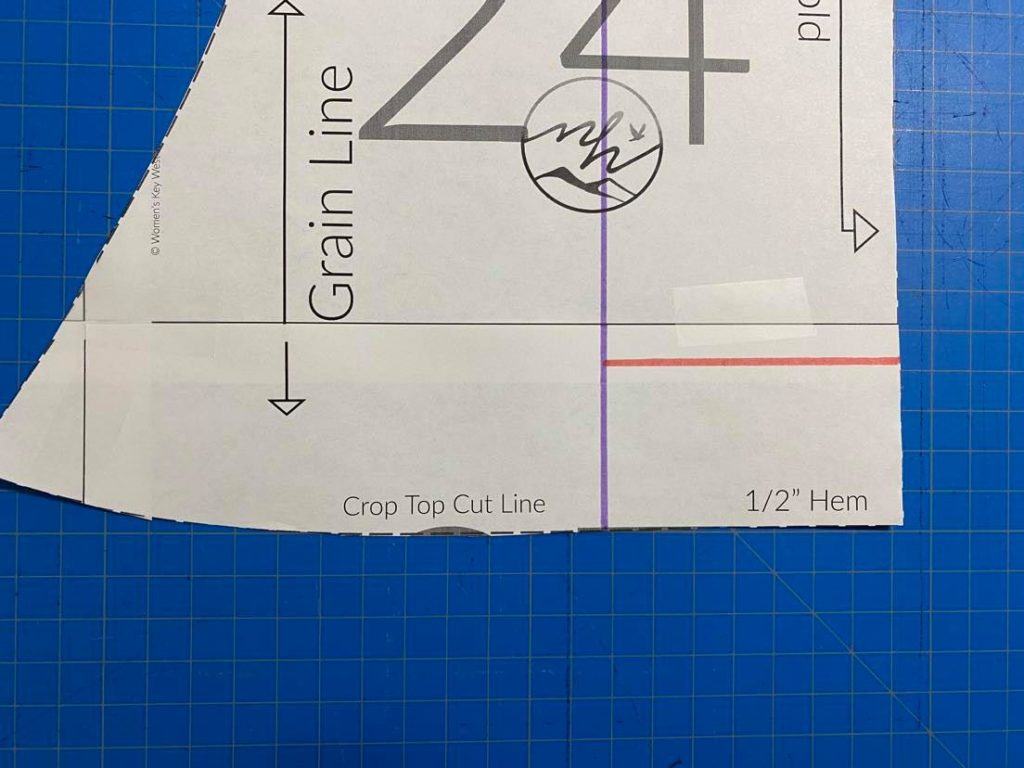
Now a few inches above the hem line draw a line from the center (purple) line 90 degrees toward the center fold line of the pattern.
Cutting into your pattern piece
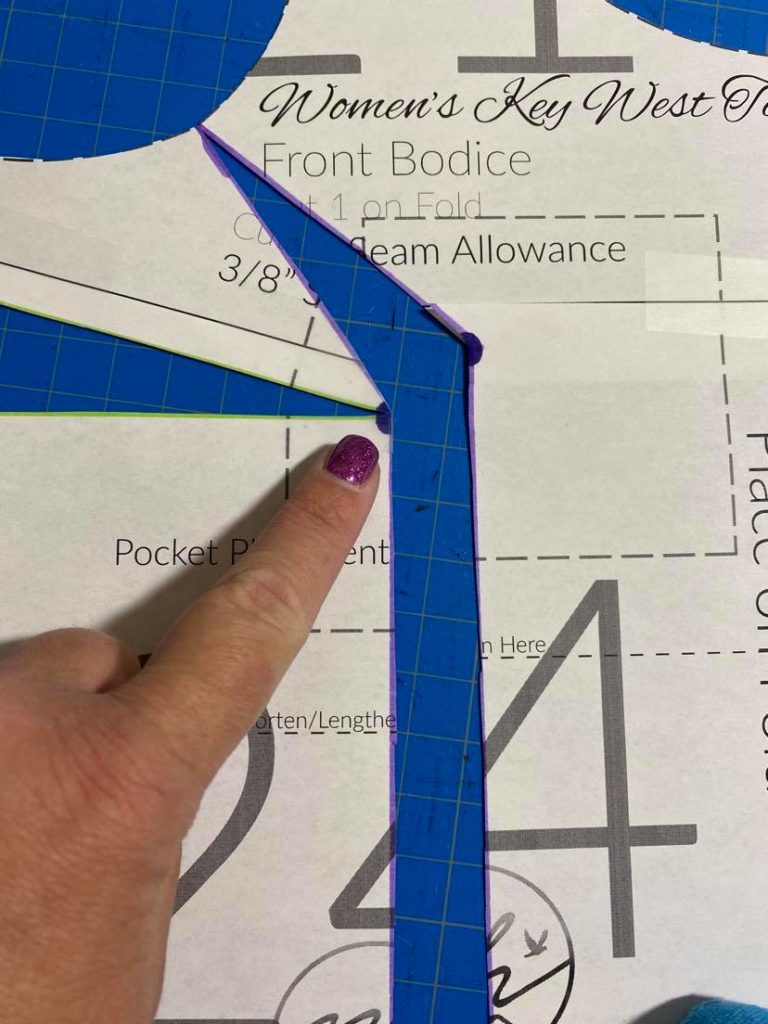
Let’s get down to actually making some adjustments! Cut the purple line starting at the hem up to the apex and out towards the armscye but not all the way through. Stop just short of the armscye to create a hinge point.
Next, cut from the side seam towards the apex (Green line). Again, you will create a hinge by stopping just shy of cutting all the way through the pattern piece.
Ignore the red line for now we will get to that later.
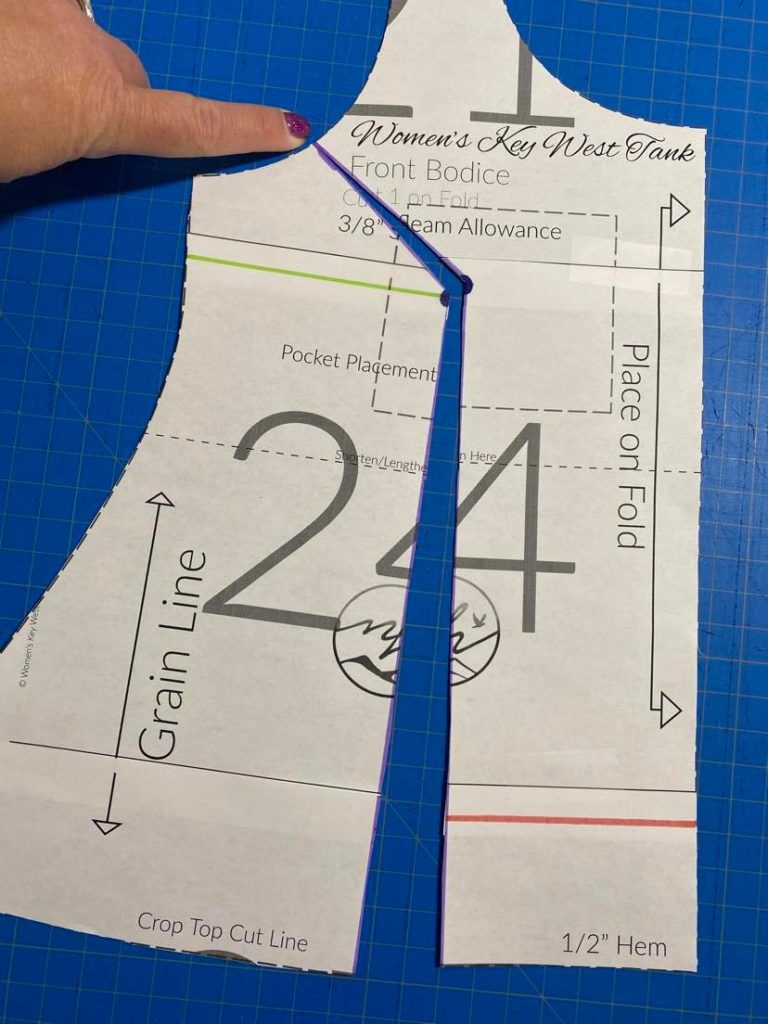
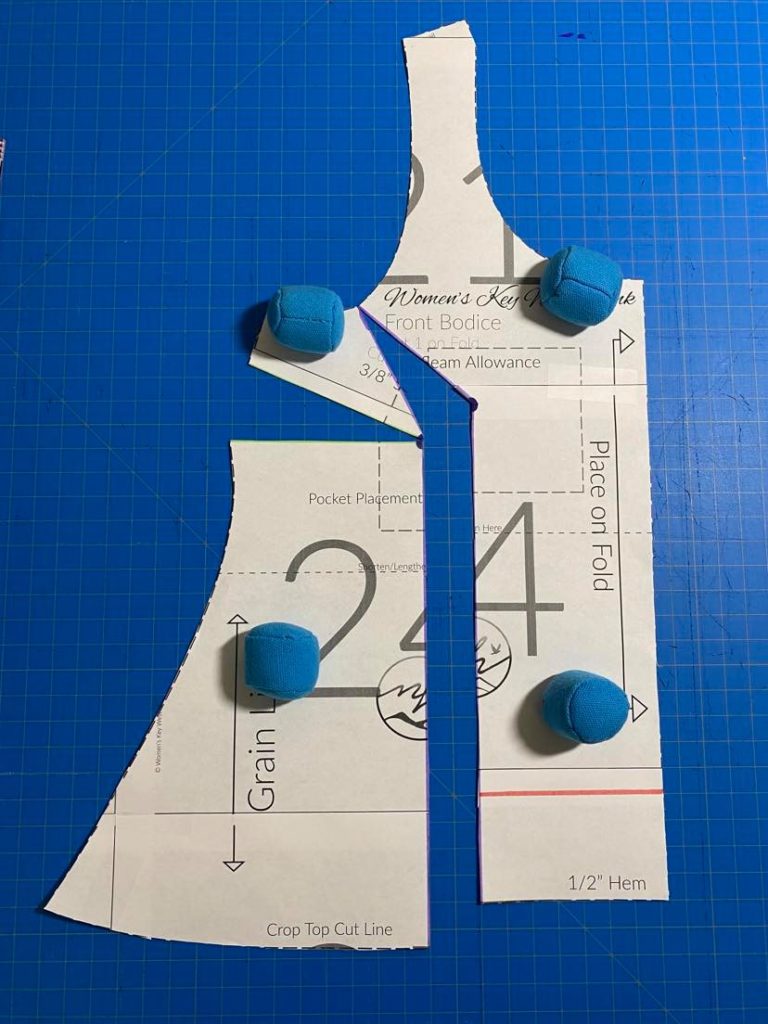
Spread the pattern piece apart by the amount we determined earlier. I will be doing 1”.
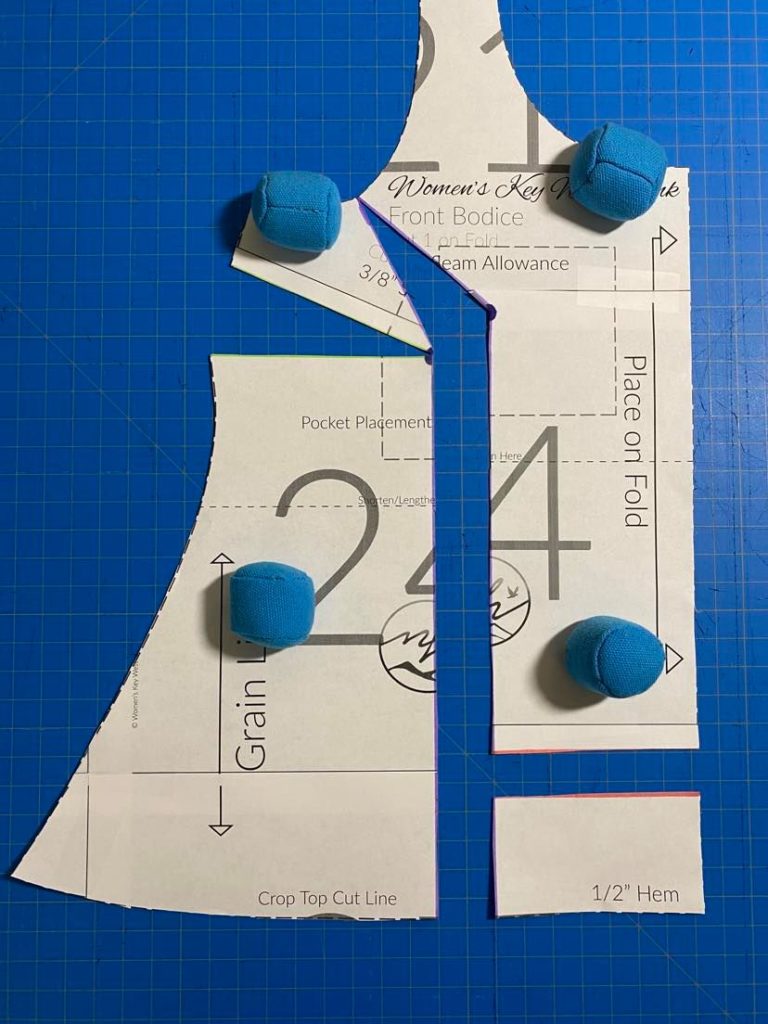
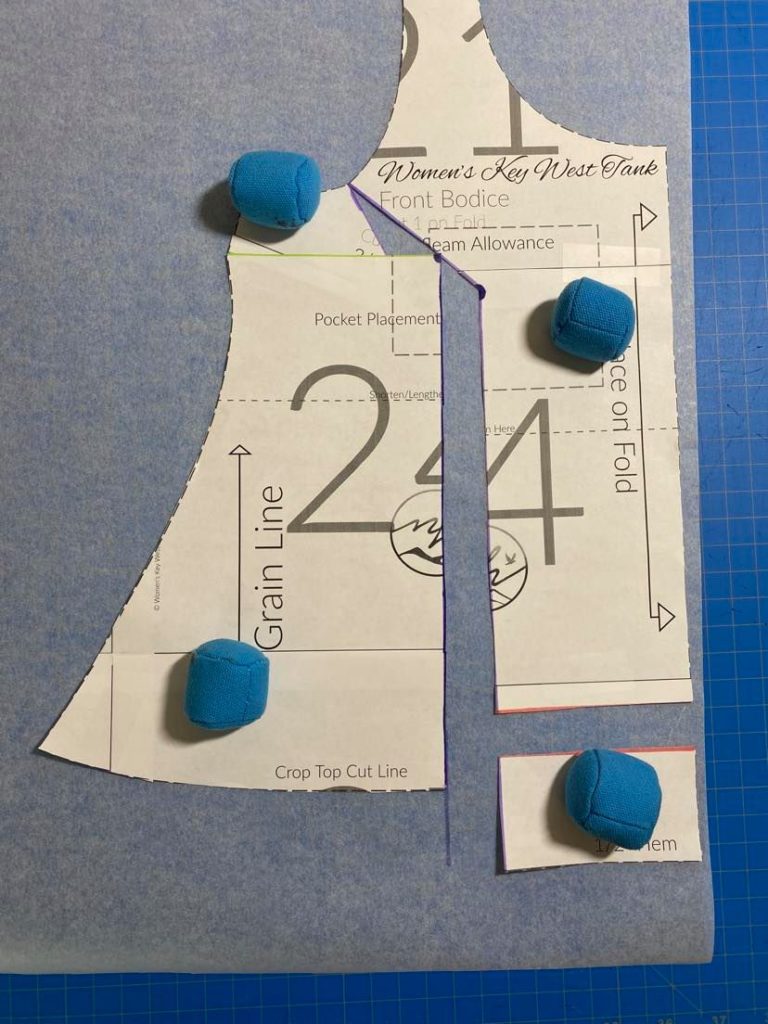
By doing this you have added length and width. Hold your pieces in place with pattern weights or whatever you have on hand. Now cut the red line all the way through and move it that piece down so it lines up with the rest of your bodice.
This step is easier if you have tracing paper but I don’t so I am making due with parchment paper. Slide the paper under your bodice piece and draw a line along the left side of the space. We will use this to line things back up after we shift things around.
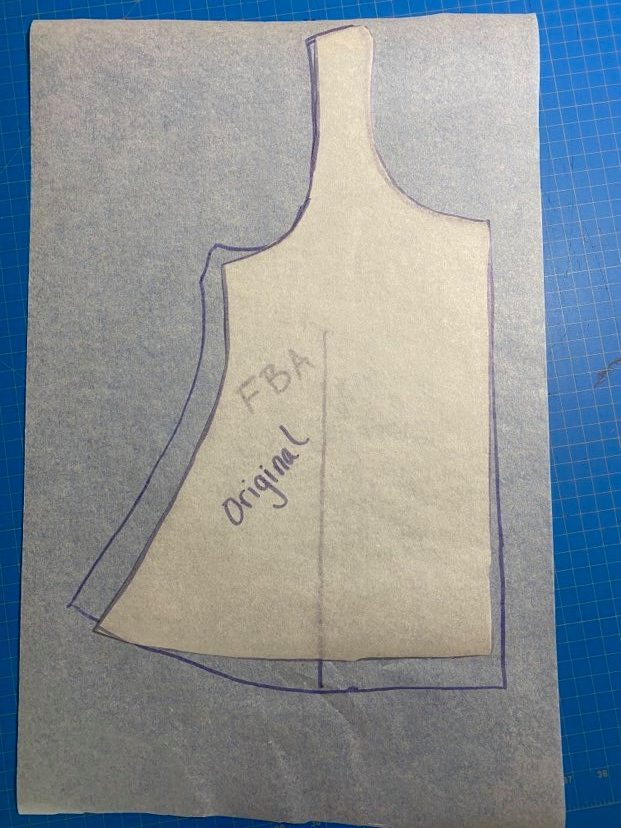
Now, pivot the left side of the bodice up to meet back up with the armscye area and tape back together.
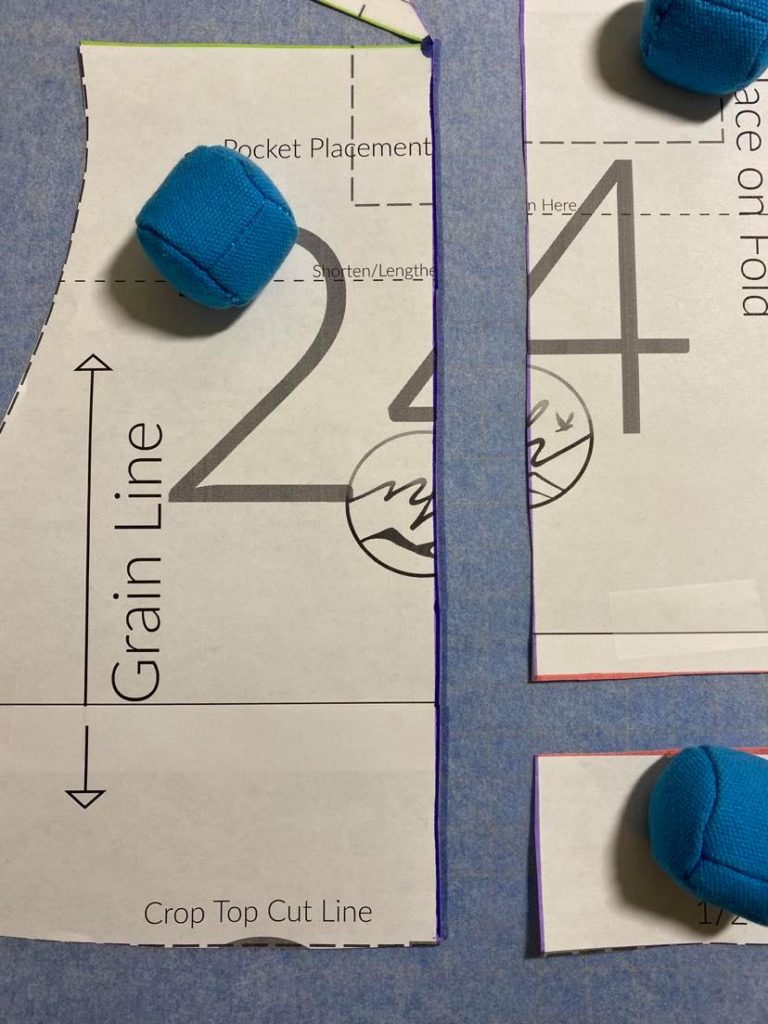
Now cut from the apex point out towards the side seam creating another hinge point. Take the left side and pivot it back to your reference line. This takes out where a dart would’ve been created but still leaves extra room for your bust.
Fixing the hemline
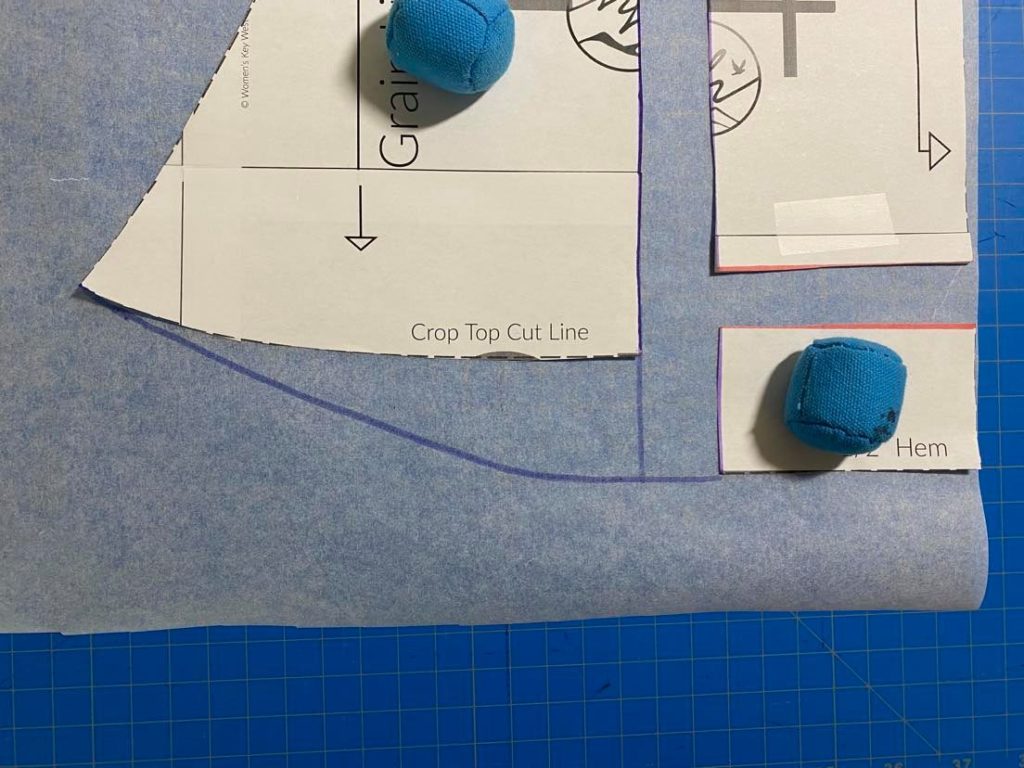
You will notice that your hemline is no longer lined up. To fix this we will redraw the hemline. From the piece on the right side you will draw a smooth curve up to meet the side seam of your bodice. When you are wearing the shirt, it will not look like a curved hem because your bust will bring up the hemline in the front. It is the same as if you have a bigger backside and wear a skirt, the back of the skirt can look shorter even though the hem is even all the way around.
Finishing up
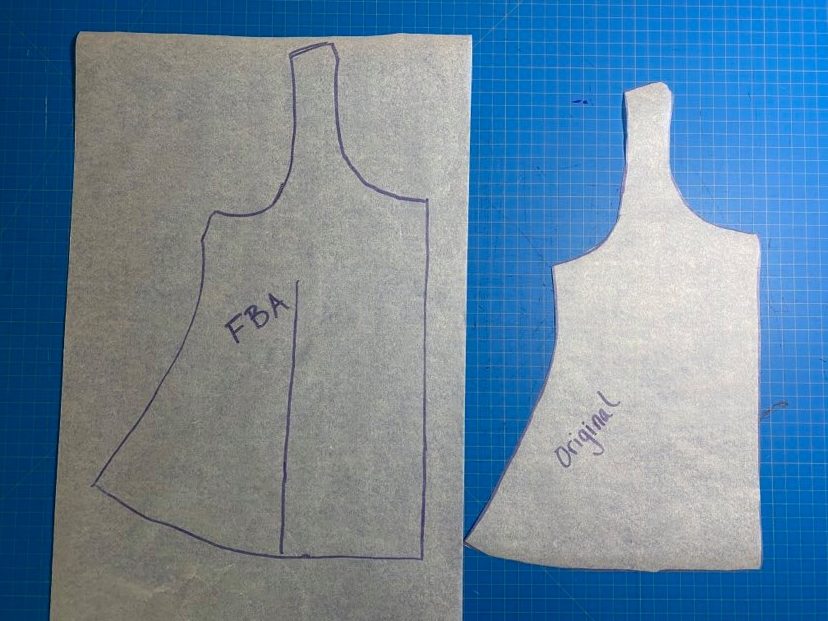
Go back to the measurements you jotted down of the width of the waist and hips. Compare the measurements of the final pattern piece with those measurements. From there you can decide if need to grade for your measurements. For grading to a bigger size you may be OK but you may need to add additional width still. If your waist and hips are the same size or smaller than your upper bust you may want to grade down. For help with grading sizes, we have a blog post here
Your pattern piece is complete!
From here you will cut out your fabric and sew according to the instructions in the pattern.
Thank you for joining us today! Make sure you head over to our Facebook group and share your new shirt with us. We love seeing what wonderful things you create there or on Instagram #newhorizonssewing


