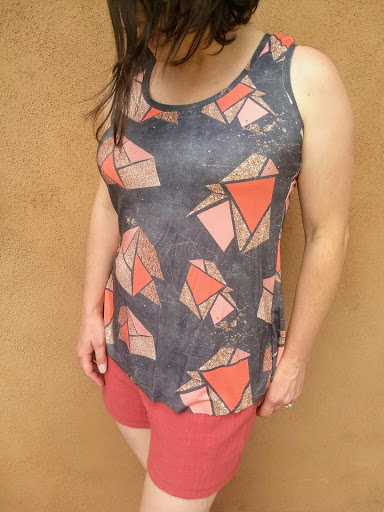
Hi all! Sarah here from Sweet Sprocket today, sharing a fun little hack for summer! In this blog post, I’ll show you how to modify the (free with the coupon code in our Facebook group) Key West Tank Top to have an open “tulip” back. This inspiration came to me as I needed more summer pjs and just happened to coincide with the release of the new Lanai Loungers, which I used for my shorts in the photos below.
So, grab your pattern, print it out in your size, and decide on your options – racer-back or regular and slimmer or more swing hem. I chose racer-back slimmer cut (which as you can see is still perfectly roomy, but not flared).
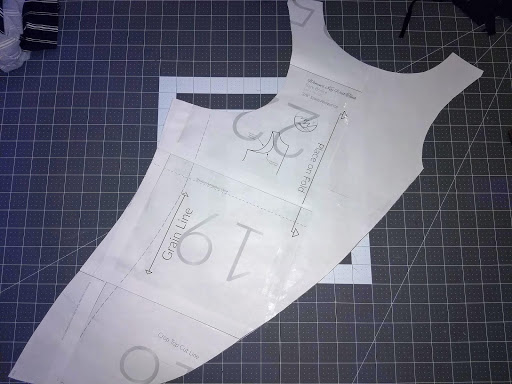
Your front piece and your bands will be used as is, so you can set those pieces aside (and cut the fabric as written on the pattern piece when it’s time). We will be modifying the back only. You will need some extra pieces of paper or whatever you use to trace patterns. I ended up using only two pieces of white paper to add on to my existing back pattern piece.
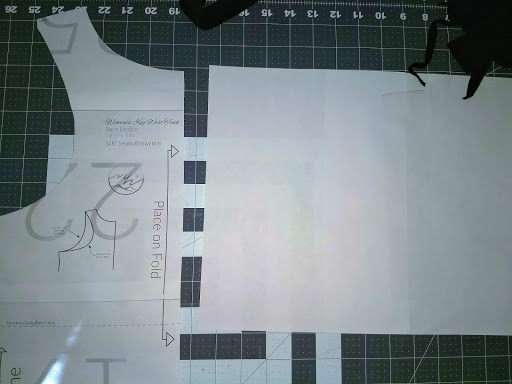
Take one piece of paper and trace a mirror image of the upper back bodice onto that piece of paper, as shown below. Tape that to the fold line on the pattern piece.
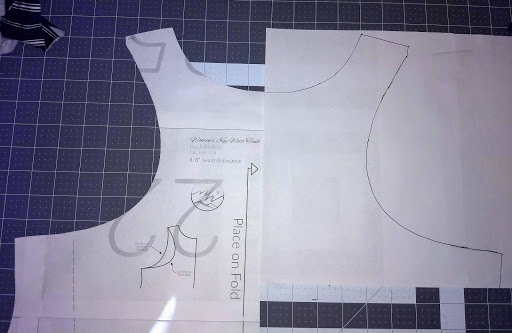
Take a second piece of paper and tape it below the piece of paper you just traced on to, both to that piece of paper and to the fold line on the pattern piece.
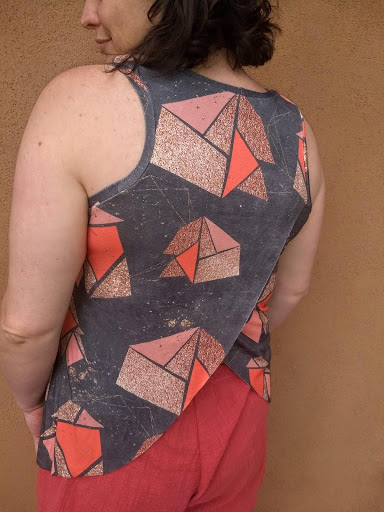
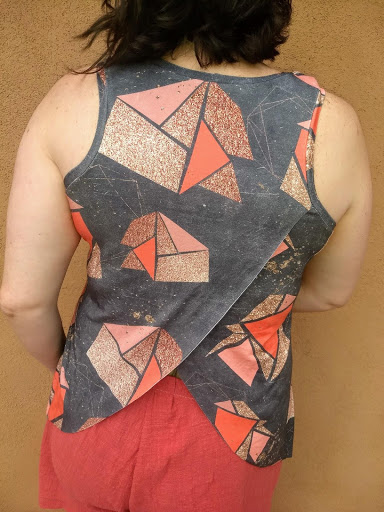
Now you get to decide what you want your back to look like – where you want the overlap to start and the shape of the back hem you want. This will affect how much the tank is open in the back. As you can see, I started my “tulip” on the lower part of the racer-back curve. If you start it higher up (toward the shoulder), there will be less overlap on the back (or not, depending on how you draw your curve). Likewise, starting it all the way at the bottom of the armscye will show very little open back – but could still be a pretty detail! I did a pretty smooth swoop down toward the side seam. If you wanted to do a different shape for the back hem, you might need more paper. My modified pattern piece is below:
When you modified back piece is done being drawn, cut it out and cut out your fabric – two back pieces, mirrored.
For sewing, some helpful tips:
- If you are hemming your back (as I expect most would, but I did not since they were pjs), I suggest sewing the side seams together and hemming both back pieces and the front piece at the same time. It won’t be sewn together at the shoulders yet – just a flat piece of fabric – front bodice with a back bodice piece on either side (make sure you attach them to the correct side!) Much easier this way to get a nice smooth hem!
- Take those back pieces and lay them together, as they will be when you are wearing them (so the right side of the bottom layer to the wrong side of the top layer) and baste all the edges (around the back neckline and the armscyes). Sew the rest per the tutorial.
Hope you enjoy this fun little hack and make yourself some lovely summer shirts