I’m always looking for new activewear patterns to try. As a male sewist, I find we have a limited range compared to those designed for women. However, many patterns aimed at the women’s market can be easily adapted for any gender and better suit any body size and shape.
When I saw the Olympia pattern, it was love at first sight; I could see so many uses. I have a holiday home by the beach, and it looks like the perfect top to throw on after a swim or paddle. I also enjoy running, but I find running tops make me very hot in the summer. I’m looking forward to wearing the Olympia for some extra ventilation!
The first step was to check my own measurements with the measurements on the pattern. I used the high bust, waist and hips as a guide. I needed a 16 on the top half, 12 at the waist and 10 at the hips. I find this degree of change from the standard pattern is usually necessary when altering women’s patterns to a typical male shape. These changes broaden the shoulder width and grades down into a triangle shape. We are all different, though, so adjust according to your own measurements.
The next thing to tackle was the length. The shirt version was a little too short for my body, so I printed the longer tunic version of the Olympia. I printed only size 10-16 using the PDF layers to later blend for my body shape.
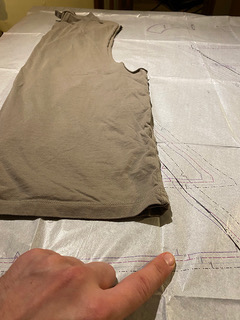
I like to check patterns using existing well-fitting clothing. I laid a vest top of mine over the paper pattern pieces to see if there are any areas that look out of place. This helped me to see that I needed to shorten the tunic version by around 2 inches. I also used this method to confirm the grading from 16 at the shoulders down to 10 at the hips.
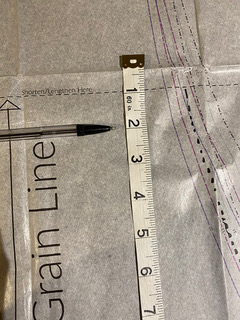
The pattern comes with instructions on how to shorten the body pieces. It has a ‘shorten here’ line near the bust so I took one inch from each side of this line to create a tunic 2 inches shorter – perfect for my body. It’s essential to shorten (or lengthen) at this precise point. As the pattern curves out at the base, reducing at the bottom would result in a narrower hip-width, and the Olympia would be too small here.
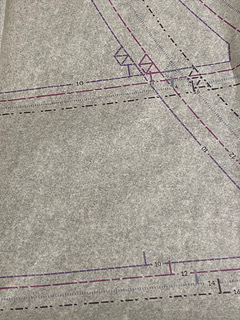
Next was the grading. This was very straightforward. I sketched a freehand line from 16 at the shoulders to the line at 14 at the bust. Then down to 12 at the waist and 10 for the hips. I have lots of pattern making rulers but actually prefer to use a flexible ruler to create a smooth curve to connect the points.
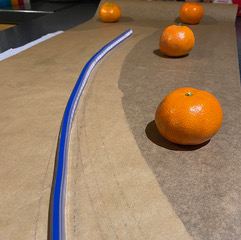
Ignore the oranges in the picture; I couldn’t find my pattern weights!
With the pattern paper cut to this new curve, I used wonder clips to hold it together against my body for a final check before cutting the fabric.
At this stage, I noticed that I still might want a tighter fit around the hips. This pattern has overlapping fabric for the front and back pieces so this is easily resolved if needed when sewing. More on that later!
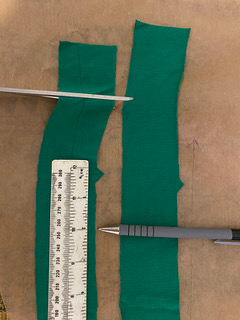
As proof that we all make mistakes, when cutting the side bands for the front and back pieces, I forgot that I had reduced the body height by 2 inches. It’s easy to remove this from the top of each of these bands. Remember to also move the top notches down by the same amount, so that they still line up to the body piece when you come to sewing. These bands need to be stretched to fit the body pieces so lining up the notches is vital. Having the stretched parts in the right places provide the correct tension to contour the pieces so they sit closer to your body.
And that was it! No more adjustments required, and the sewing instructions were very, very simple to follow.
I made two tiny changes to the construction method. I thread the cord through the hood before attaching it. This is a personal preference as I struggle to get everything through the eyelets. I then used clips to keep the cord out of the way before sewing.
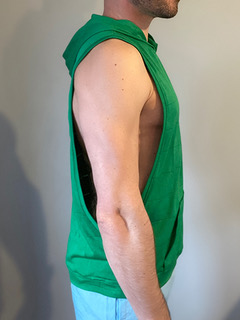
I mentioned earlier that I wasn’t sure if the hip measurement was quite right when holding the pattern paper up to my body. I made a test version of the pattern in some cheap fabric to check. This pattern has a waistband and the front and back panels overlap before you attach the waistband. Many people’s hips are a lot wider than their waist, which is how this pattern is designed, but there isn’t a big variation for me. I used the test version to try different ways of pinning the body pieces to the waistband. It’s such an easy pattern to alter at this point. Keep the waistband the same, as you need to stretch this to fit anyway, and adjust the amount of overlap of the front and back pieces. I added about 1/2 inch overlap to each side and it was perfect – no adjustment to the waistband required as I still had to stretch it to fit before sewing them together.
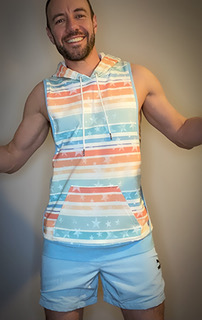
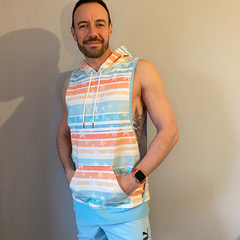
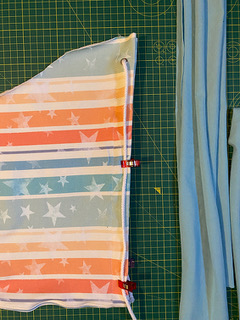
And the finished result was perfect! The green fabric is an old IKEA throw I used for the test version. The star and stripe is fabric is available from Wattle & Slate (only available to preorder Feb 2021 with limited retail available).