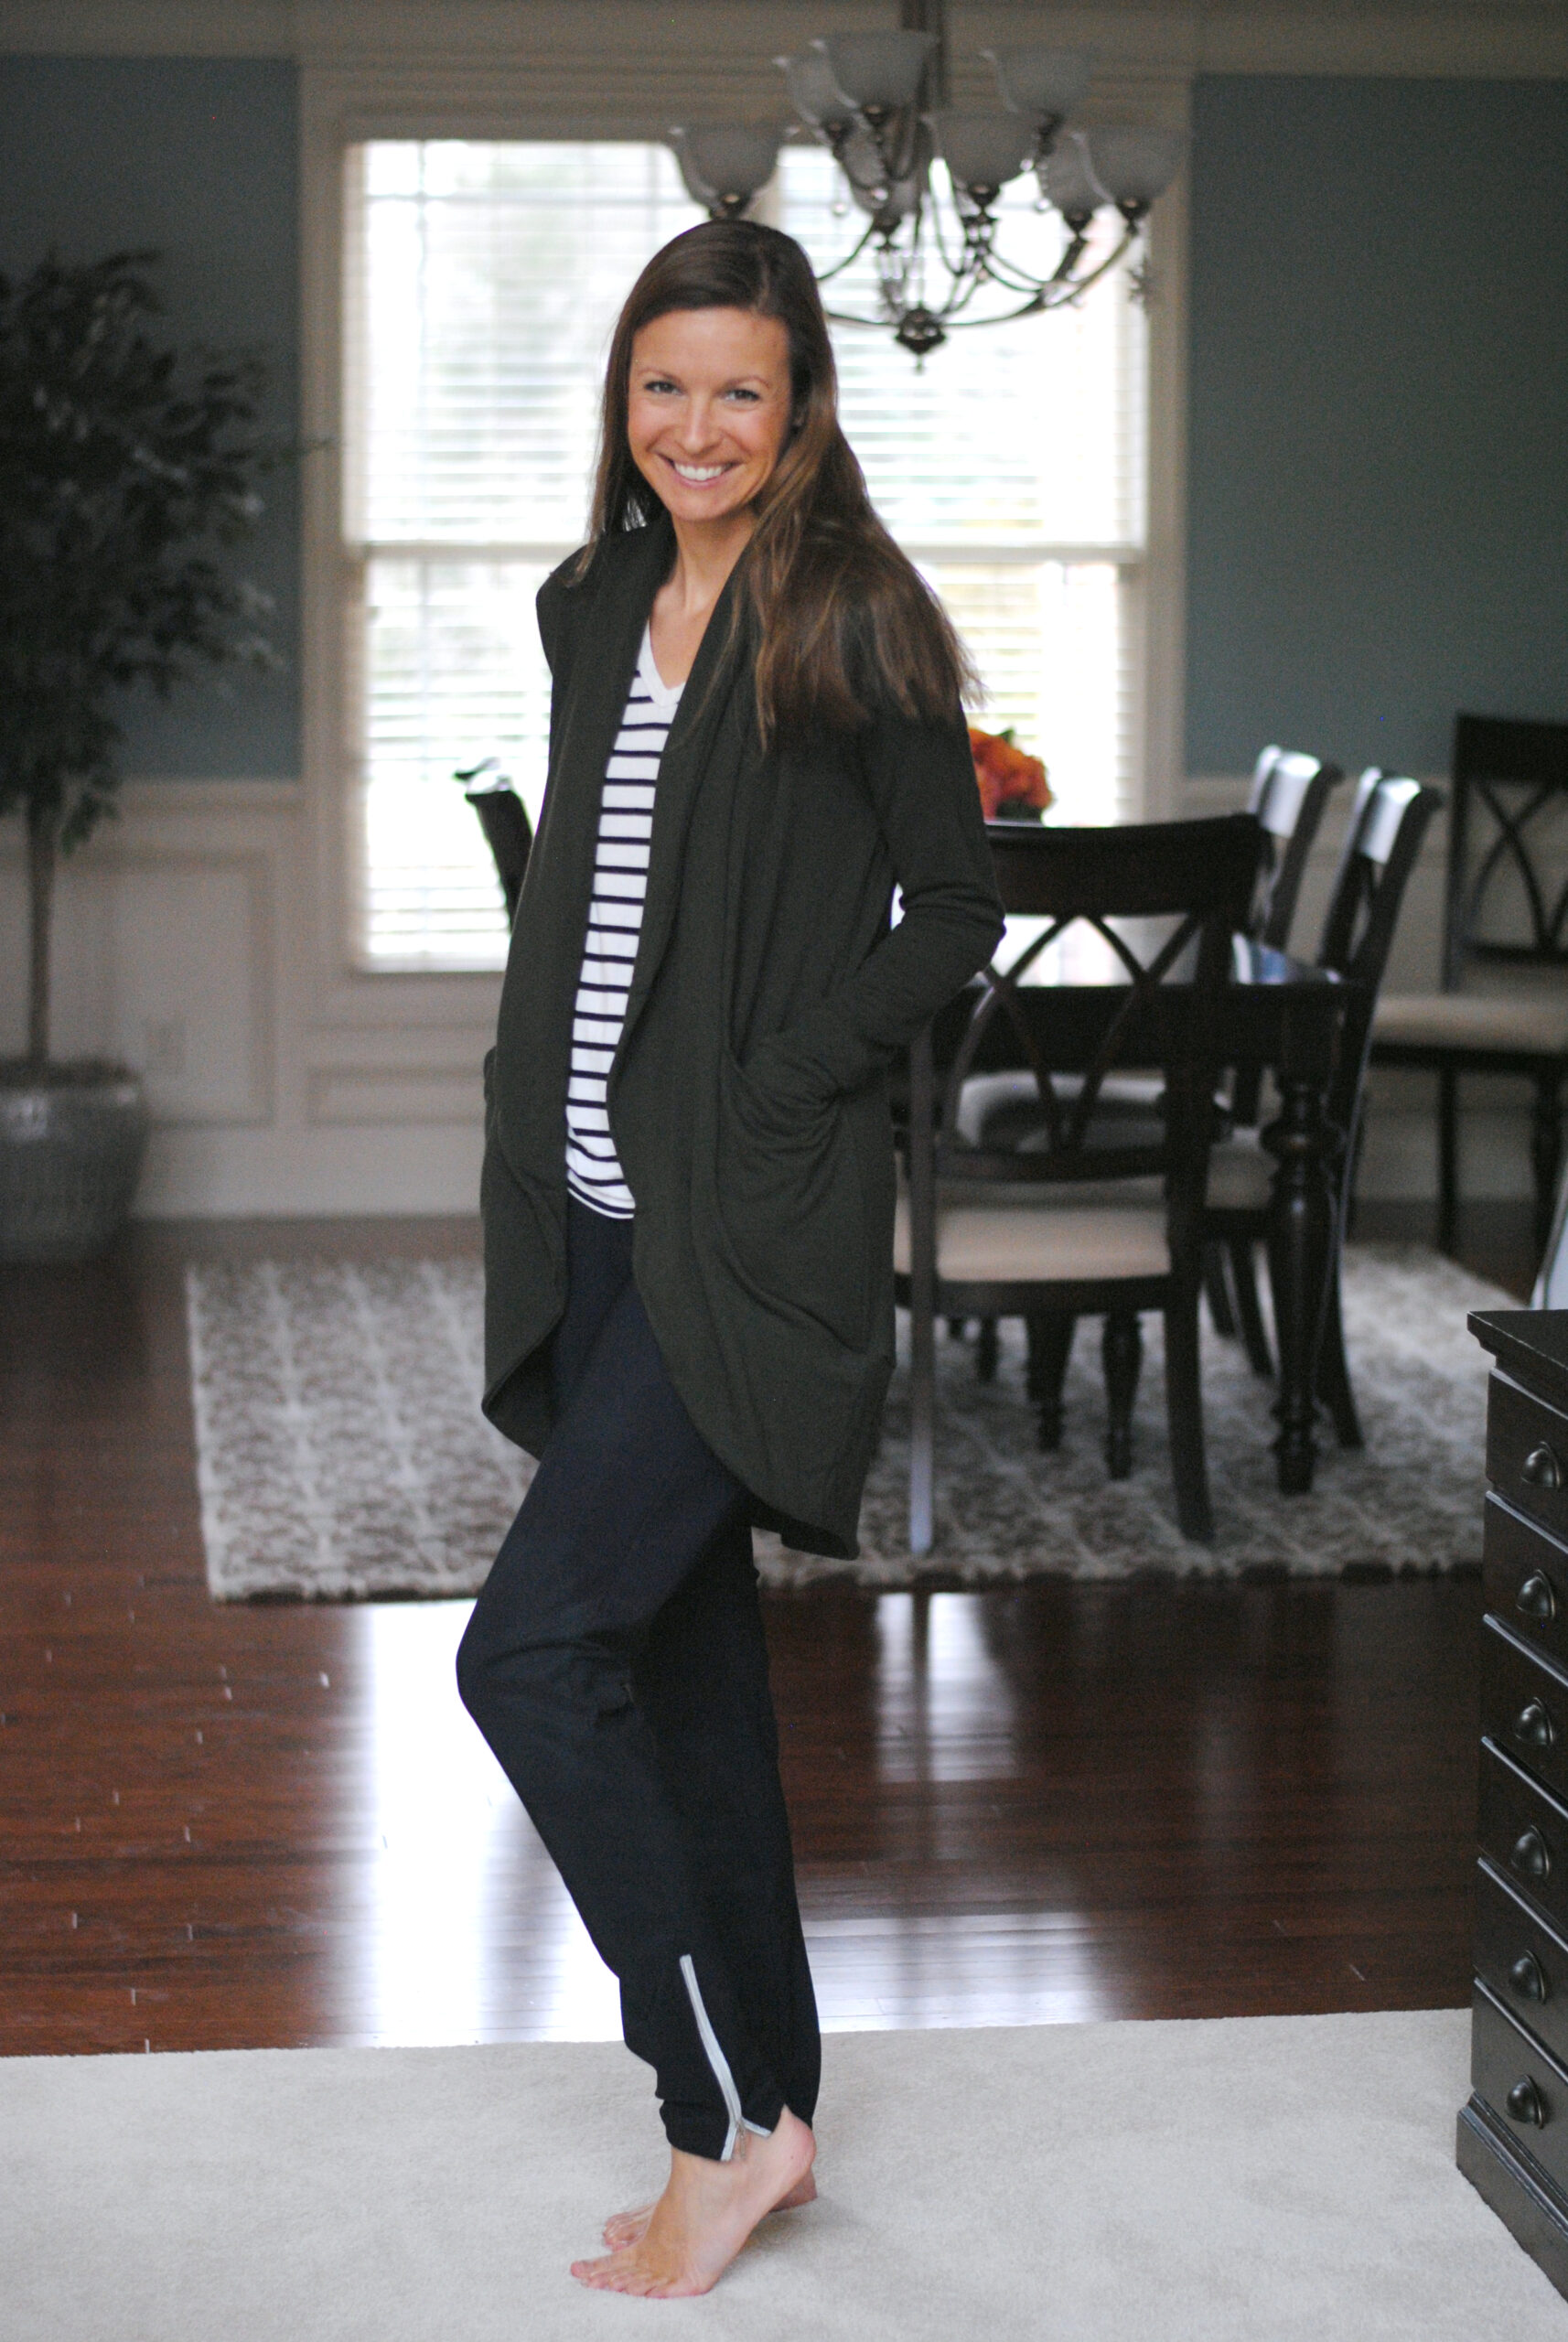
Lately, joggers have become a large part of my day to day wardrobe. I love the fit of the Carita joggers, but wanted to elevate the look a little bit. Have you seen lots of ready to wear joggers with zipper details at the ankles like I have? I thought that would be a pretty easy detail to hack, and I was right!
Many people are intimidated by installing zippers, but by just taking your time and maybe using a little bit of wash away wonder tape, they’re really not so bad! I recalled the instructions within the TAMI pattern for installing zippers being very clear and easy to follow. The zippers on the ankles I wanted to add seemed very similar in length to the shoulder zipper accent on the TAMI, so I pulled up those instructions, and followed that method for adding the zippers to the bottoms of my joggers. I will break it down for you below!
Supplies Needed
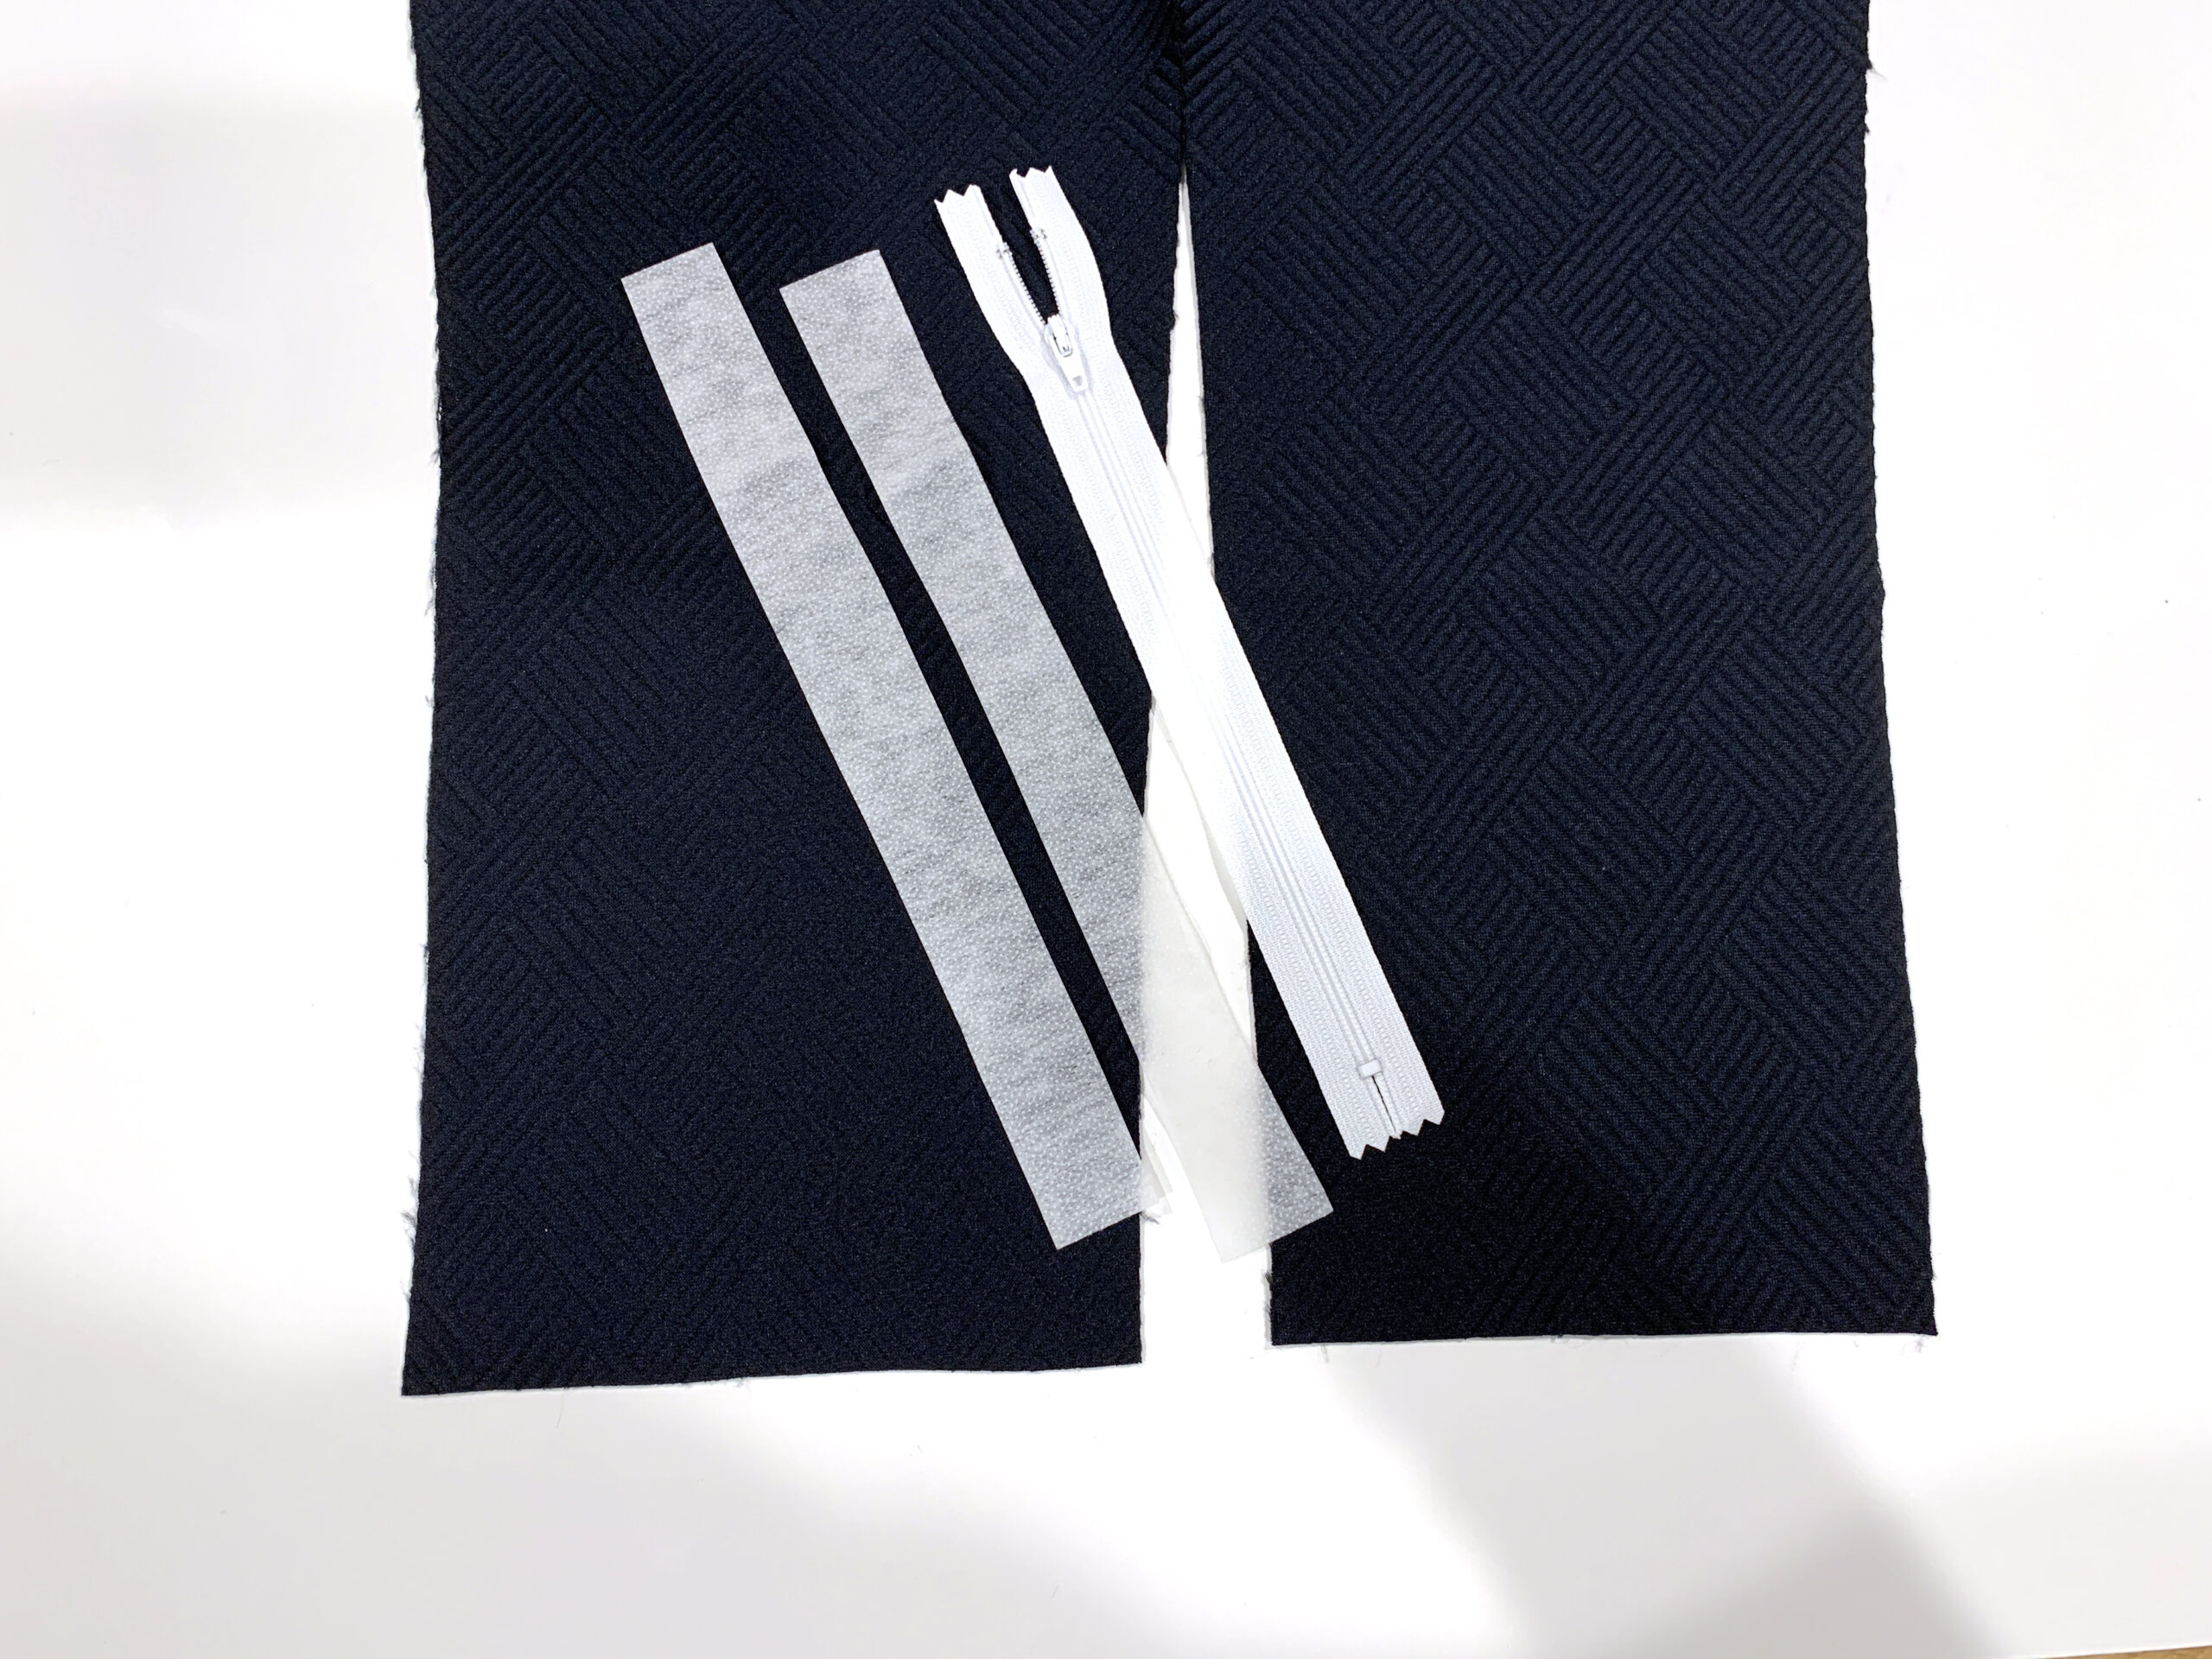
In regards to the supplies necessary, you will need all your normal sewing tools, your Carita pattern, two matching zippers around 7” each or so, lightweight interfacing and some ½” elastic. When you cut out your Caritas, remember that you will be eliminating the cuff and adding a casing for some elastic at the bottom. I normally use the 31” inseam pattern pieces since that is my inseam measurement, but for this hack I needed some extra length since we won’t be adding the cuffs that would normally lengthen them. I used the 33” inseam pieces, and cut my front and back pieces, pocket pieces and waistband. No need to cut the cuffs since we aren’t using them!
If you are adding pockets, go ahead and do that assembly first. Next, we’ll need to work on adding interfacing and marking for our zippers.
Adding Interfacing for Zippers
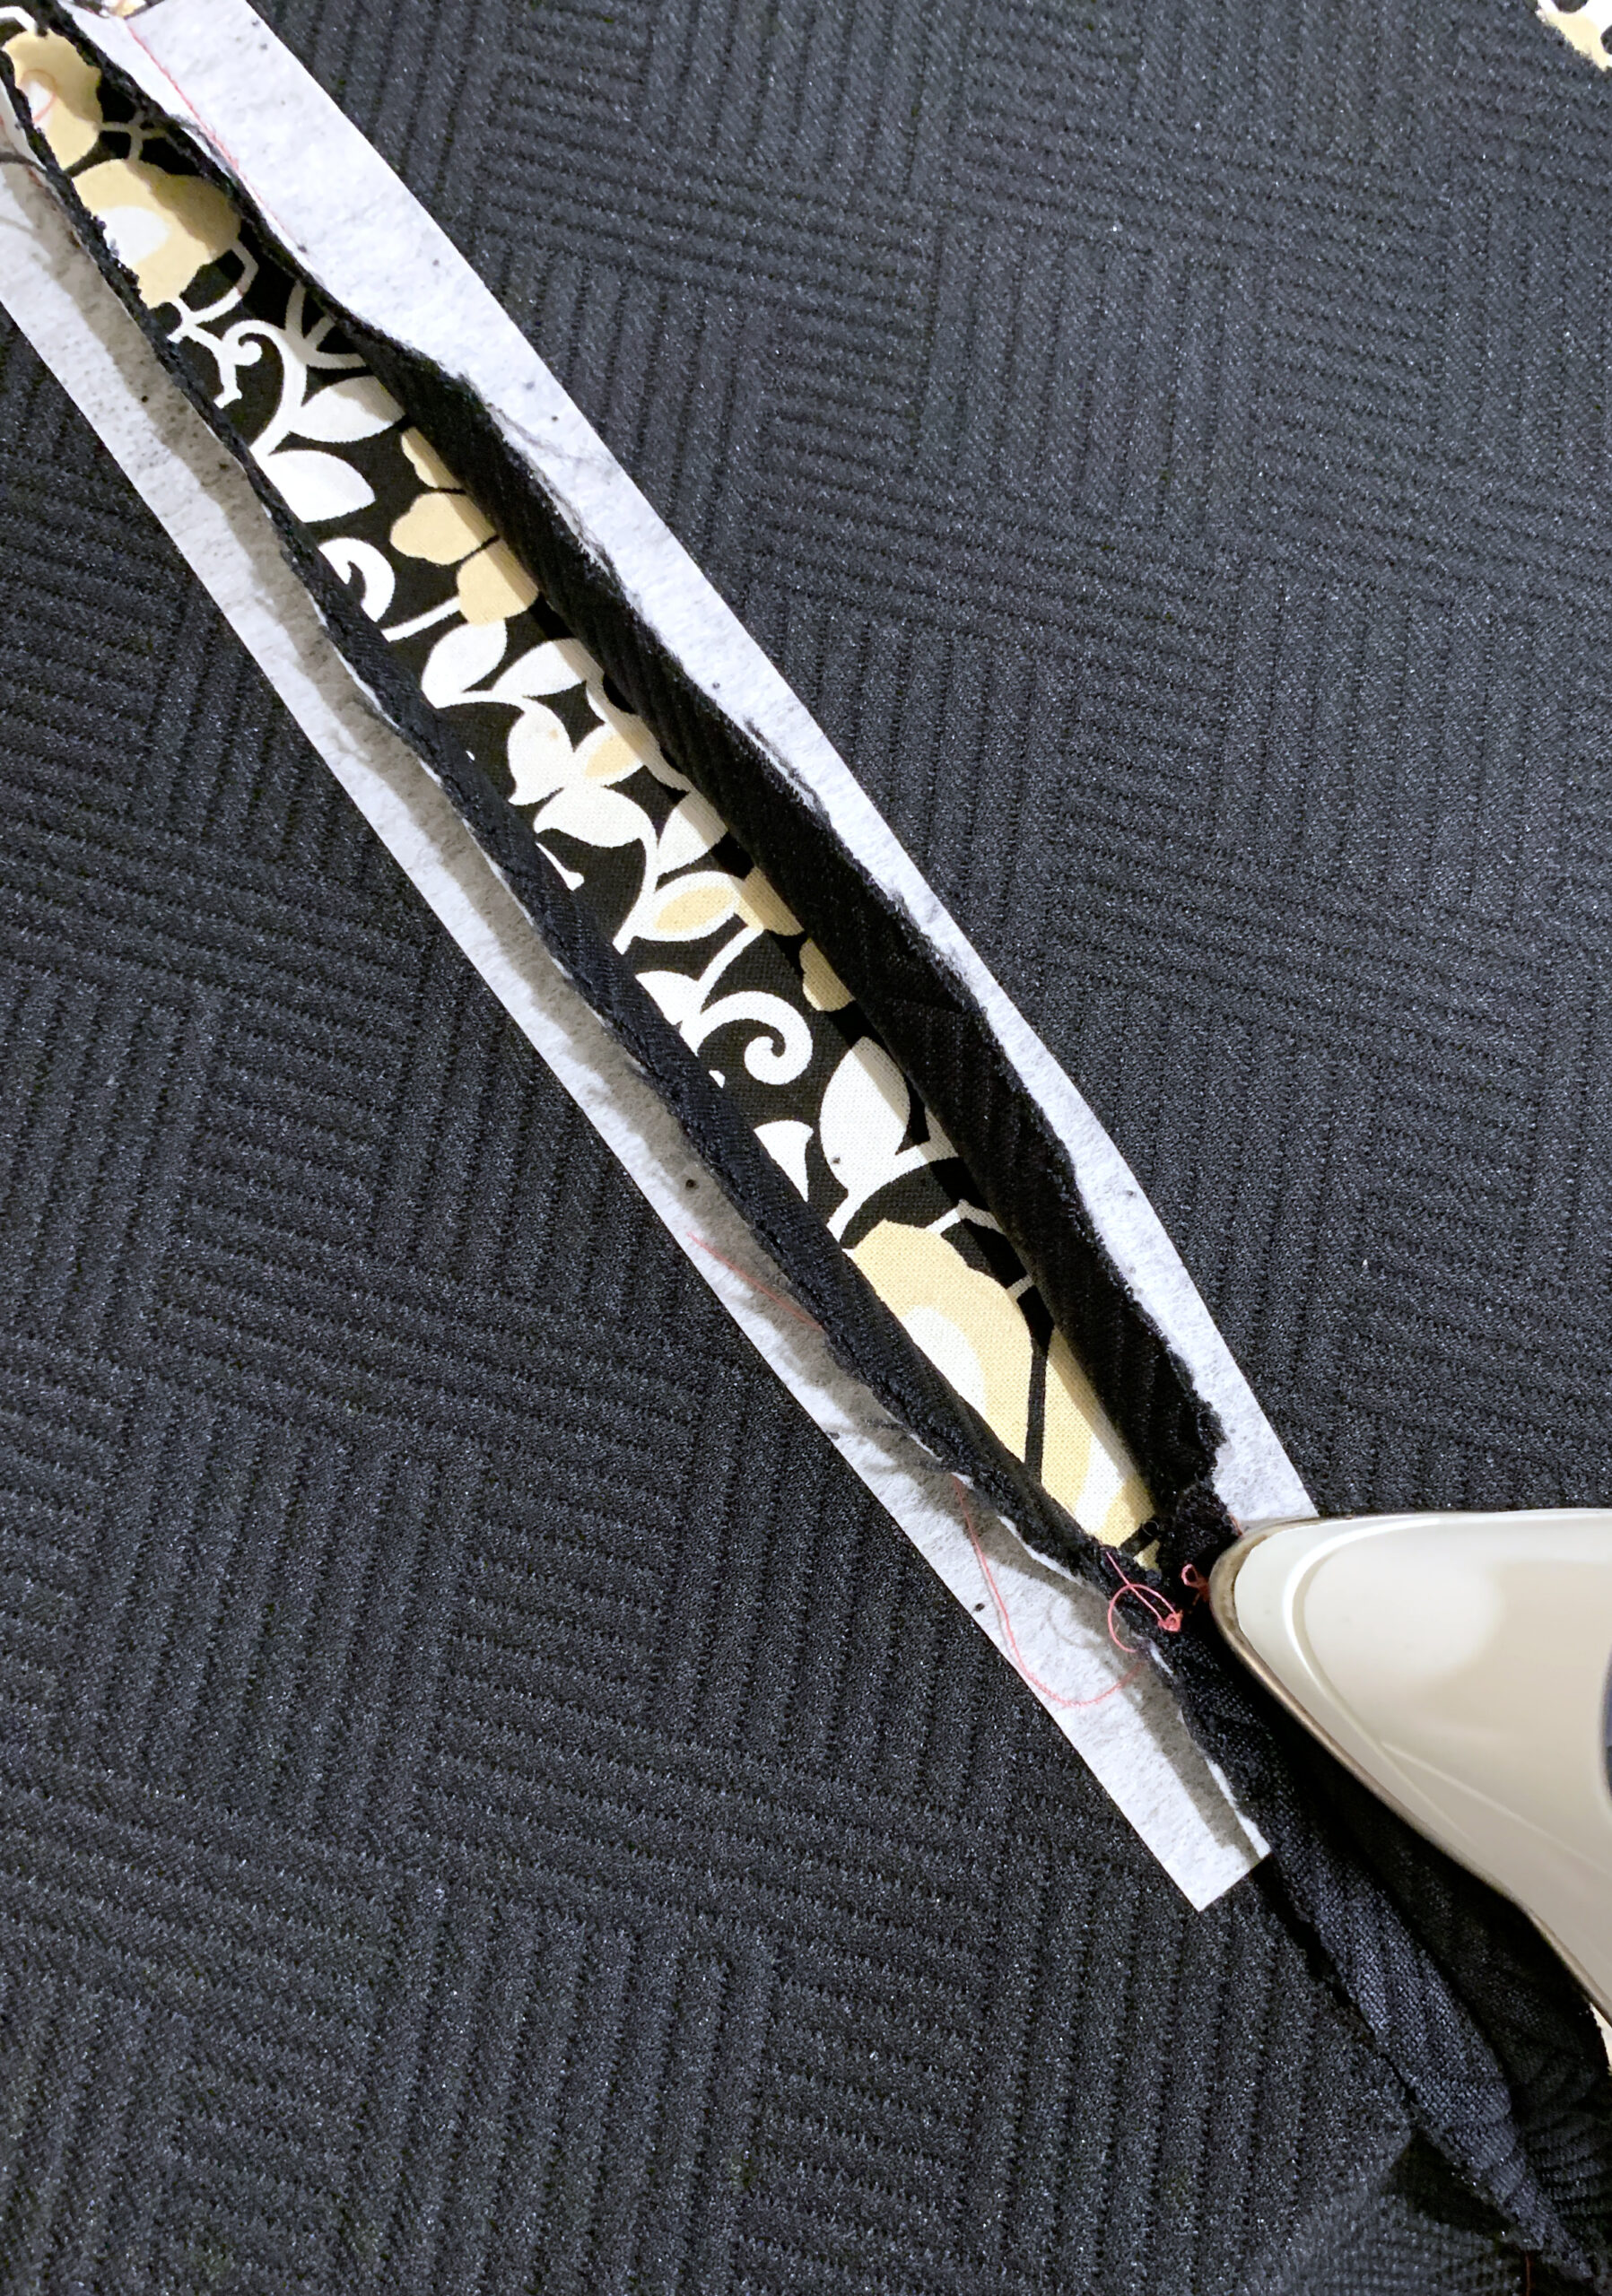
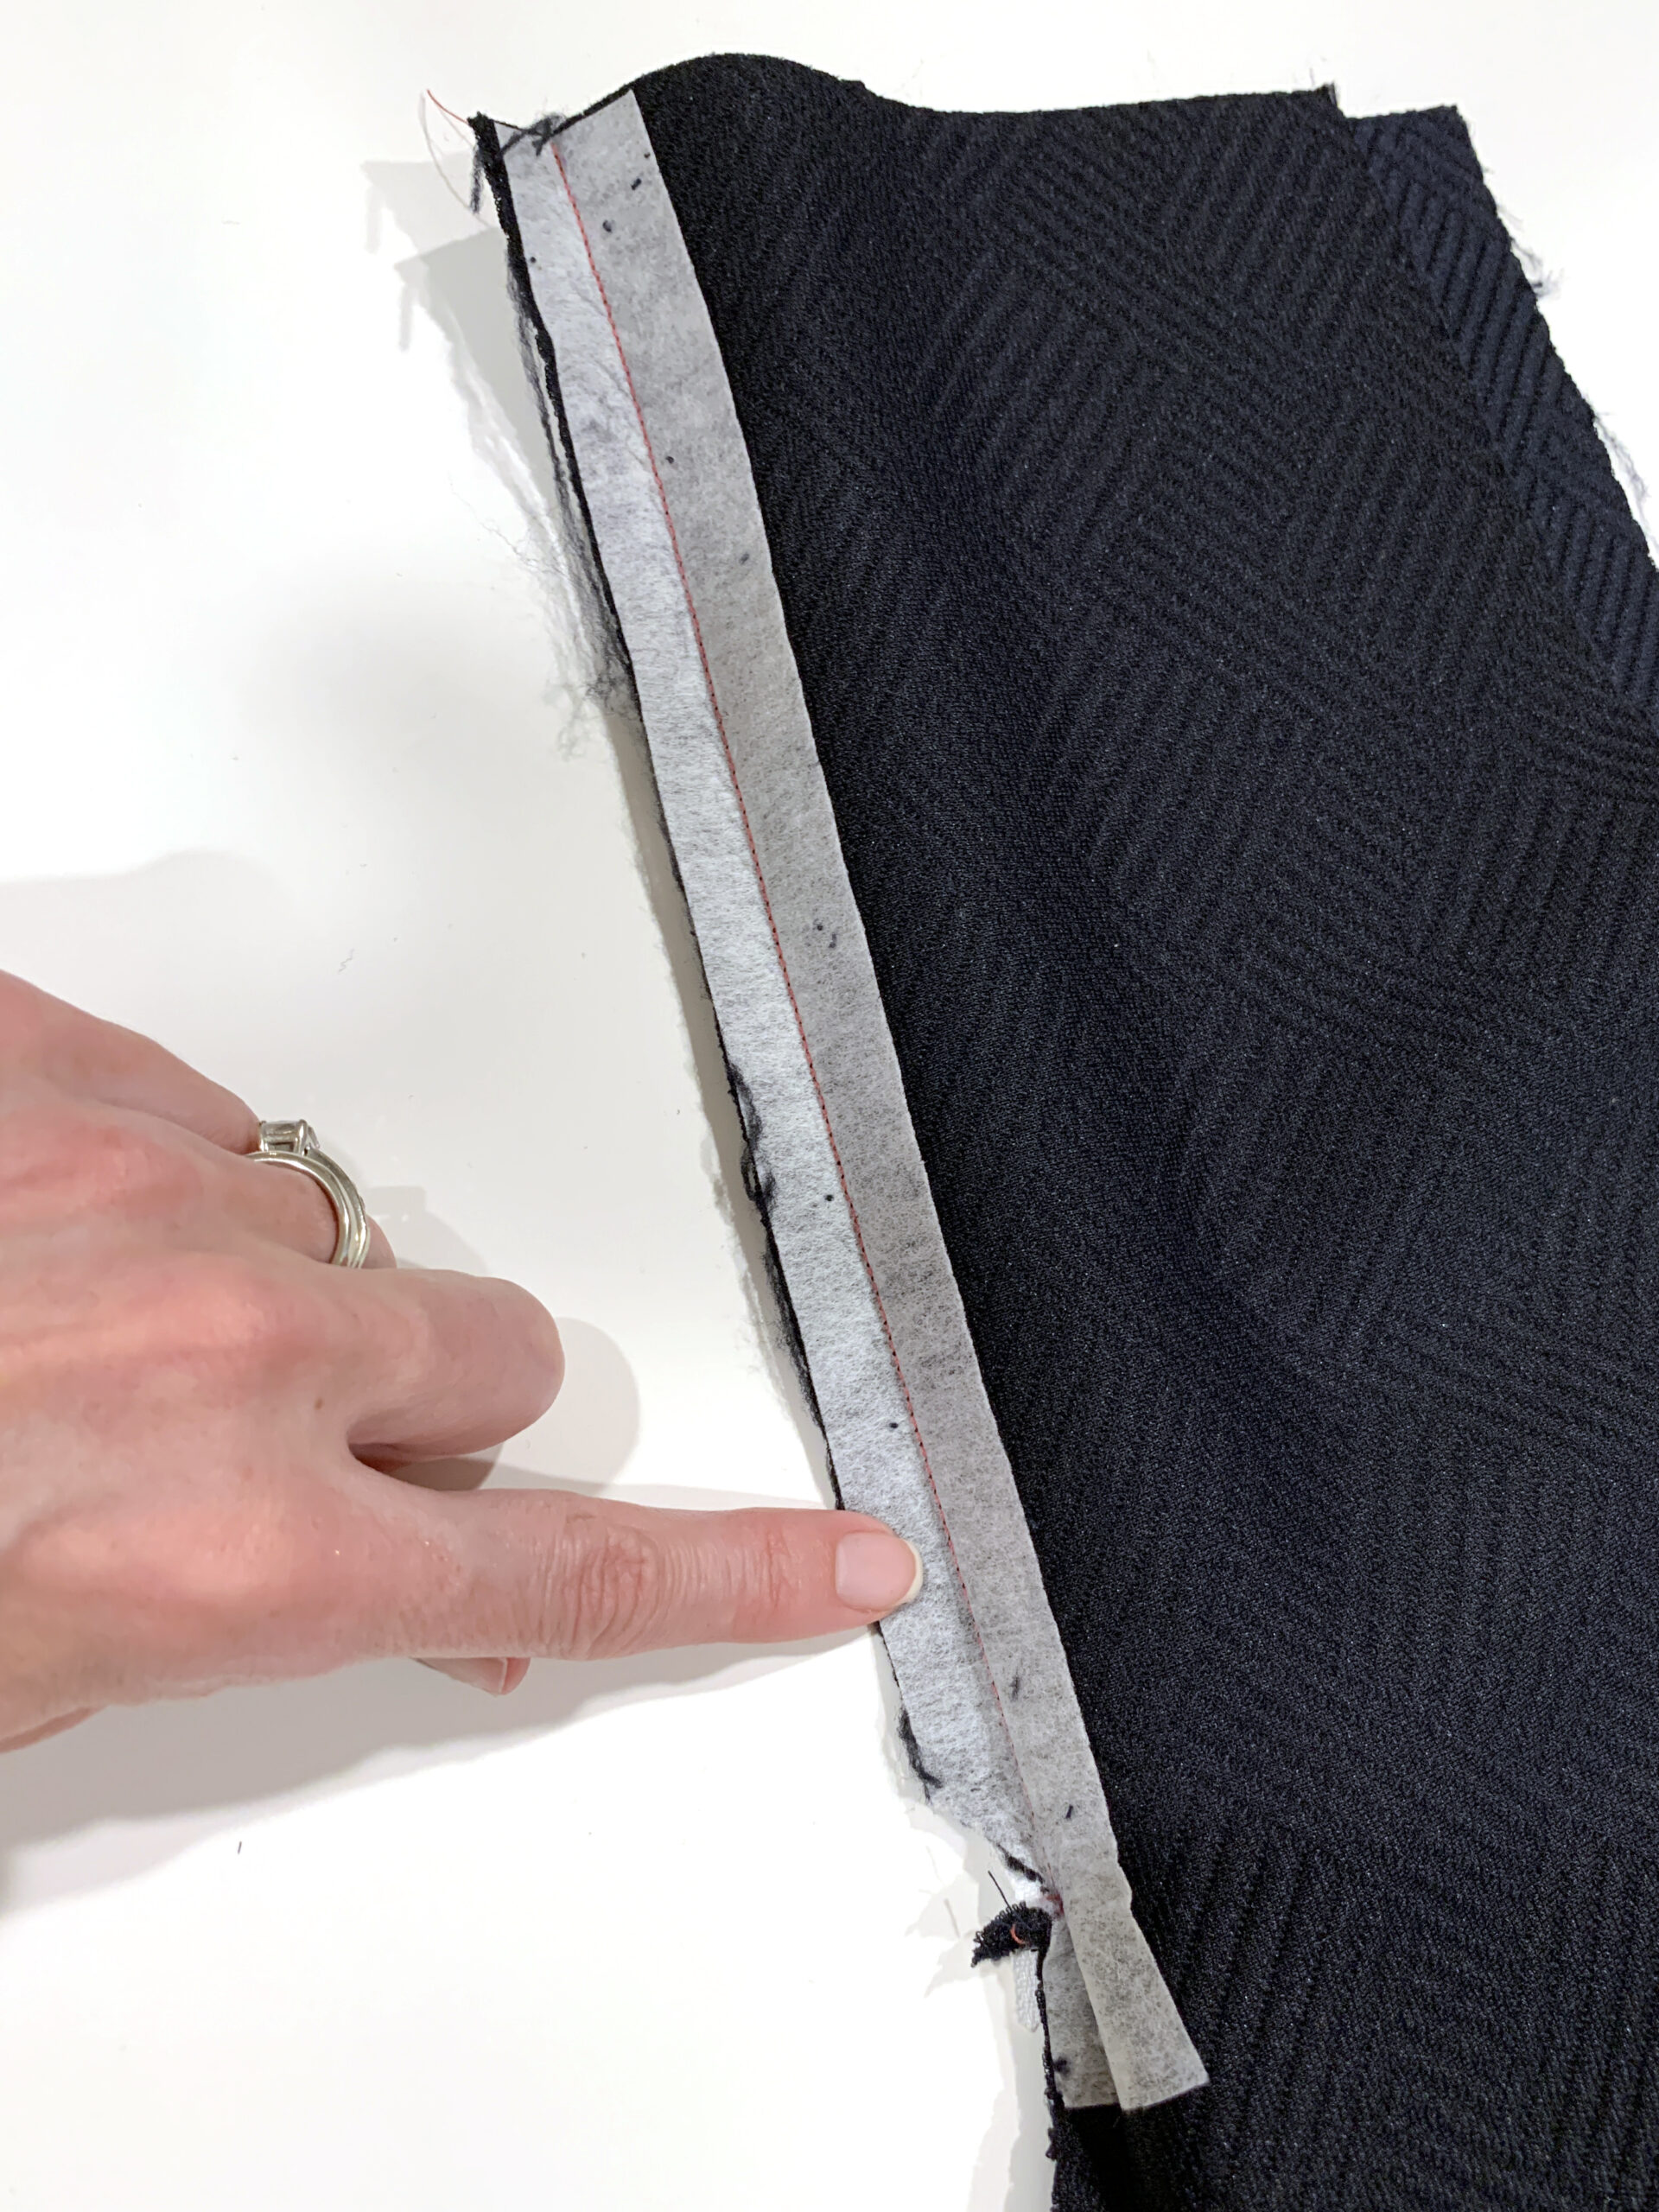
You will need to cut 4 strips of interfacing the length of your zipper tape, with each strip being 1” wide.

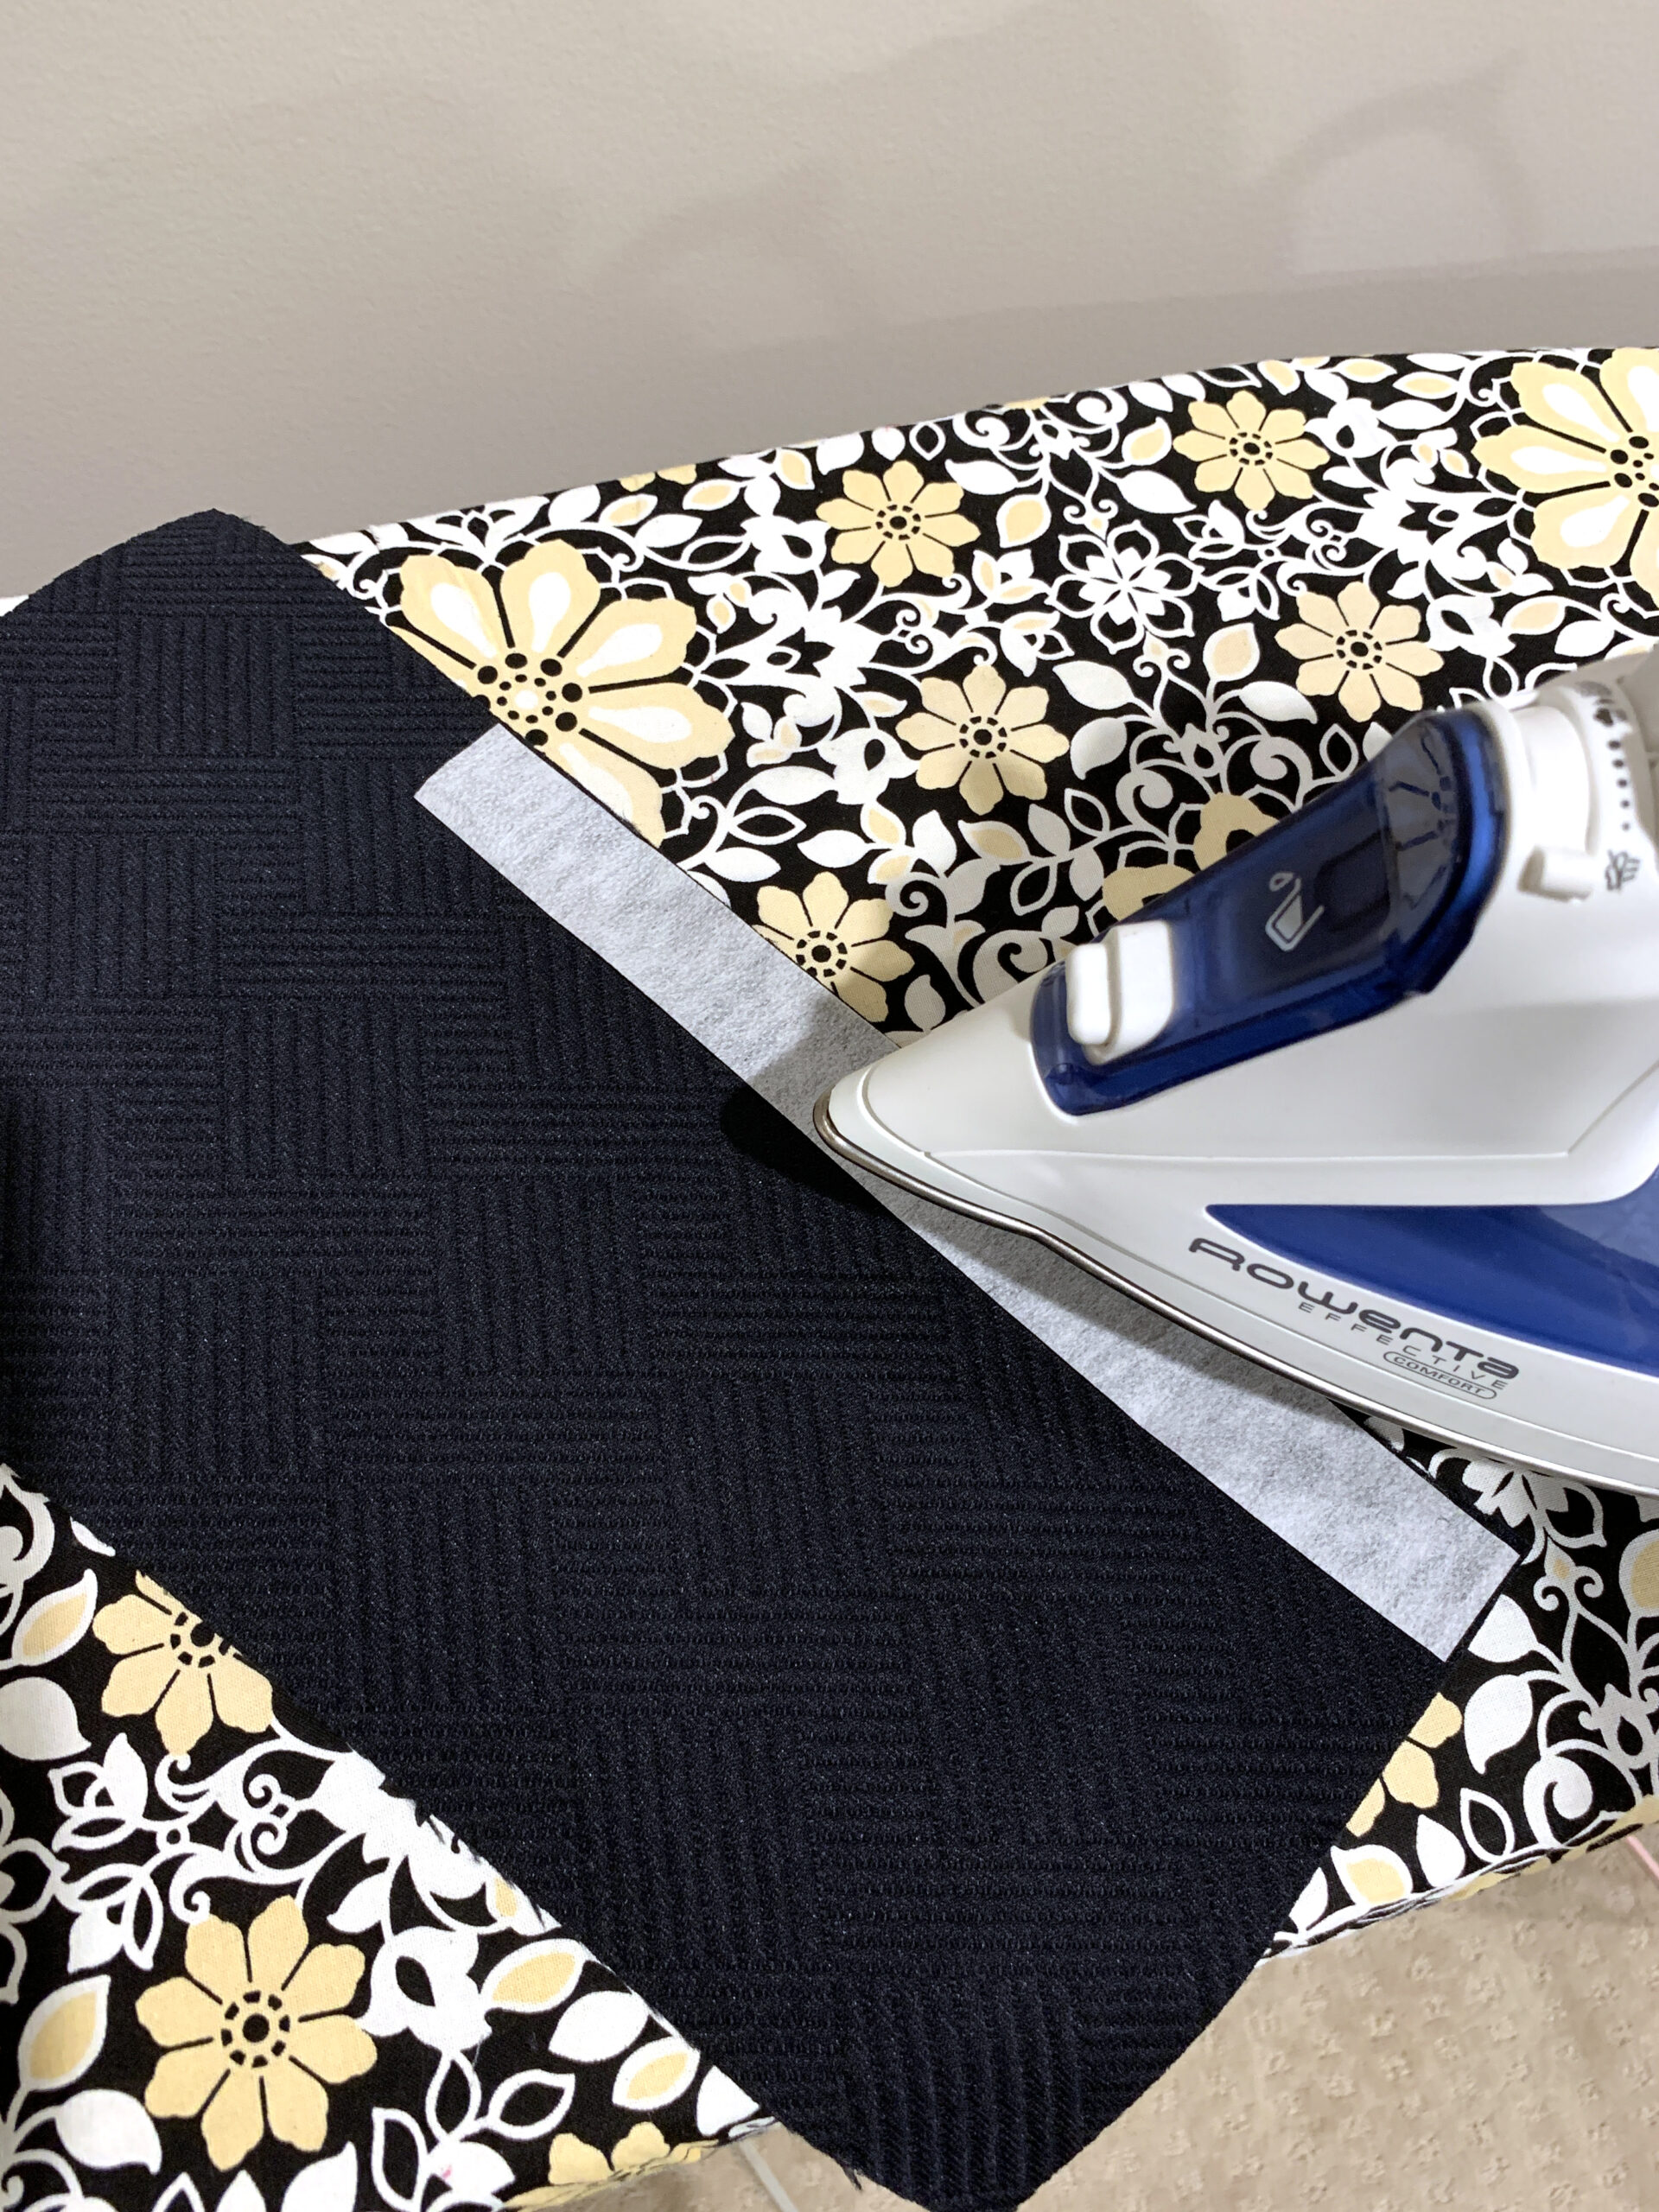
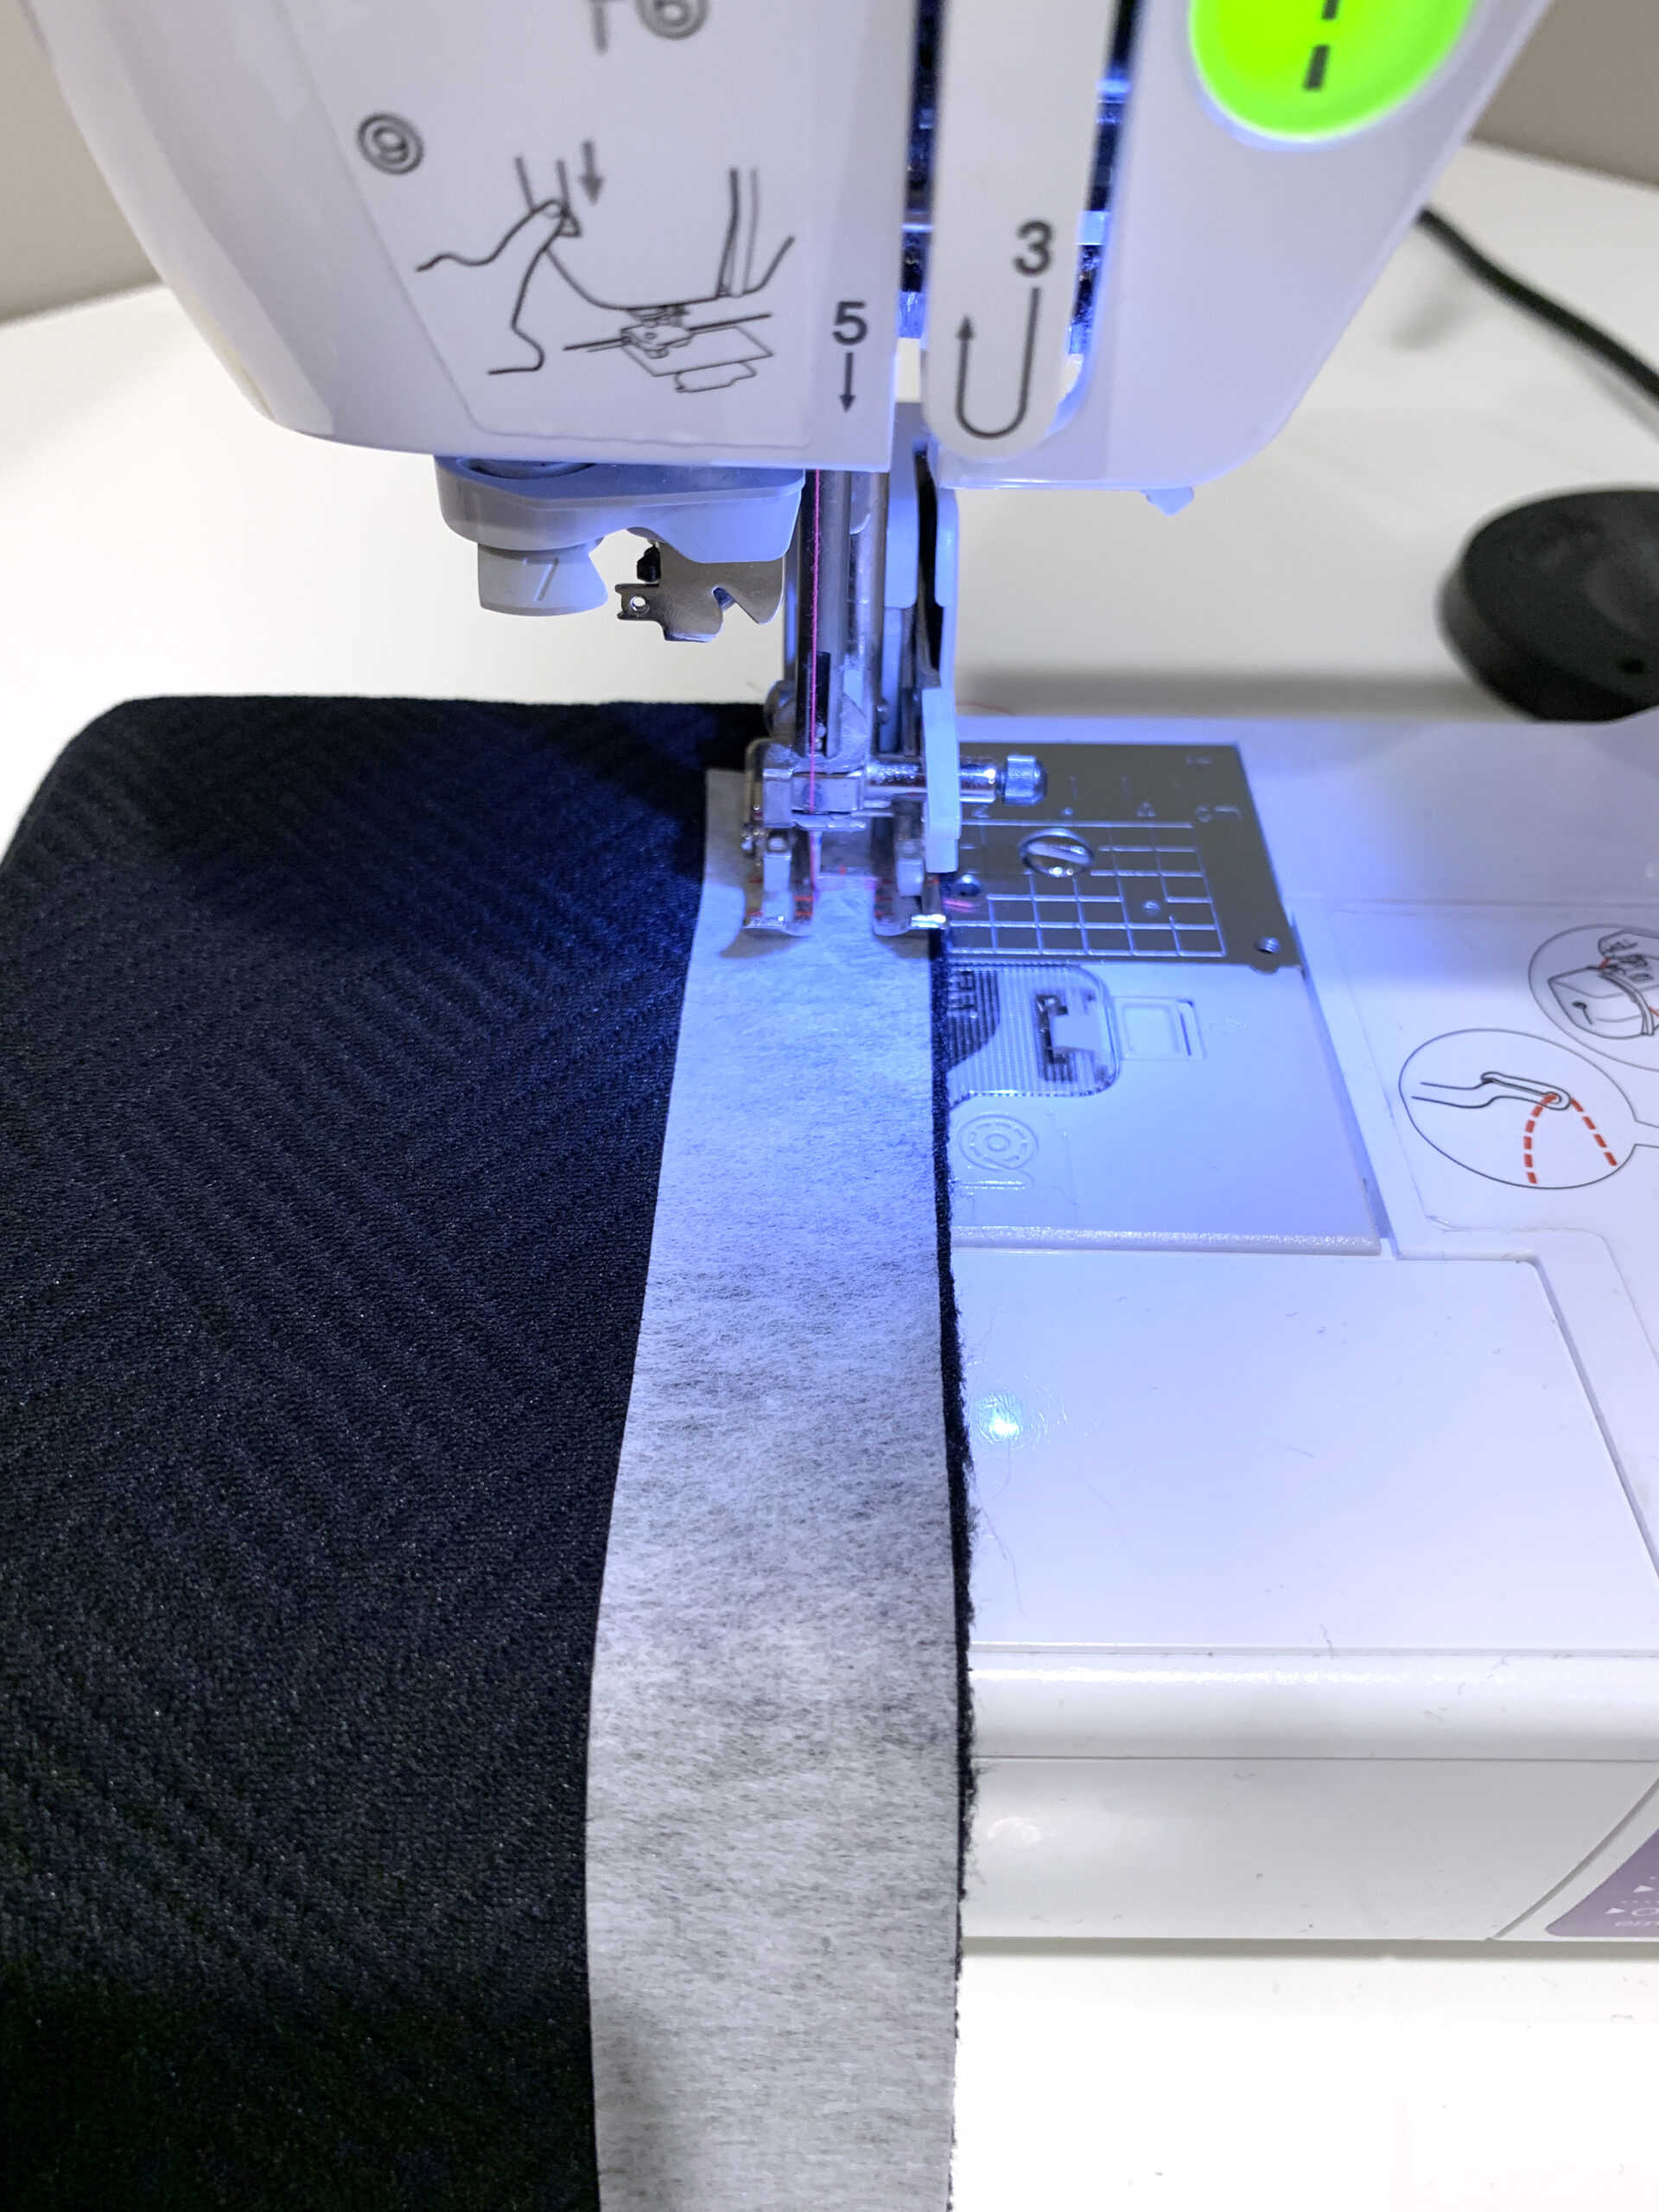
You will then iron your interfacing onto wrong side of the bottom outside seam, as shown below.

Marking Zipper Placement
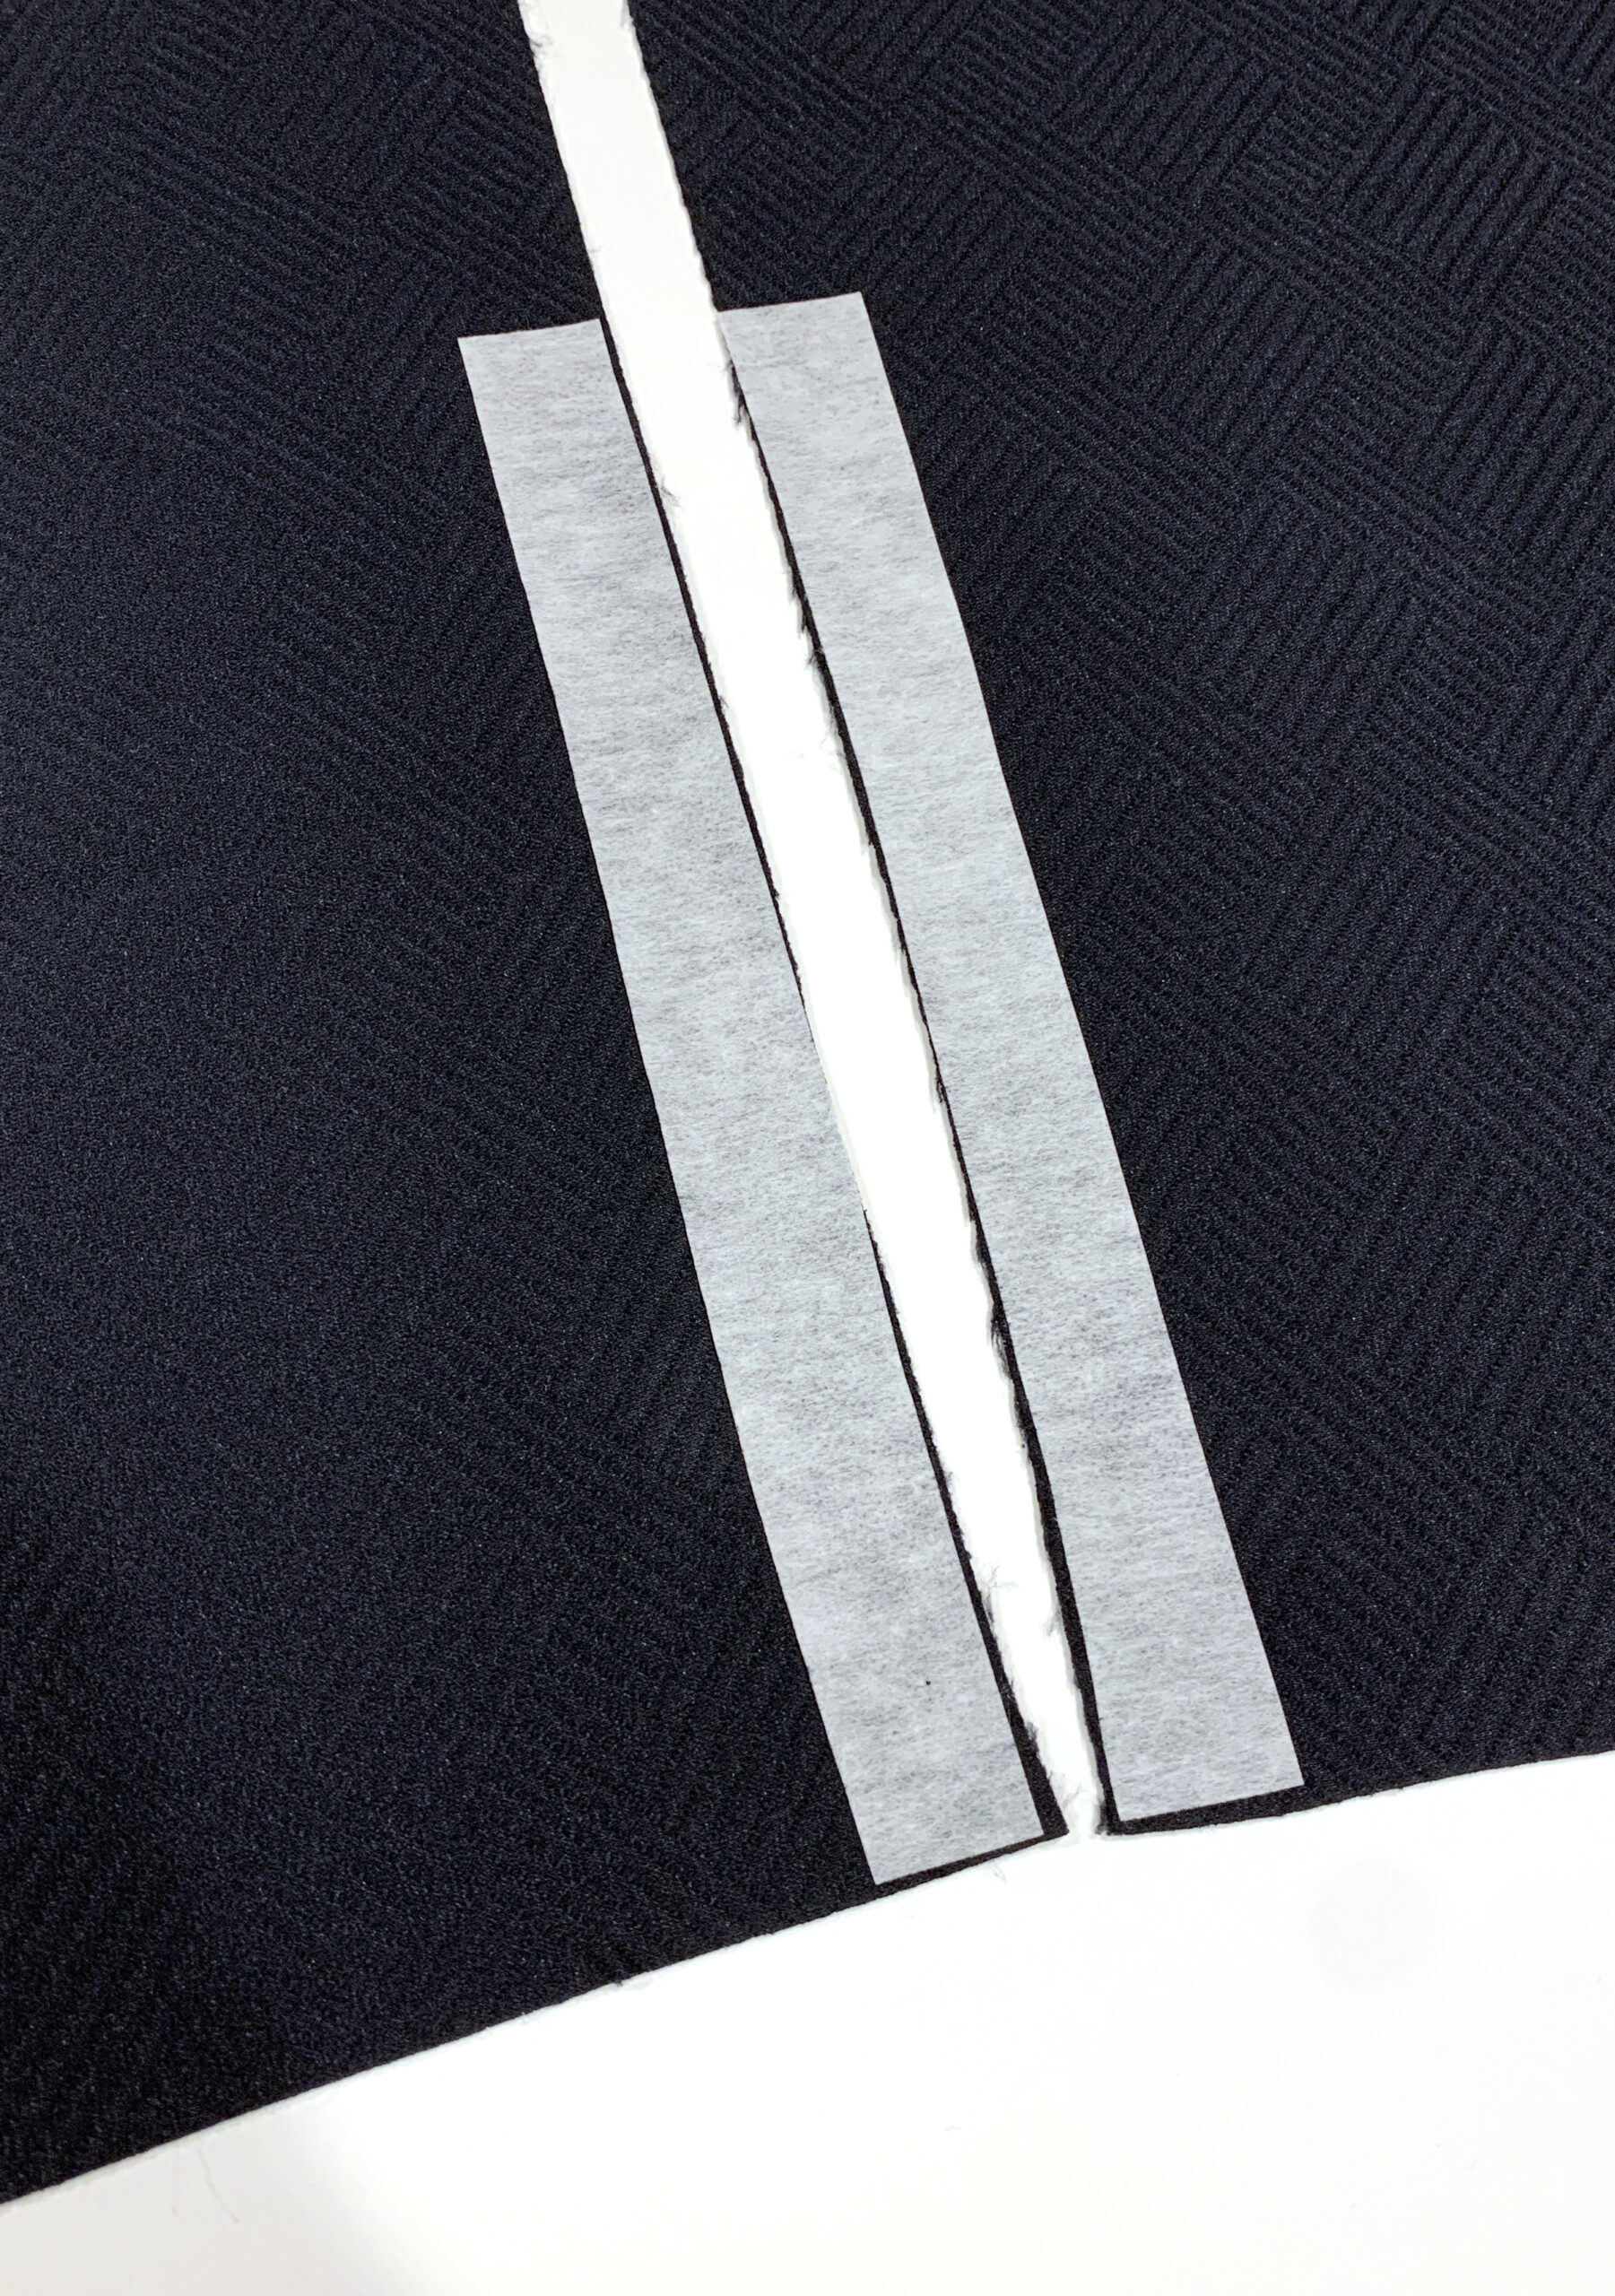
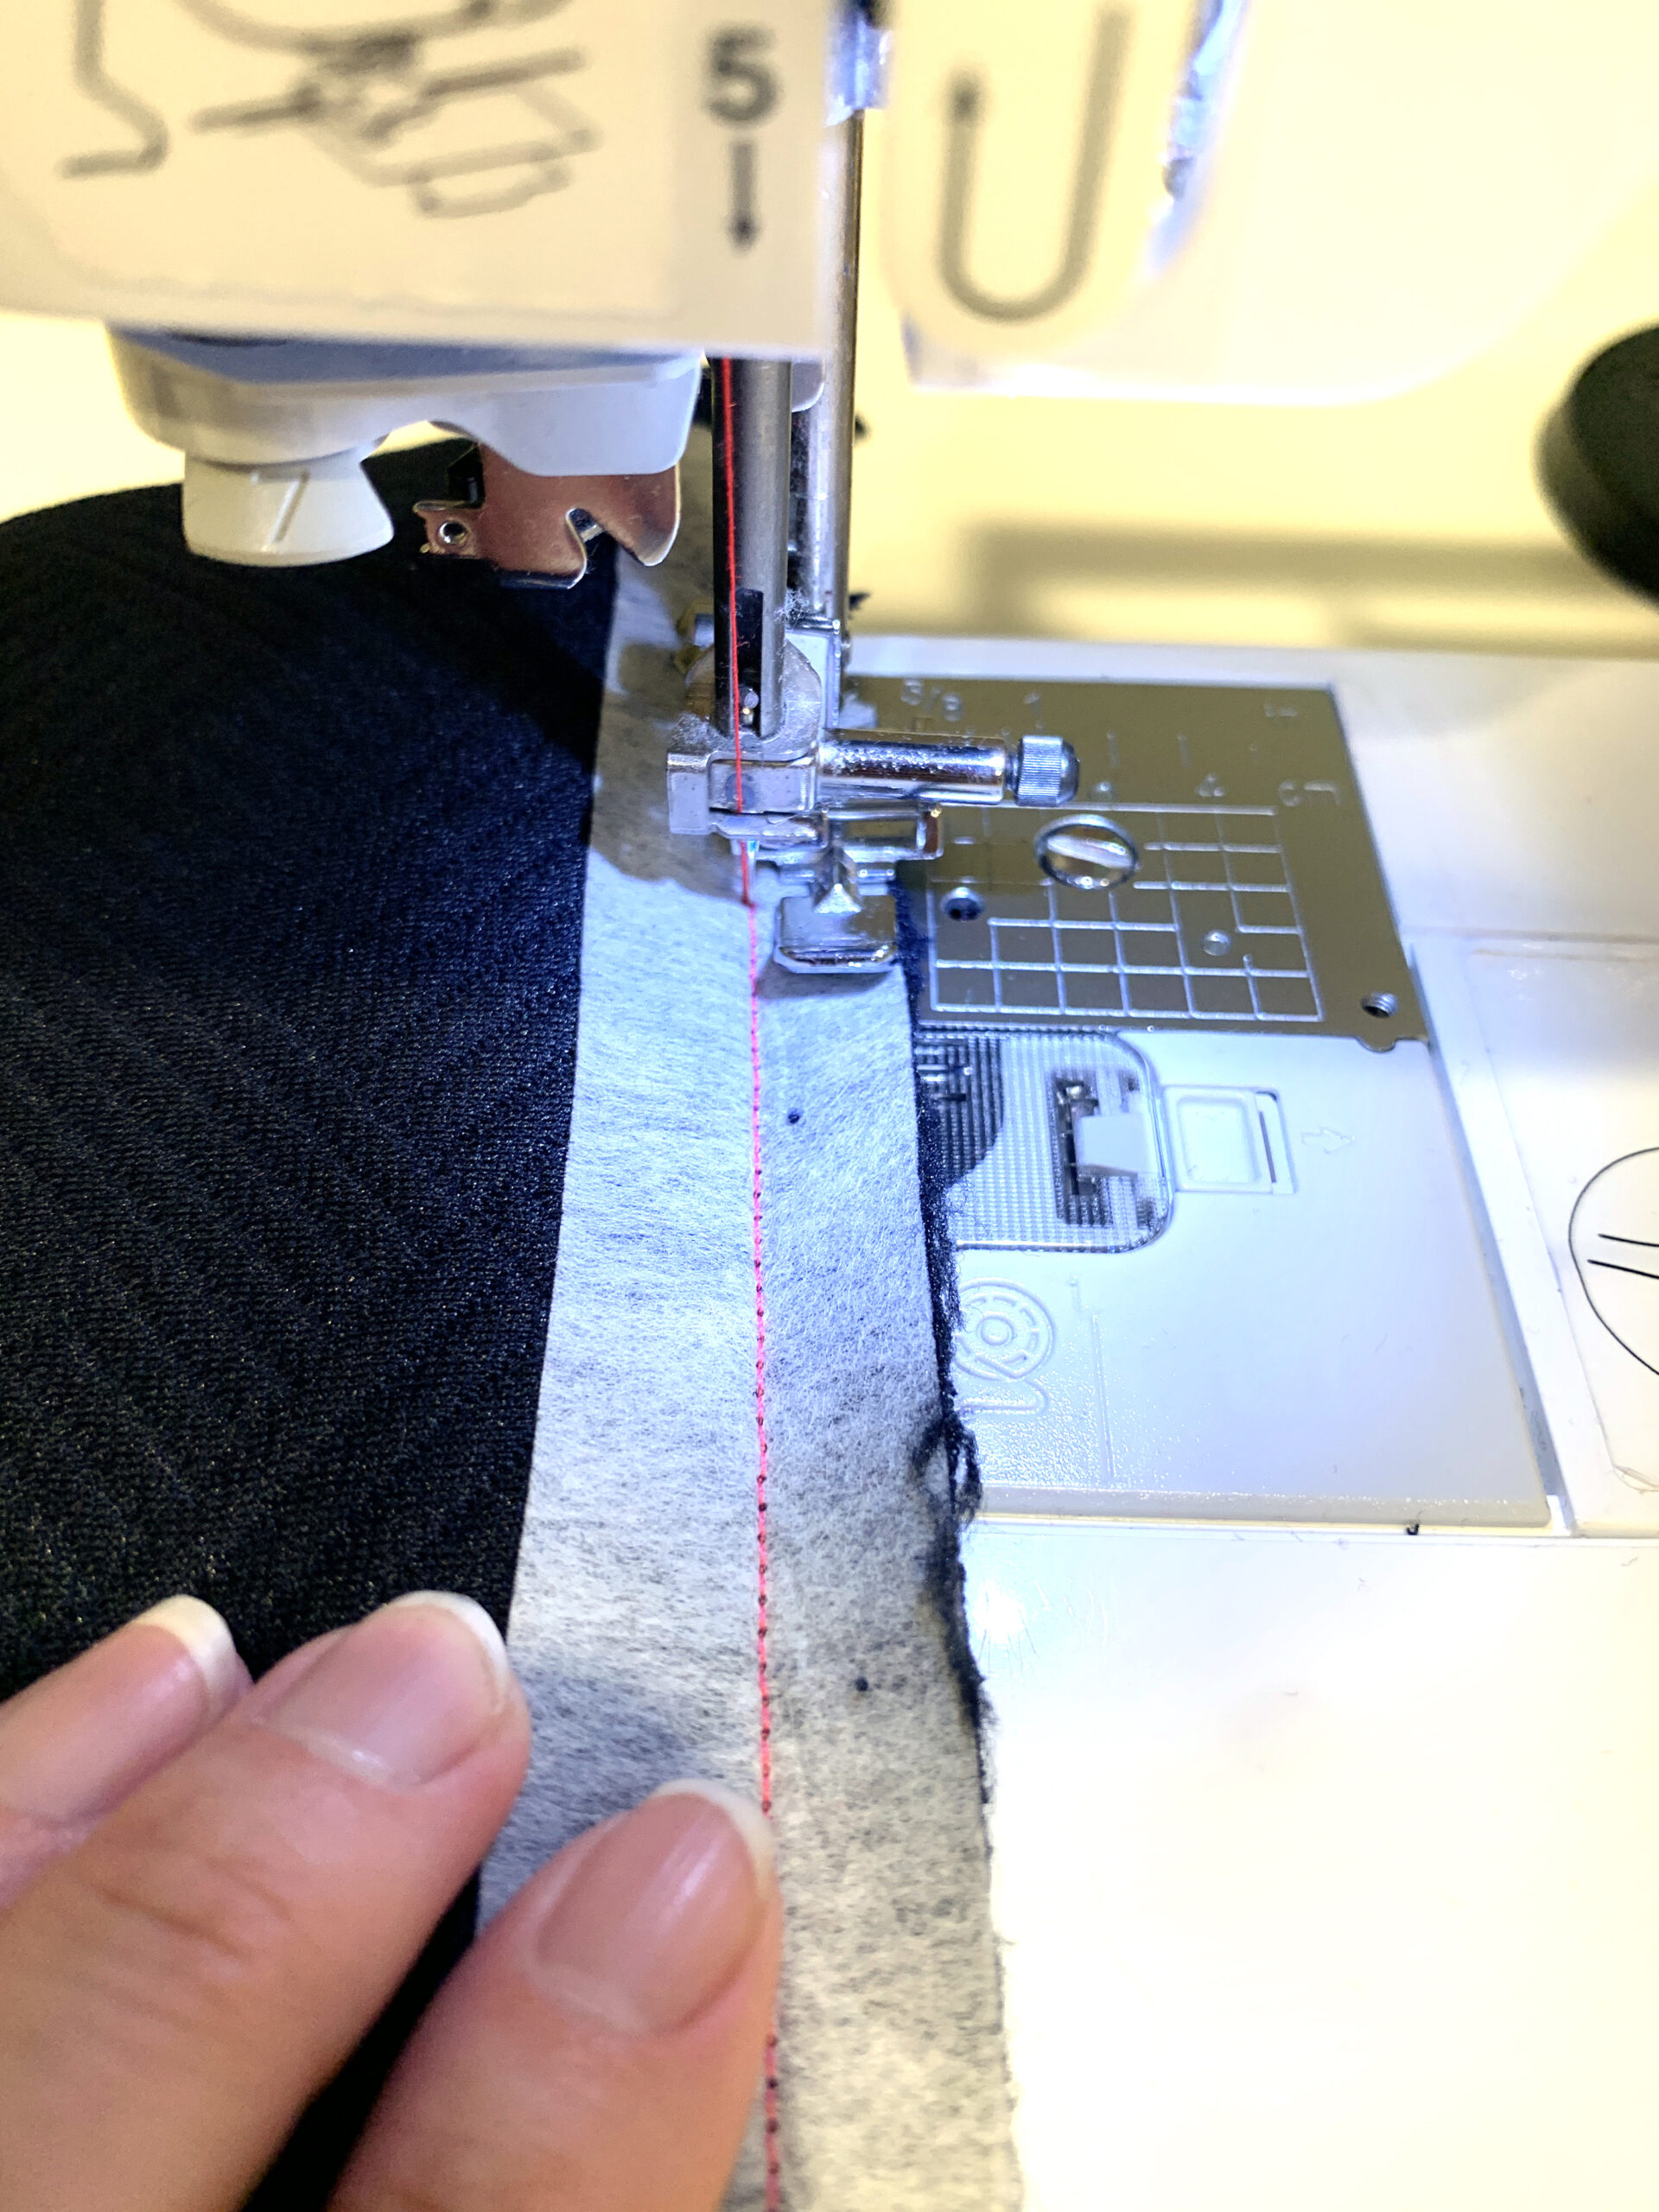
Next you will need to mark the zipper placement. Placing your zipper onto the interfacing and aligning the edge of the zipper tape to the bottom edge of the joggers, mark where the zipper stop is on to the interfacing. Then, using that as the starting point, mark a rectangle ½” wide from the zipper stop down to the bottom edge. Repeat this exact marking on each of the interfacing pieces.

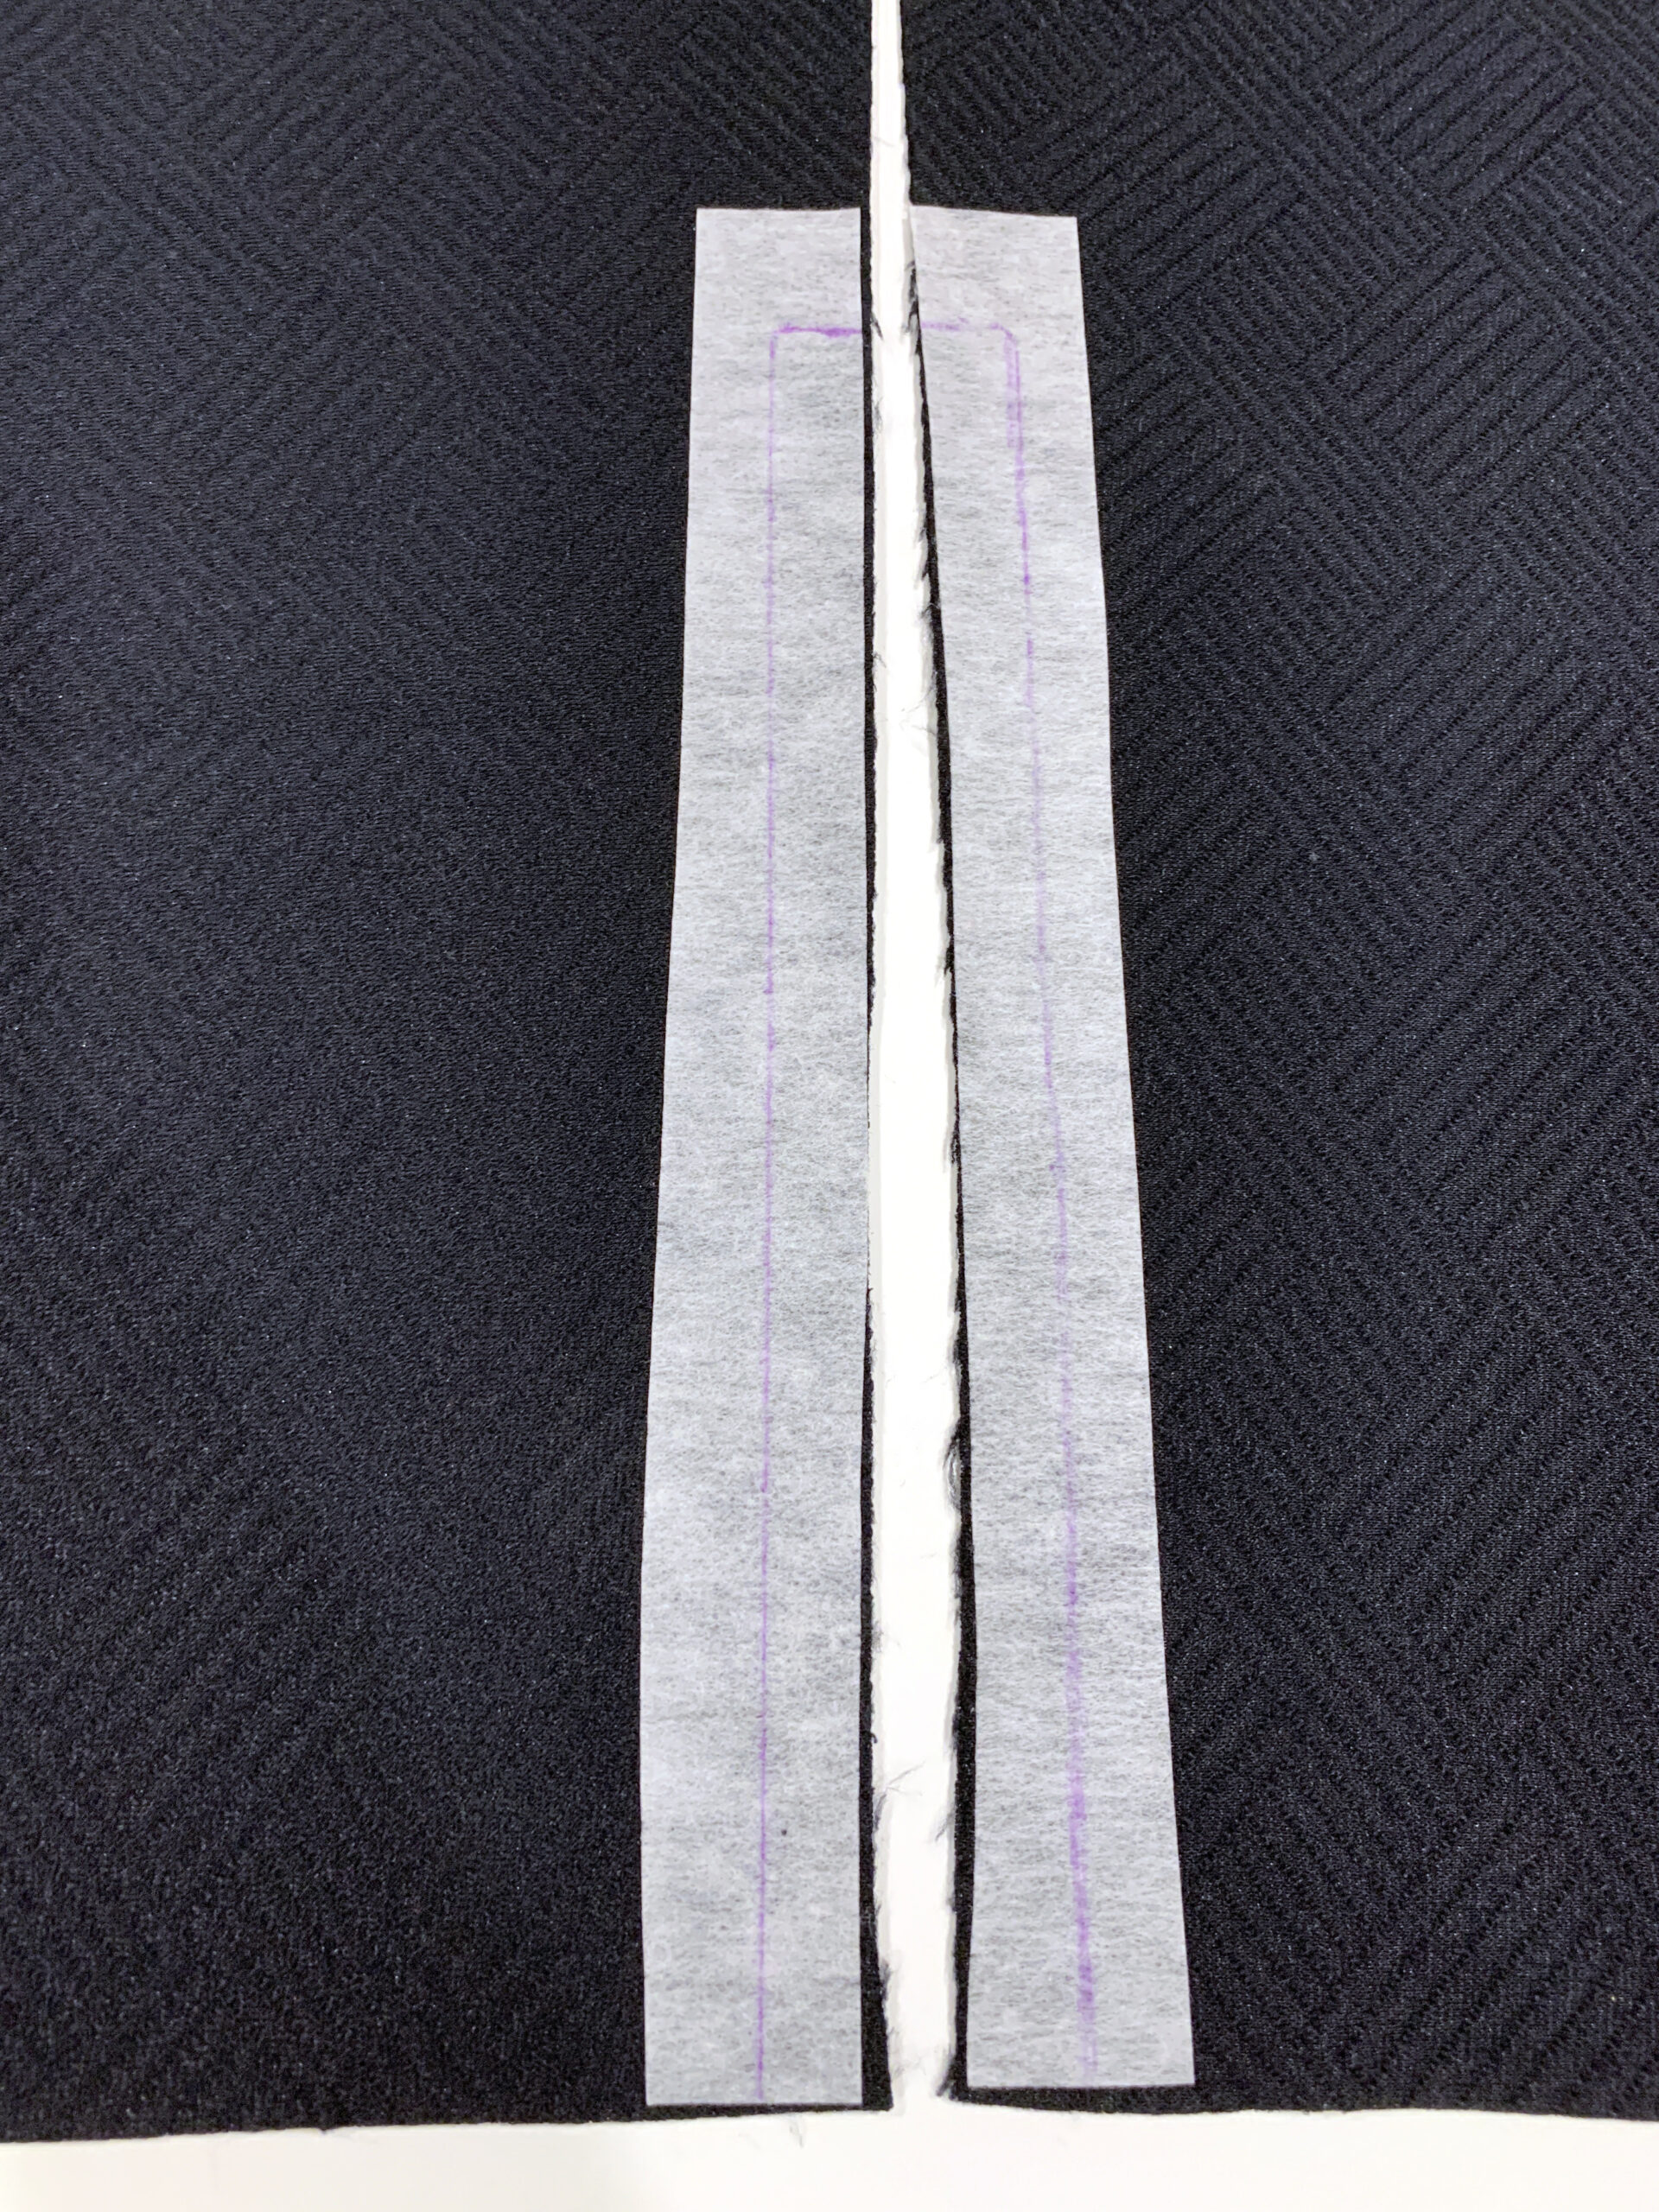
Using your sewing machine, stitch over each of these markings. Snip a triangle into each corner of the interfacing.


Sewing Jogger Legs
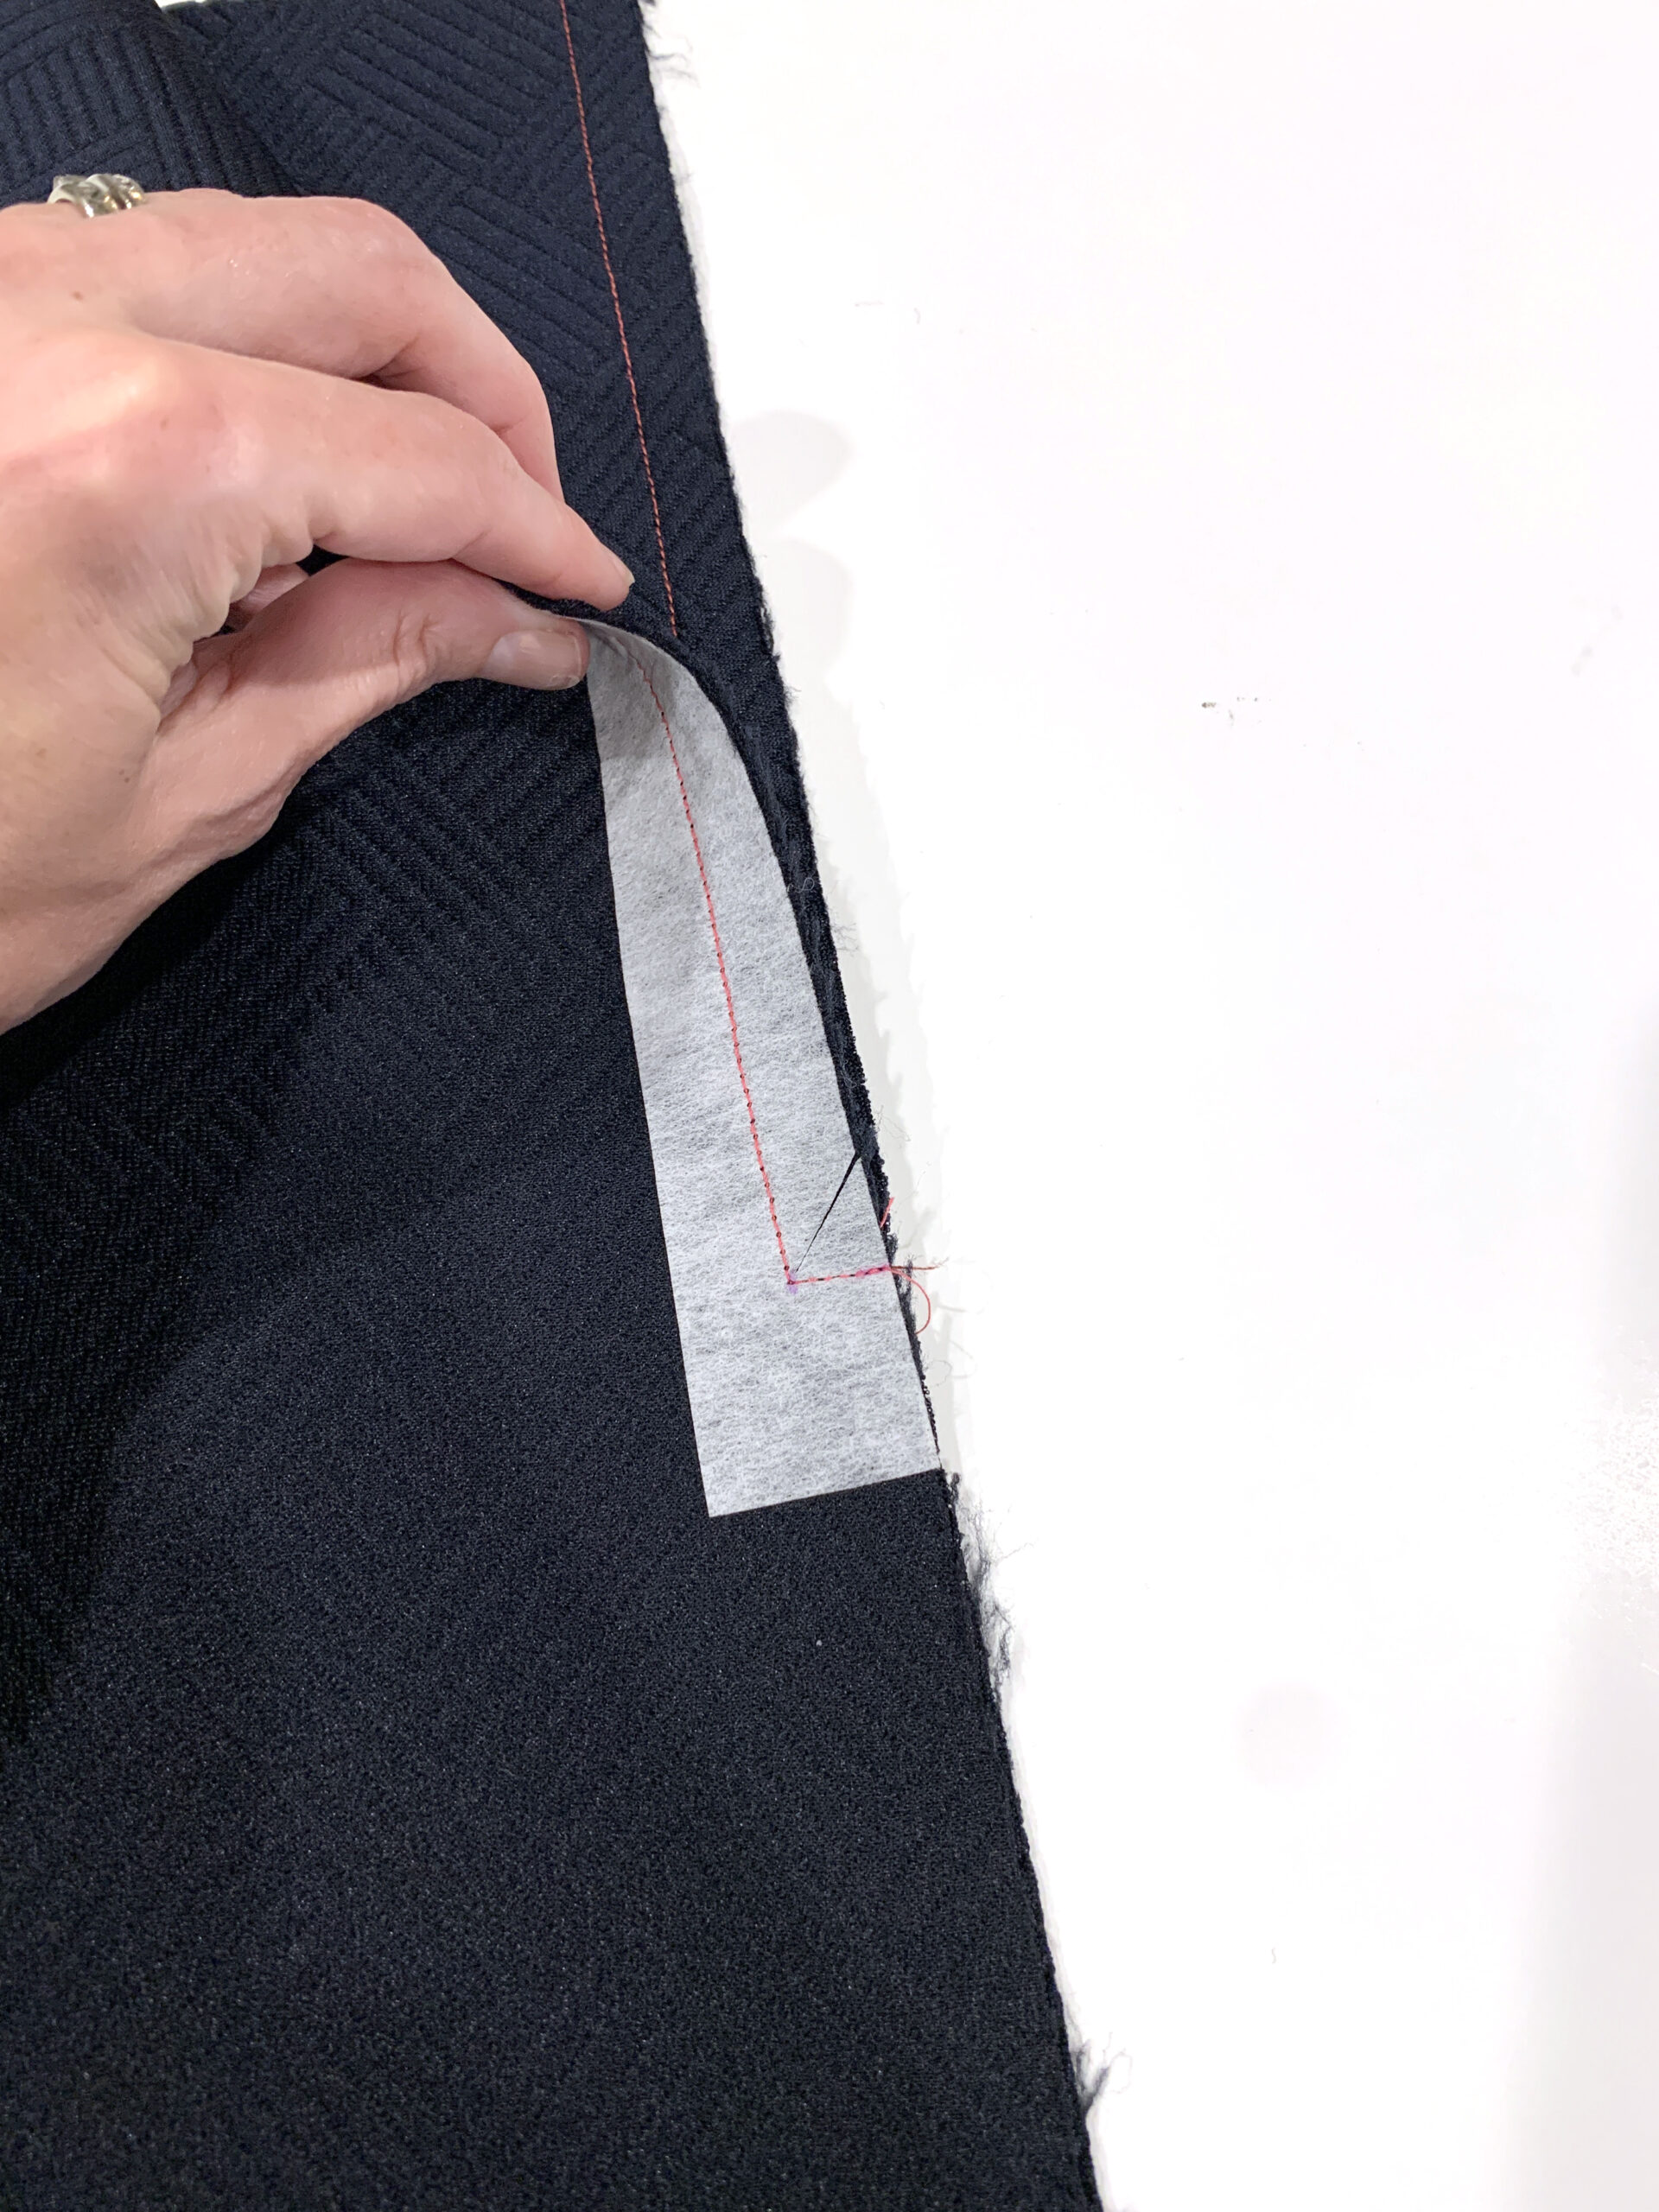
Next, next, you will need to sew the front and back leg pieces together, right sides on the outside seam, stopping at the stitching you’ve just done on the interfacing. Your zipper opening should be wider than the seam allowance you just sewed! Now, open up that seam you just finished sewing and press it open flat.
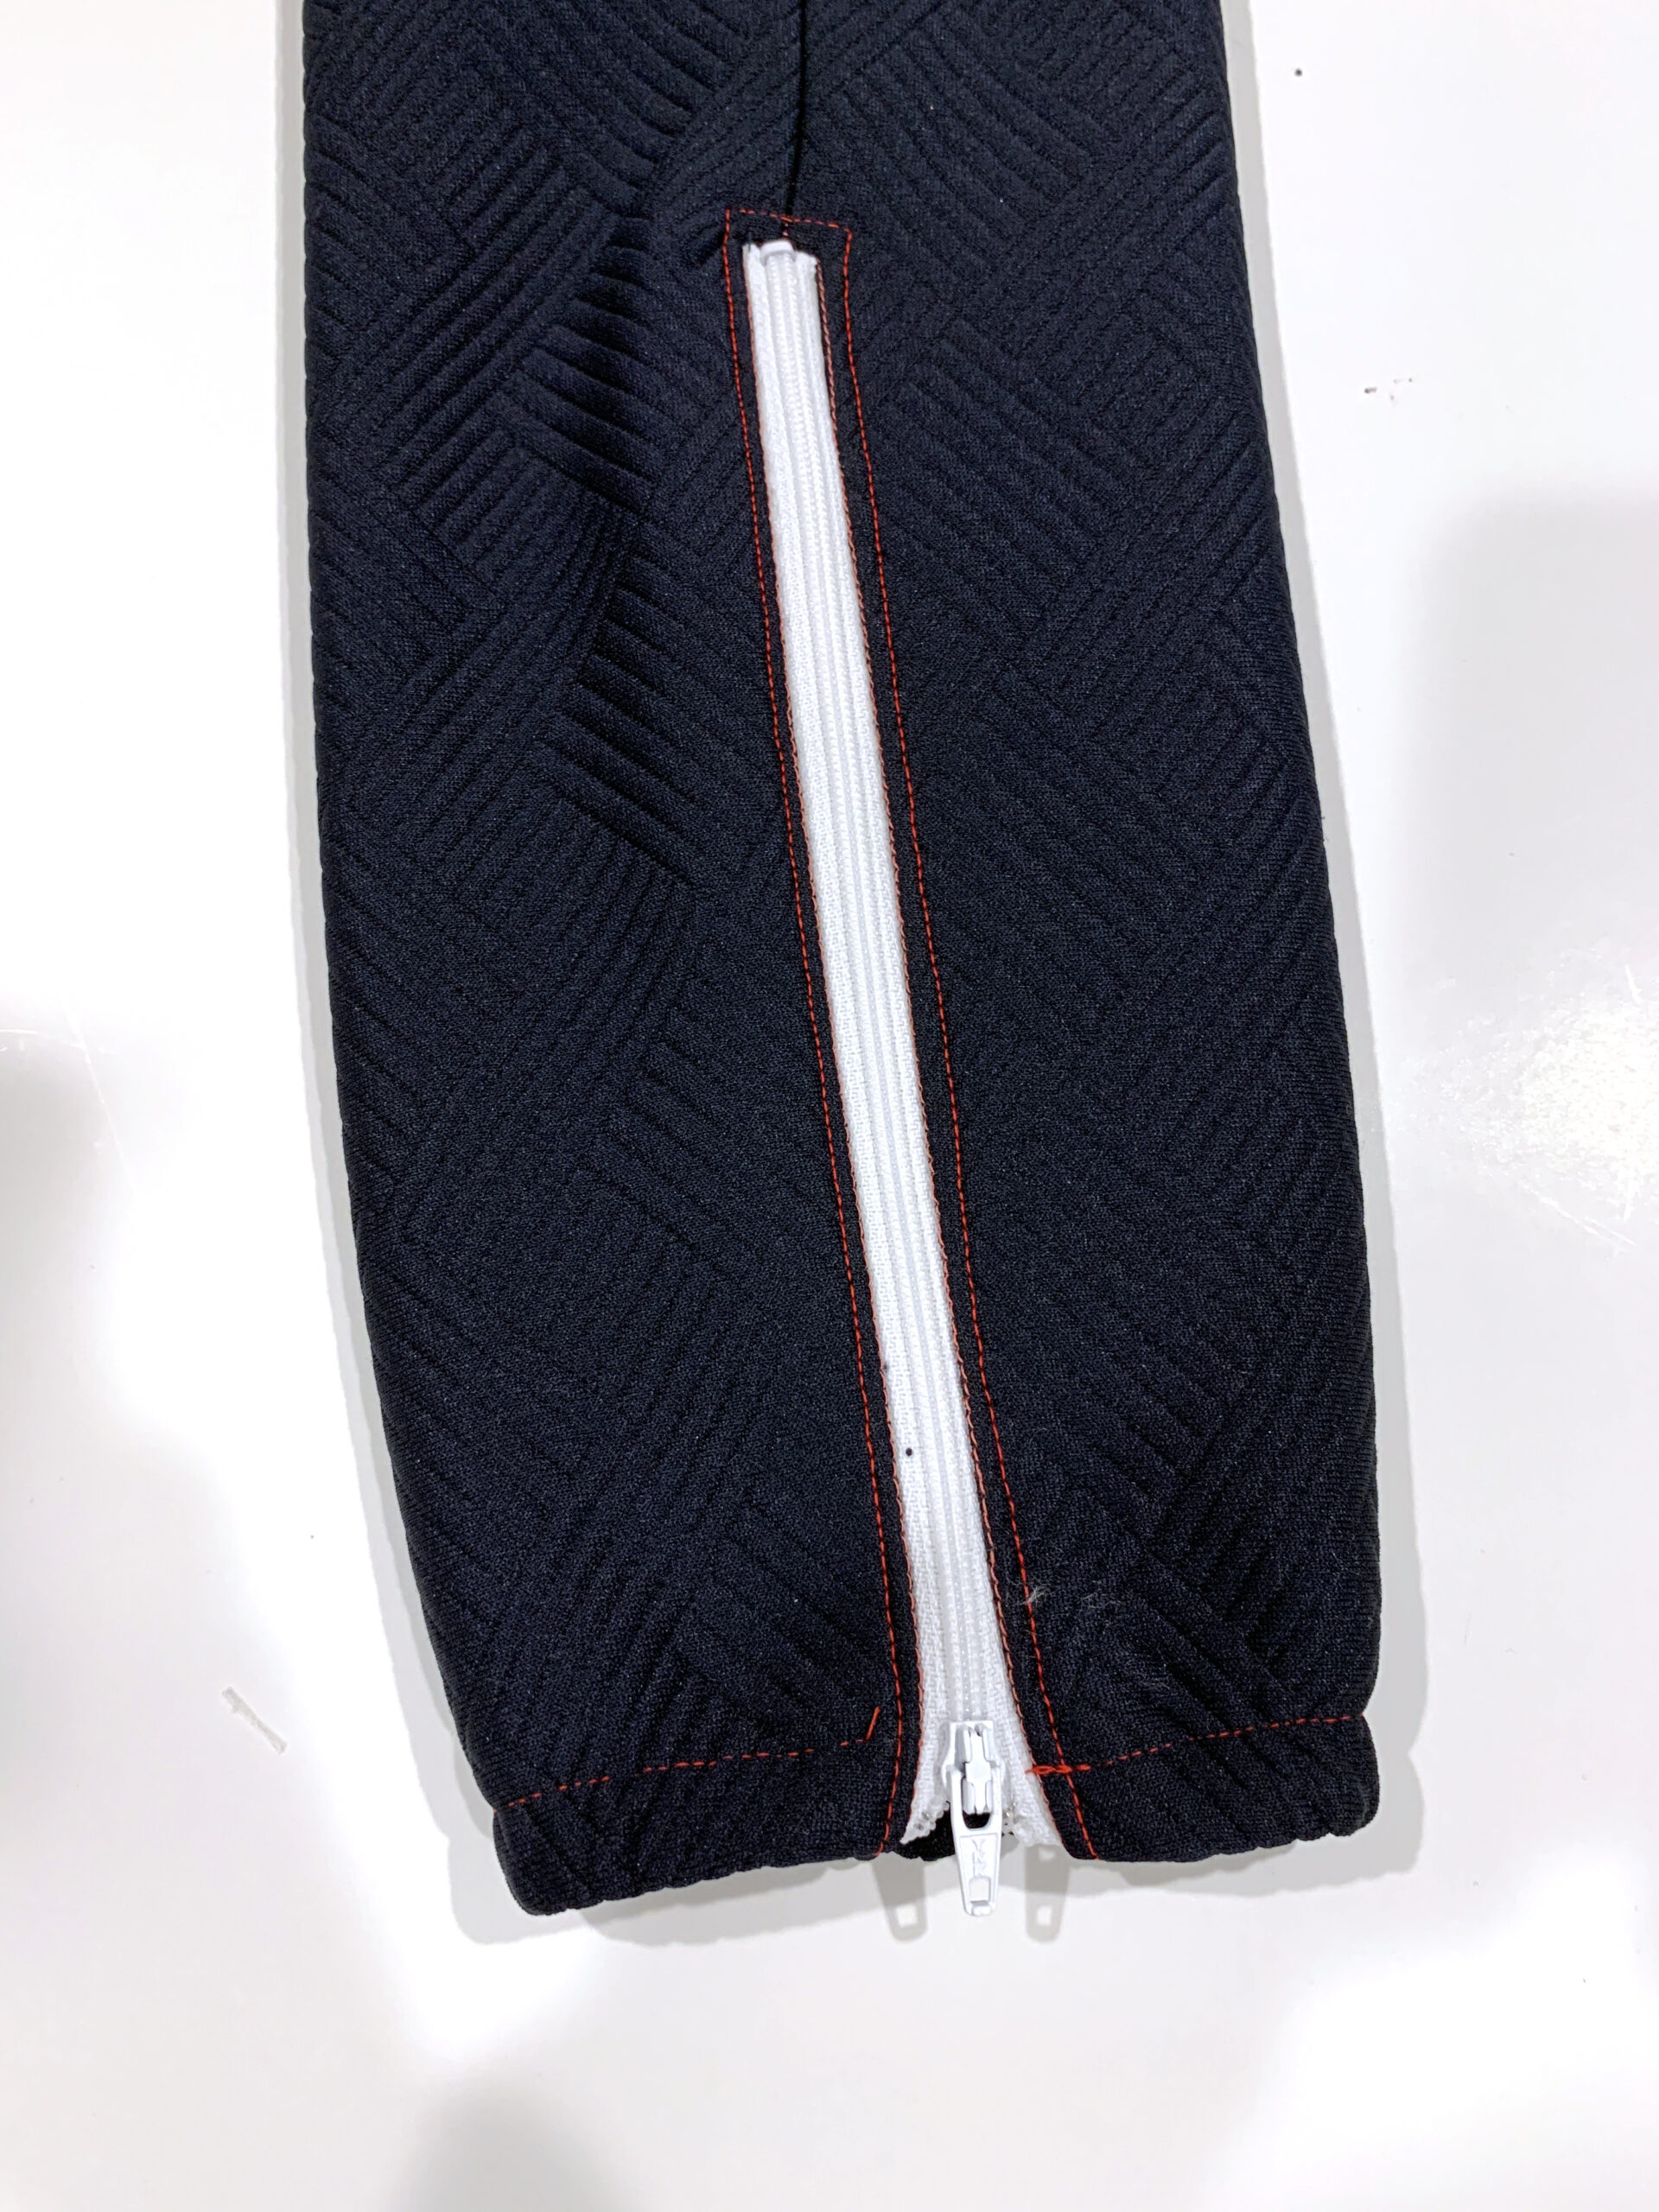
Adding the Zipper
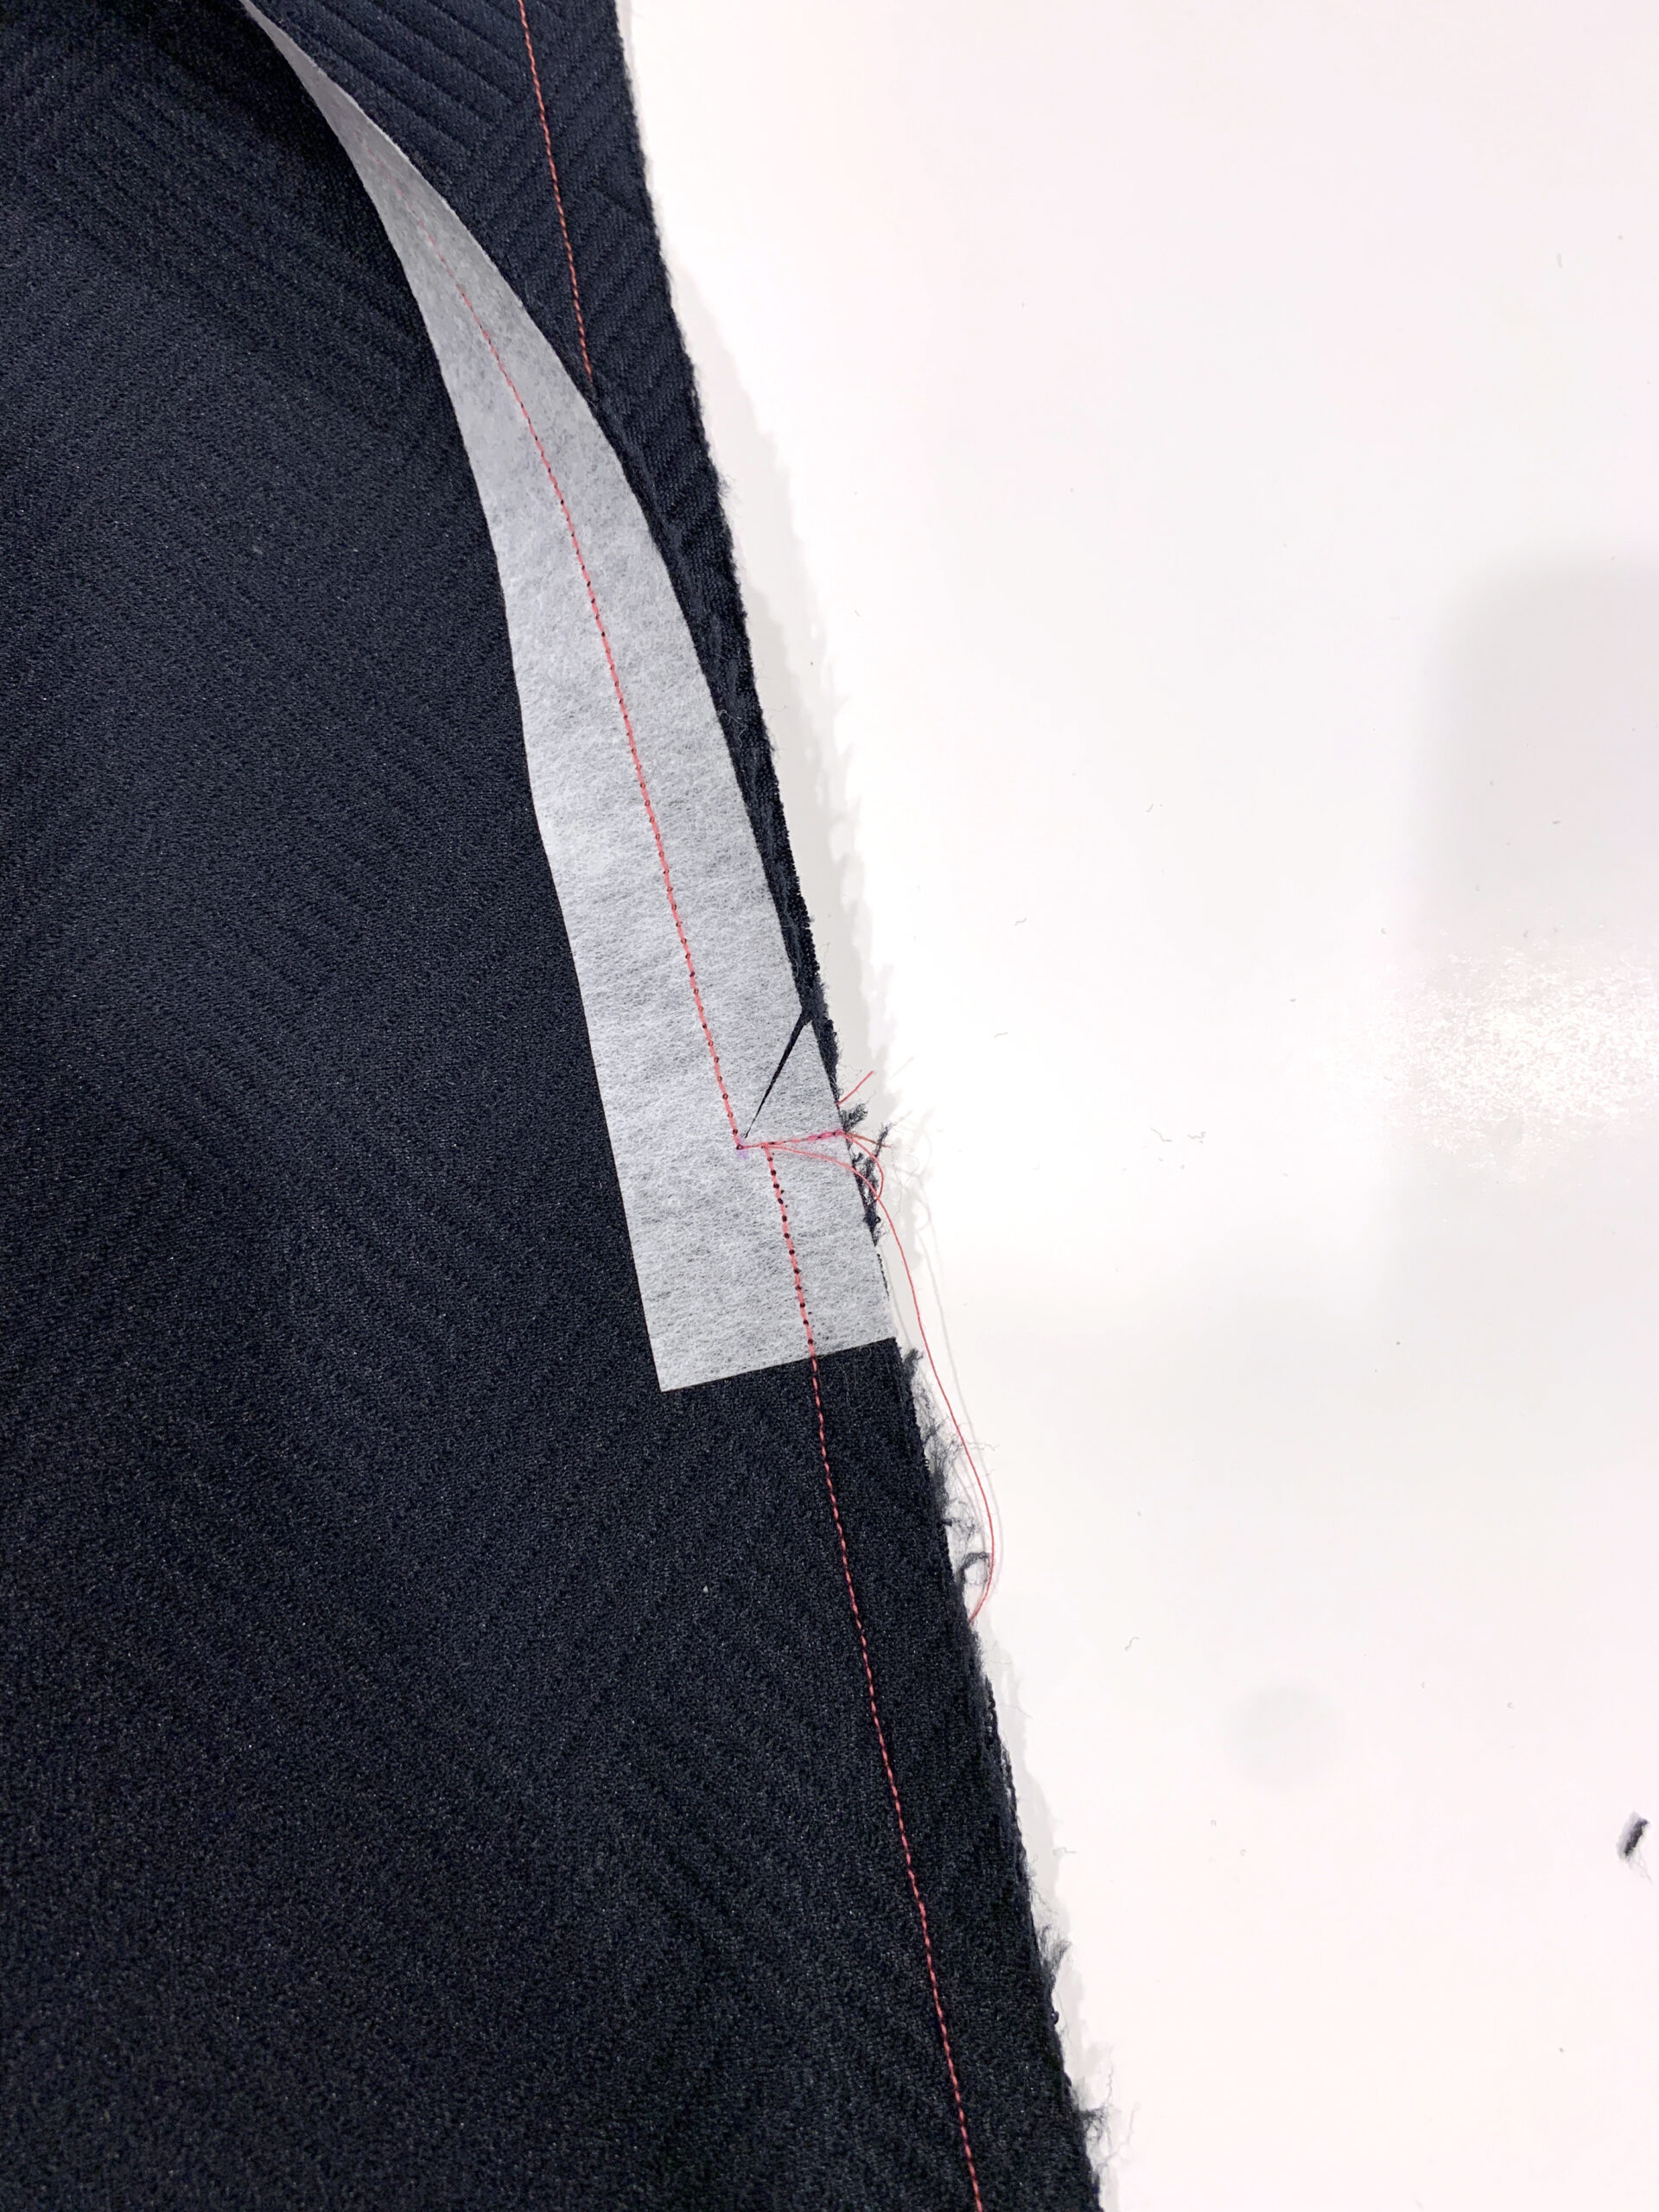
You will now take your zipper, and place it RIGHT side down onto the RIGHT side of the pants, with the zipper stop just above the opening, and the zipper facing UP towards the top of the pants. Stitch the zipper in place along the previous stitching. I prefer to stitch this by hand to make sure it doesn’t shift and so I don’t break a needle by hitting my zipper stop on accident. Make sure you only stitch overtop of the previous stitches, and do not go further outside the opening.
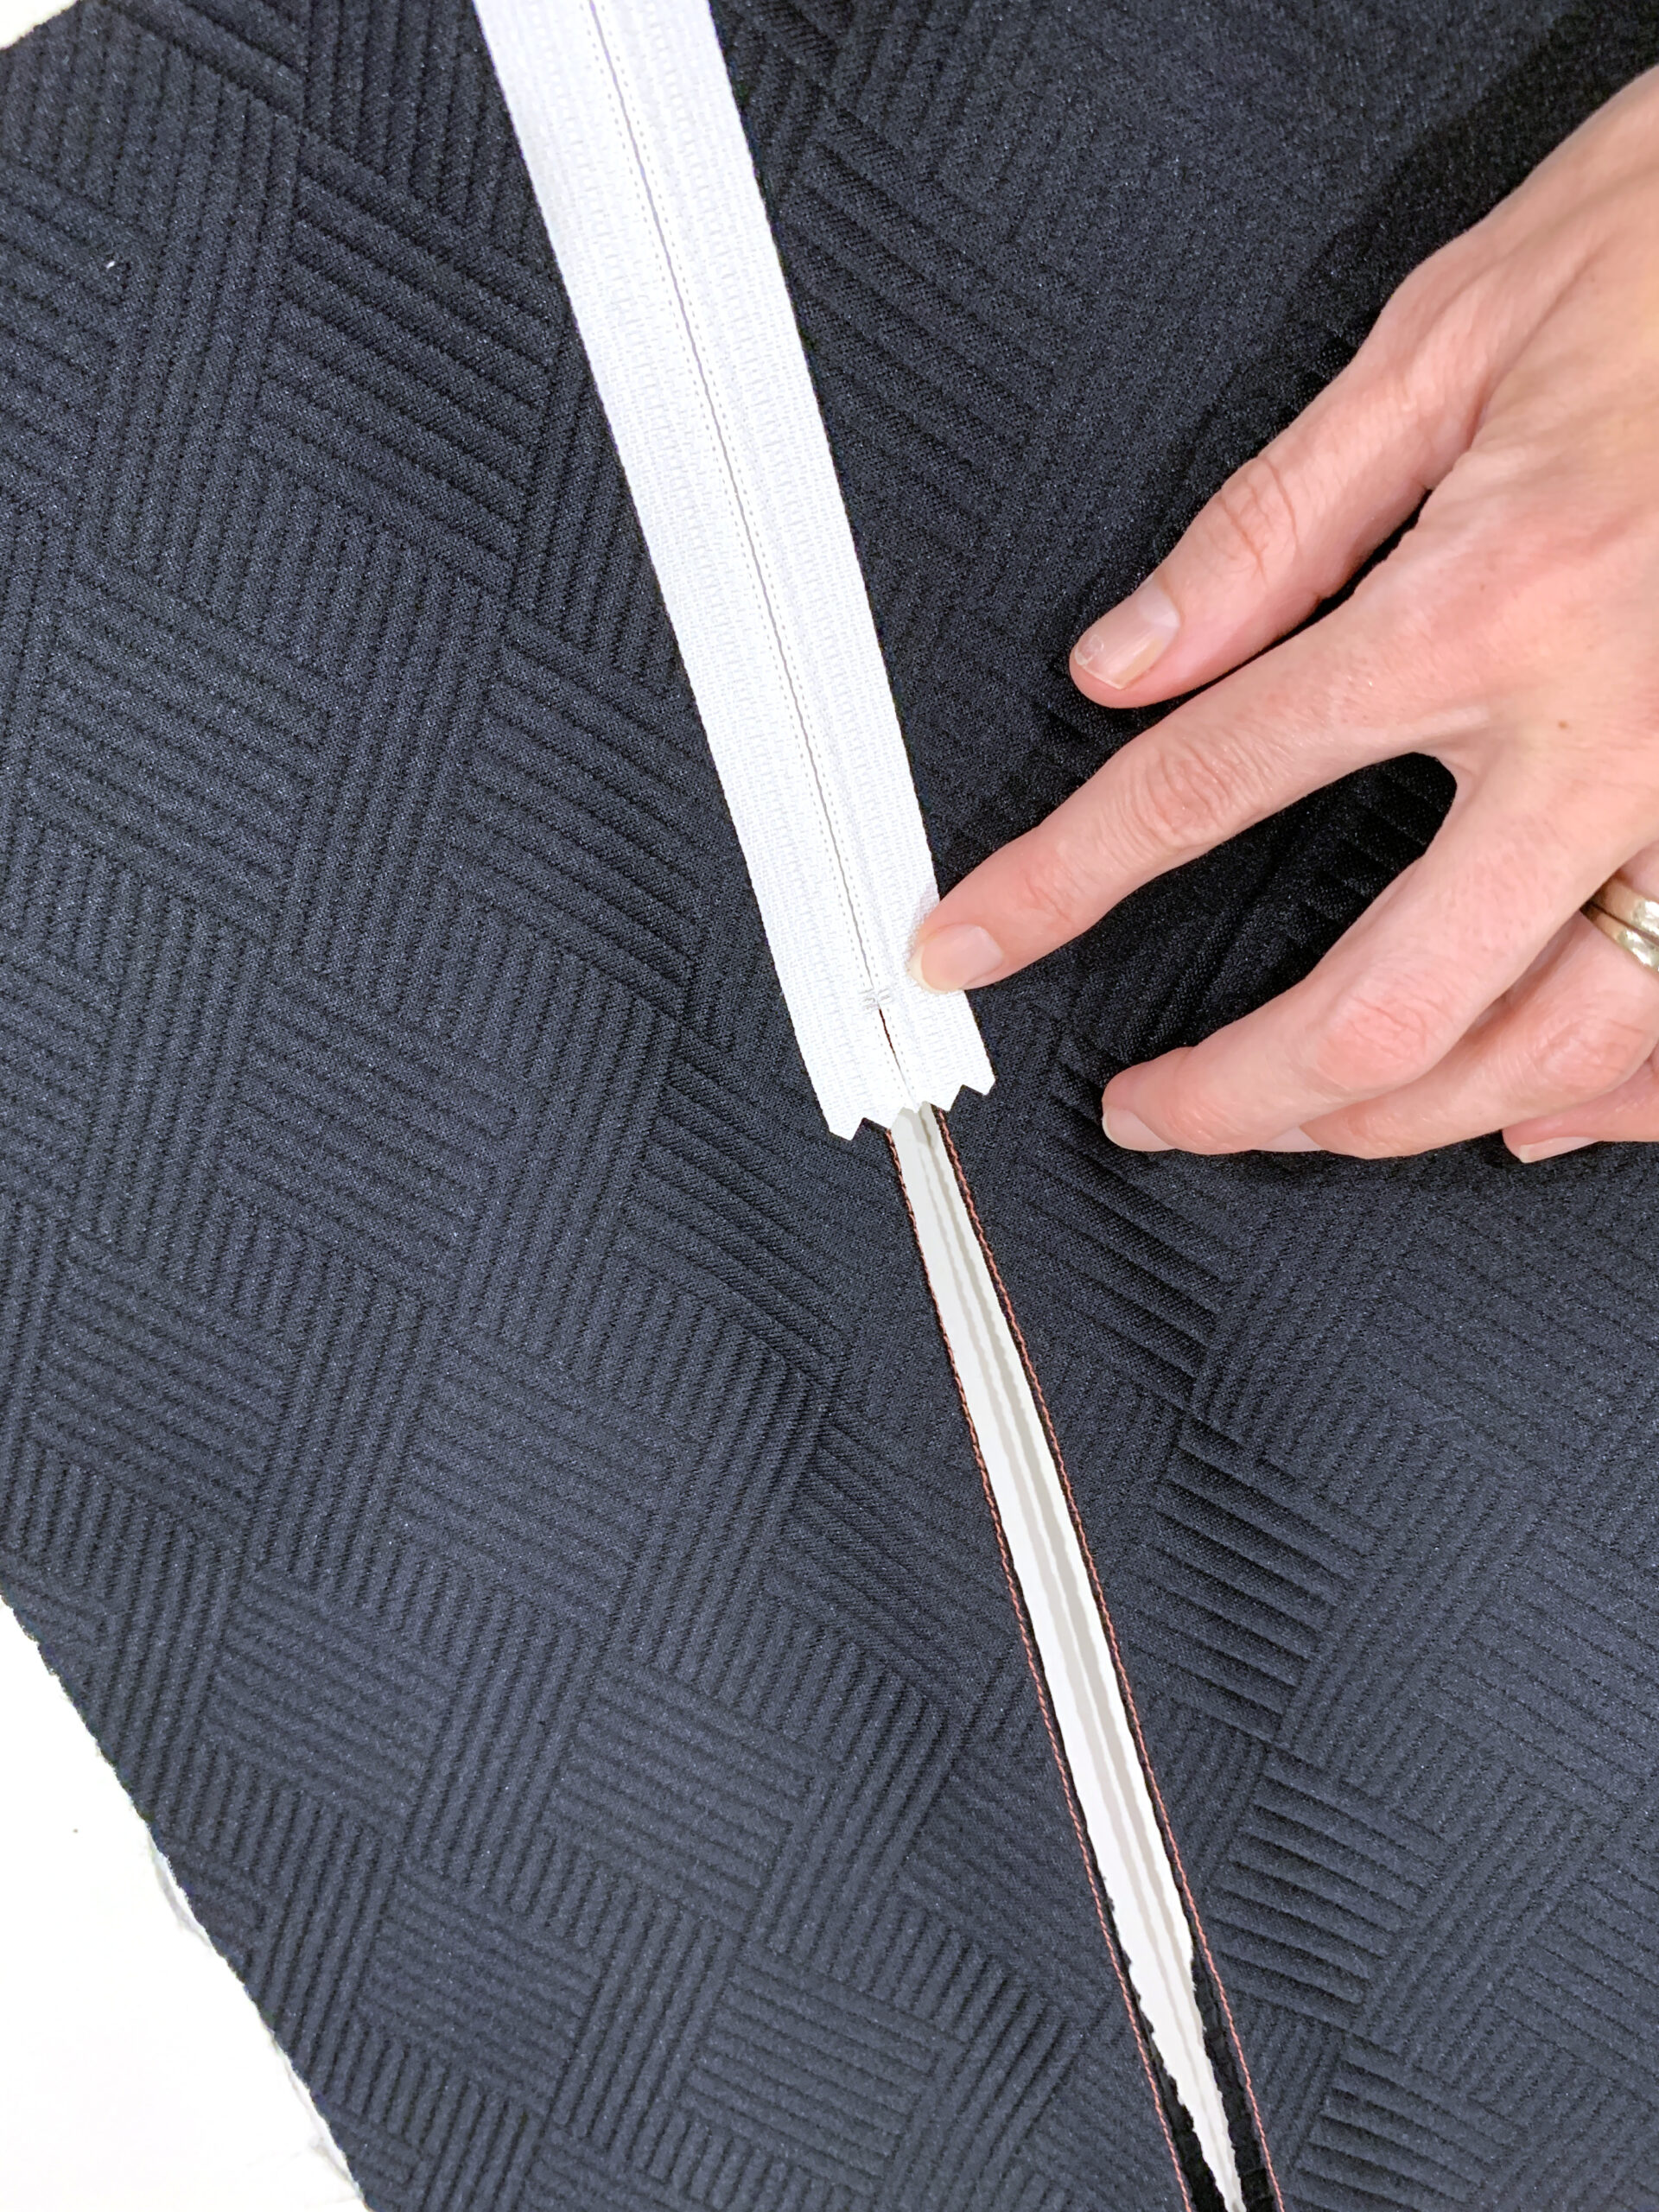

Now, flip the zipper through the opening, so it is facing right side up up, along with the pants facing right side up. The end of the zipper tape, should now align with the bottom of the pants. Using wash away wonder tape, stick the folded edges of the zipper opening onto the zipper tape.


Then fold the pant leg out of the way, and stitch the zipper into place following the original lines of stitching you marked on the interfacing. Repeat on the other side of the zipper.
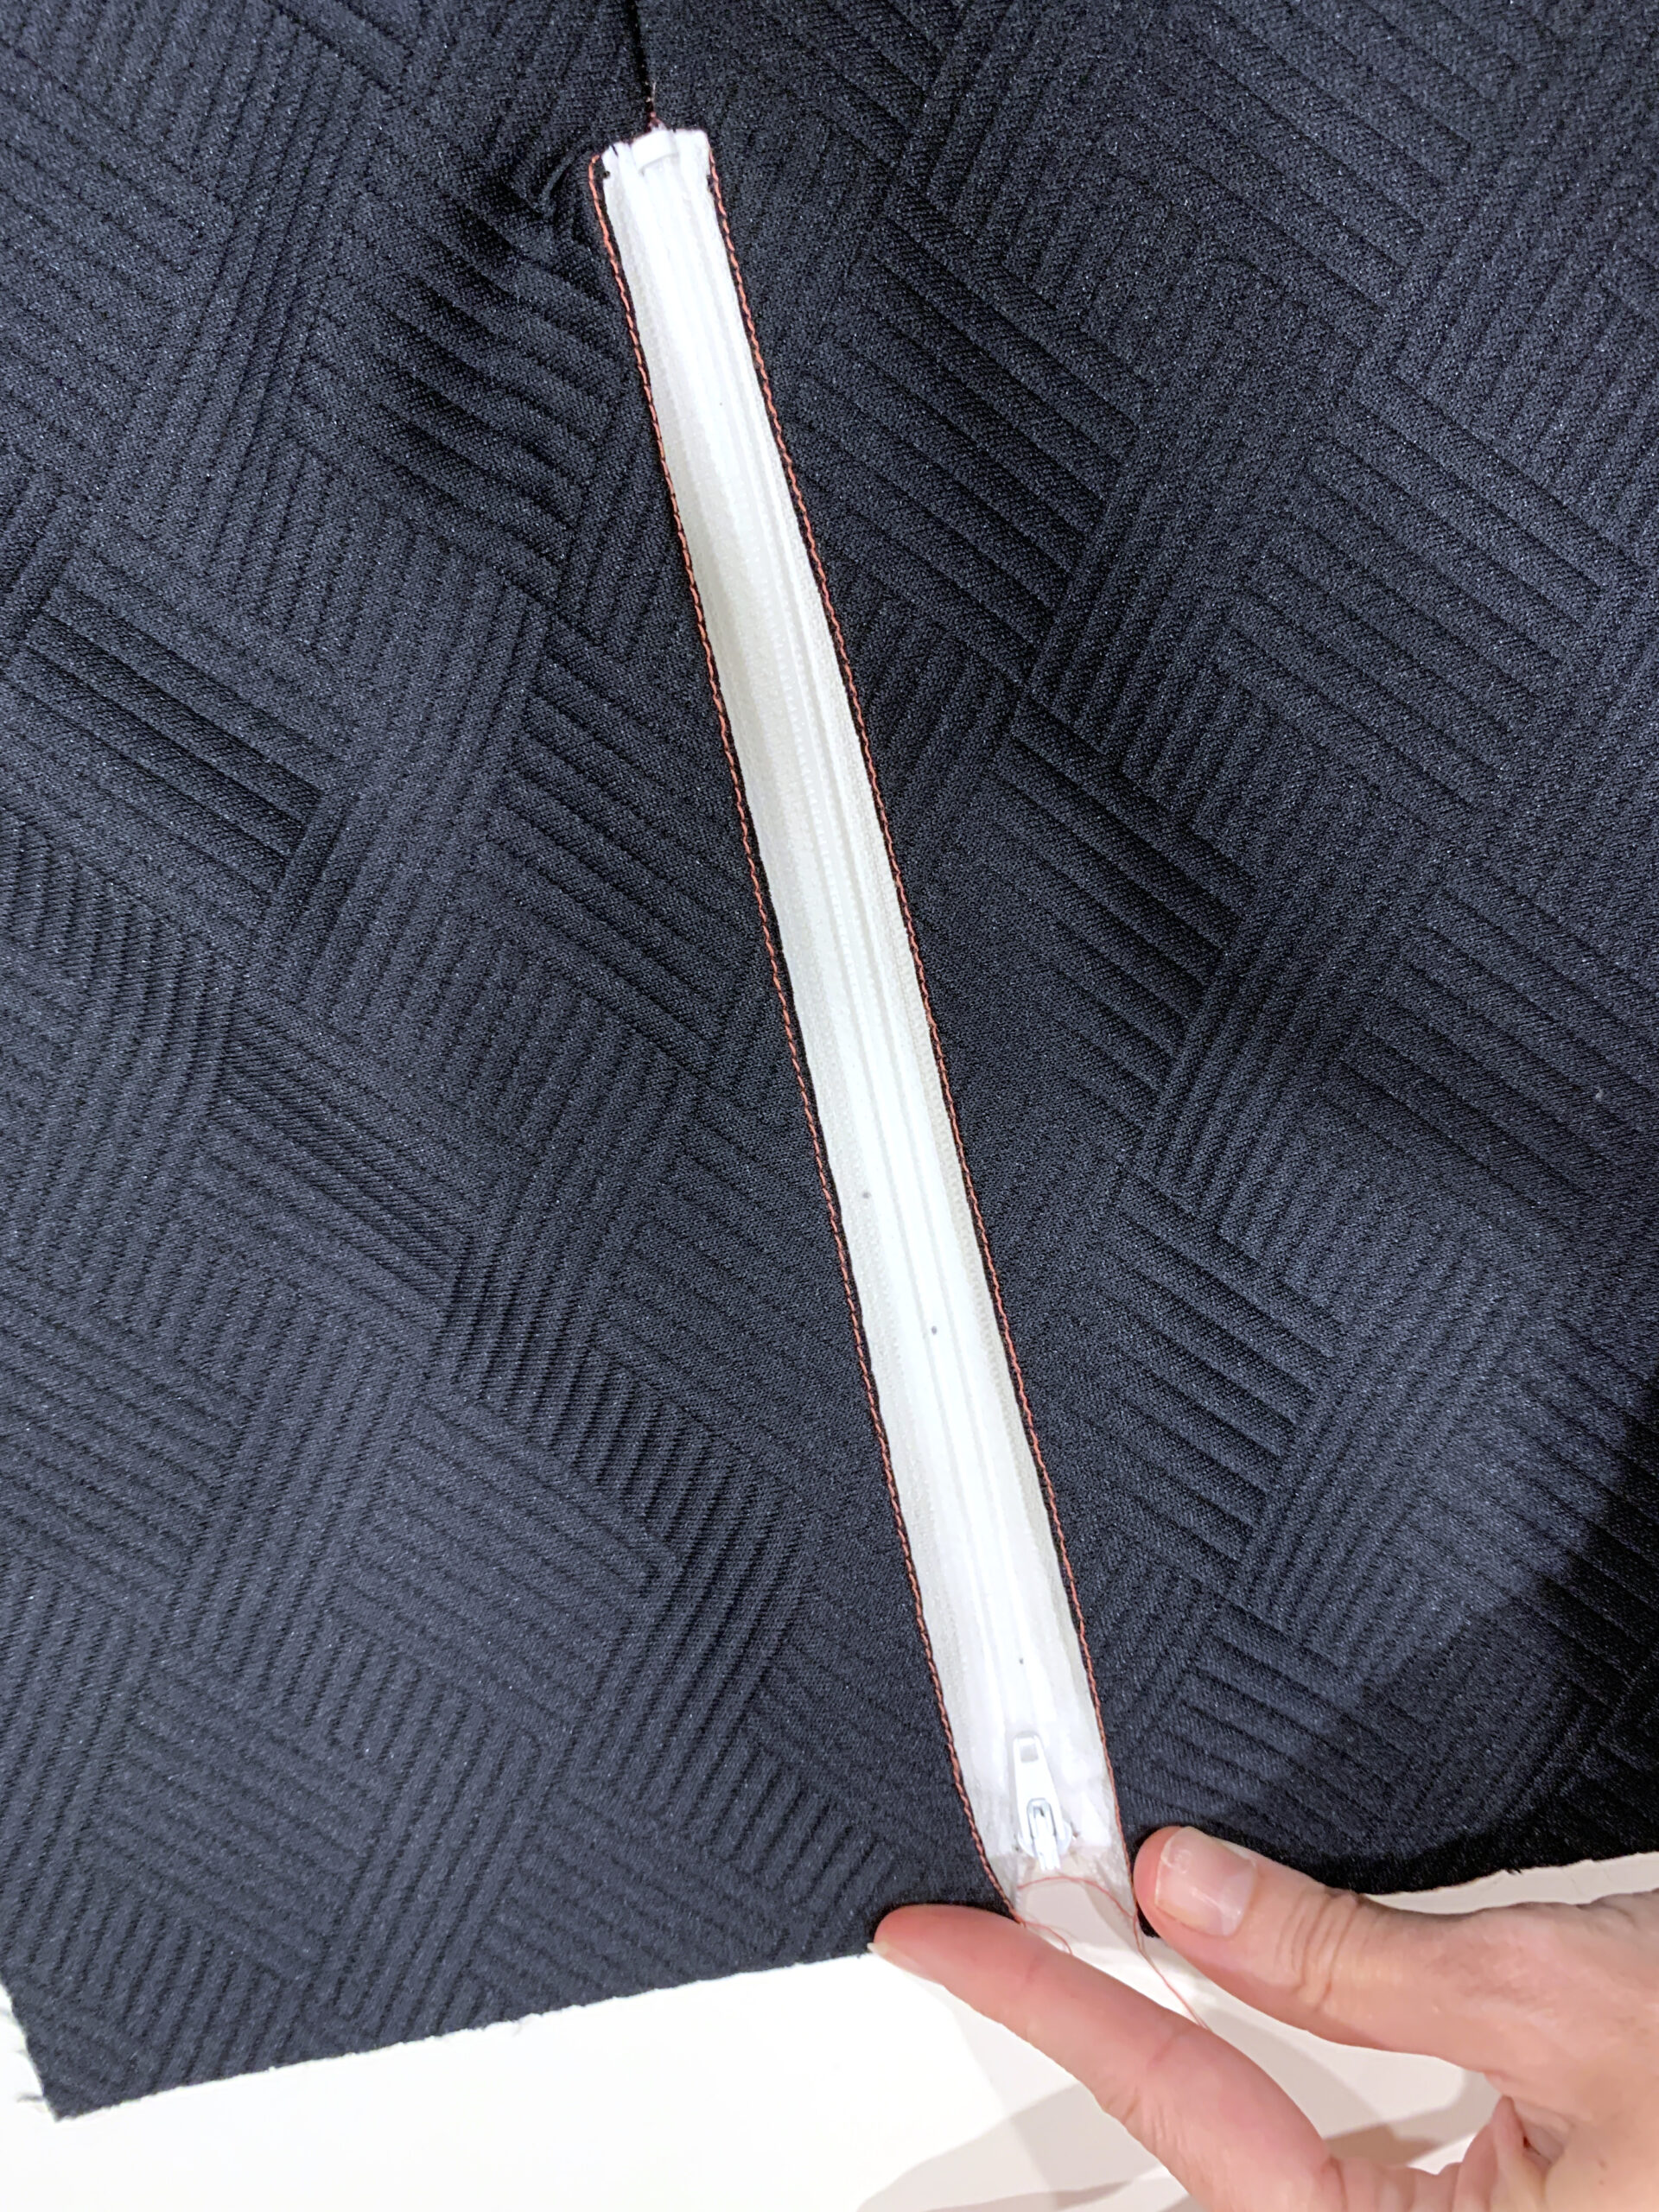
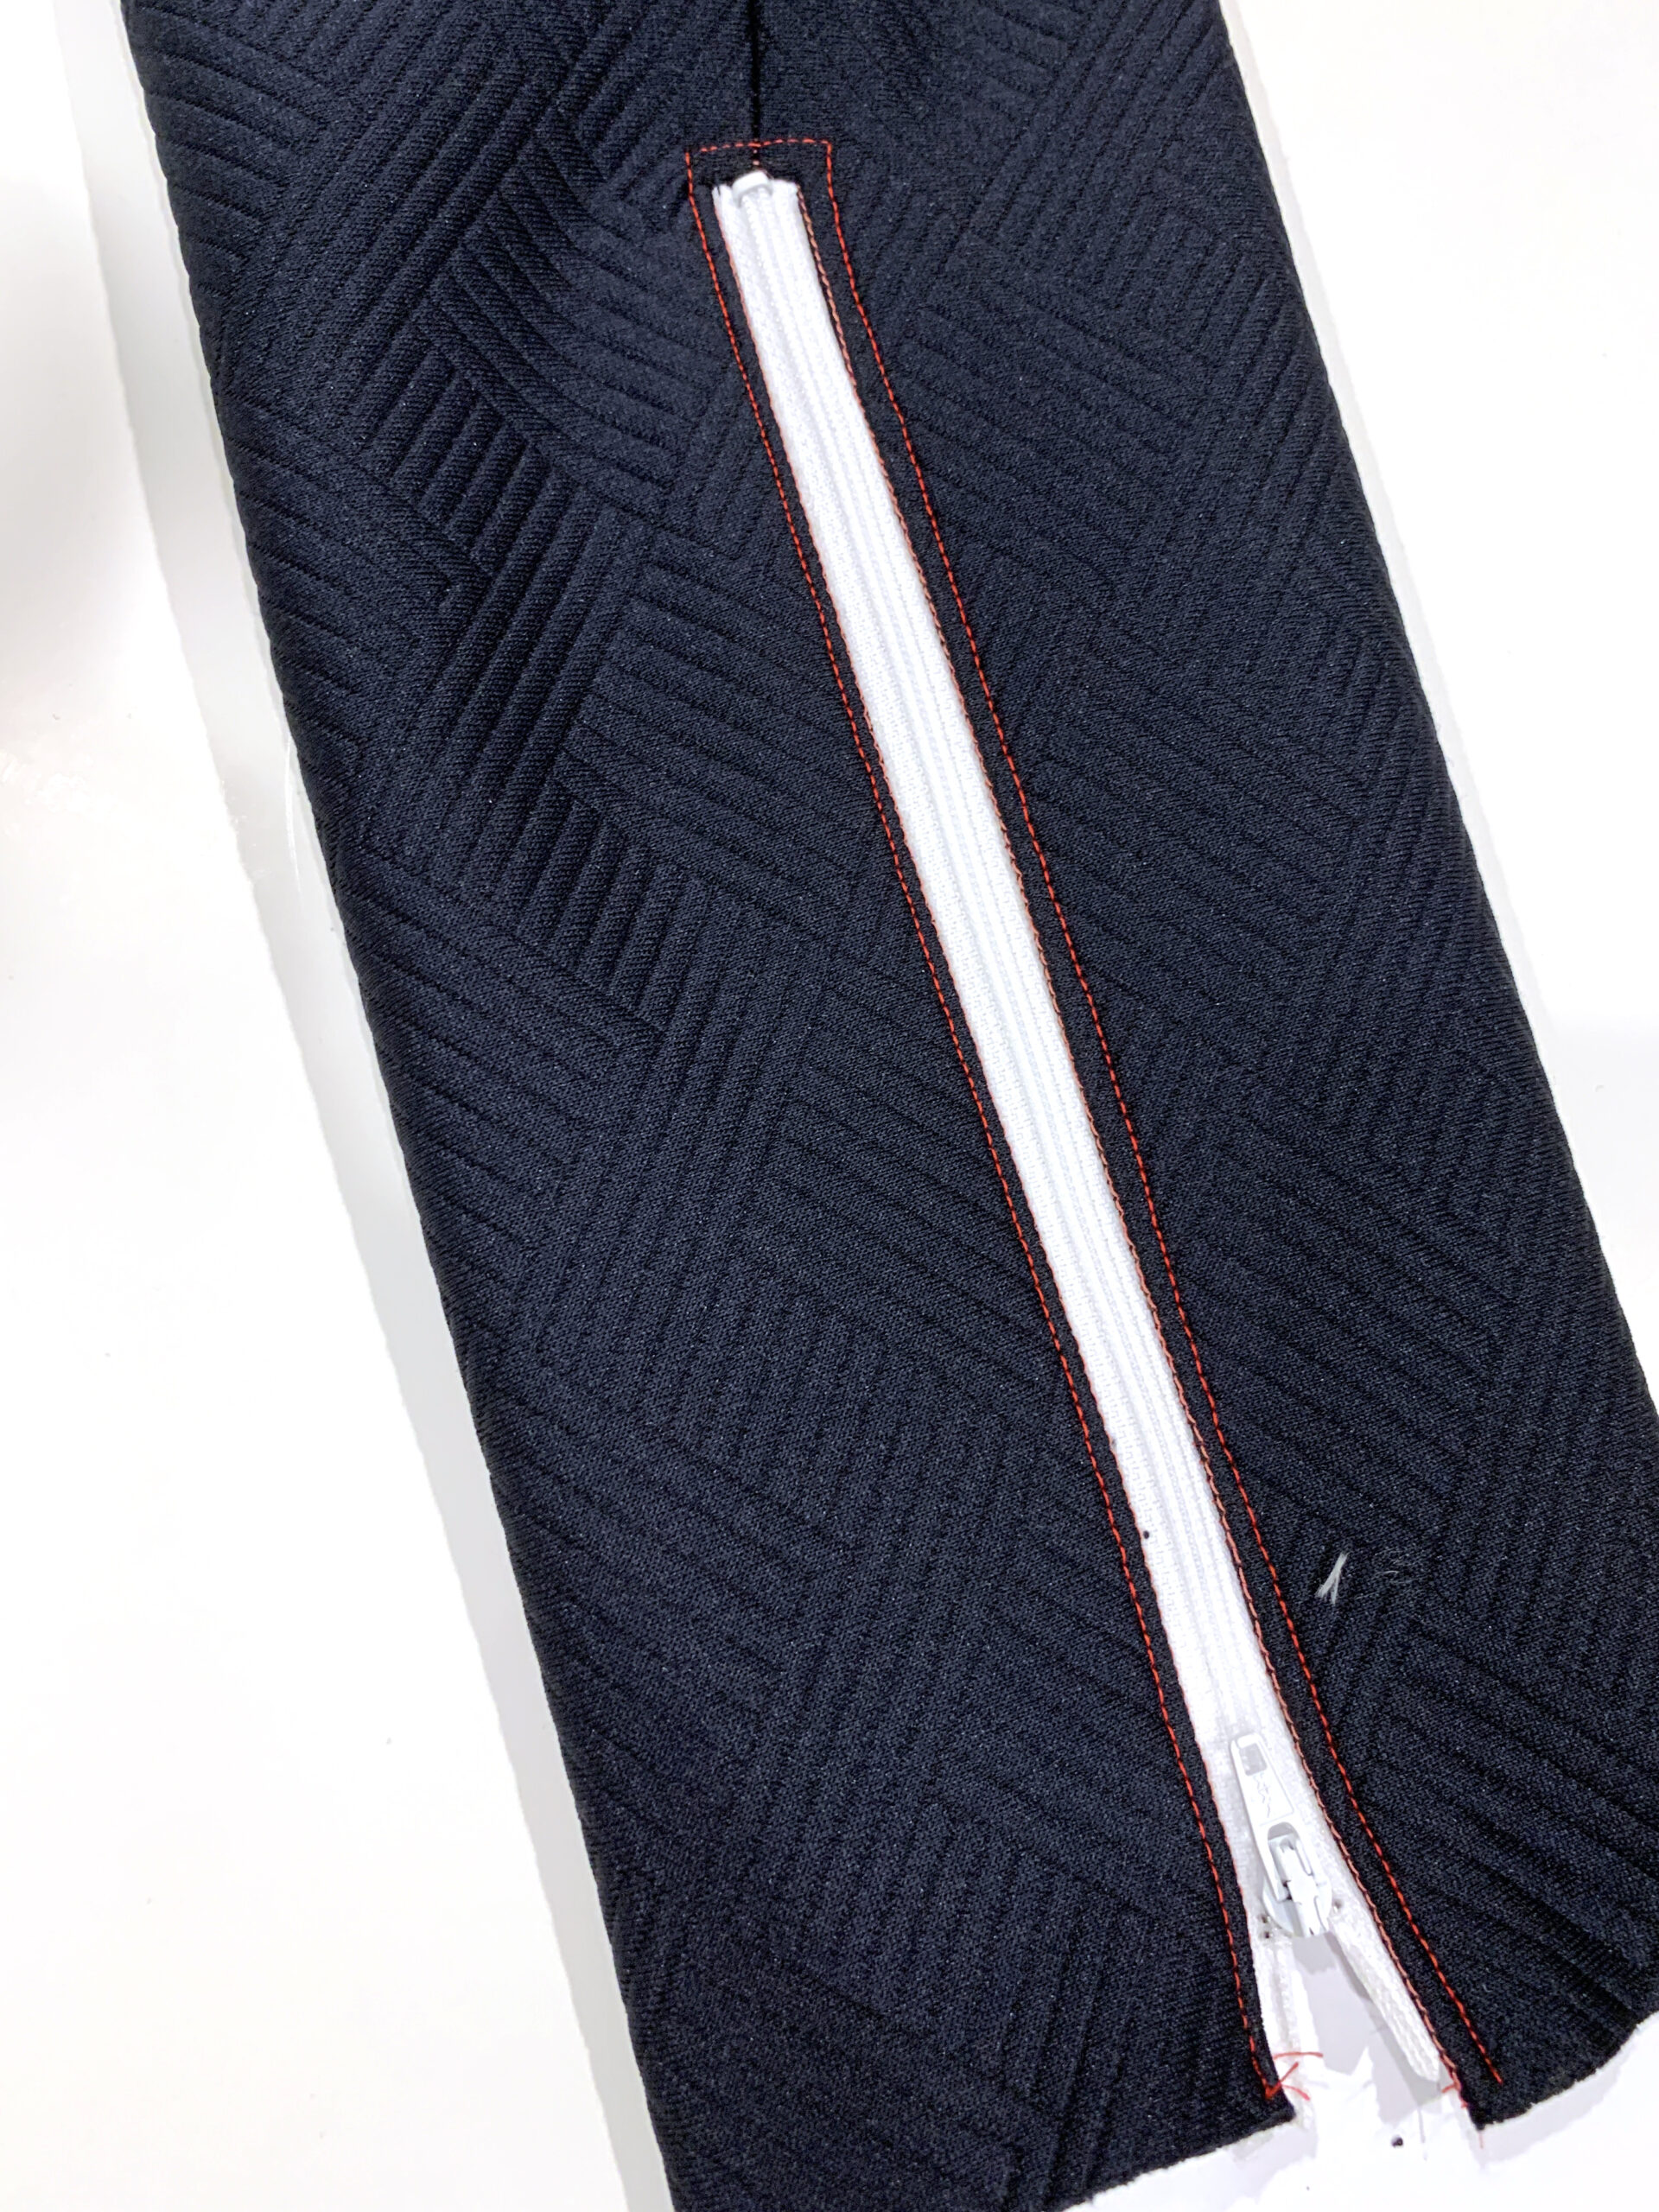
Your zipper is now installed, and can be topstitched in place, all the way around. Repeat the zipper installation on the other outside seam of the second pant leg.
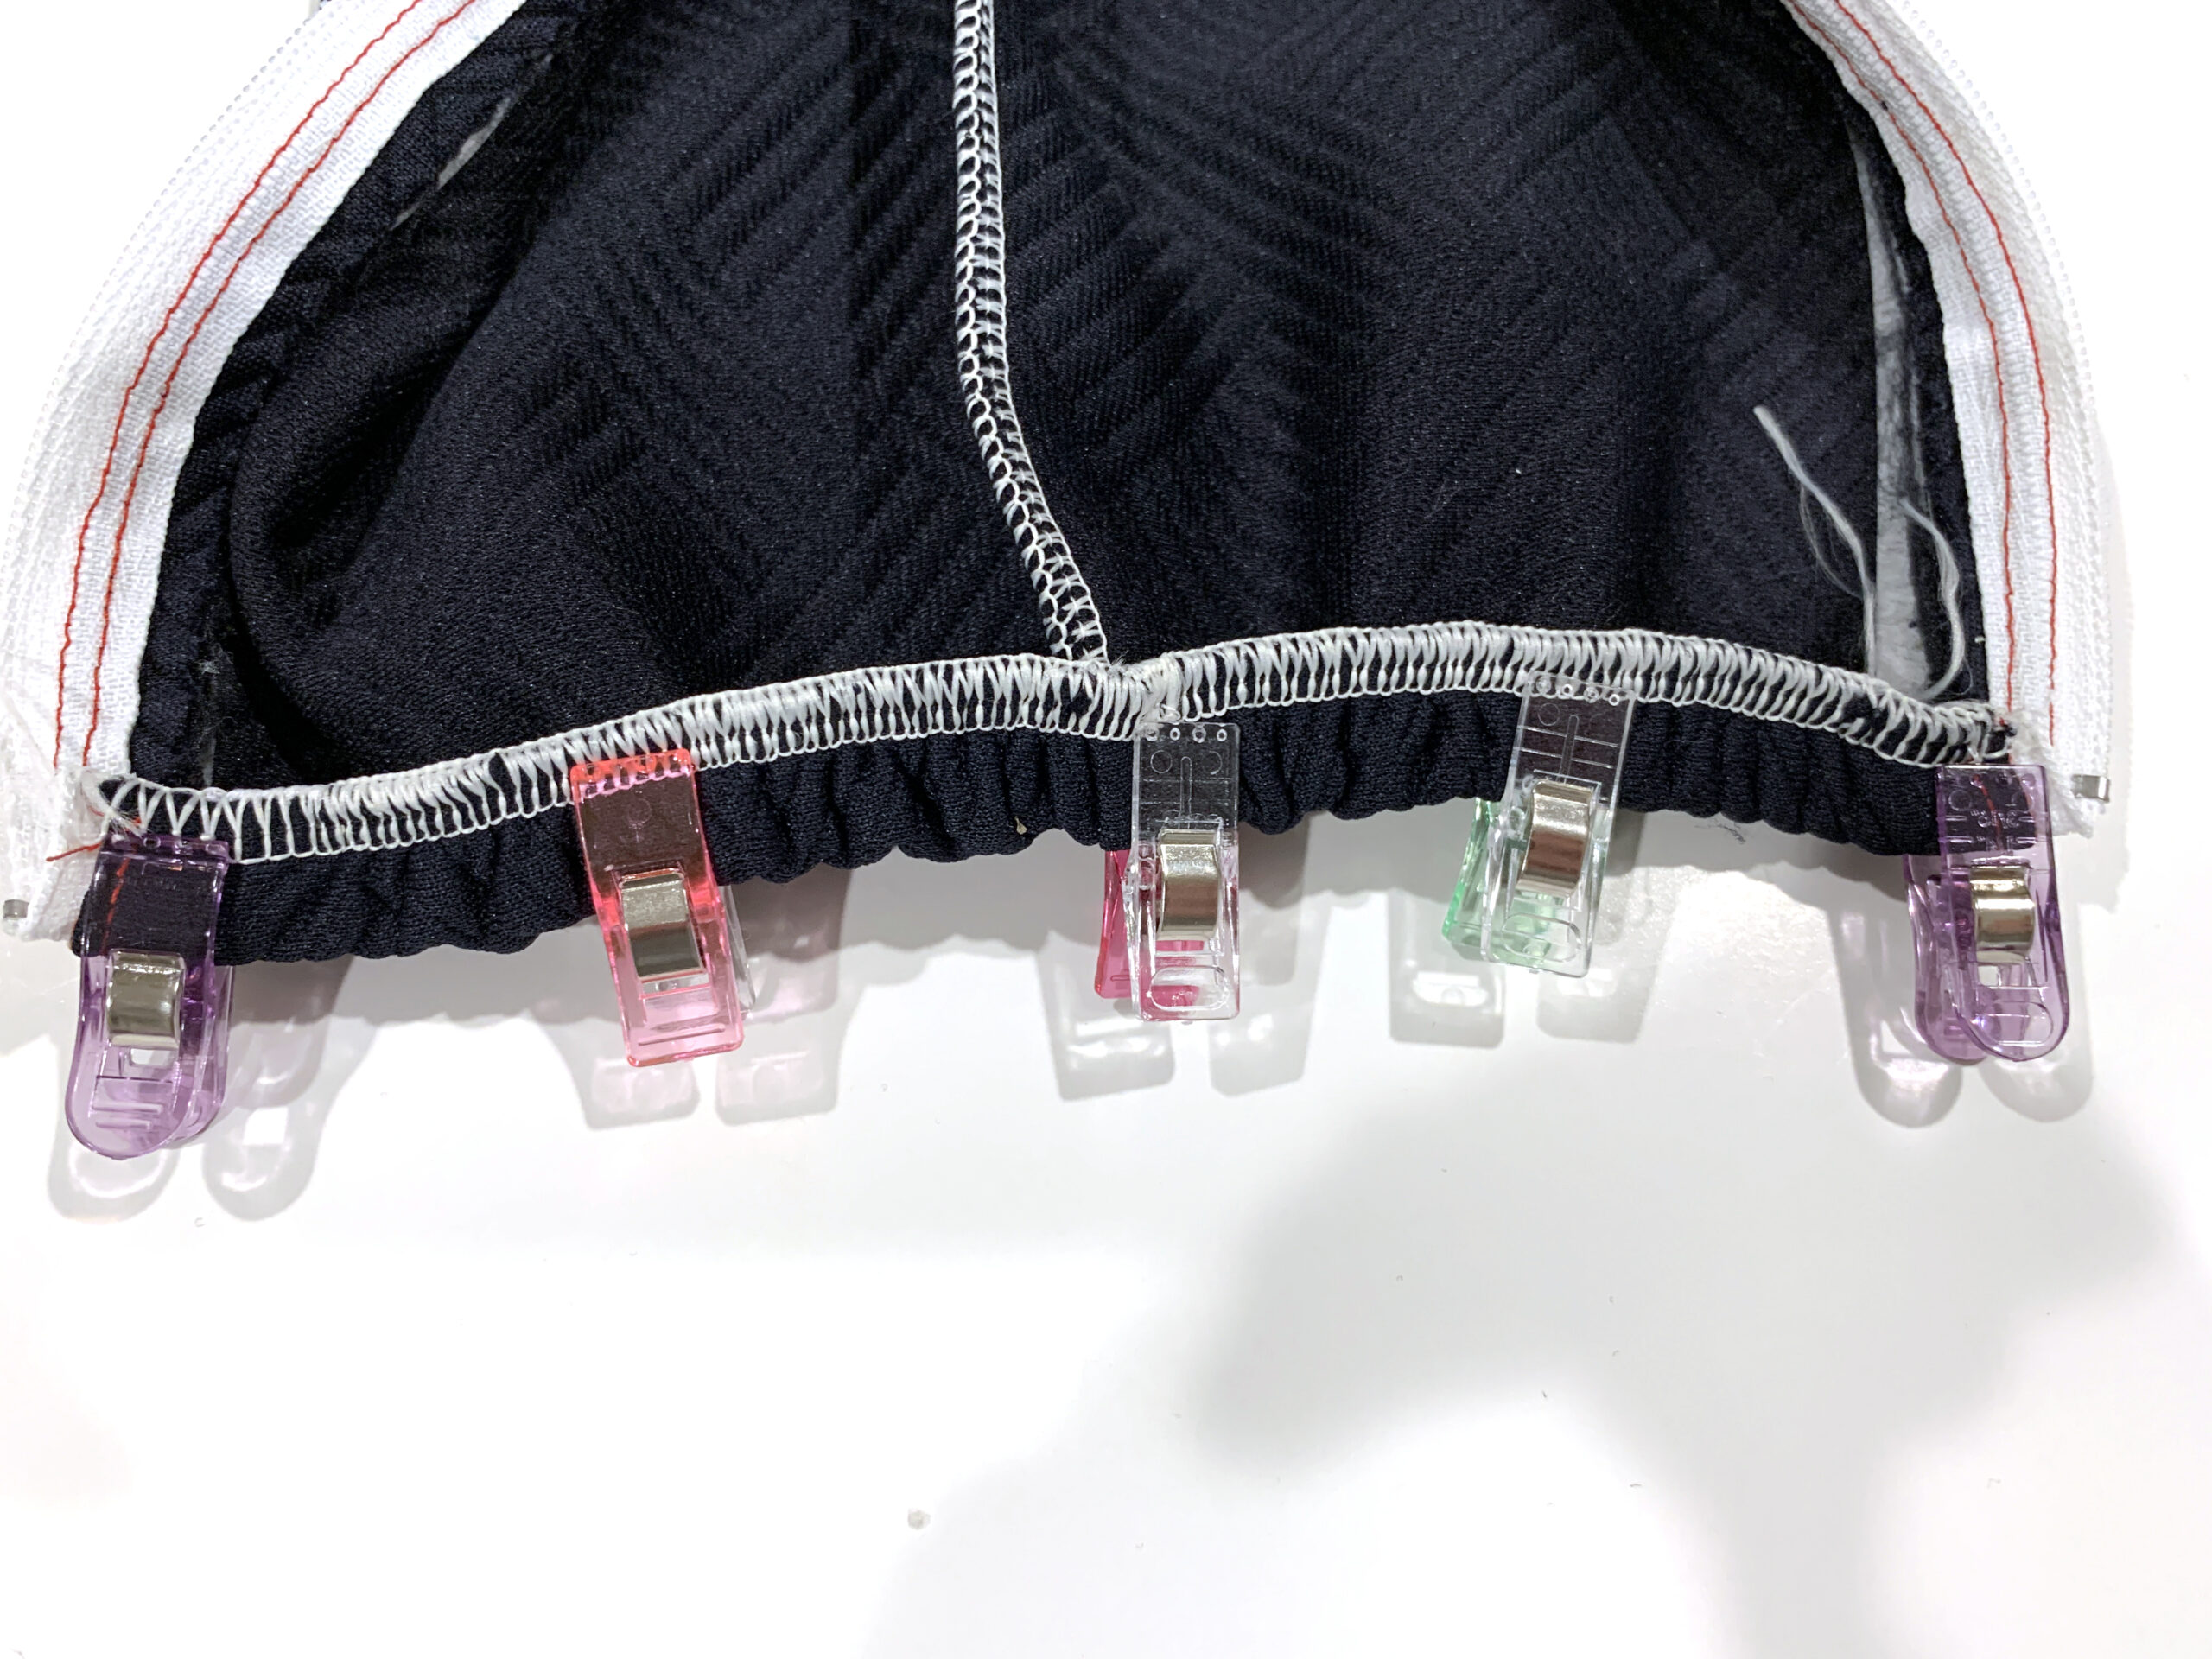
Adding Elastic
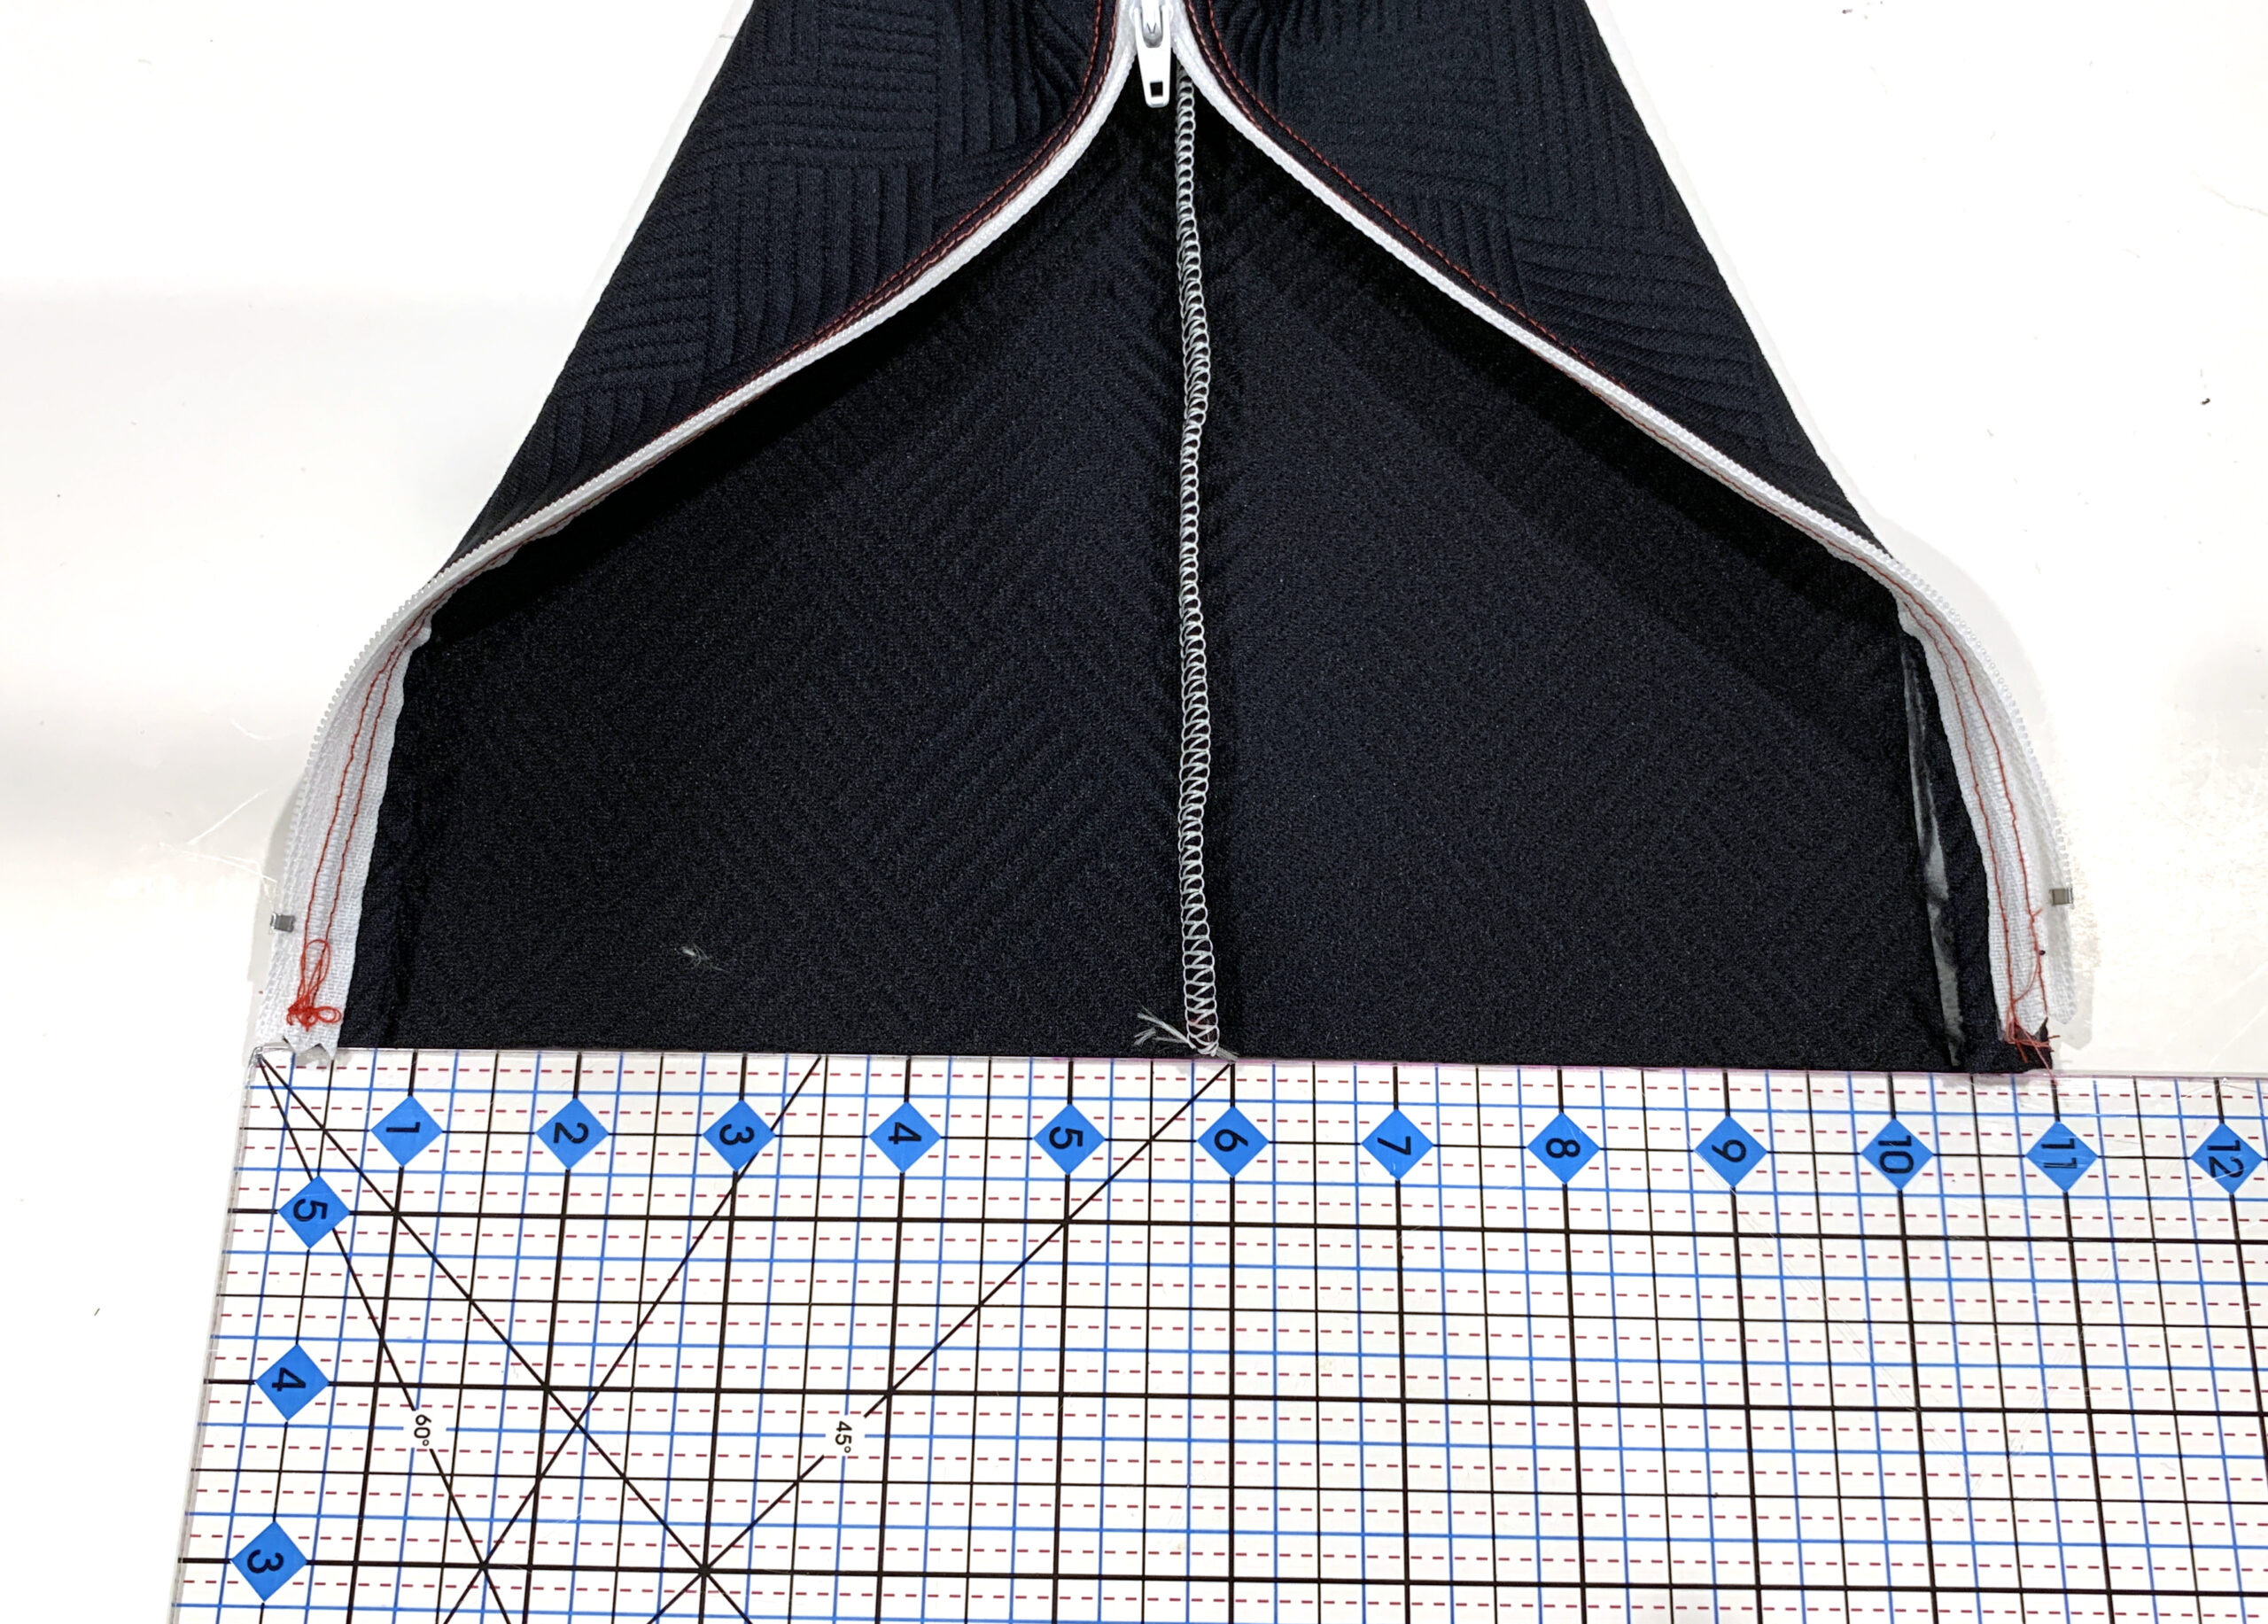
Once the zippers are installed, you may sew up the inside seams on each leg, and then sew together the pant legs at the crotch curve as the pattern instructs.
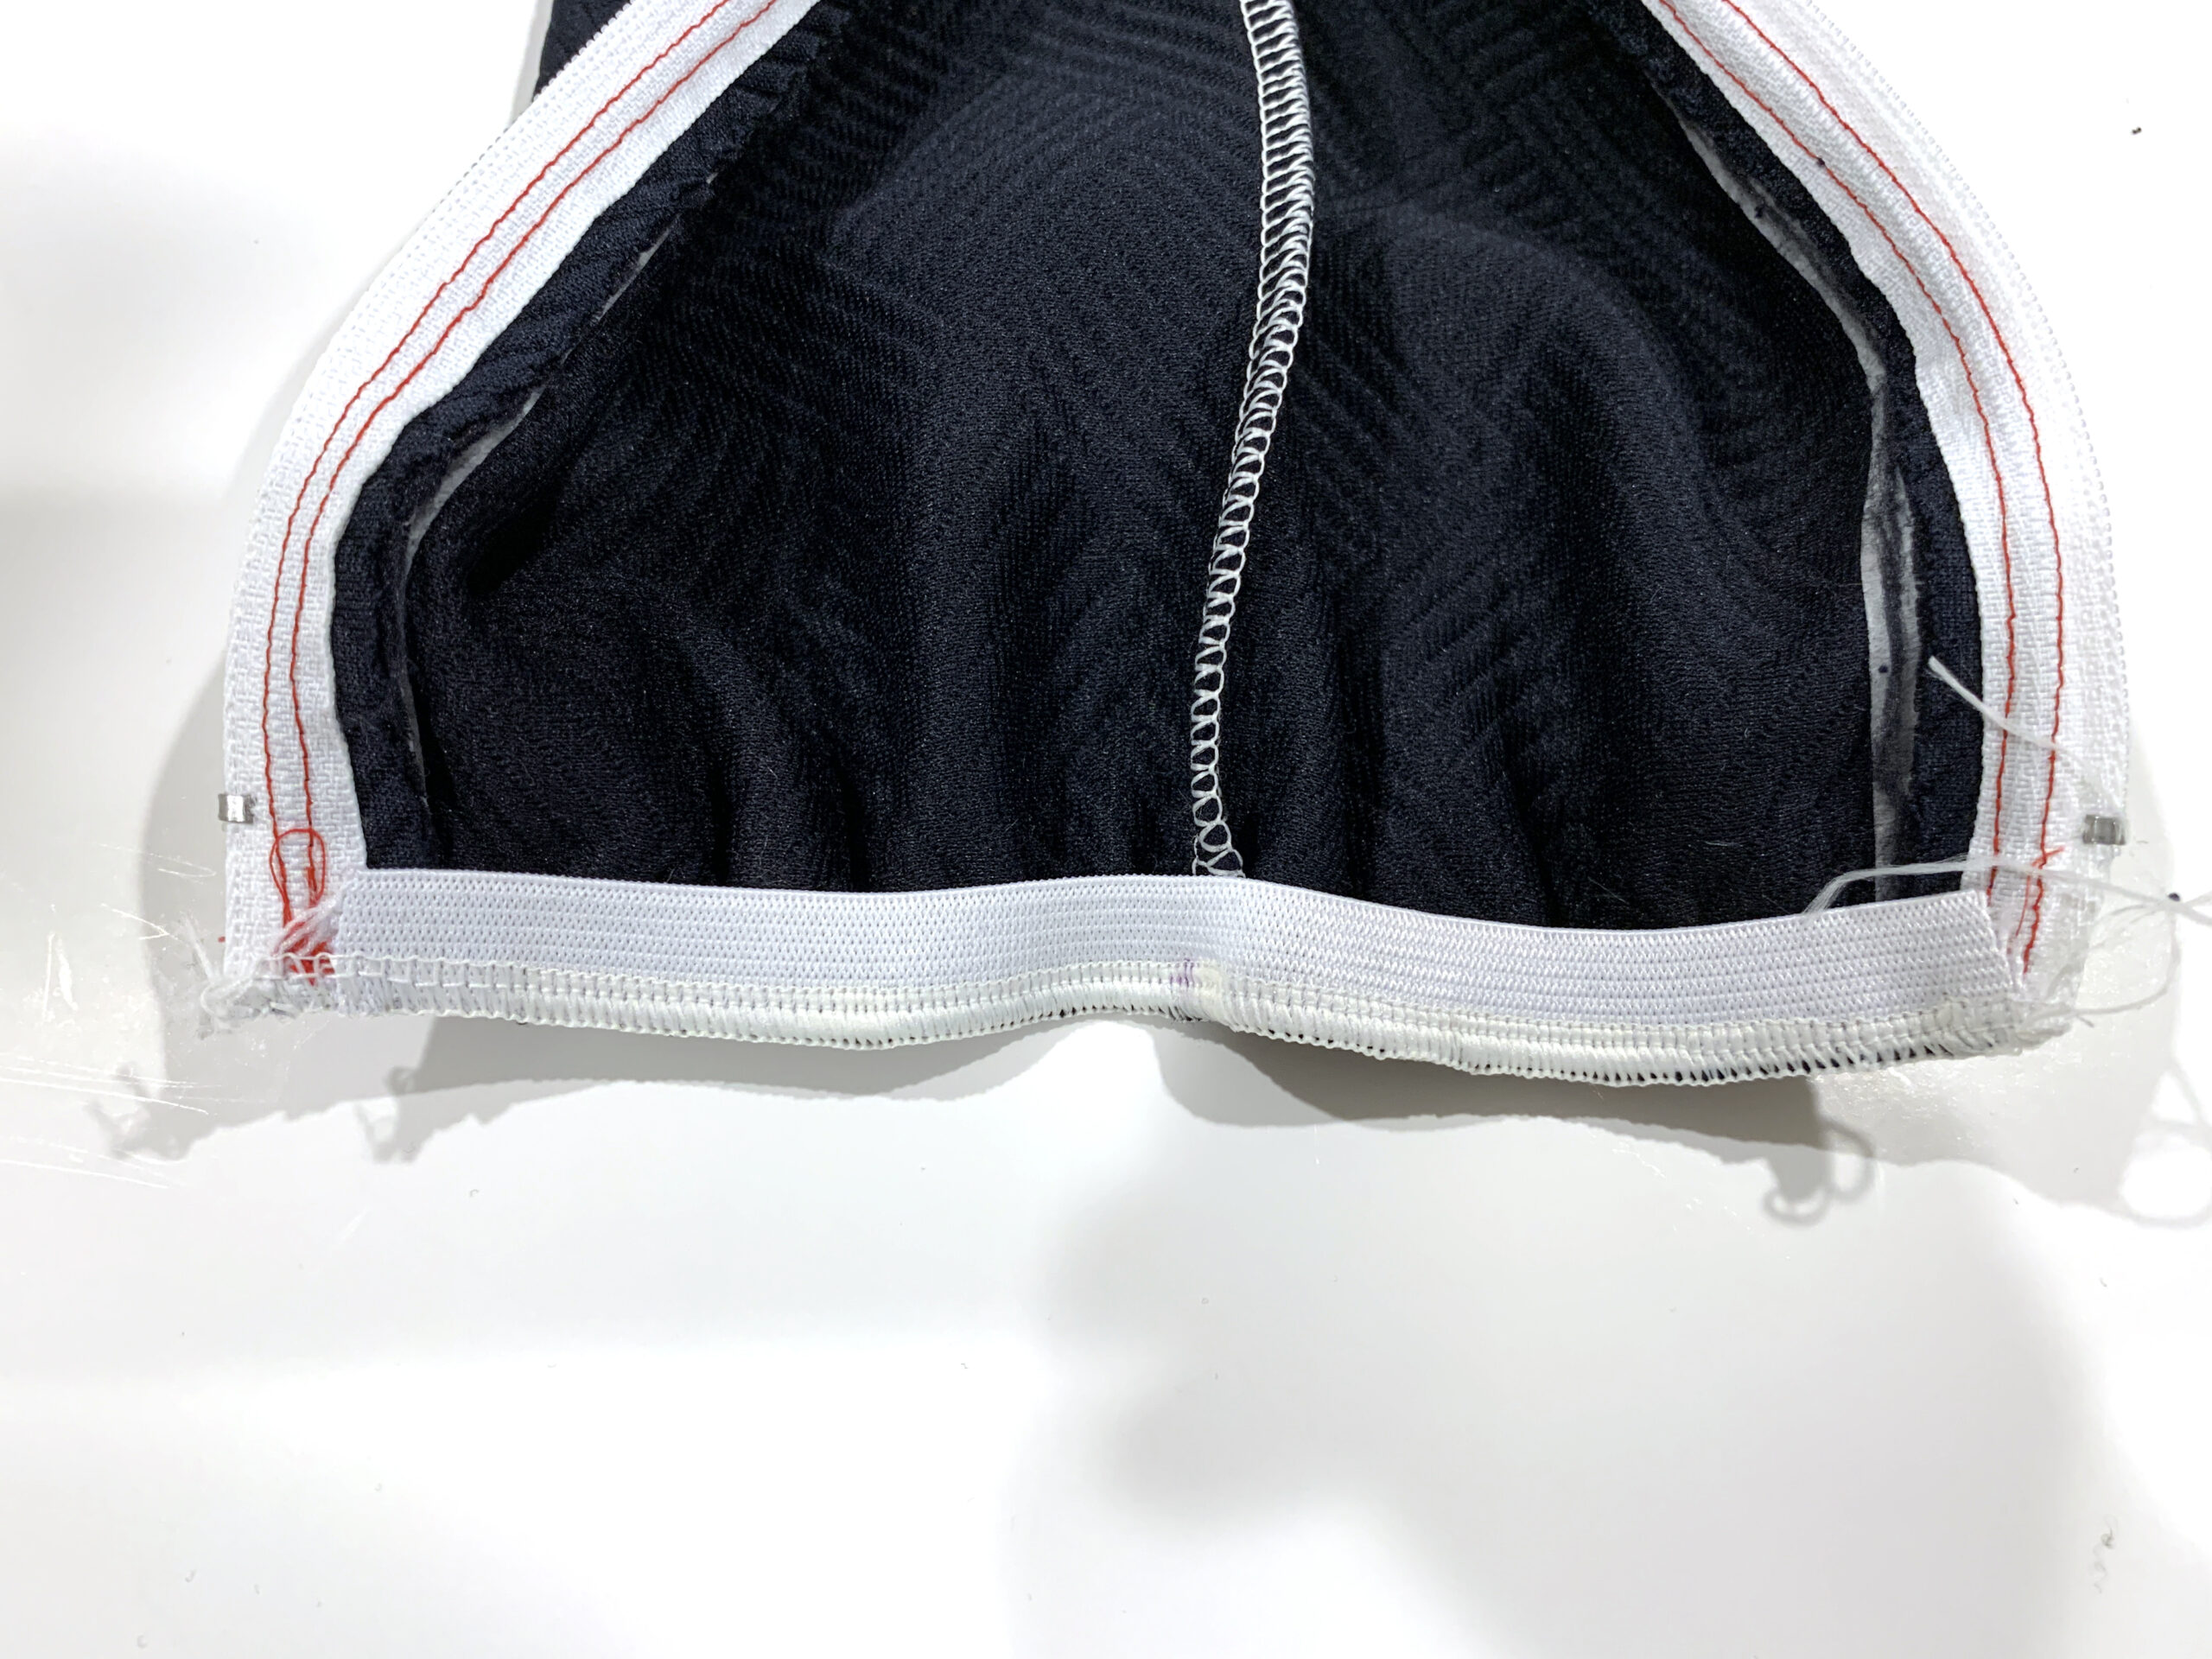
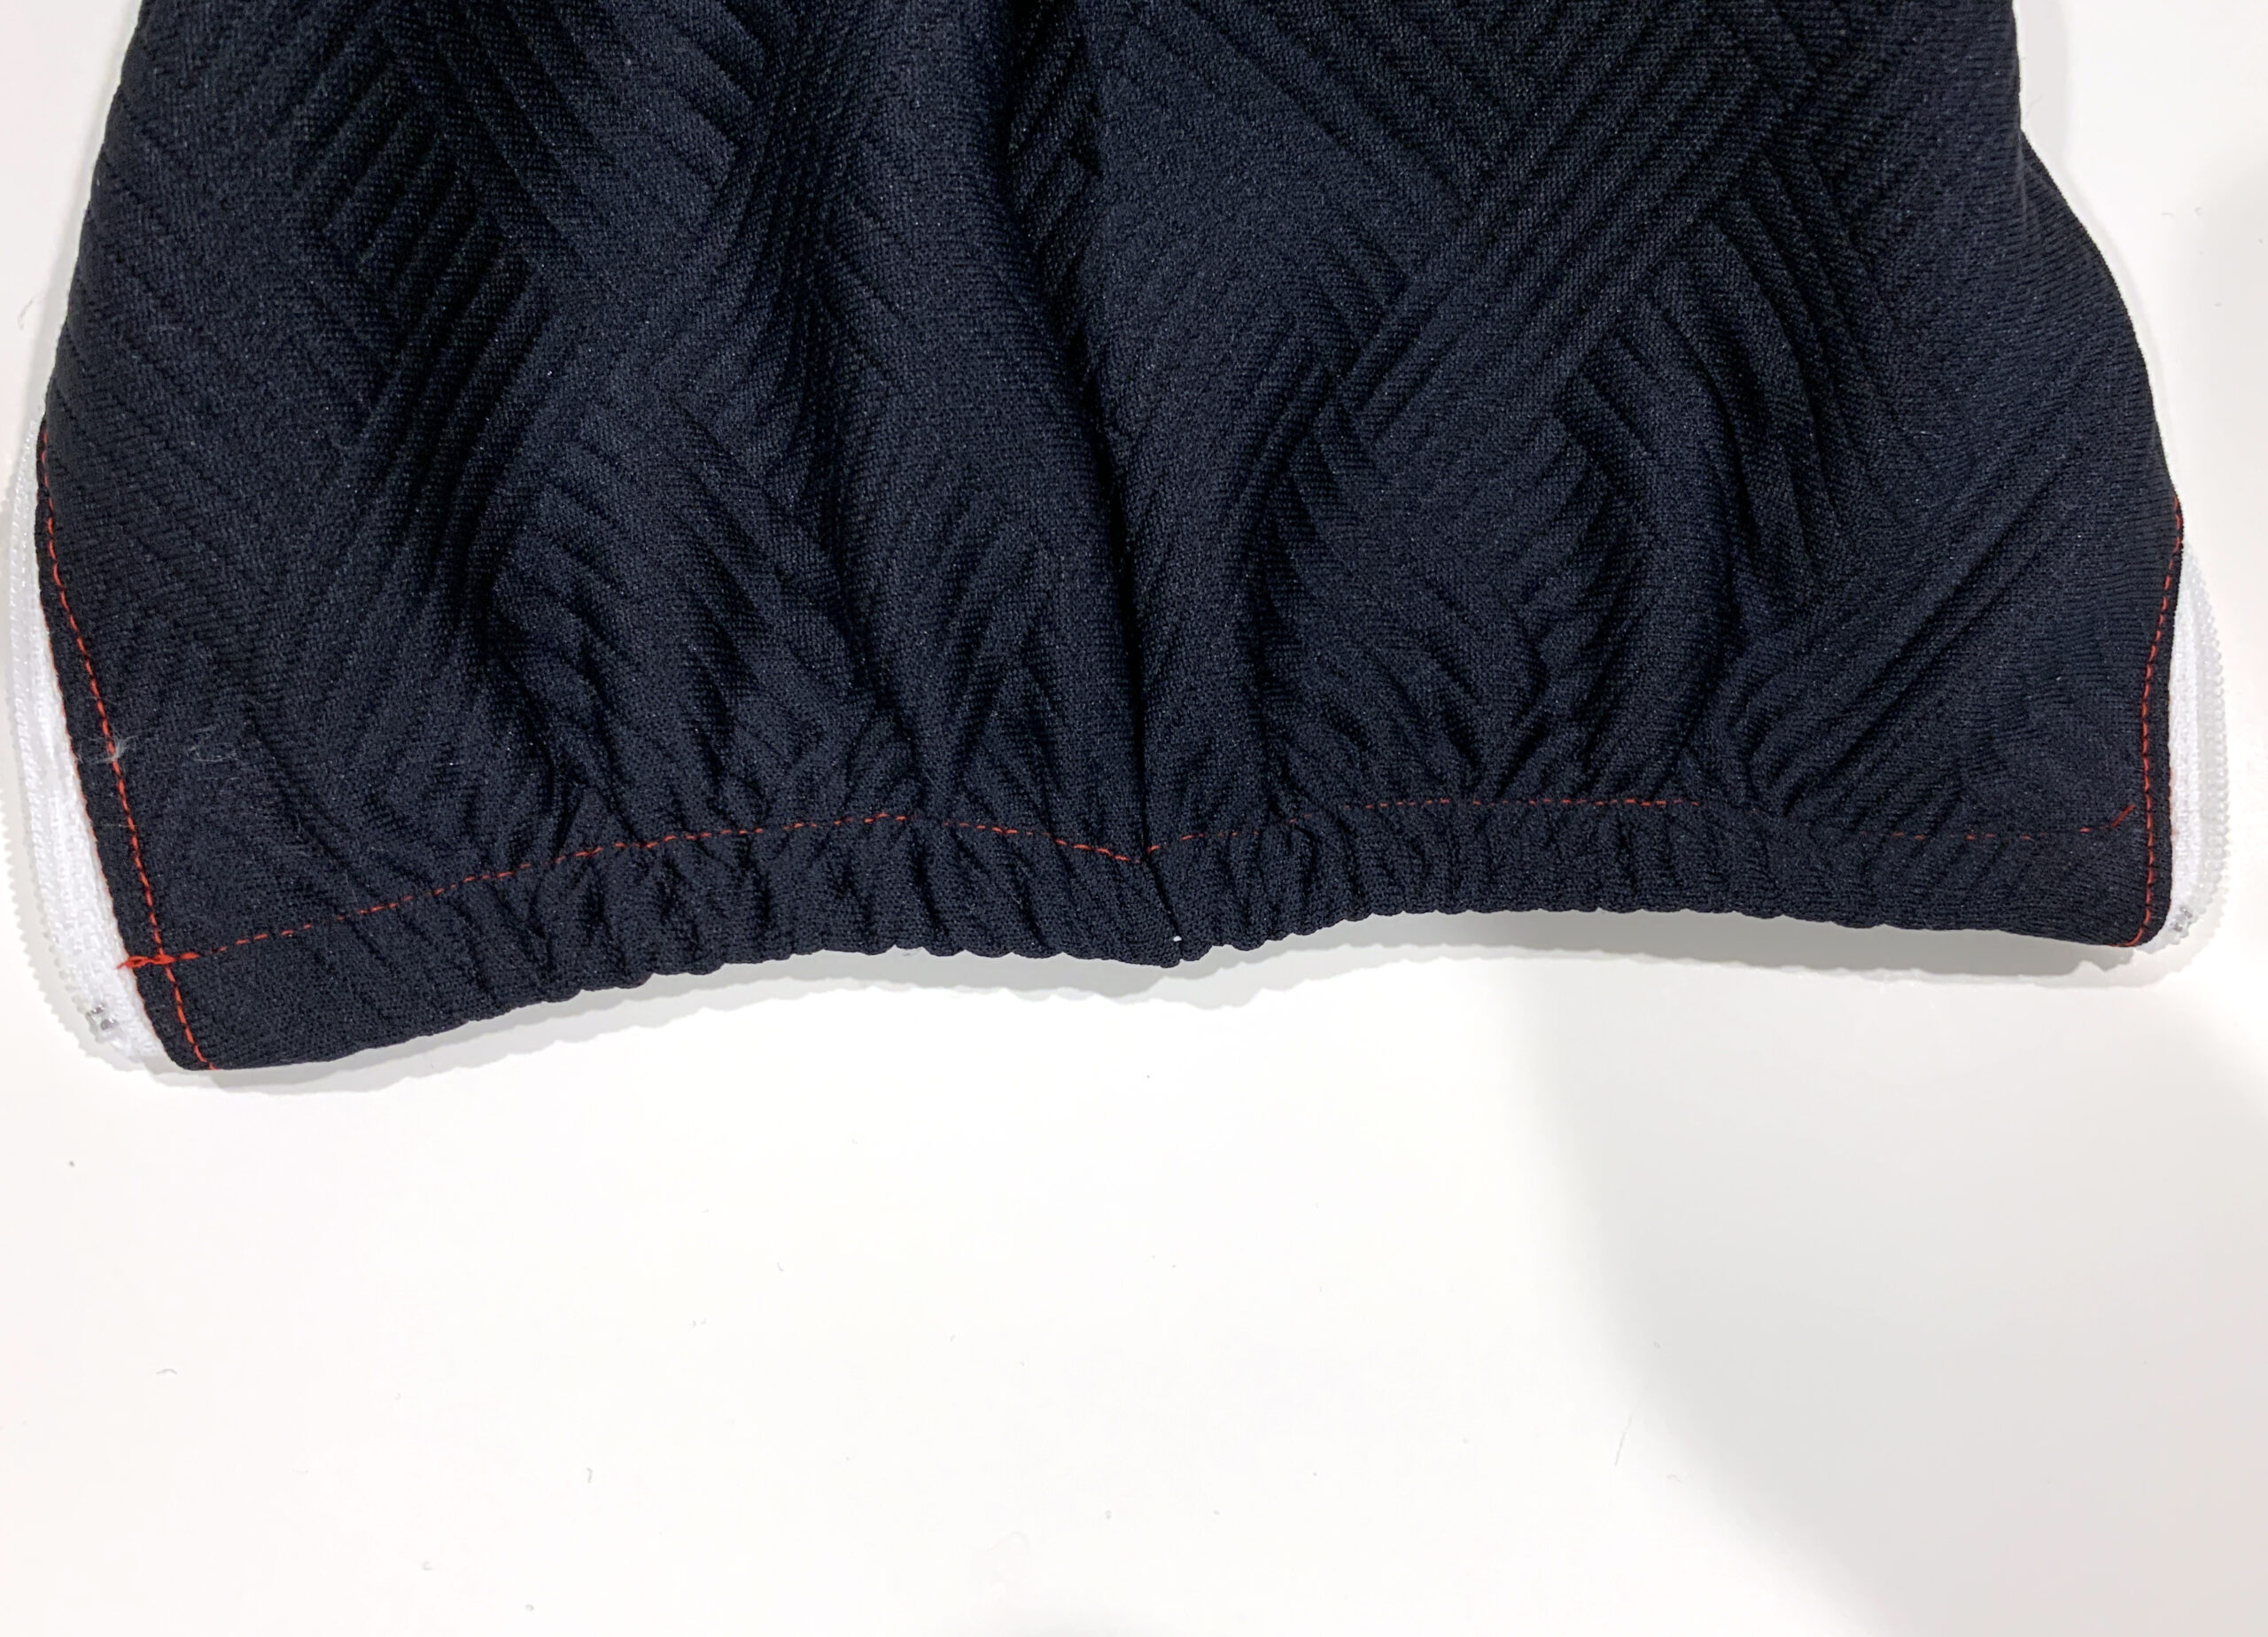
The final step will be adding an elastic casing to the bottom of the pant legs. You may either serge elastic onto the bottom of the zipper and fold it up and top stitch it into place, or you can first fold up the hem wide enough to create the casing for the elastic and stitch into place, leaving an opening to feed the elastic through, then secure the elastic at each end near the zipper and close up the casing. I used a piece of elastic 75% of the width of my bottom opening, serged it to the bottom, then flipped it up and topstitched it in place.


Carita Zipper Detail on Other Joggers
Once this is done, you have a beautiful pair of joggers with a really cool ankle zipper detail! You could also do this on the kids Carita Joggers or 11th hour gear joggers, you would need to use a shorter zipper for the smaller sizes though, and you could also use this hack on the Lanai loungers if you wanted!
-Jody

We would love to see you Carita Joggers with zipper detail in our Facebook group or tag us on Instagram #patternnichedesigns #patternniche