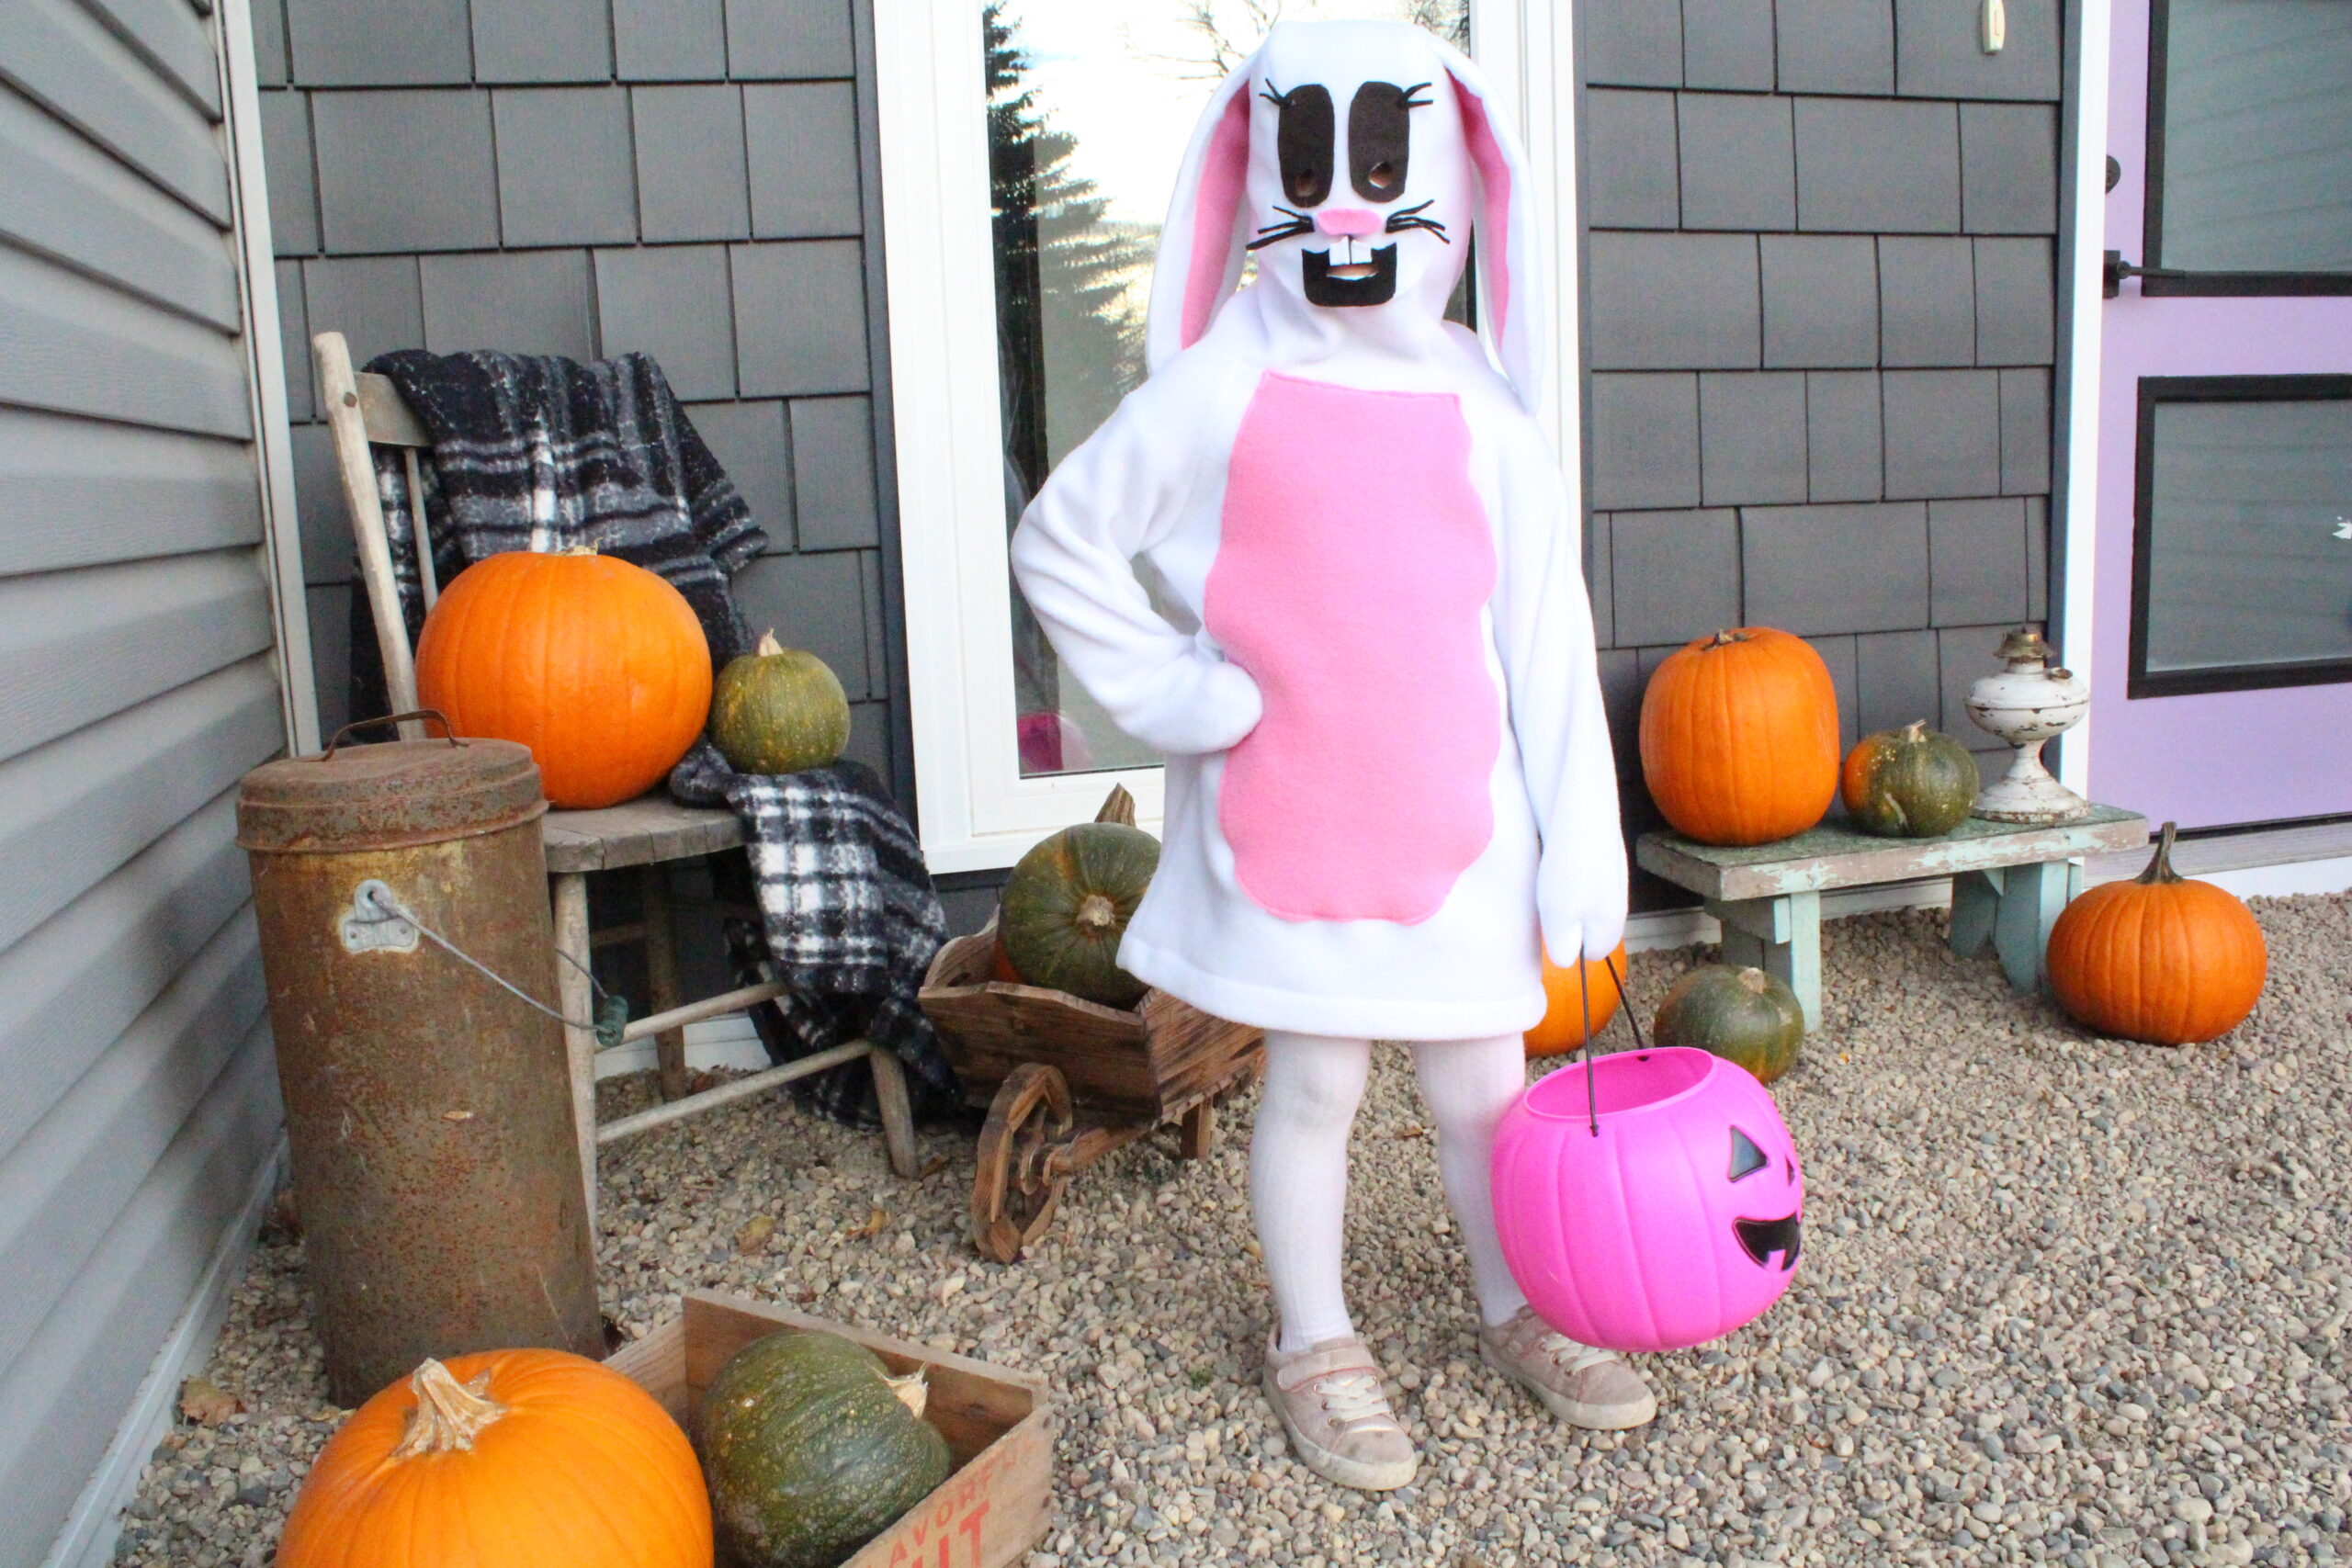
Hey! I’m Kate from Sewing from Scratch, and today I’m going to be sharing how to hack the Summit Peak Hoodie into a reverse zip costume. I chose a cute & cuddly bunny outfit for this one!

I decided to use the Summit Peak design because of it’s zip-front option, but you could easily use another awesome NH pattern to get a similar effect. Maybe you even want to mash a couple together to get the perfectly customized costume. There’s a great video on combining sewing patterns on the YouTube channel. You can check it out right here.
The pattern pieces I’m going to be using for this tutorial are:
- Front Piece A
- Front Piece B
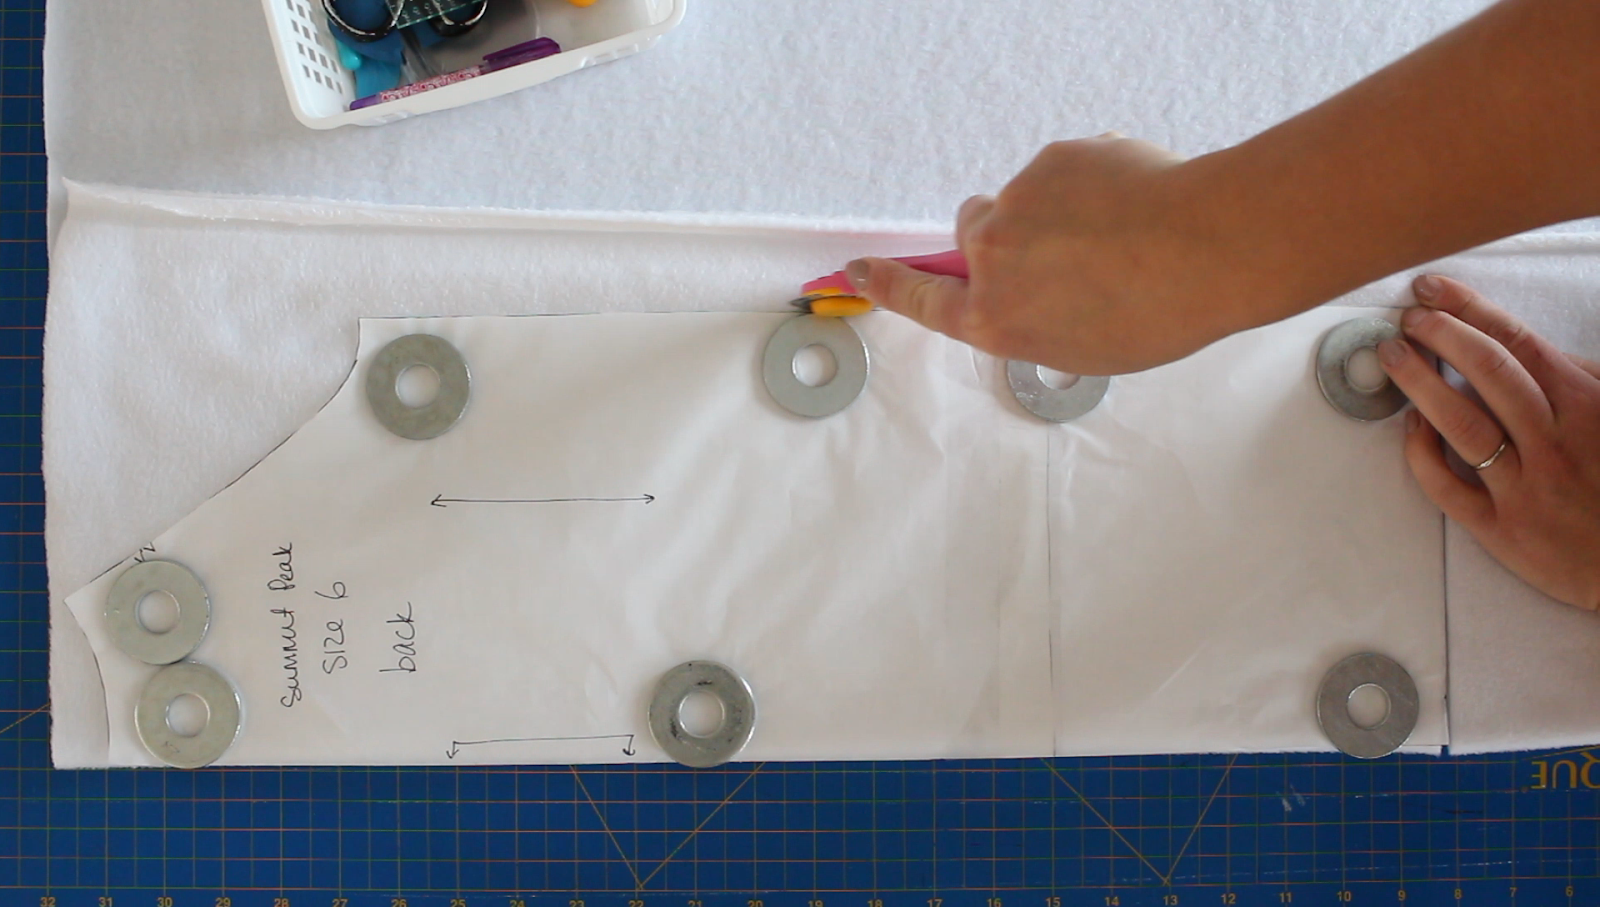
- Back
- Sleeve
- Hood
I’ll be leaving off the cuffs, waistband and pockets, but if your idea fits better with those pieces, definitely use them! This post is meant to trigger your creativity and give you some easy inspiration for those last-minute Halloween costumes this year. There really are no rules, so feel free to think big! Don’t forget to tag us on Instagram so we can see your work in action.
Since this costume is going to be worn “backwards”, there’s a few adjustments we need to make.
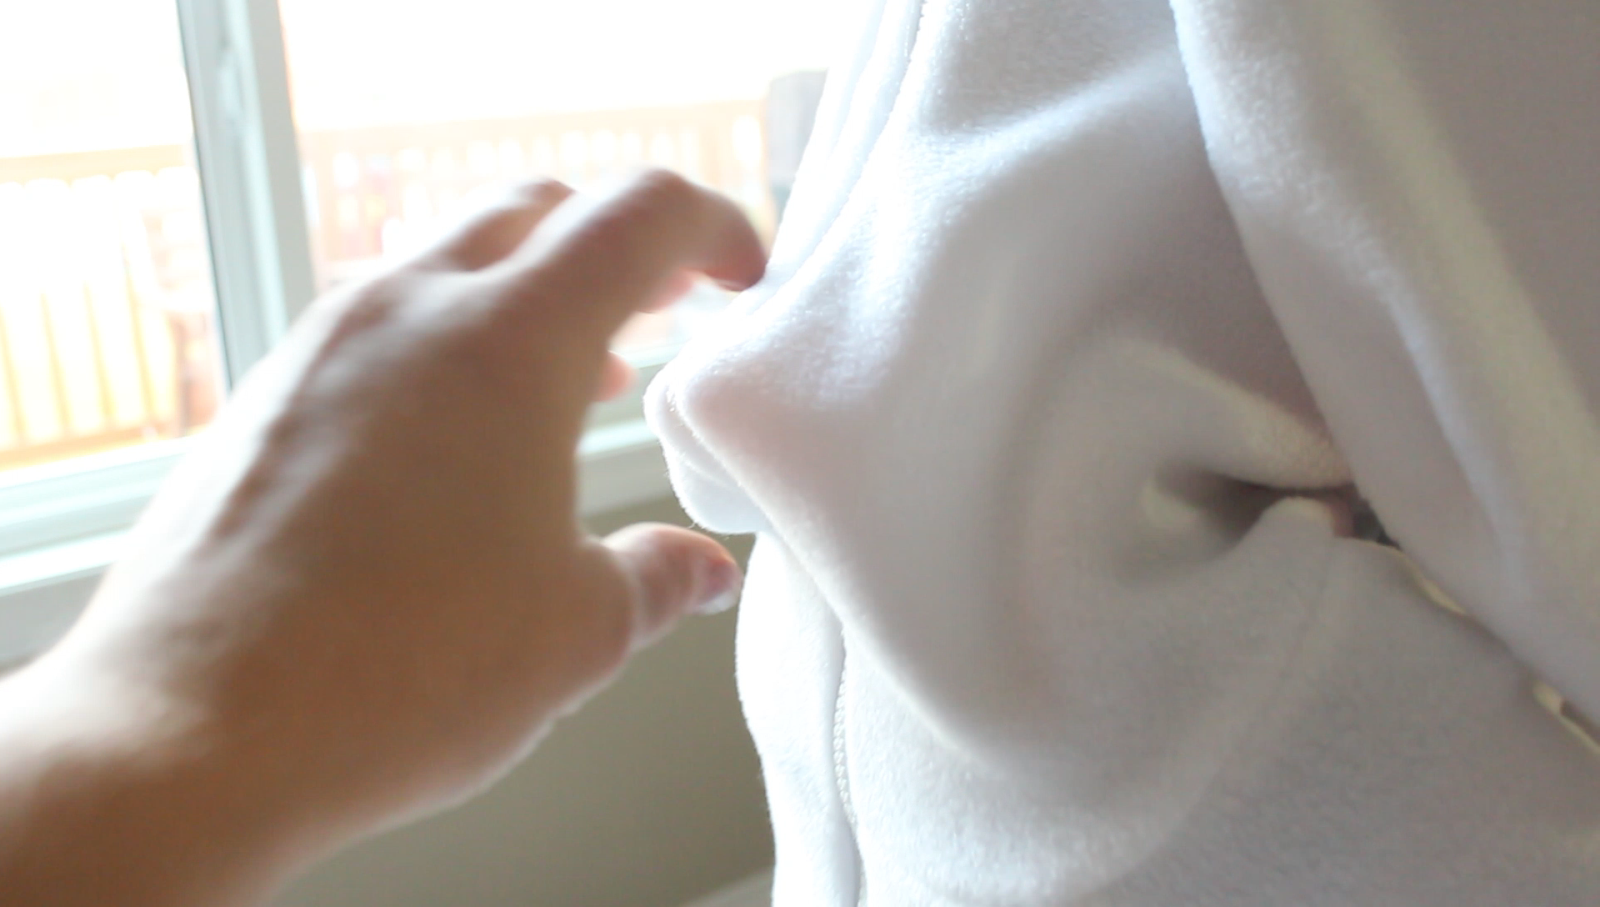
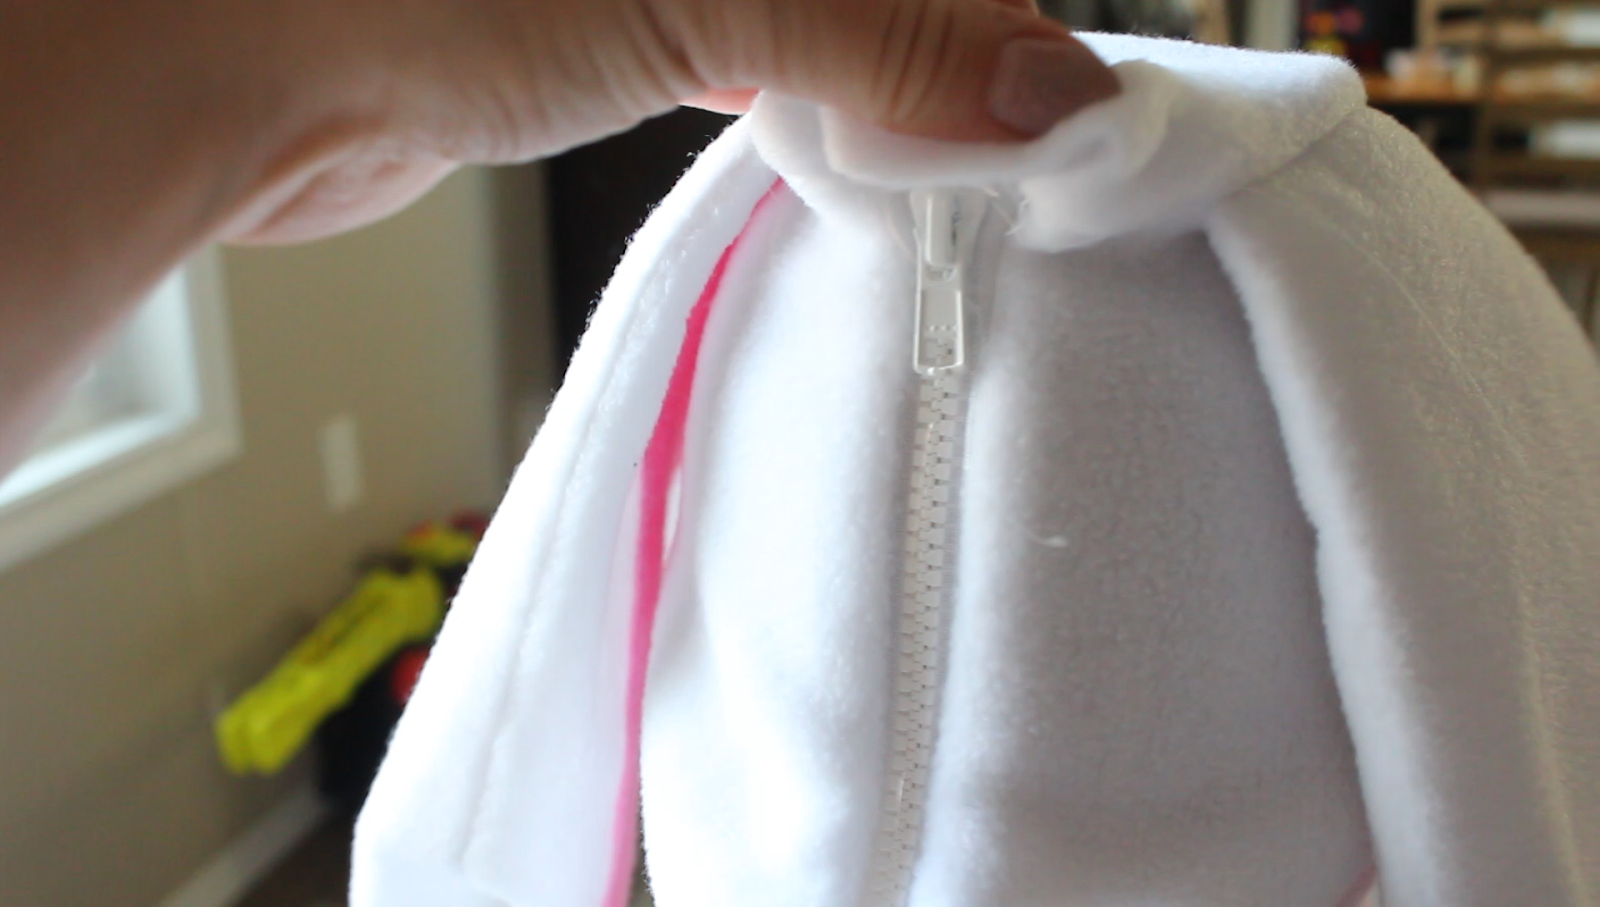
The most important adjustment will be to the hood to accommodate for the zipper extending all the way up. To do this, we just need to kind of “square off” the part that would normally be open to the face. I’m just going to draw a line from the bottom neck piece up to the center top of the hood. You might find that what is drafted as the front neck/chin portion sticks out a smidge when worn backwards. You can just trim some of this off as needed when fitting if it bothers you.

Creating a 3 piece hood
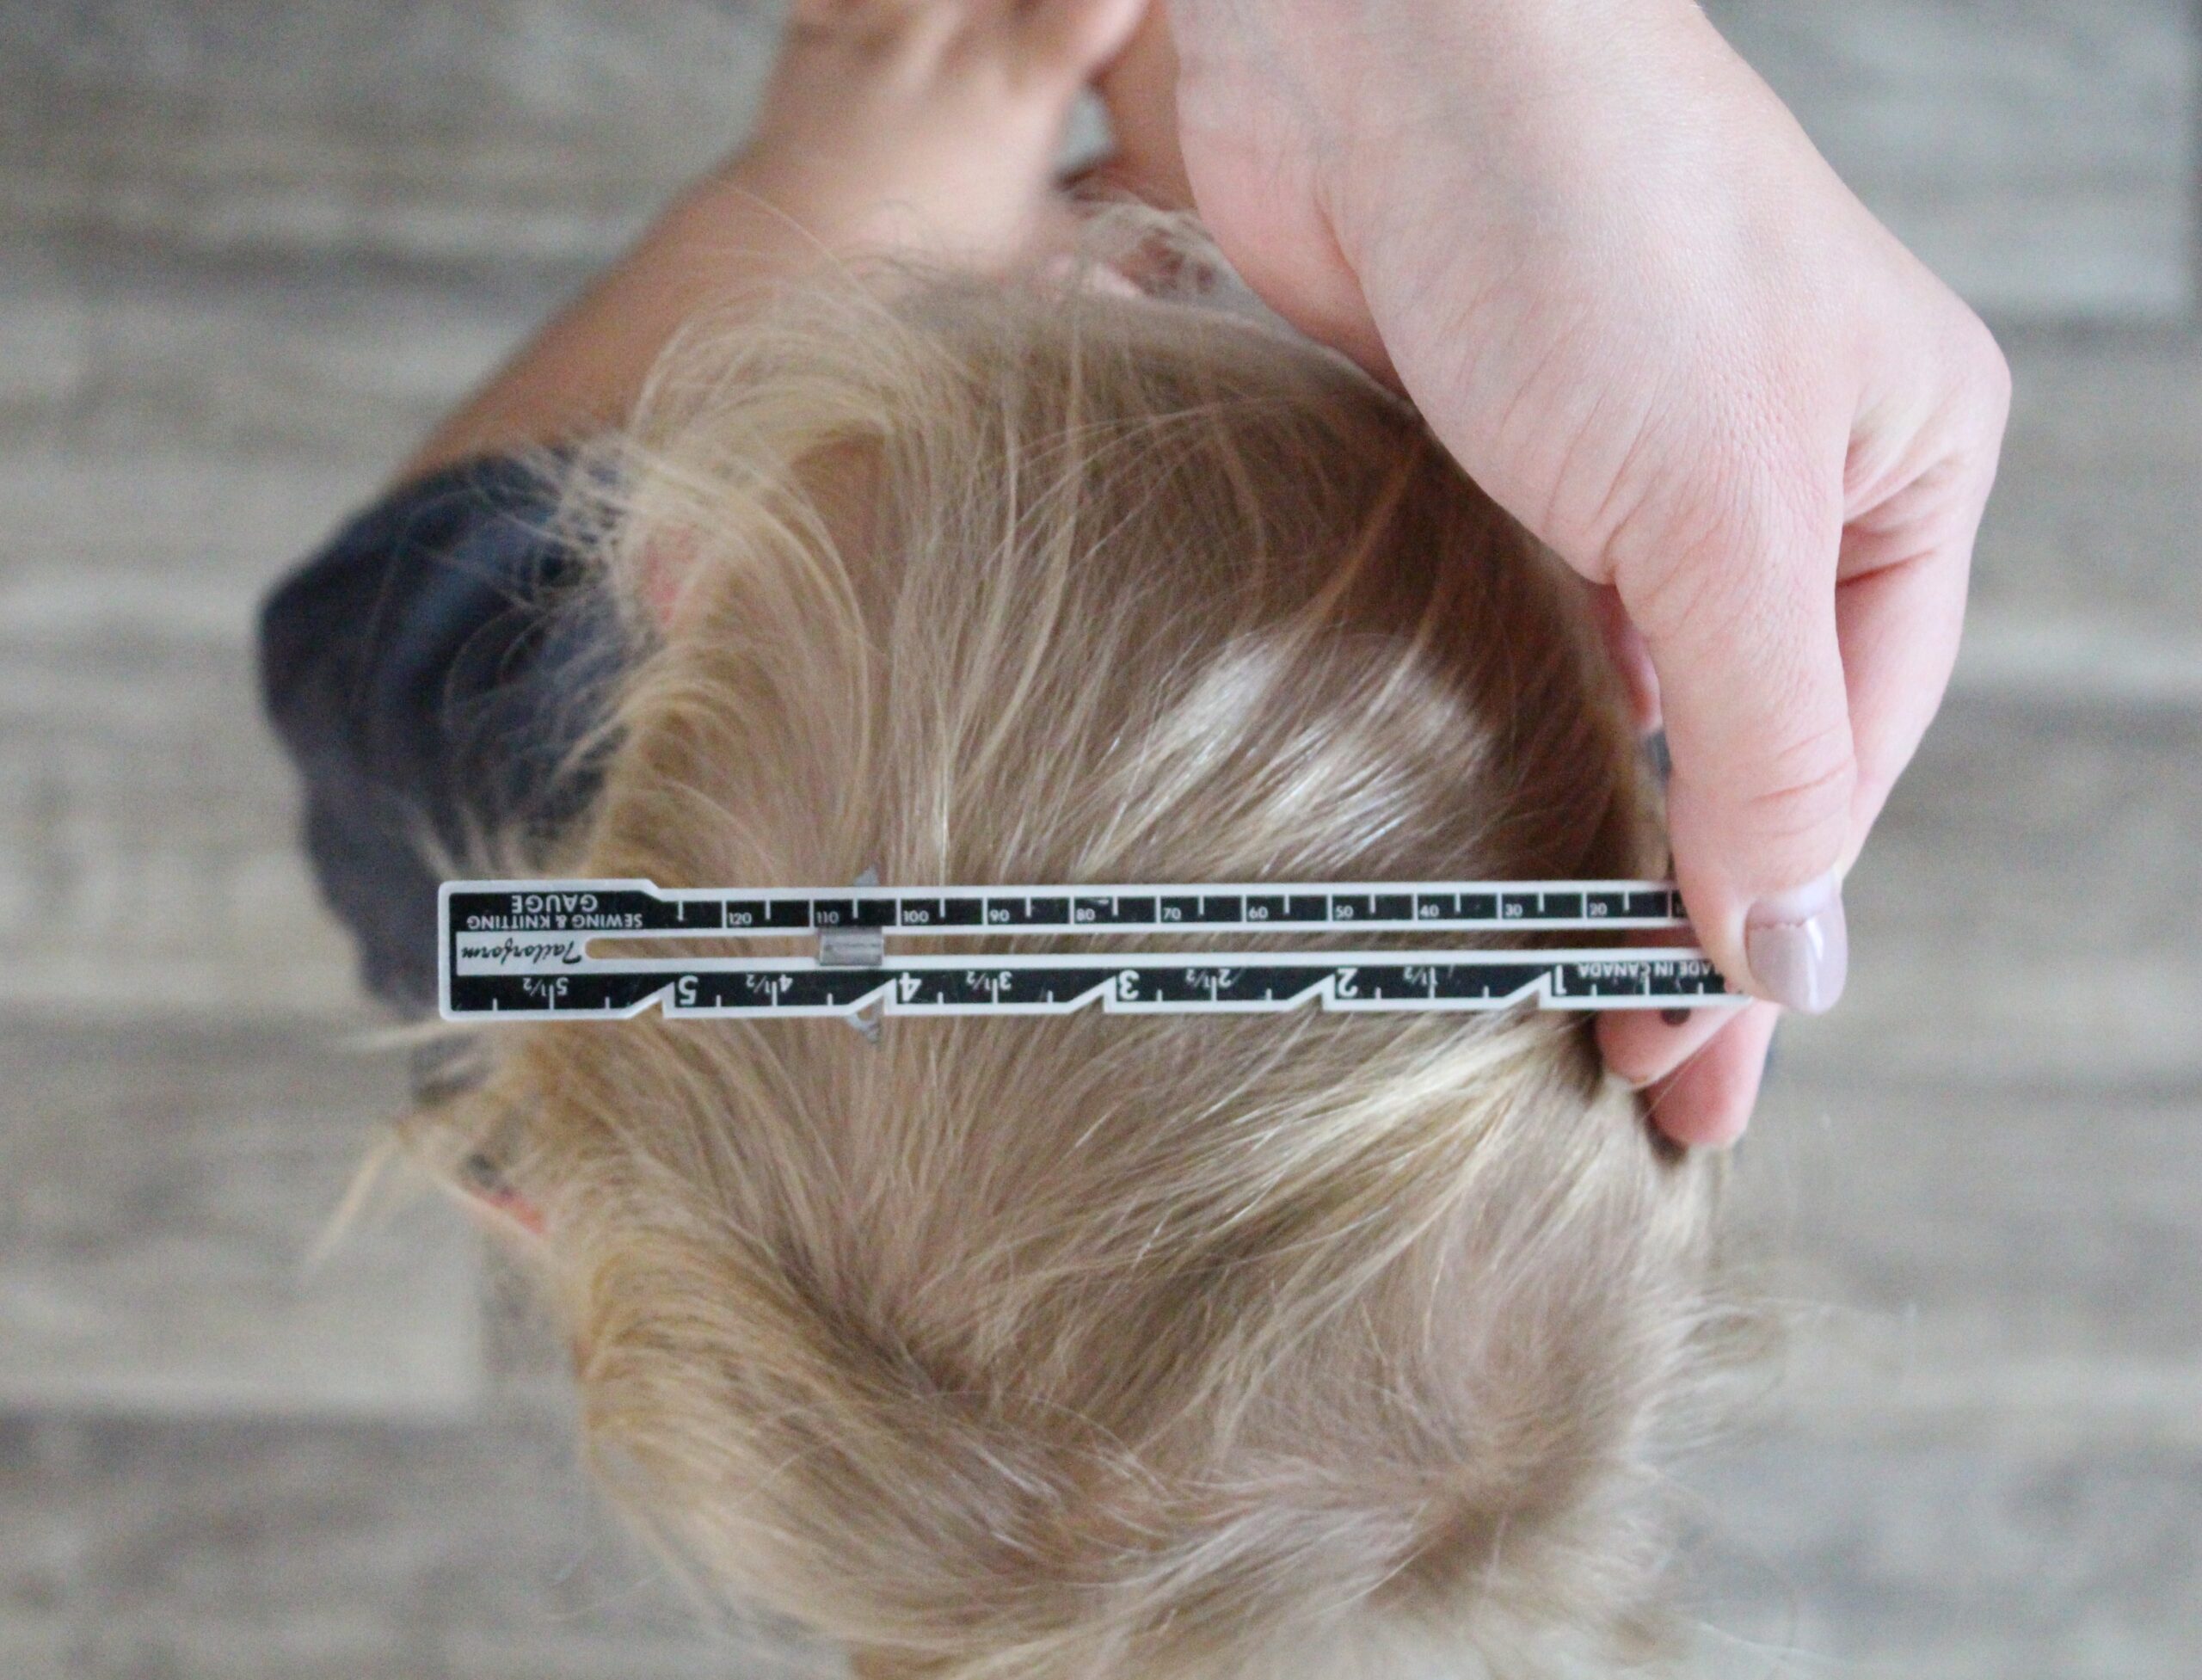
Next we’re going to make this a 3-piece hood. This isn’t necessary, but it makes for a nicer finish (in my opinion), and if you’re adding ears like I am, you’ll want a seam to stick them into. To do this, simply measure on your child’s head to decide how wide you want the center panel to be.
-
- I want mine to be a finished section of 4”.With seam allowance on either long edge, that makes it a 4.75” wide piece of fabric (seam allowance is ⅜” x 2)
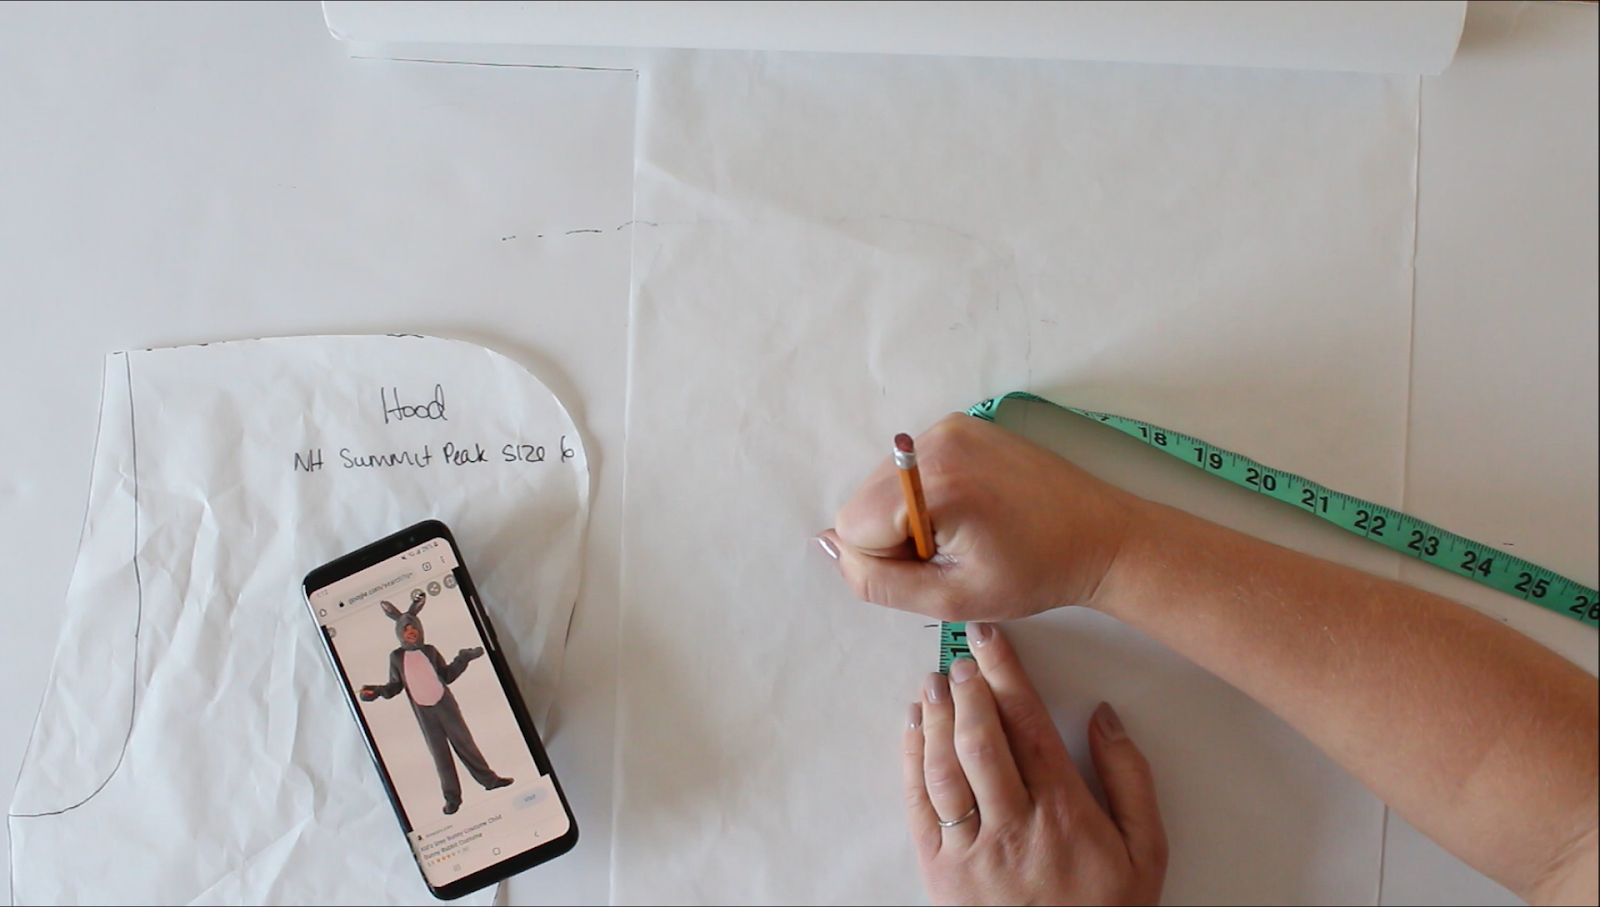
- Cut a long piece of paper 4.75” wide. The total length will depend on the size of hood. To determine this you can measure from the top front center, around the curve, and down to the center bottom where the hood will meet the neck of the sweater (if you do this before trimming the sides, your piece will be a bit long). This is now your hood center panel pattern piece.
-
-
- Because we added 4” to the center of the hood, we need to reduce the width of the sides by an equal amount. Just remember that our hood pattern piece is only half of the hood, so we will divide our center panel width (4”) by 2. We use the pre-seam allowance number because we’re just referring to finished measurements.
- 4”/2 = 2”
- Use a seam gauge or ruler to make even marks along the top hood curve, 2” (or whatever your measurement is), all the way down. We don’t need to add or subtract seam allowance here because it’s already accounted for in the pattern. You can now cut this excess off. I’m also going to round out the curve just a bit so there’s not a bump. I’m using a fancy curved ruler, but freehanding would work just fine.
- Because we added 4” to the center of the hood, we need to reduce the width of the sides by an equal amount. Just remember that our hood pattern piece is only half of the hood, so we will divide our center panel width (4”) by 2. We use the pre-seam allowance number because we’re just referring to finished measurements.
-

Drafting the Bunny Ear Piece
I also need to draft a bunny ear piece. I’m just going to free-hand this while looking at a Google search.
These next two adjustments are totally optional and dependent on your design.
- The Summit Peak Hoodie features a fun 2-piece front panel design. I think this would work awesome for a lot of costumes, like a skunk or dinosaur, but for my costume, I want solid front pieces, so I’m going to combine Front A and Front B. To do this I’ll just overlap and tape the two pieces together. If this were being sewn, you’d be matching top and bottom points and easing in around the curve. We don’t need to worry about that with taping, so just line up the top sleeve curve, and we’ll trim the bottom excess after.
-
- I’m going to overlap about ¼” because I want this to be roomy, but if you wanted to keep the original size intact, you would want to overlap ¾” to account for the seam allowance removal. Trim bottom if necessary.

2. I’m also going to widen the sleeve to make it less fitted. To do this I’m just making lines from the underarm points down to the sleeve hem, ⅝” wider than the original pattern, on each side.

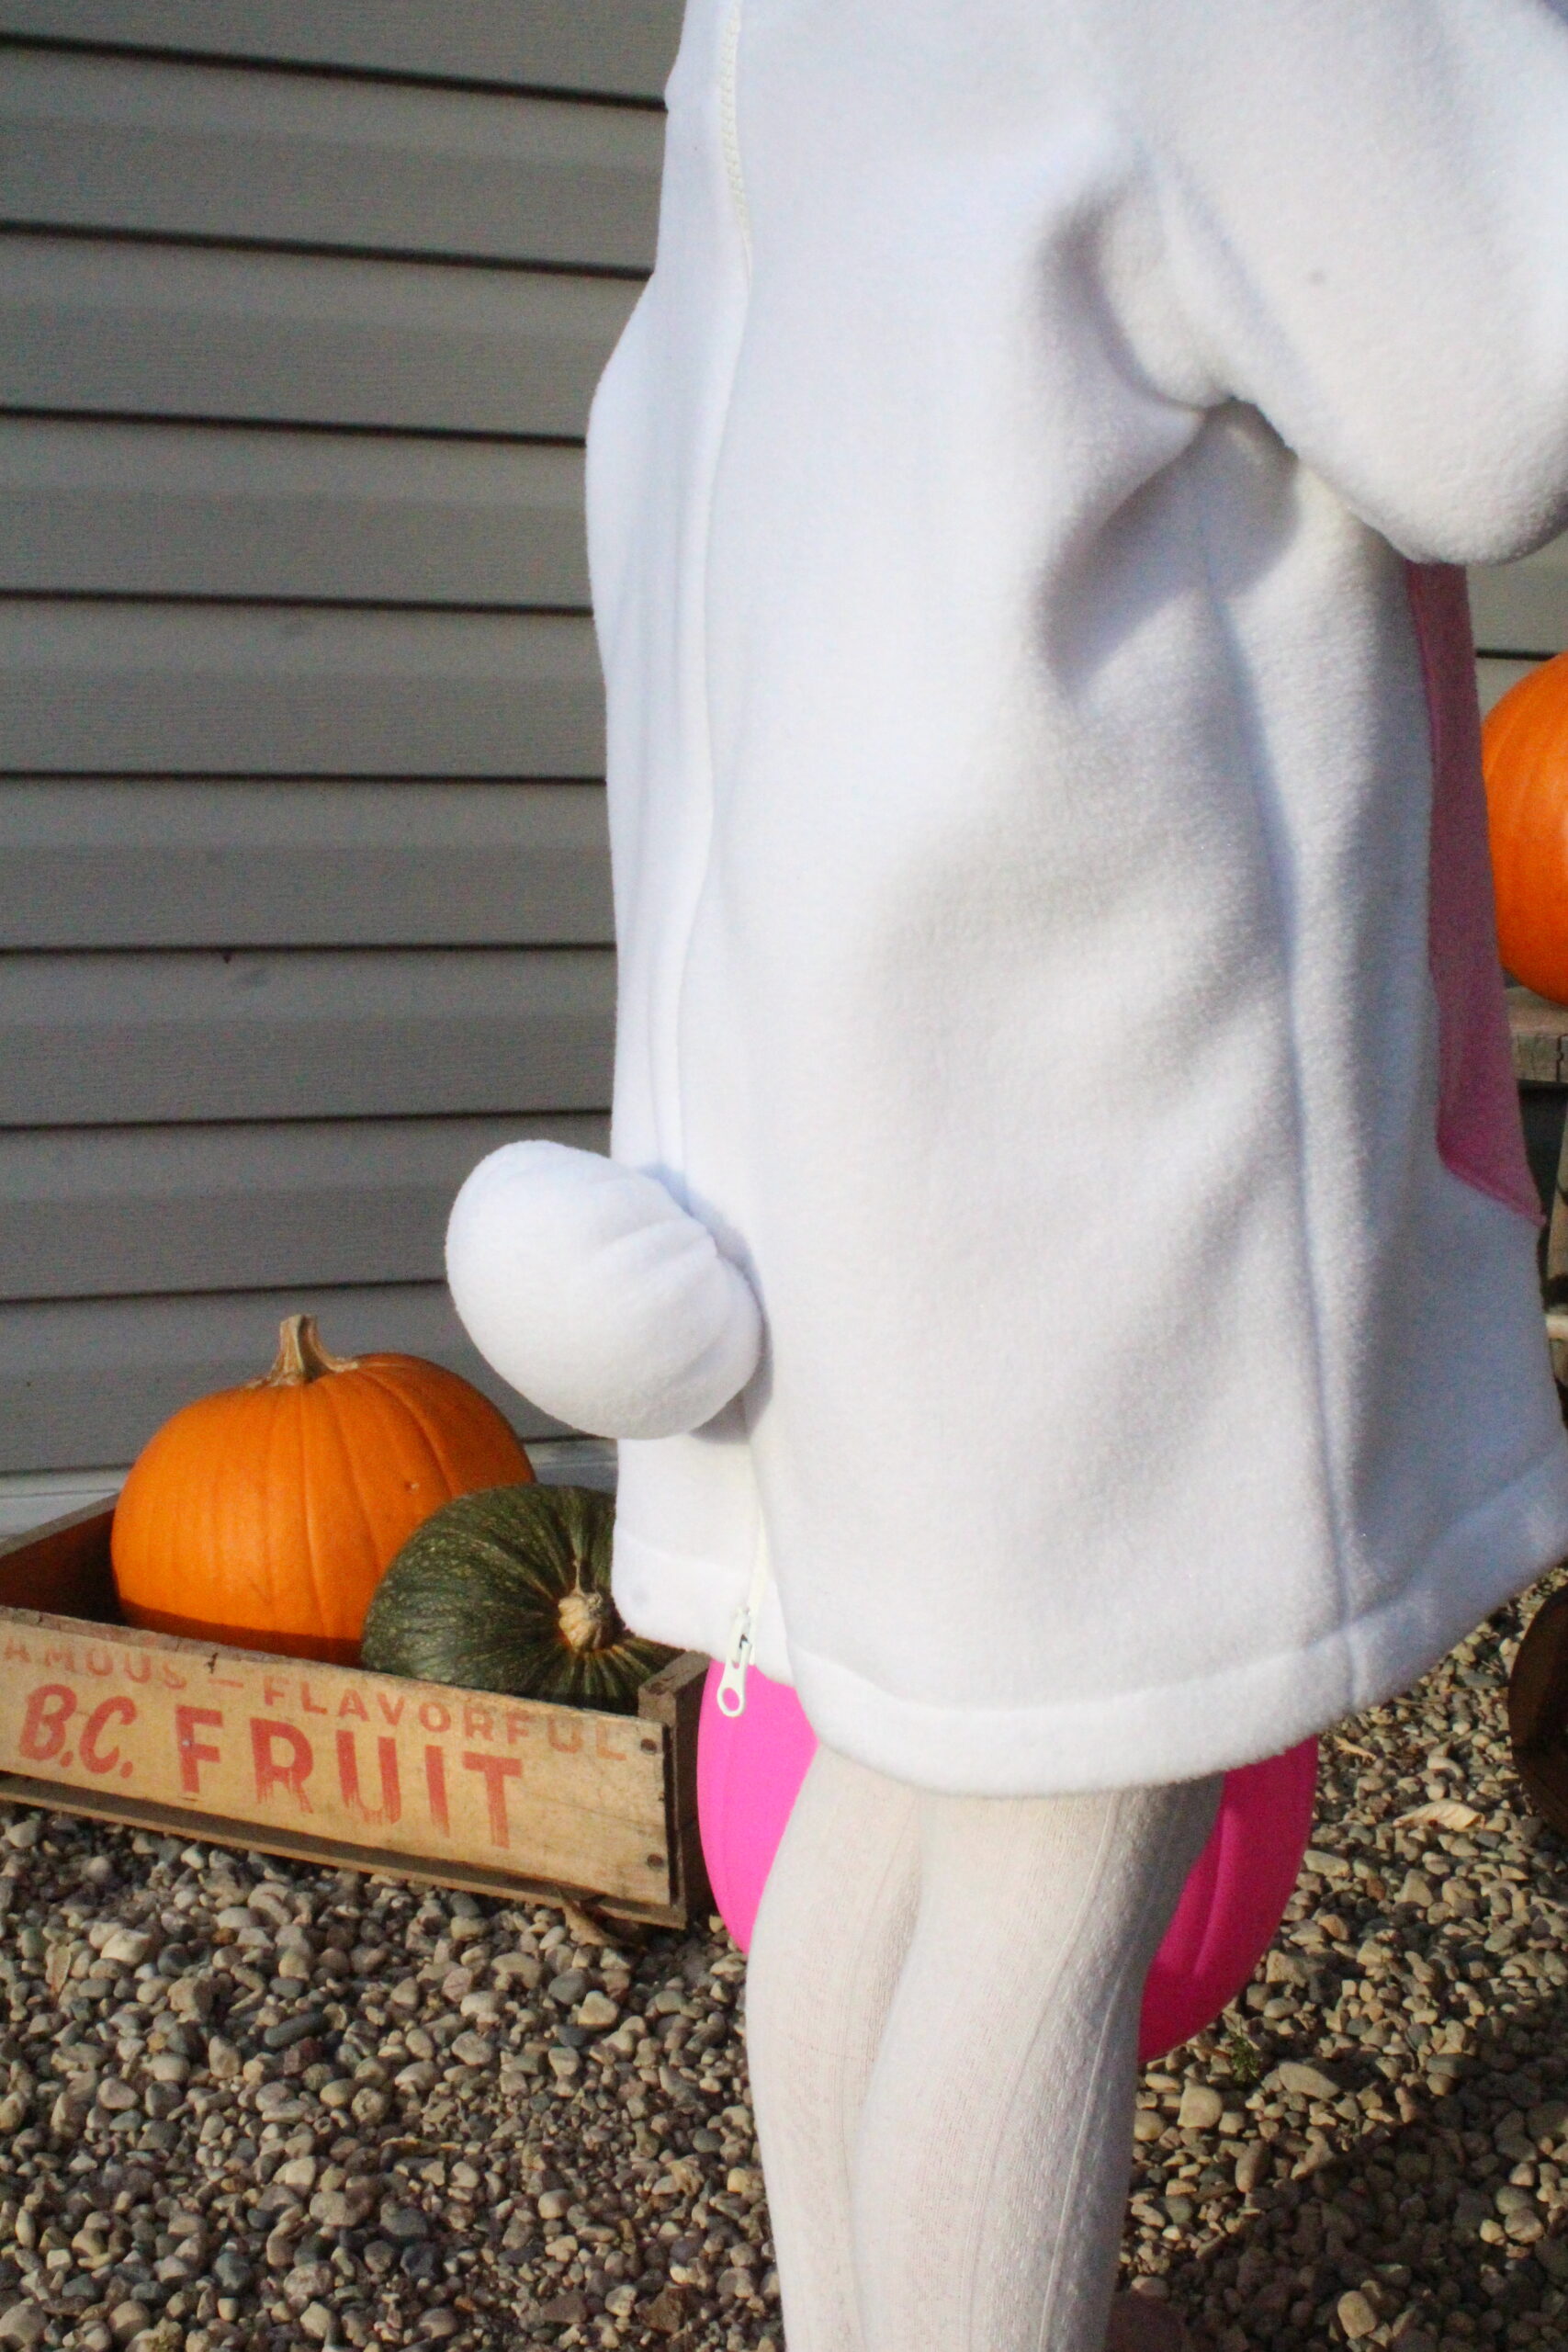
Adding length for the tail
Finally, I want to add some length to my costume to leave room for a little tail. I’m going to add some paper to the bottom and increase the front and back pieces by the same amount, keeping in mind the length of the zipper that I have for this project, as well as hem allowance. Remember you can always cut excess off once you have the basic construction completed.. If you’re printing at home, you can simply select a larger size to use for length adjustments.
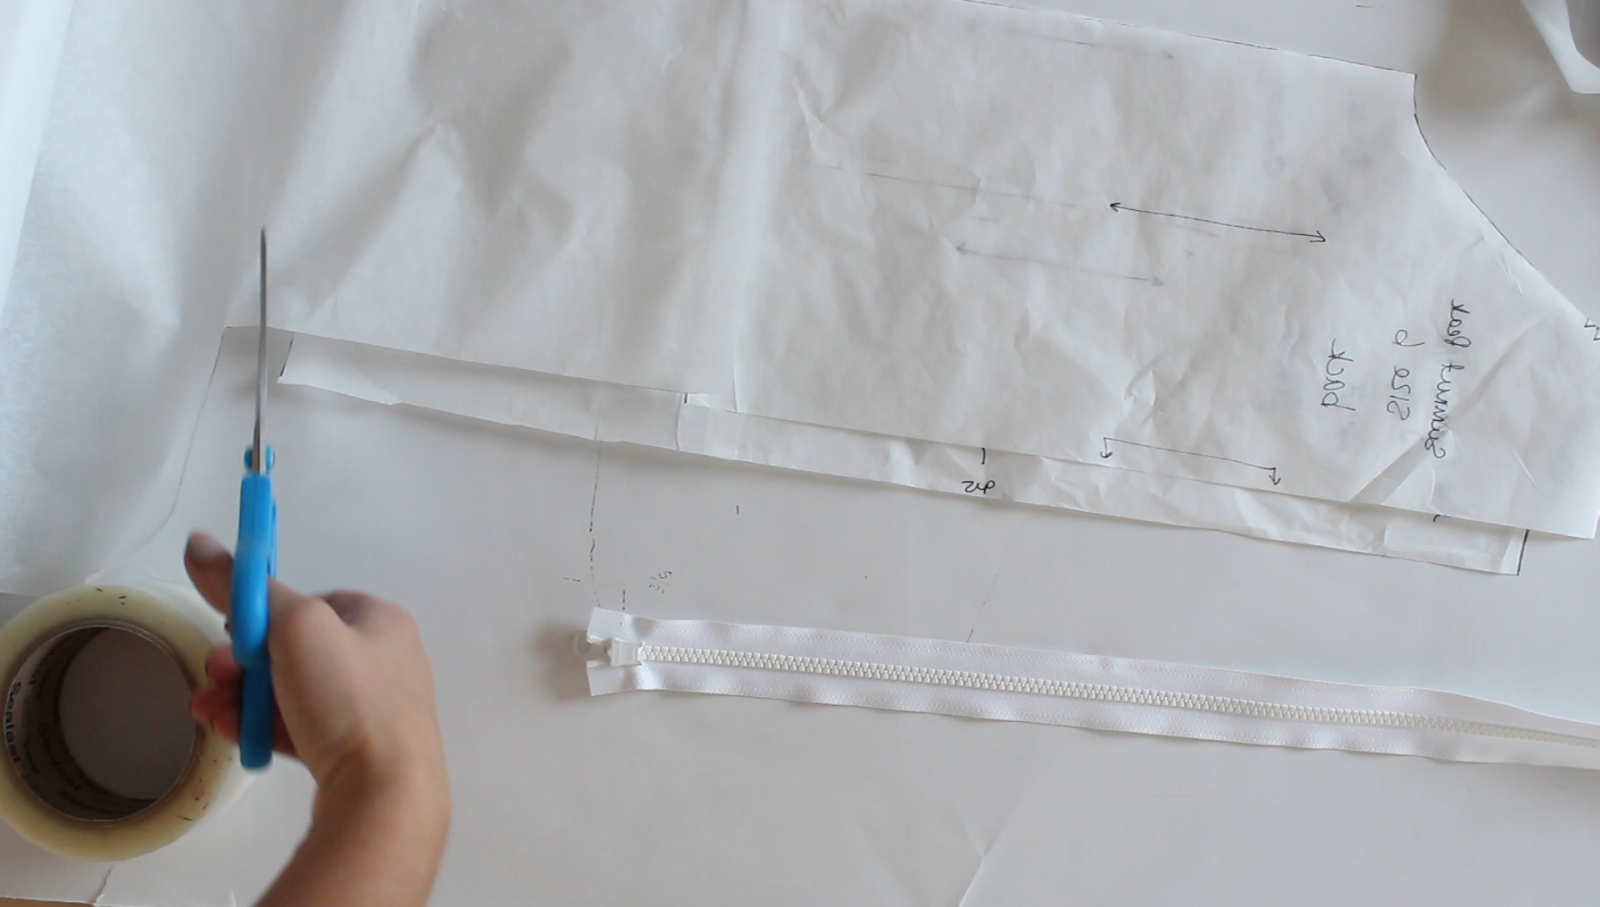
Cutting Your Fabric
Now it’s time to cut the fabric! I’m using fleece for the main garment, plus some interfacing in the ears and felt for the face. I chose to size up a couple times since this fabric doesn’t meet the stretch requirements of the pattern, and because I want it to fit over a snowsuit, if necessary! If you’re not sure which fabrics to use, or have a couple different options in mind, you could always do a quick fabric mockup to compare. Yep, we have a video for that too!
The rest of the steps are relatively straightforward. You can follow the pattern instructions to assemble the zip up hoodie. There are just a couple things to keep in mind if you’re making this a back-zip costume:
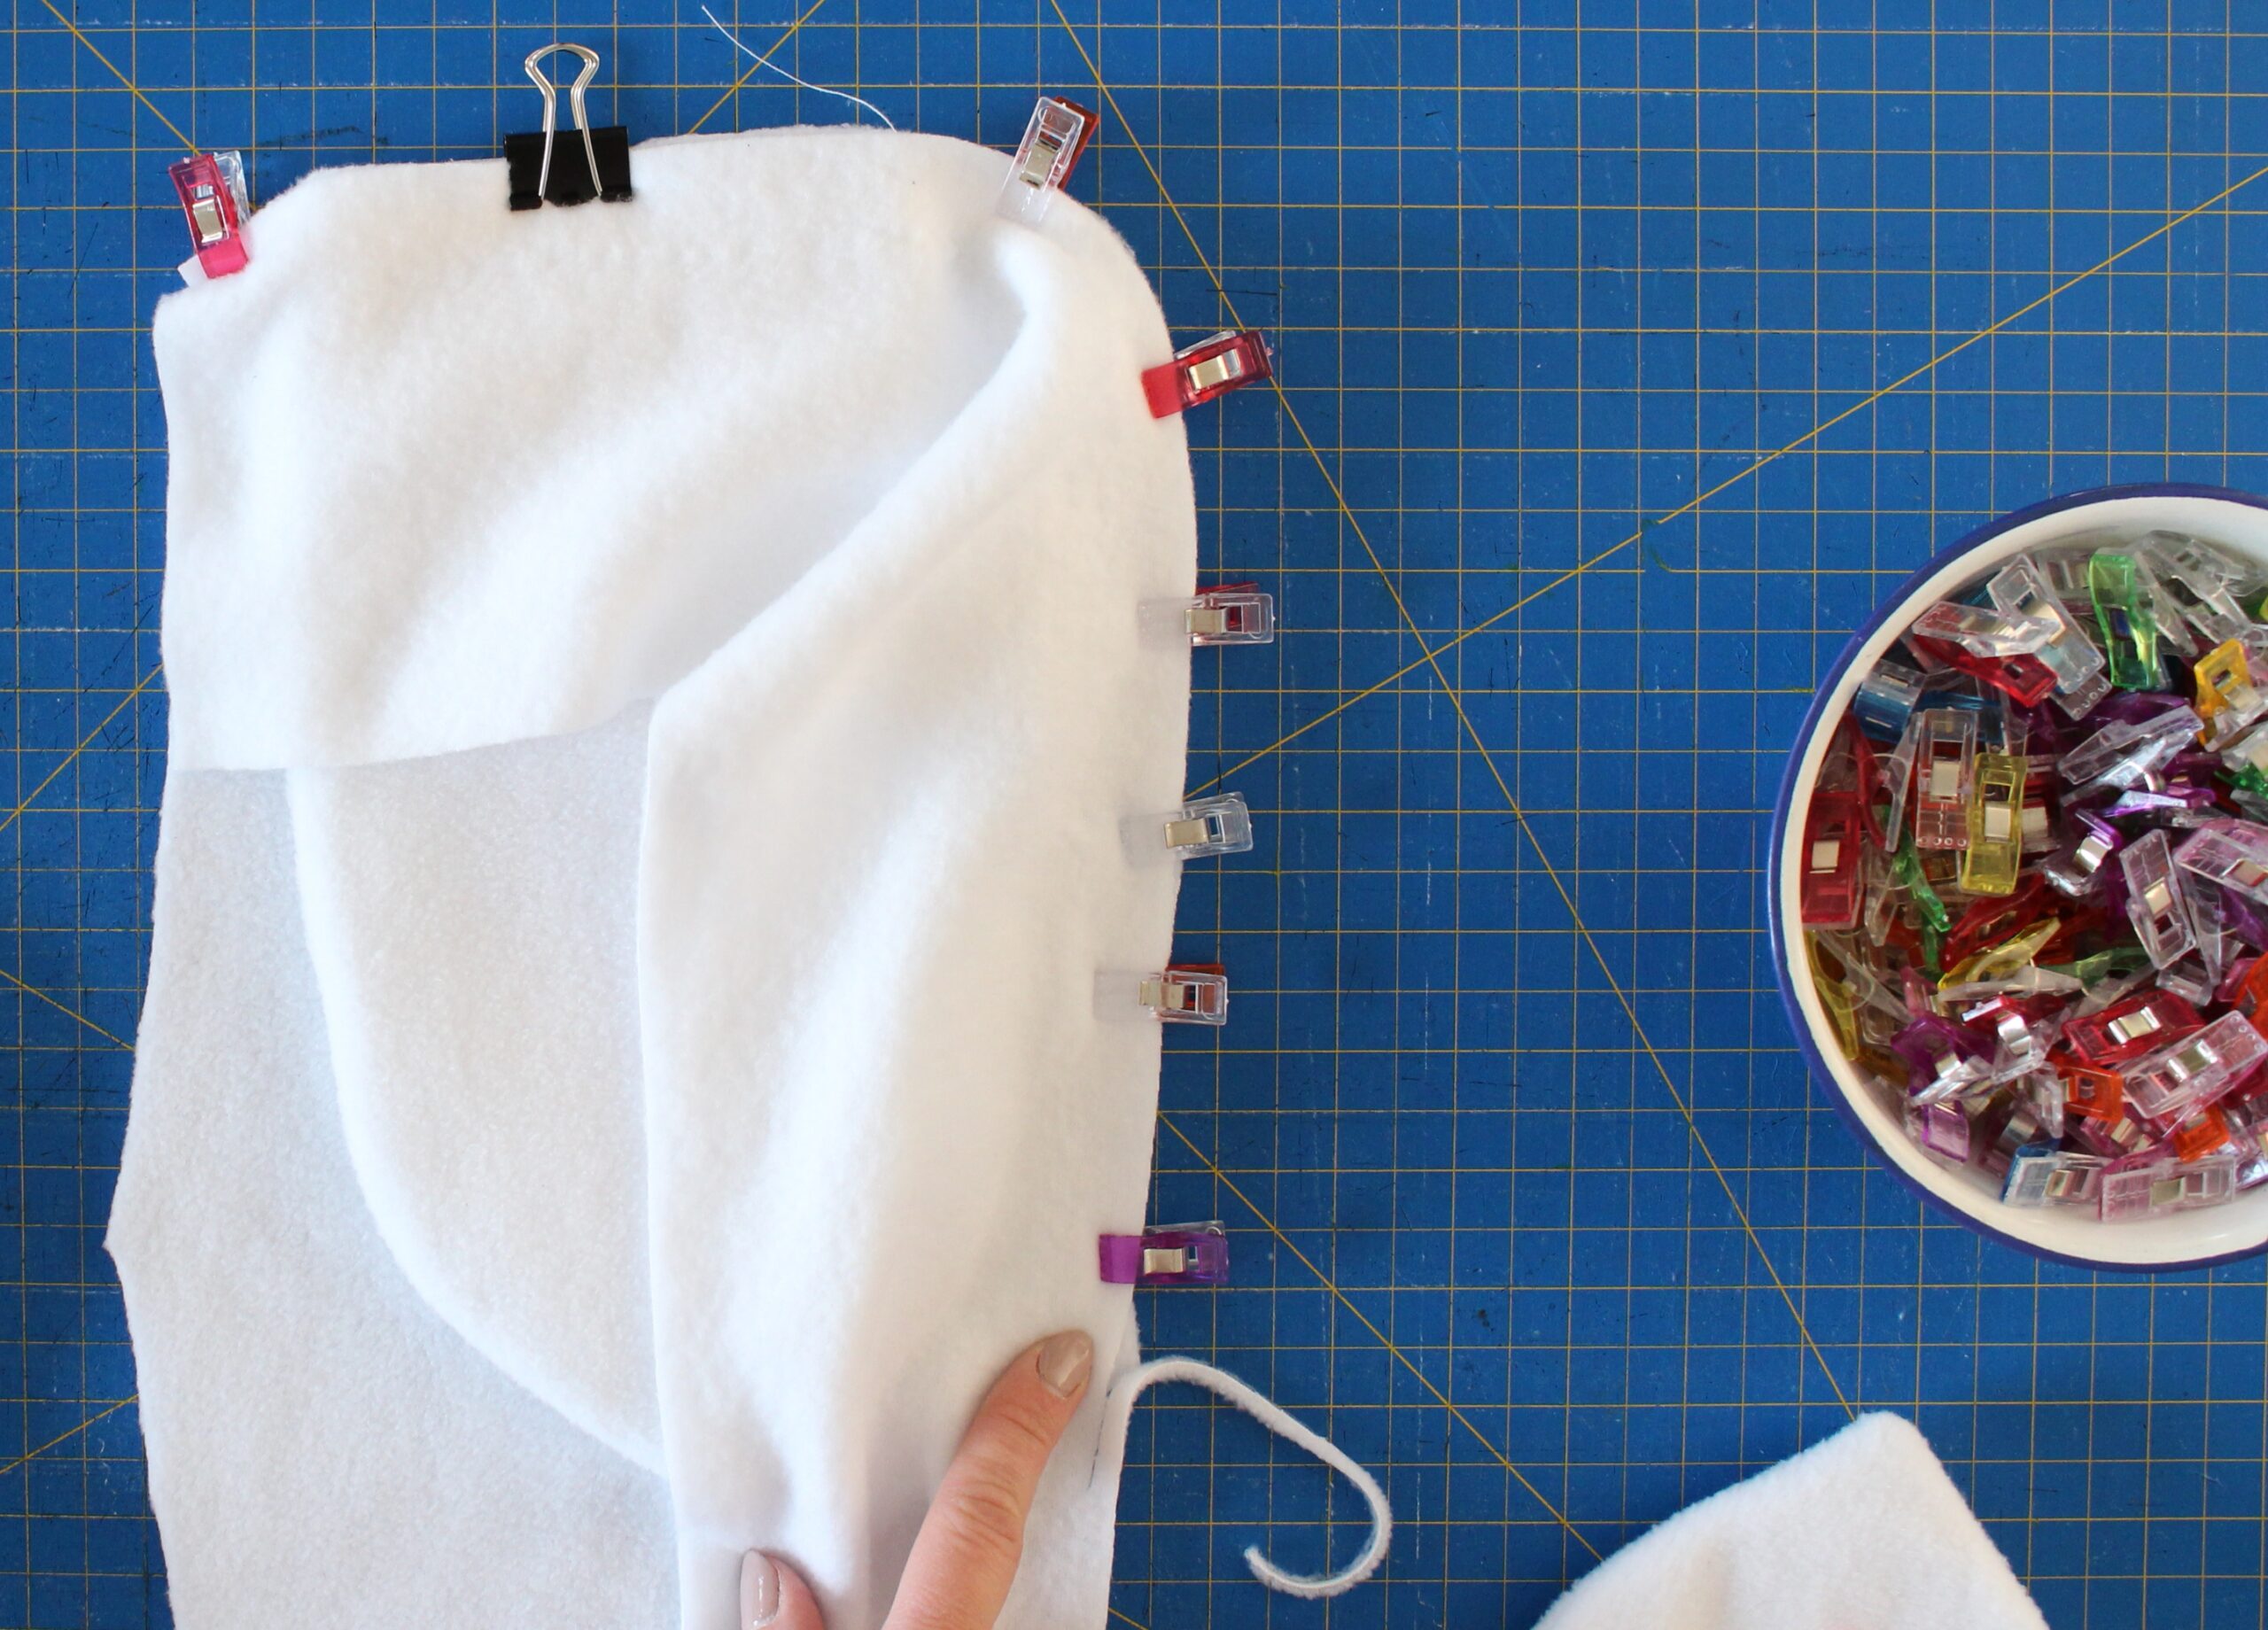
- For the hood, you’ll want to attach the new center panel to one side panel, starting at the front edge of the hood, and then to the other side, also starting at the front edge. This is to ensure any excess on the new center strip stays at one end of the hood so we can trim it off after. Don’t forget to add in any ears in the seams if needed!
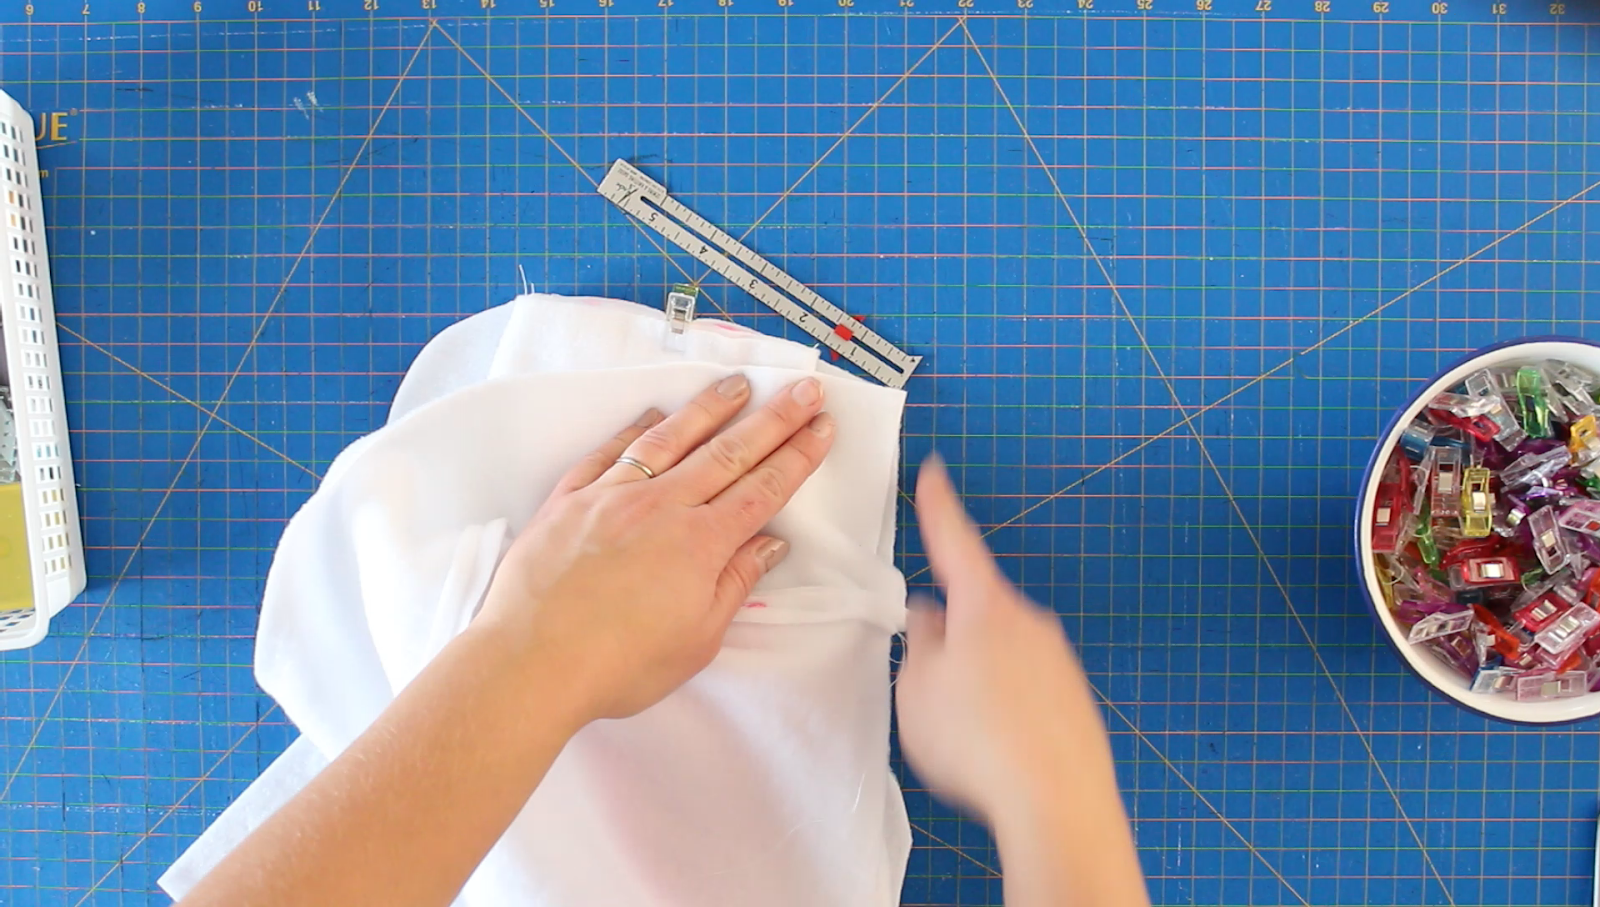
- To extend the zipper all the way up the hood, just continue attaching it all the way up the sides of the hood. You might choose to tuck in the top portion of the center panel for a more finished look.
- Remember I planned not to do cuffs or a waistband? I’m just going to hem the bottom edge of the sweater, but I ended up choosing to make some built-in mitts since the sleeves were long enough. I just drew a little mitt outline while the sleeve was wrong side out, sewed it up, notched around the curves and turned out.

Embellishing Your Hoodie
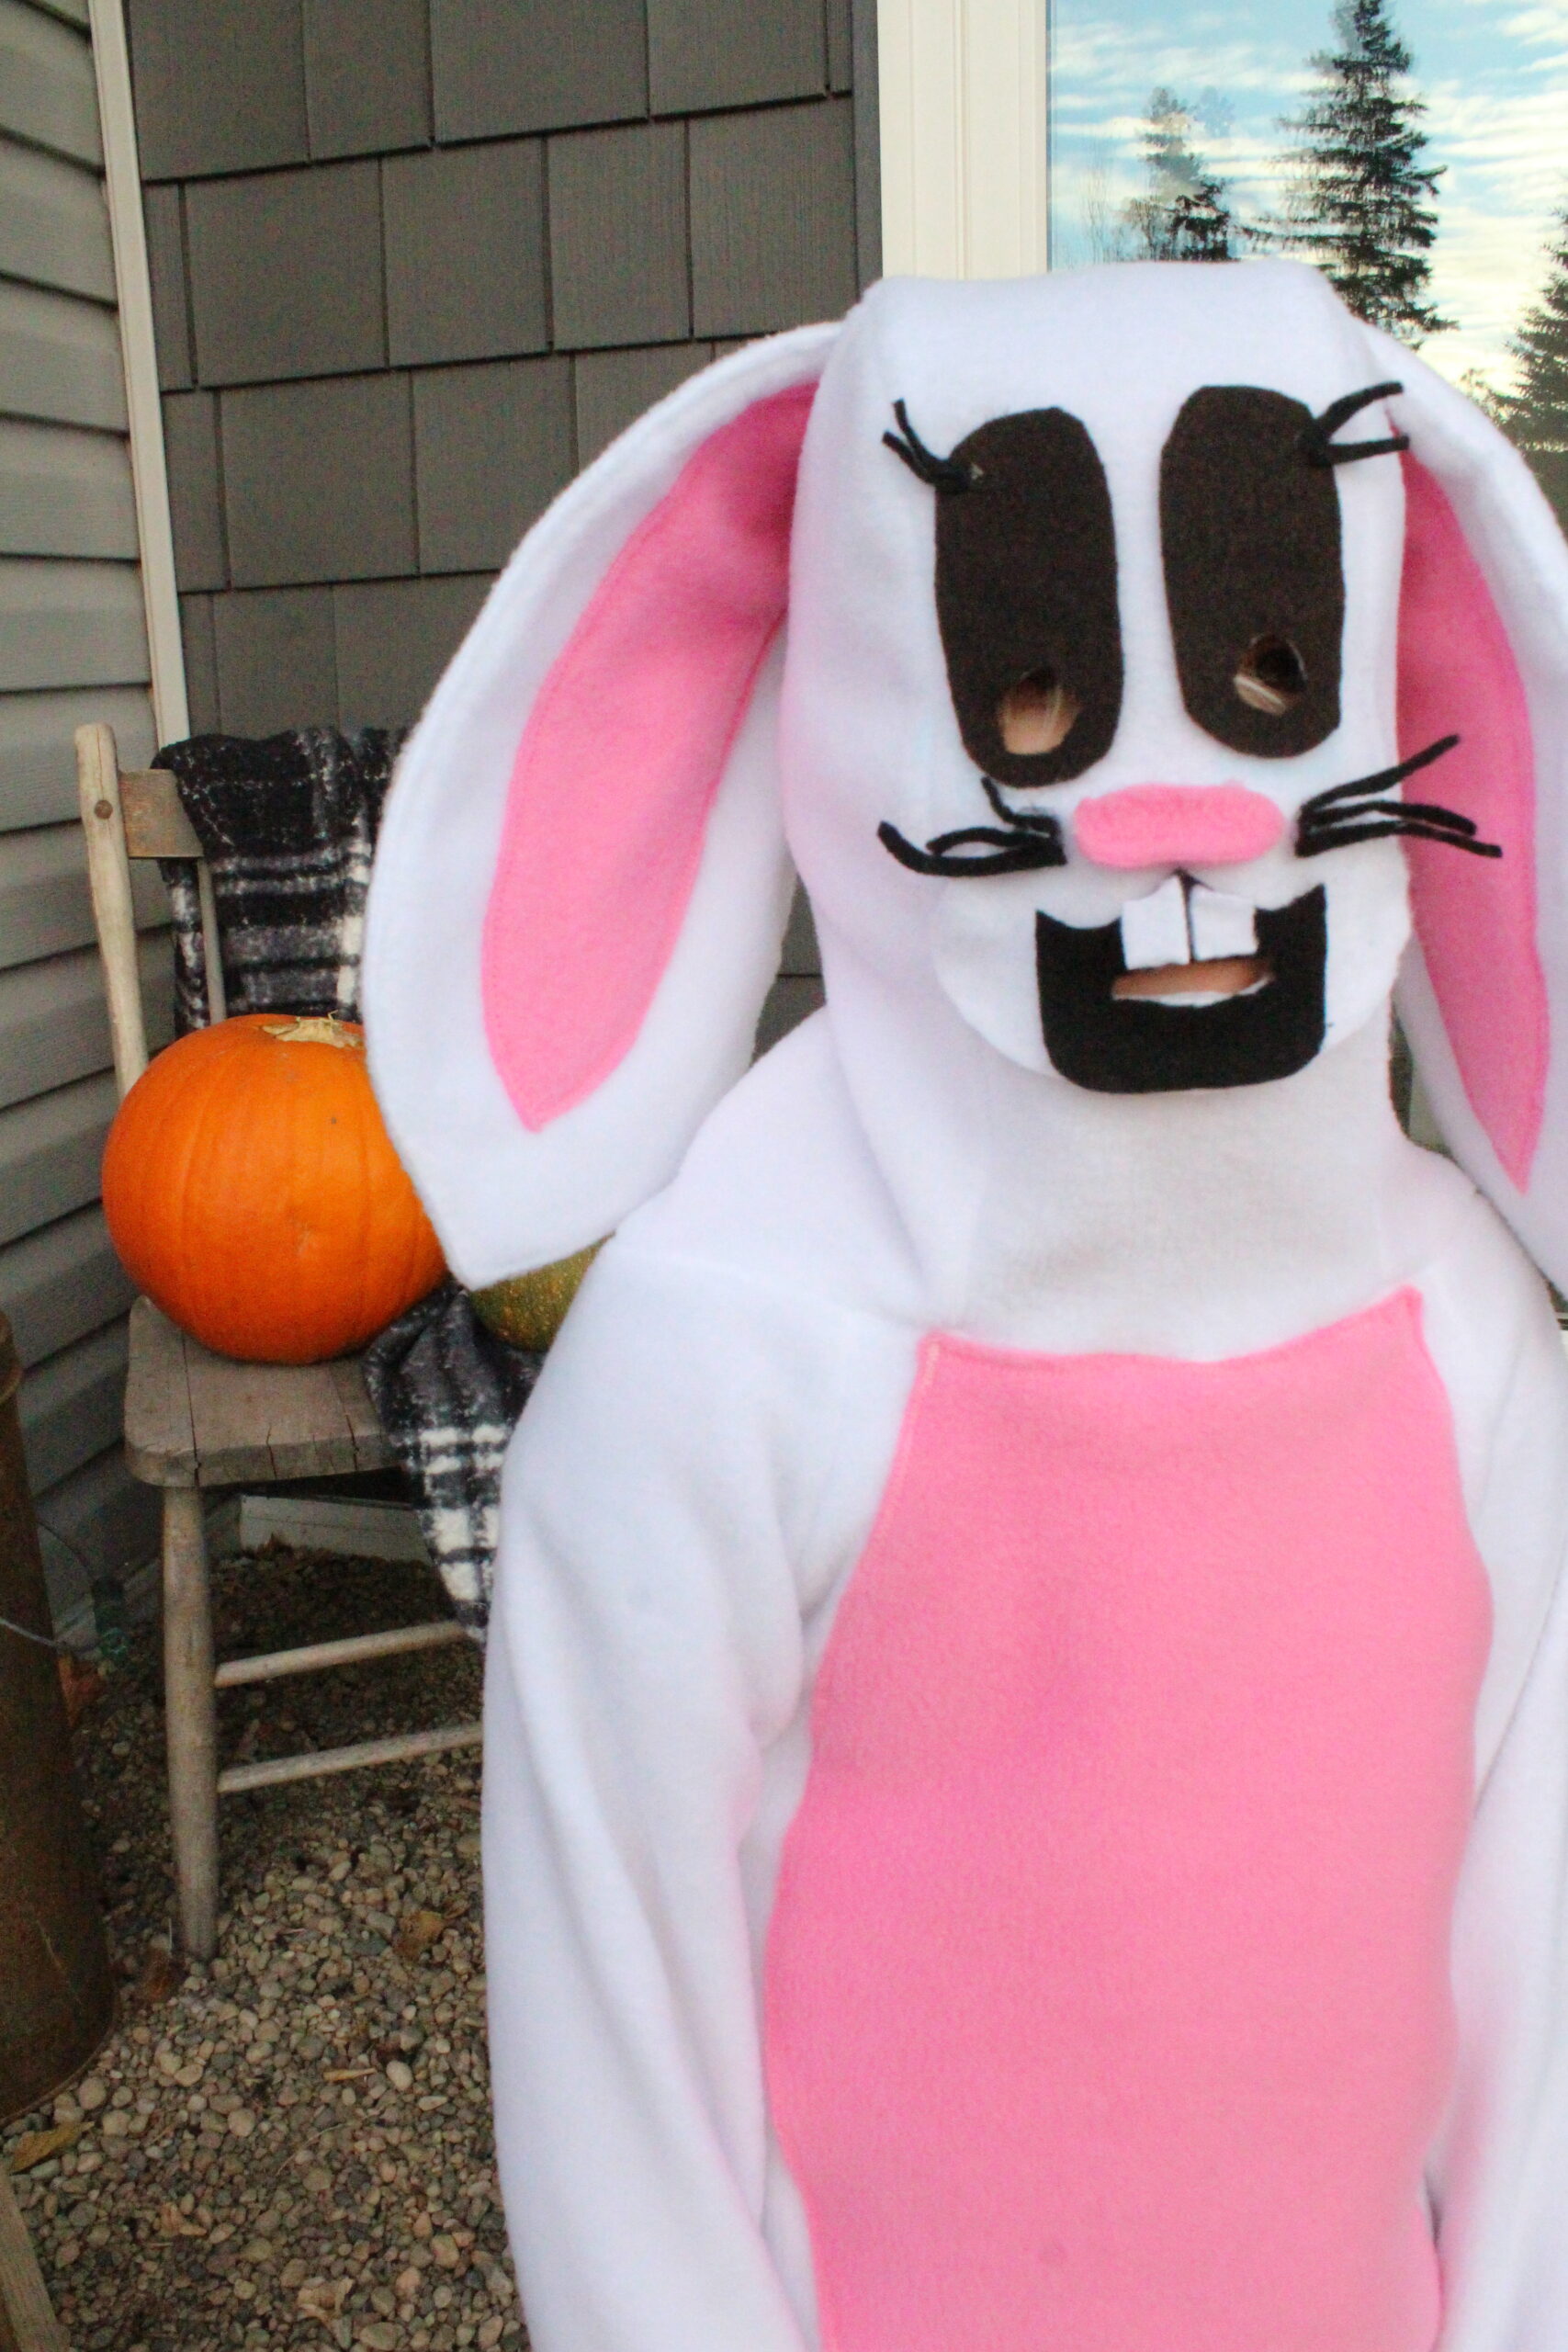
Now I’m embellishing as necessary to fit the costume demands. An applique tummy and palm circles, cute handmade pom tail and finishing facial features complete my Halloween bunny. I chose to make holes for the eyes and mouth. Since I’m using fleece and felt, they won’t fray. You could also add in something like pantyhose/nylon or mesh if you wanted a less transparent look. And hopefully you’re better at recreating facial features than I am!

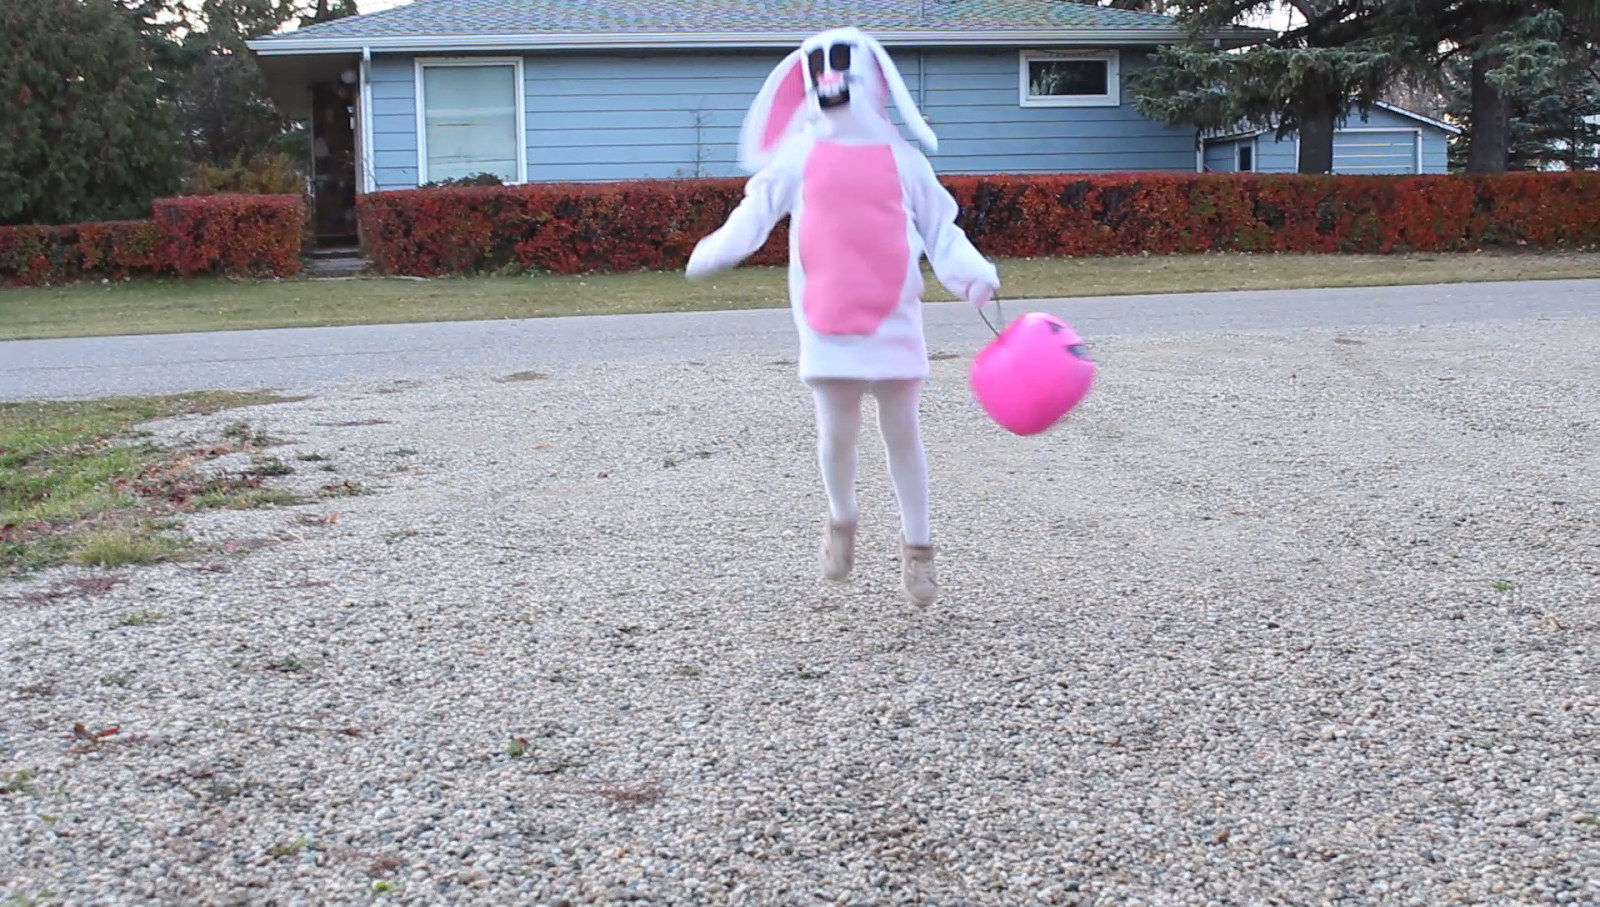
Make sure you check out the video of this make to see how cute it looks in hopping action!
Other Costume Ideas
I was having a lot of fun daydreaming up all the costume ideas you could use with this hack. I really like that it adds flexibility to designing the front of the garment since the zipper is in the back. Aside from the skunk and dinosaur I already mentioned, I was also thinking of:
- Movie characters like Heihei, Scoobie, a Minion or Patrick Star
- Dolphin
- Cow
- Wolf
- Banana
- Clown
- Superhero
Thanks so much for spending a bit of time with me here at New Horizons. I can’t wait to see your Summit Peak costume with this reverse zip up tutorial. Don’t forget to tag us on instagram. Have a great, safe Halloween!