Our blog today is going to show you how to create a clean finish on your zip up hoodies!
Hello, I’m An Ca and I live in a small country called Belgium. I am so honored to be a guest blogger for New Horizons Designs. If you love my post you can visit my sewing blog: Flaxfield Sewing, or my Instagram account: flaxfield_sewing.

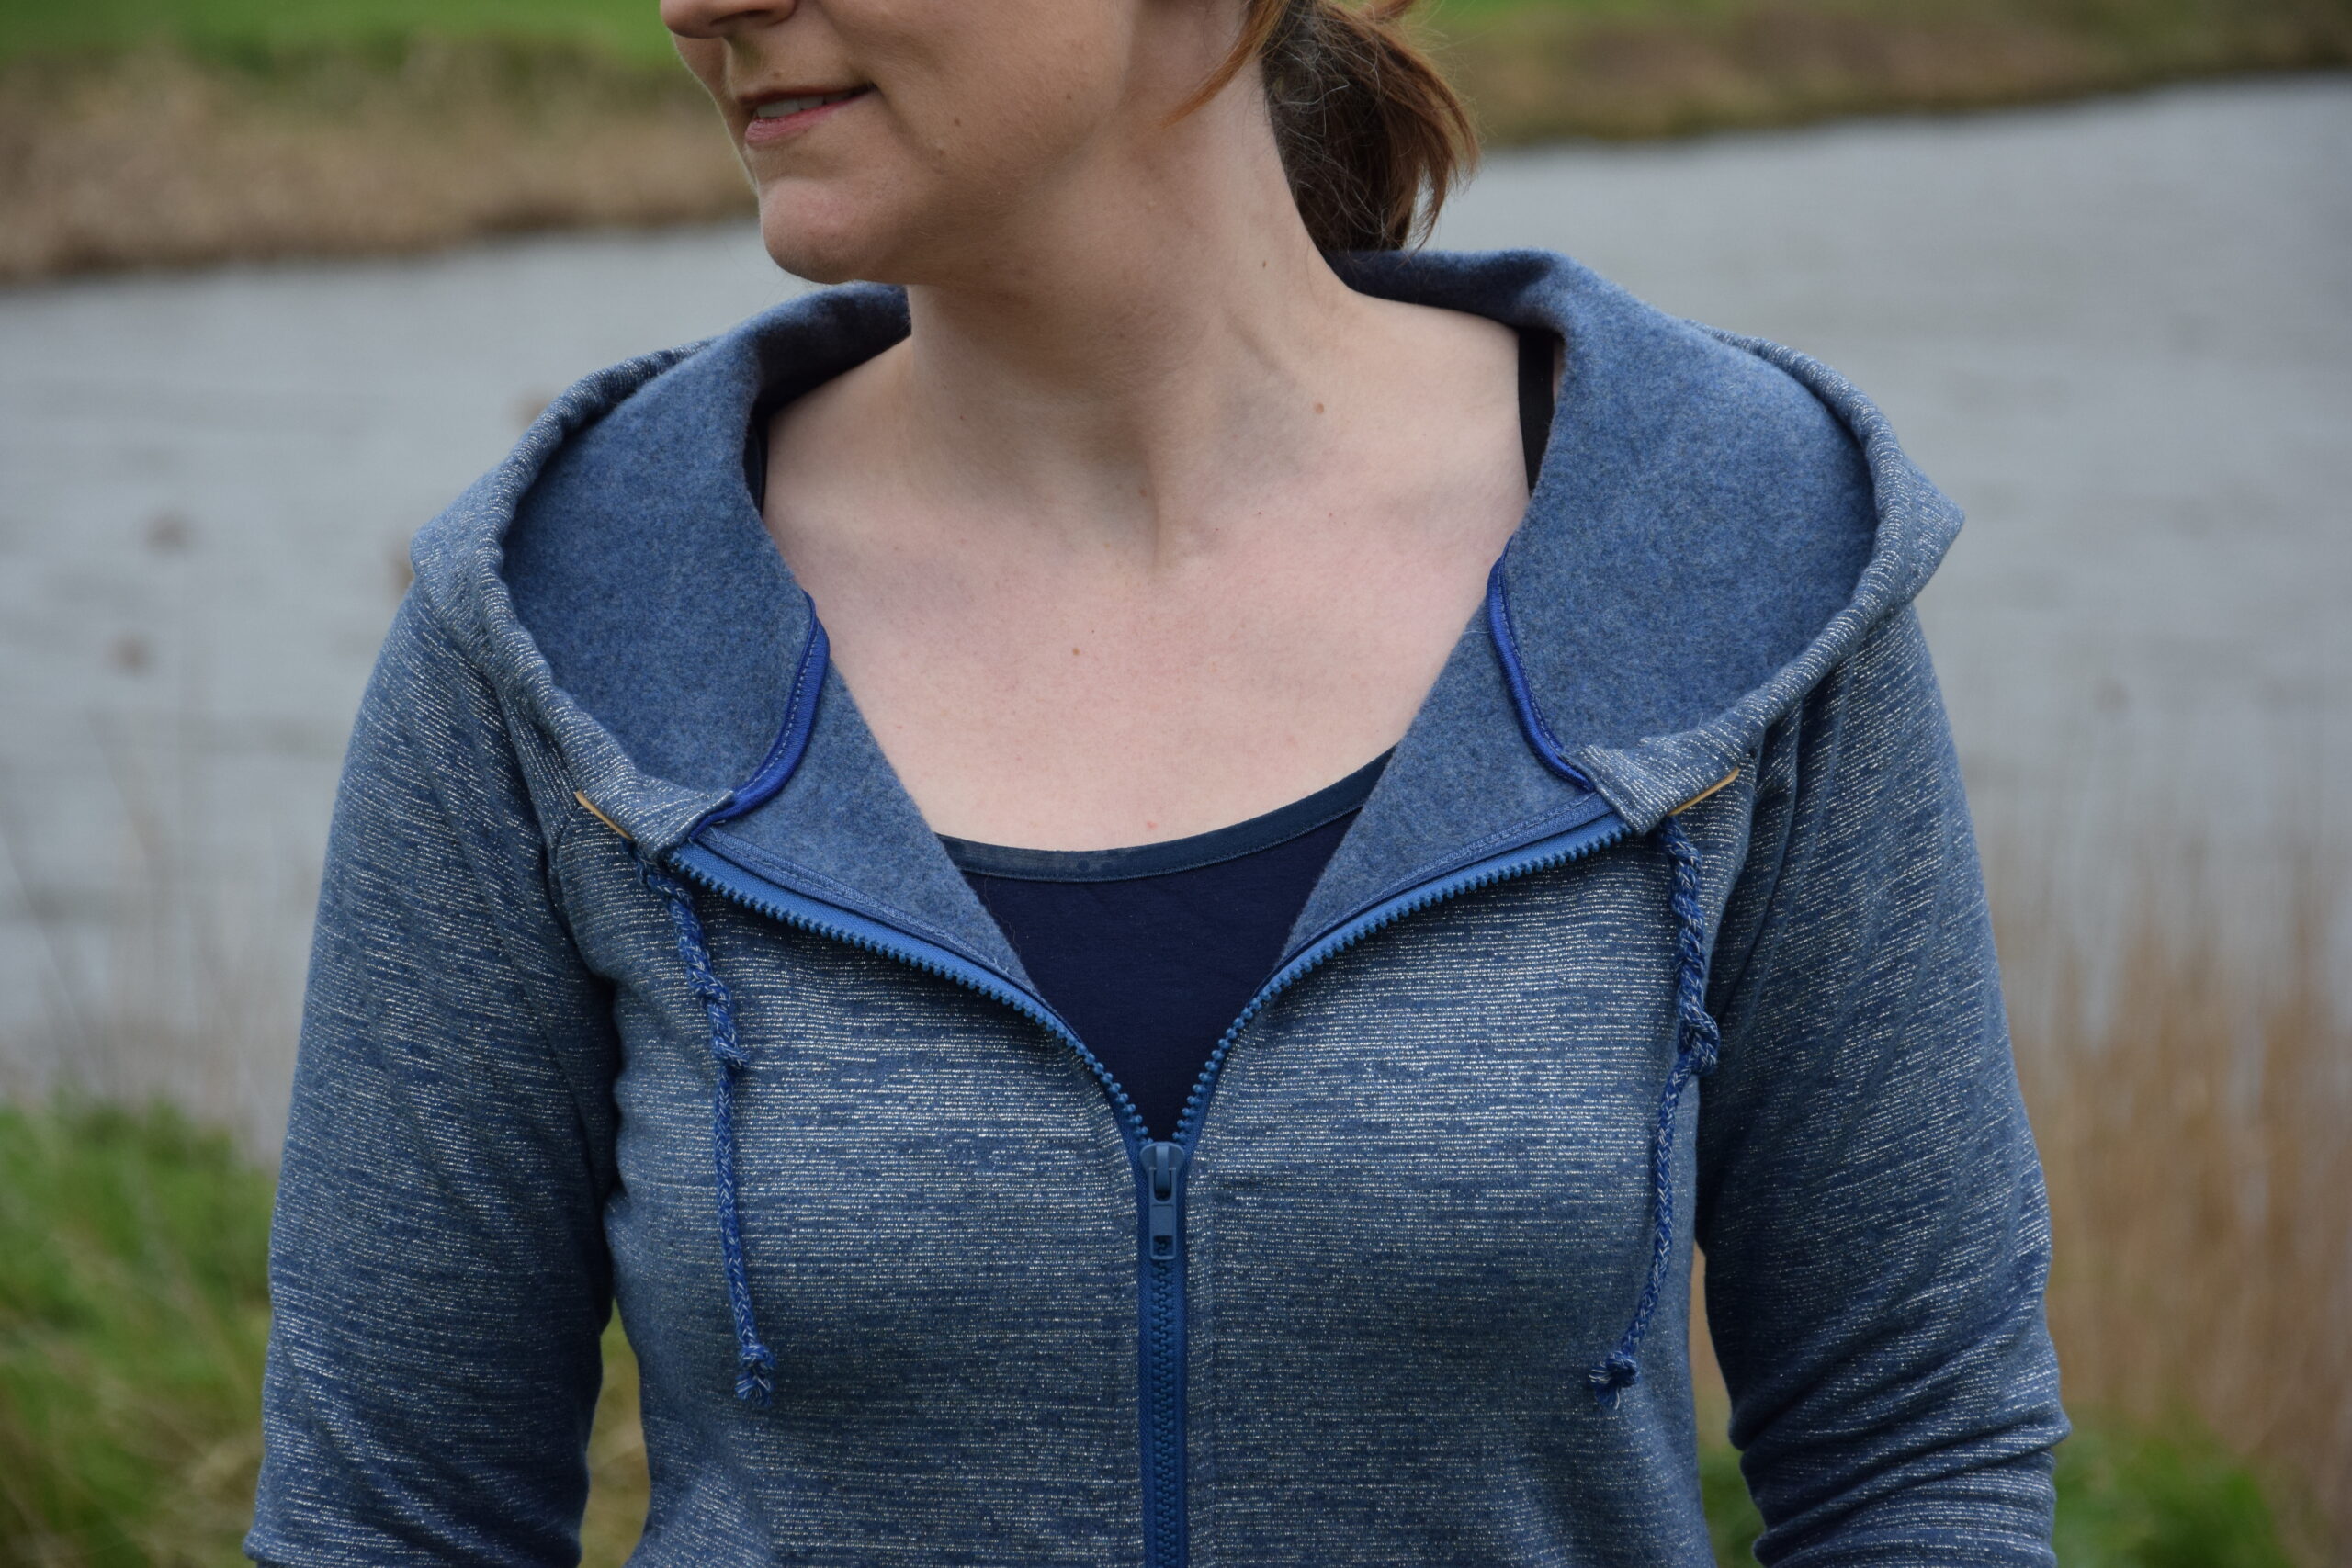
I’m a huge fan of hoodies but I don’t get cold so fast so I like the unlined ones, like the Tami Revolution Hoodie. The only downside to not lining is that you can see the unfinished edge of the zipper and the seams on the hood and neckline quit well.
Of course, there is a solution for every problem and today I want to share with you how I finish my unlined Tami revolution hoodie in a clean way. My favorite way to do this is to use Bias tape.
Are you following my tutorial?
First I’ve cut the pattern parts of the Zip up hoodie with the standard hood.
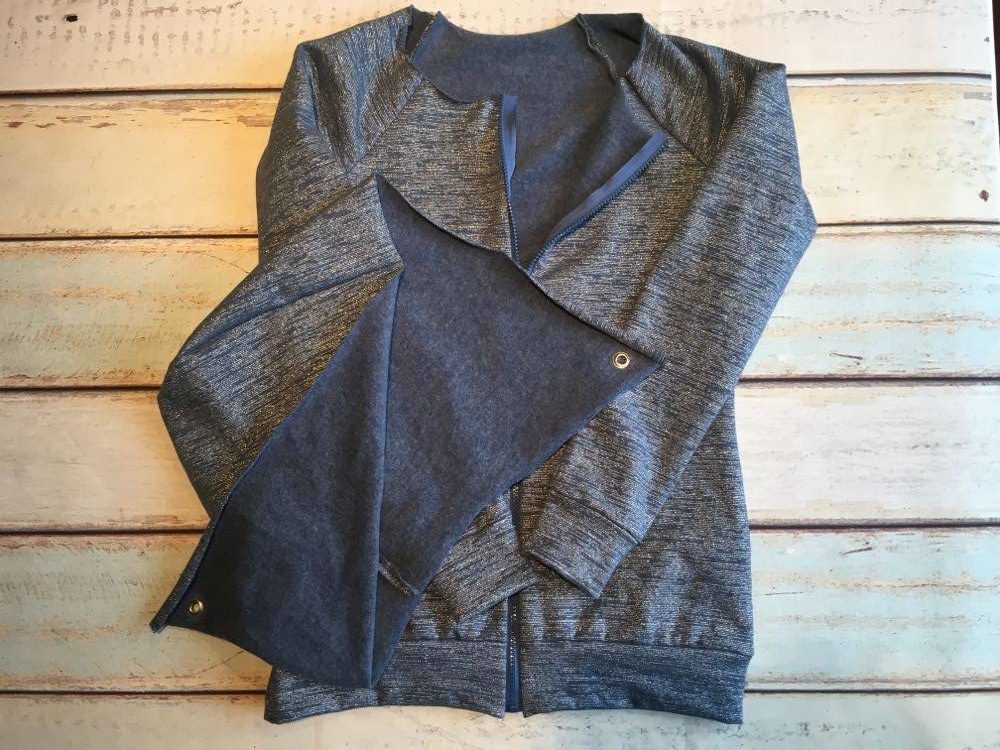
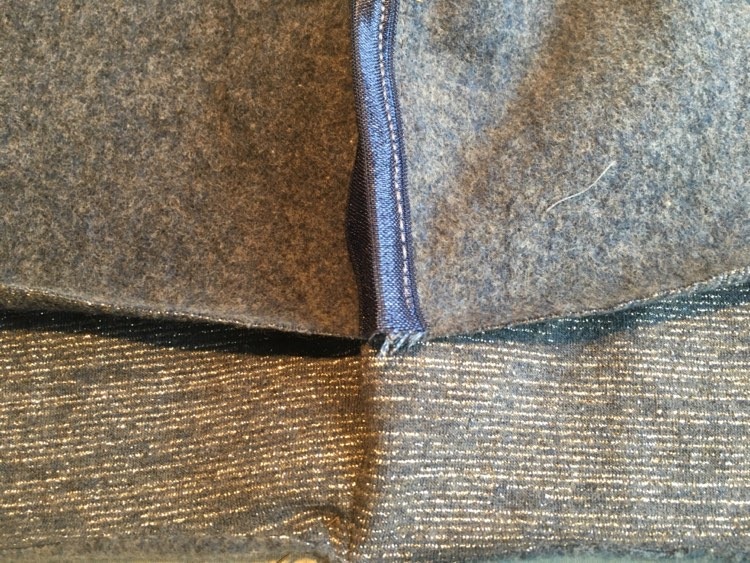
I followed all the steps from the original instructions right up to the step where the zipper is sewed in place. After you have finished this step, you must skip the topstitching.
Then you can sew the hood pieces together and you can sew the cuffs in place.
If all went well, this is your result:
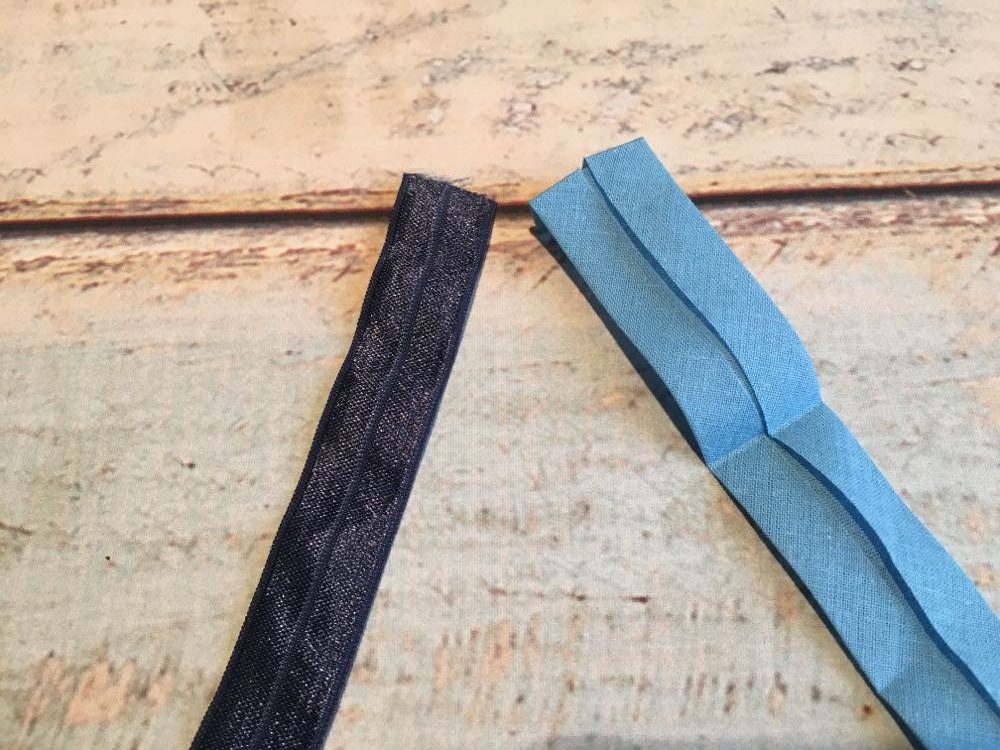
Types of Bias Tape
Now we’re going to start with the bias tape.
You have three types of bias tape: the elastic bias tape, the cotton bias tape and the jersey bias tape. In the picture you can see the elastic and the cotton bias tape. The jersey bias tape resembles the cotton version but is stretchy.
In this tutorial I chose the elastic version (on the left). I love to work with this tape because it has nicely finished edges, which means it only needs to be folded once and you can reduce bulk.
Adding the clean finish to the hood
We start with the hood. Put the wrong side of the bias against the seam allowance of the hood. The edge of the seam allowance hits the center of the bias tape.
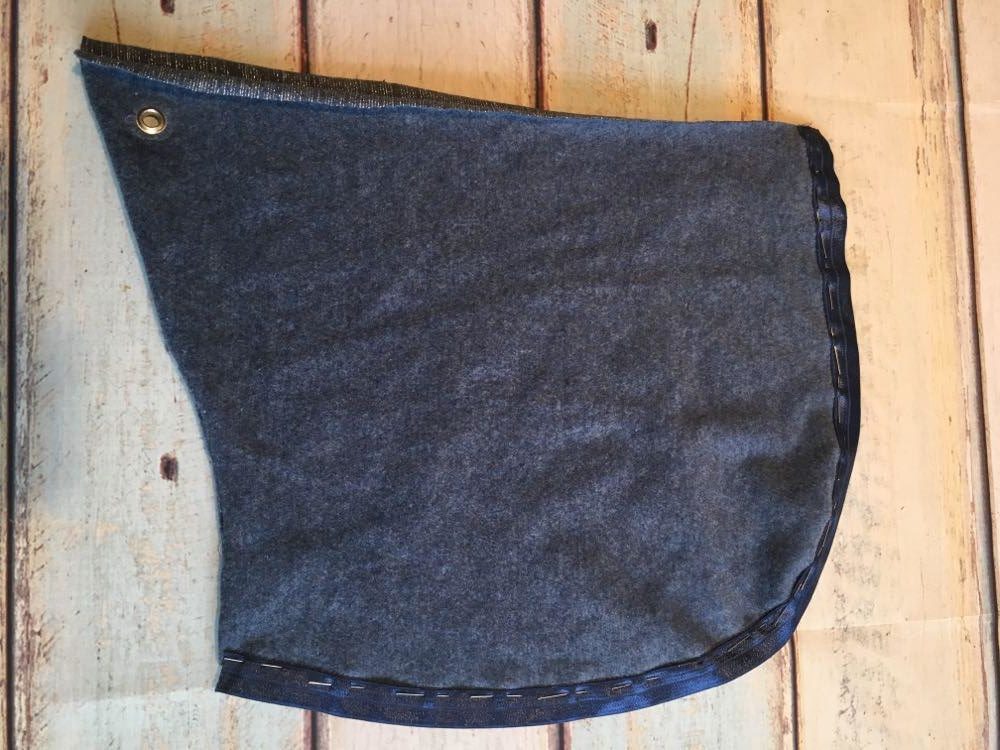

Stitch in place. Fold the bias tape on the folding line, around the seam allowance.
Fold the seam (with the bias band around it) to one side. Topstitch in place.
The hood is ready.
Finishing the zipper
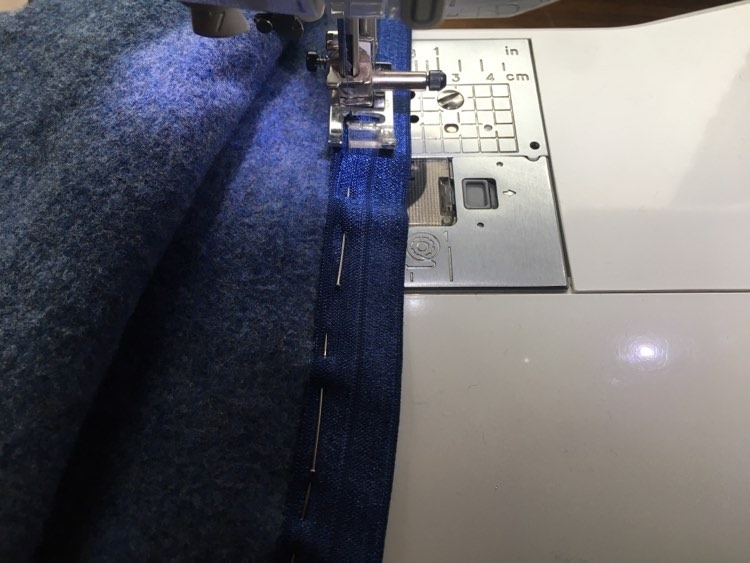
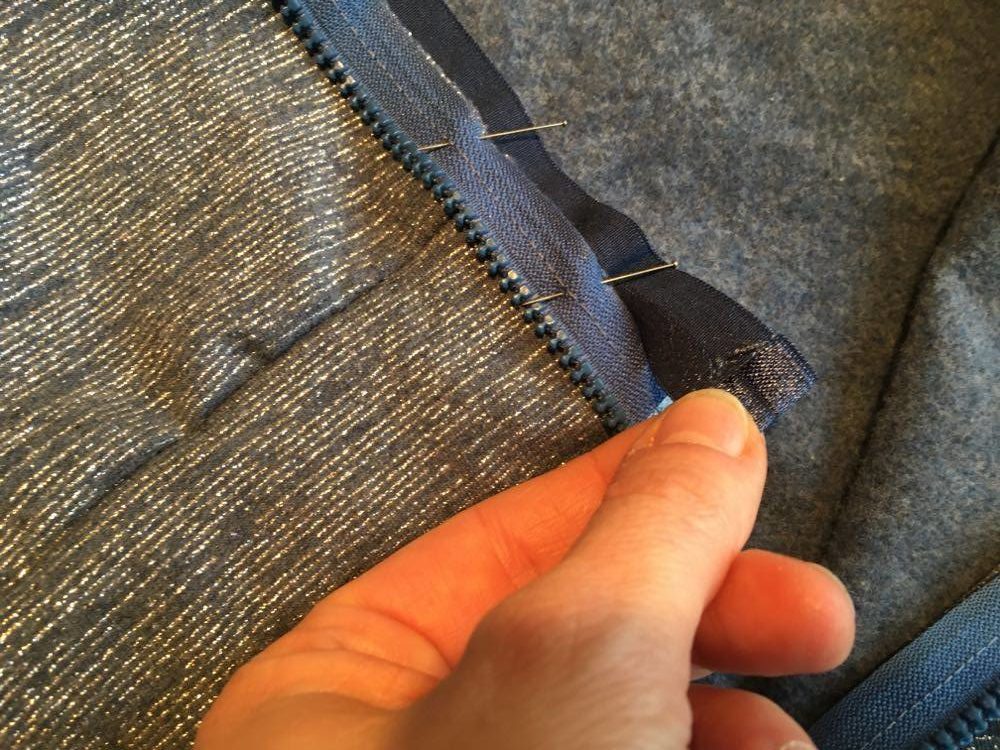
Now we are going to finish the zipper.
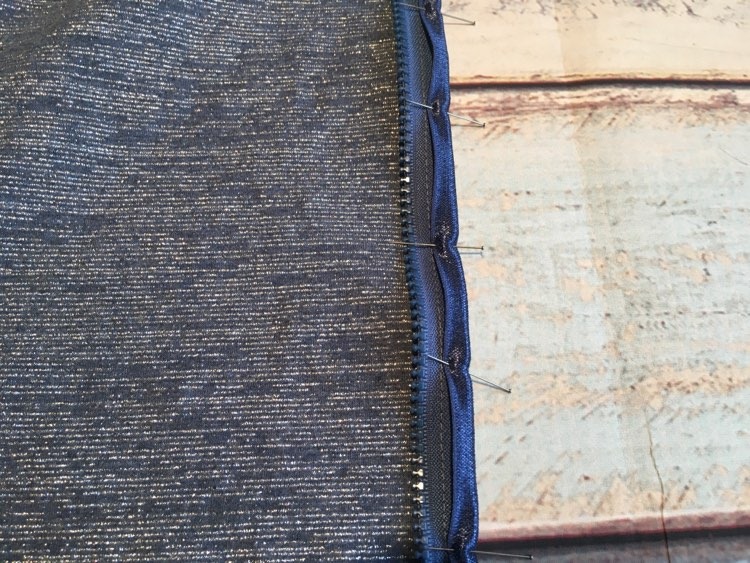
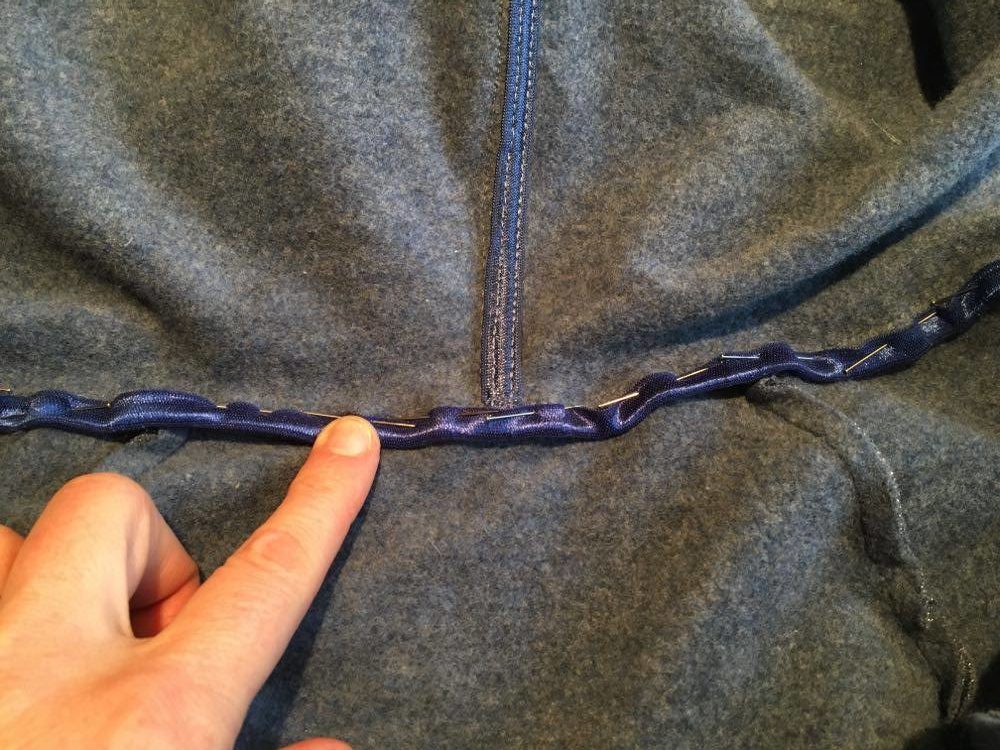
Place the edge of the bias tape against the edge of seam allowance, wrong sides against each other. Fold the bias band at the bottom 1 cm to the inside, so you get a clean finish.
Sew in place.


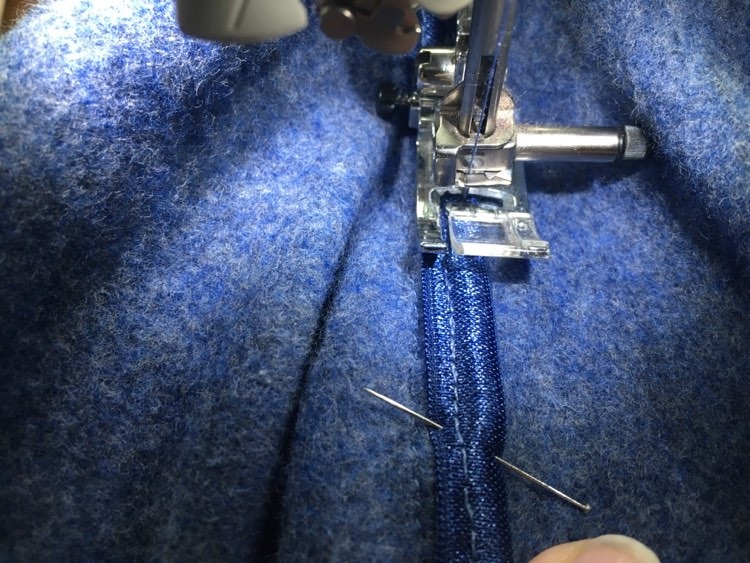
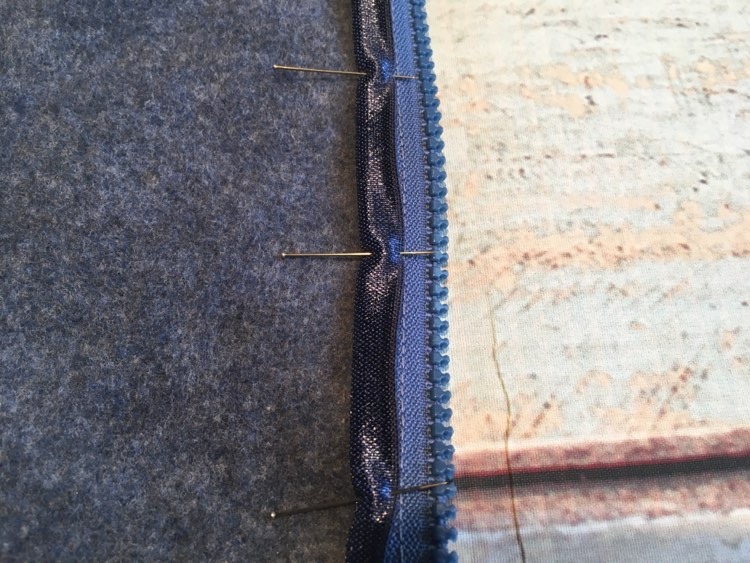
Fold the bias band in half, around the zipper. Flip the zipper, which is wrapped by the bias, to the wrong side of the bodice so the zipper teeth are meeting in the middle.
Topstitch in place.
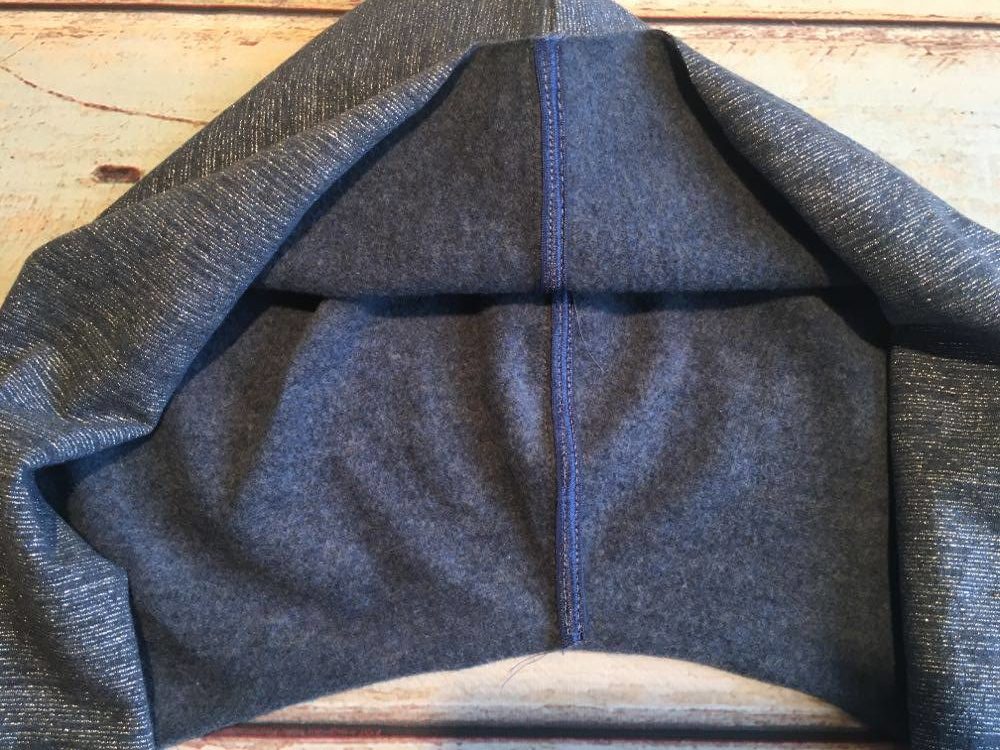
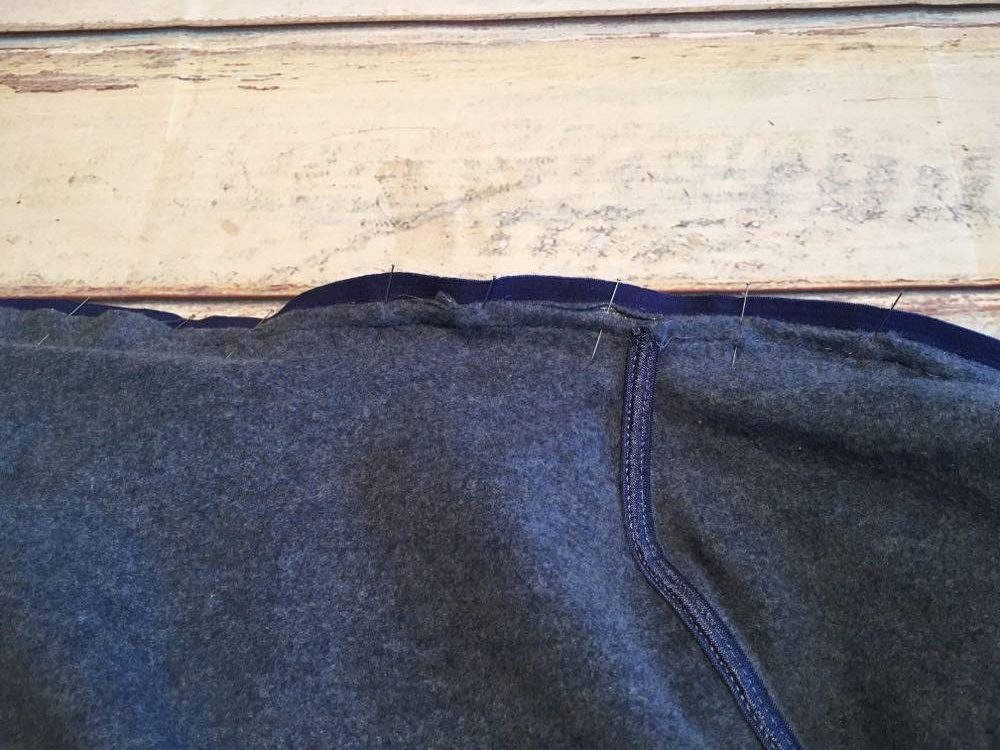
Now we’re going to sew the hood to the body.
Place the hood to the body right sides together at the neckline. The sides of the hood are sticking out (see instructions). Pin and stitch in place.
Place the edge of the bias tape against the edge of seam allowance, pin in place and sew. Fold the bias in half so the seam is wrapped. Fold the wrapped seam allowance to the body, pin in place. Take the hood edge that’s sticking out from the neckline and wrap it around to the other side.
Top stitch the bias to the body.
All that remains is to sew the tunnel in the hood. You can read in the instructions how you can do that.
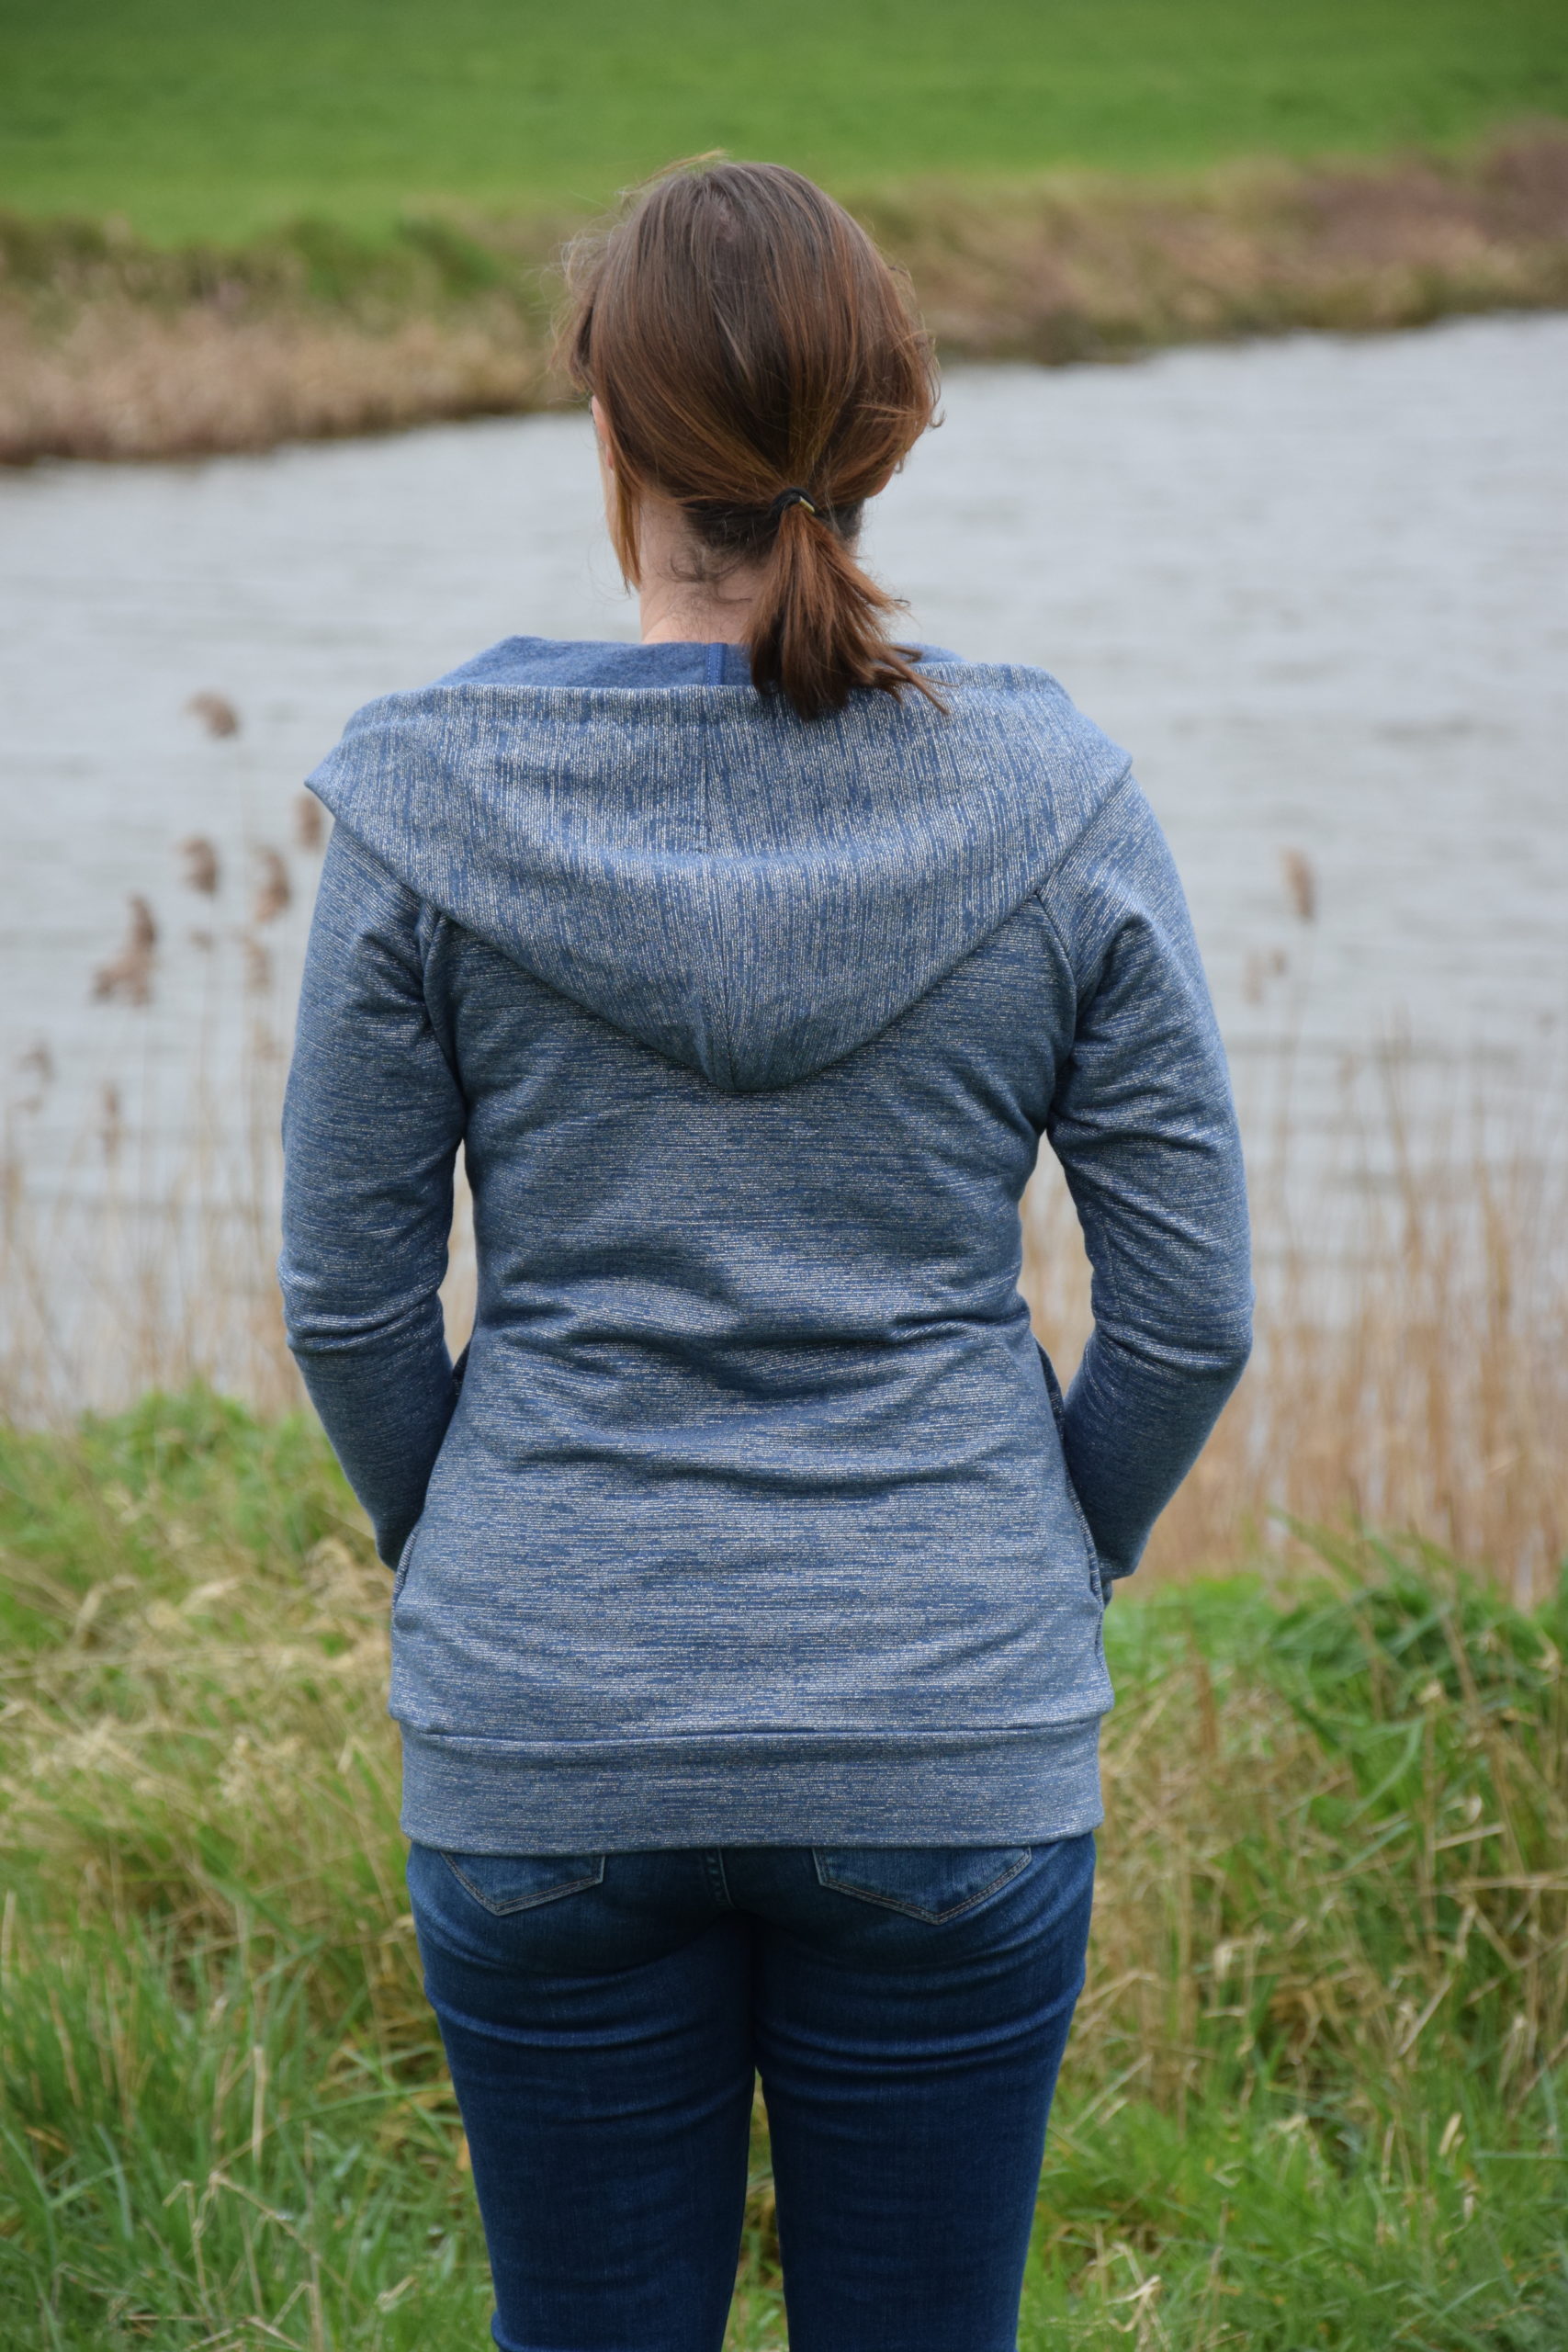
You ‘re all done! Admire your beautiful hoodie and start the next one 😉.

I hope you love this tutorial and you will use it to finish all of your beautiful New Horizons Designs hoodies. It may seem complicated, but it certainly isn’t.

I wish you all every success! Please let us know when something is not clear.
See you next time!
X
An Ca
Make sure to head over to our Facebook Group and follow us on Instagram to stay up to date on the happenings with New Horizons Designs.