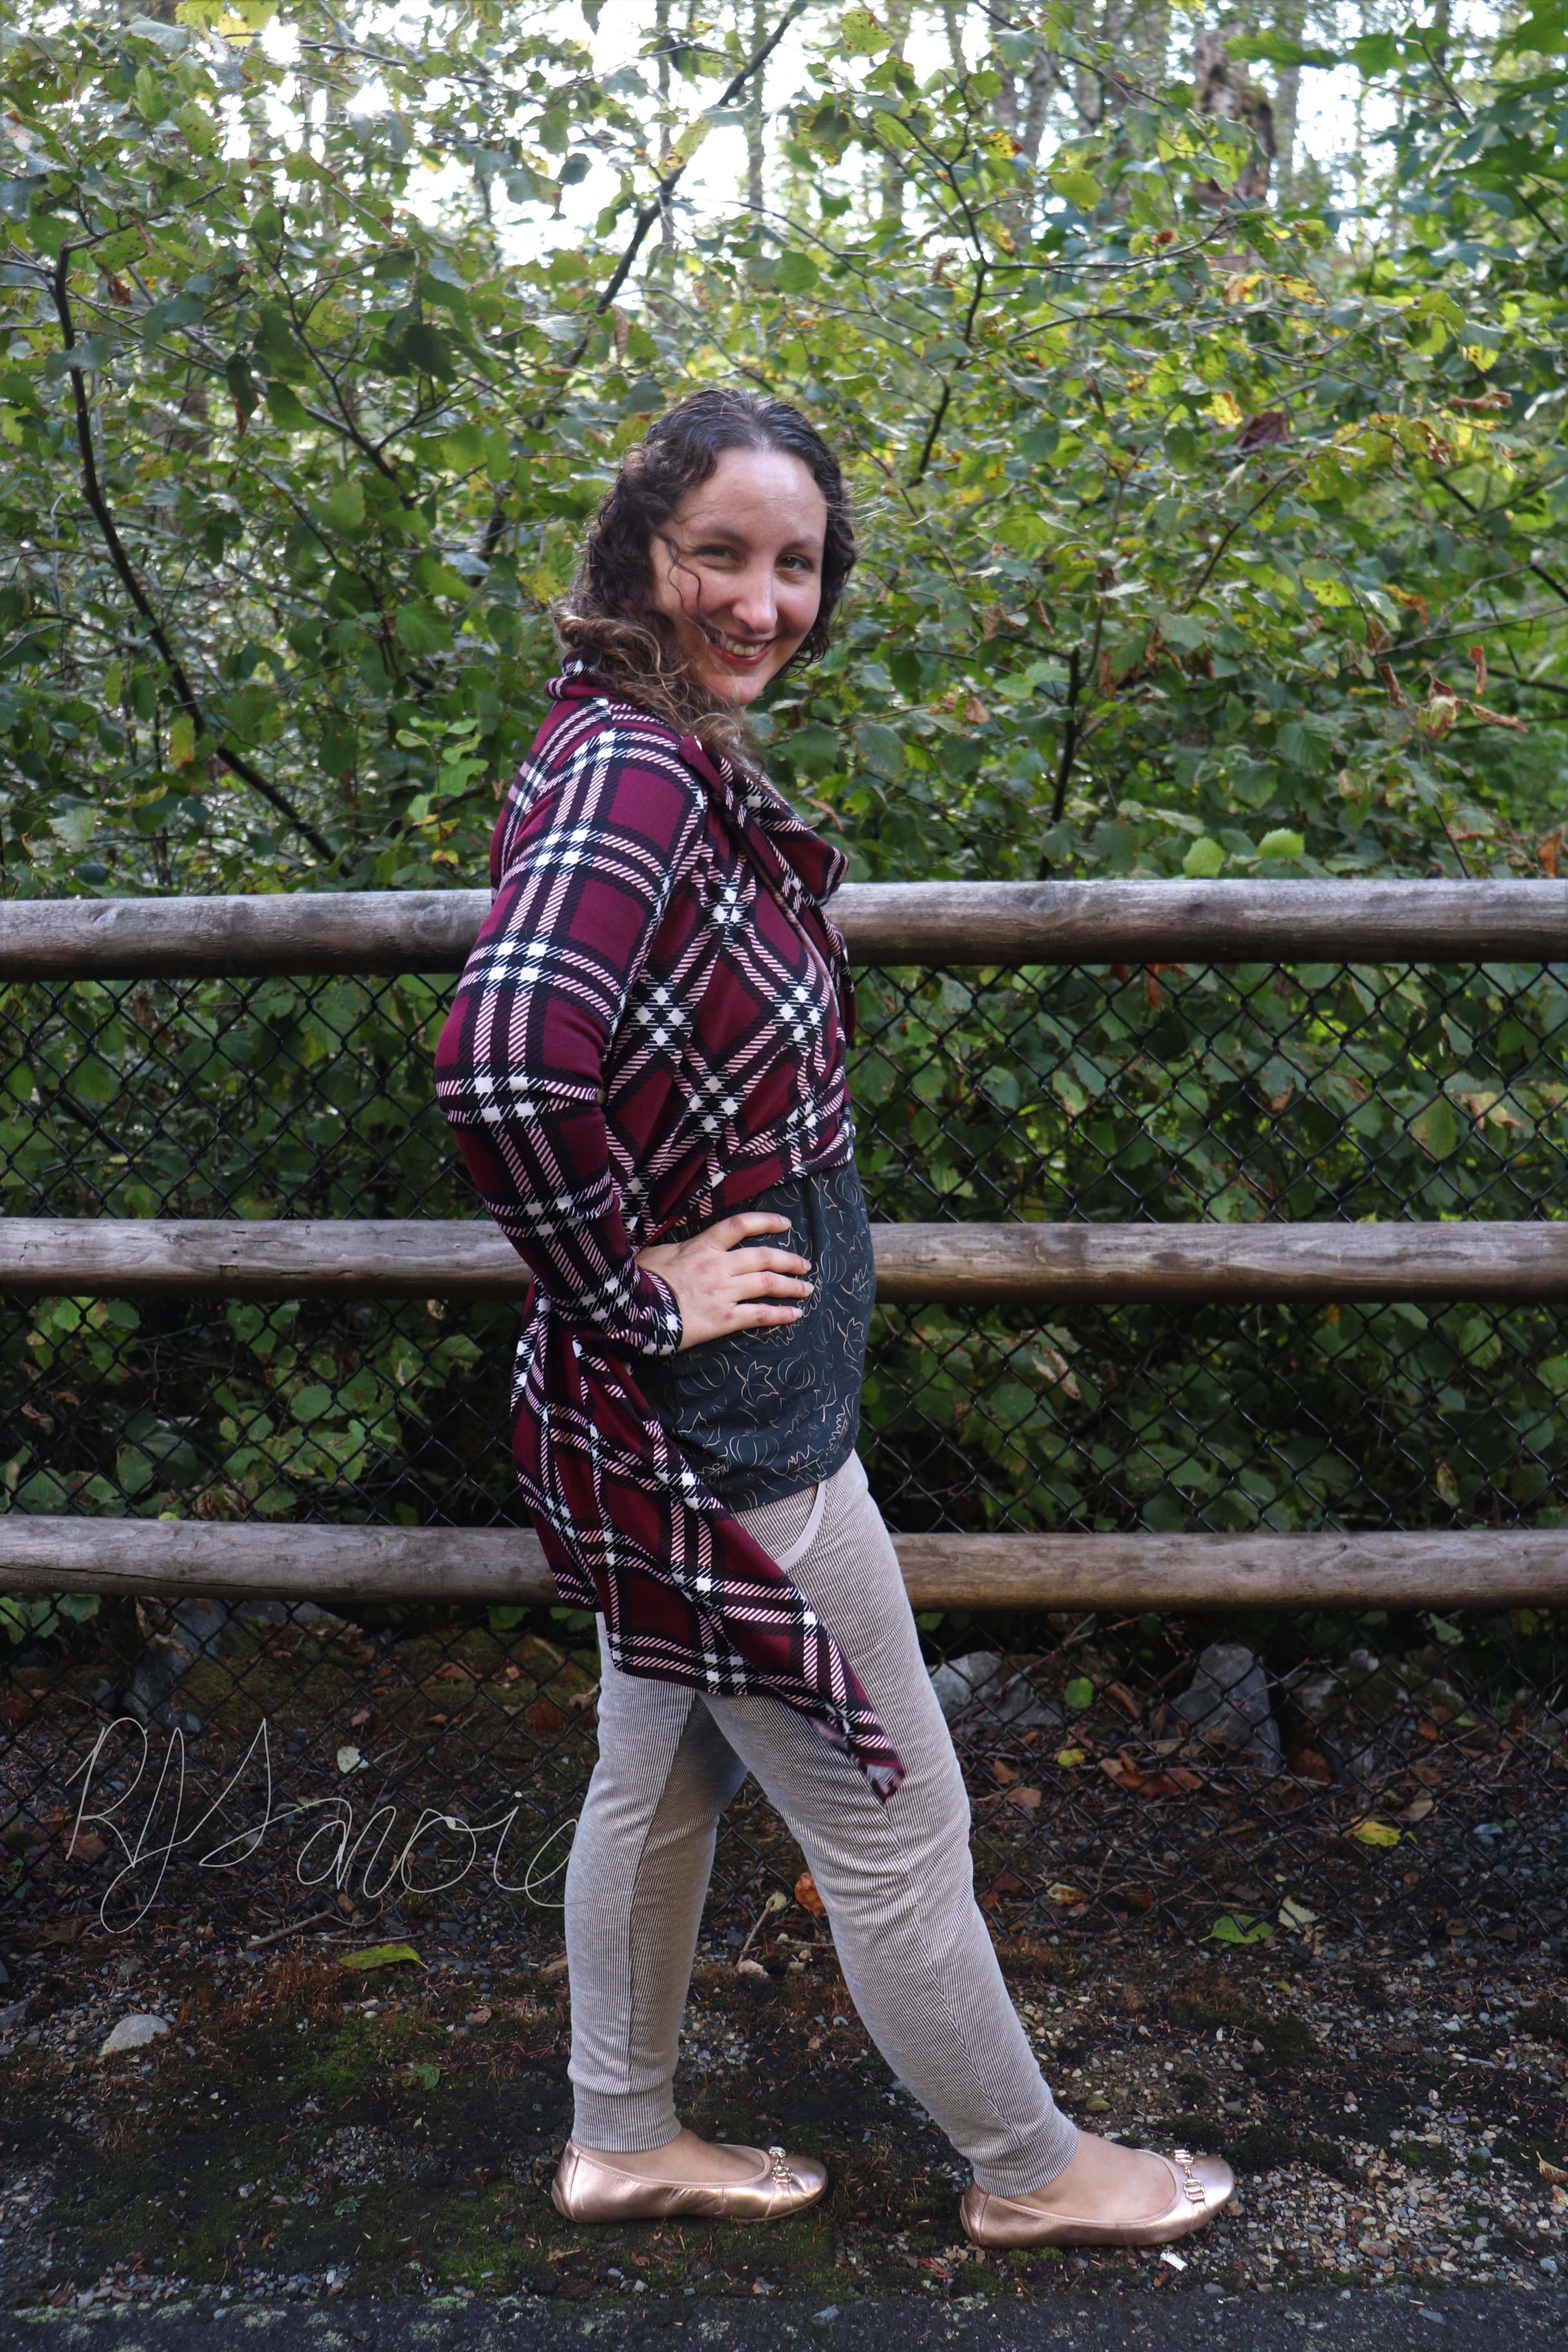
It’s Fall! It’s Fall! The leaves are changing, the air is crisp, coffee just tastes better, and the sky is that shade of blue you only see in October. Summertime dresses are beautiful, but there is nothing like sweater weather!

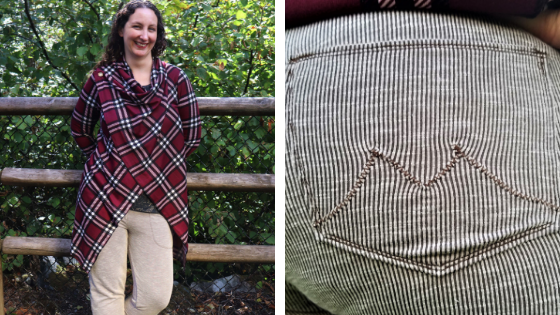
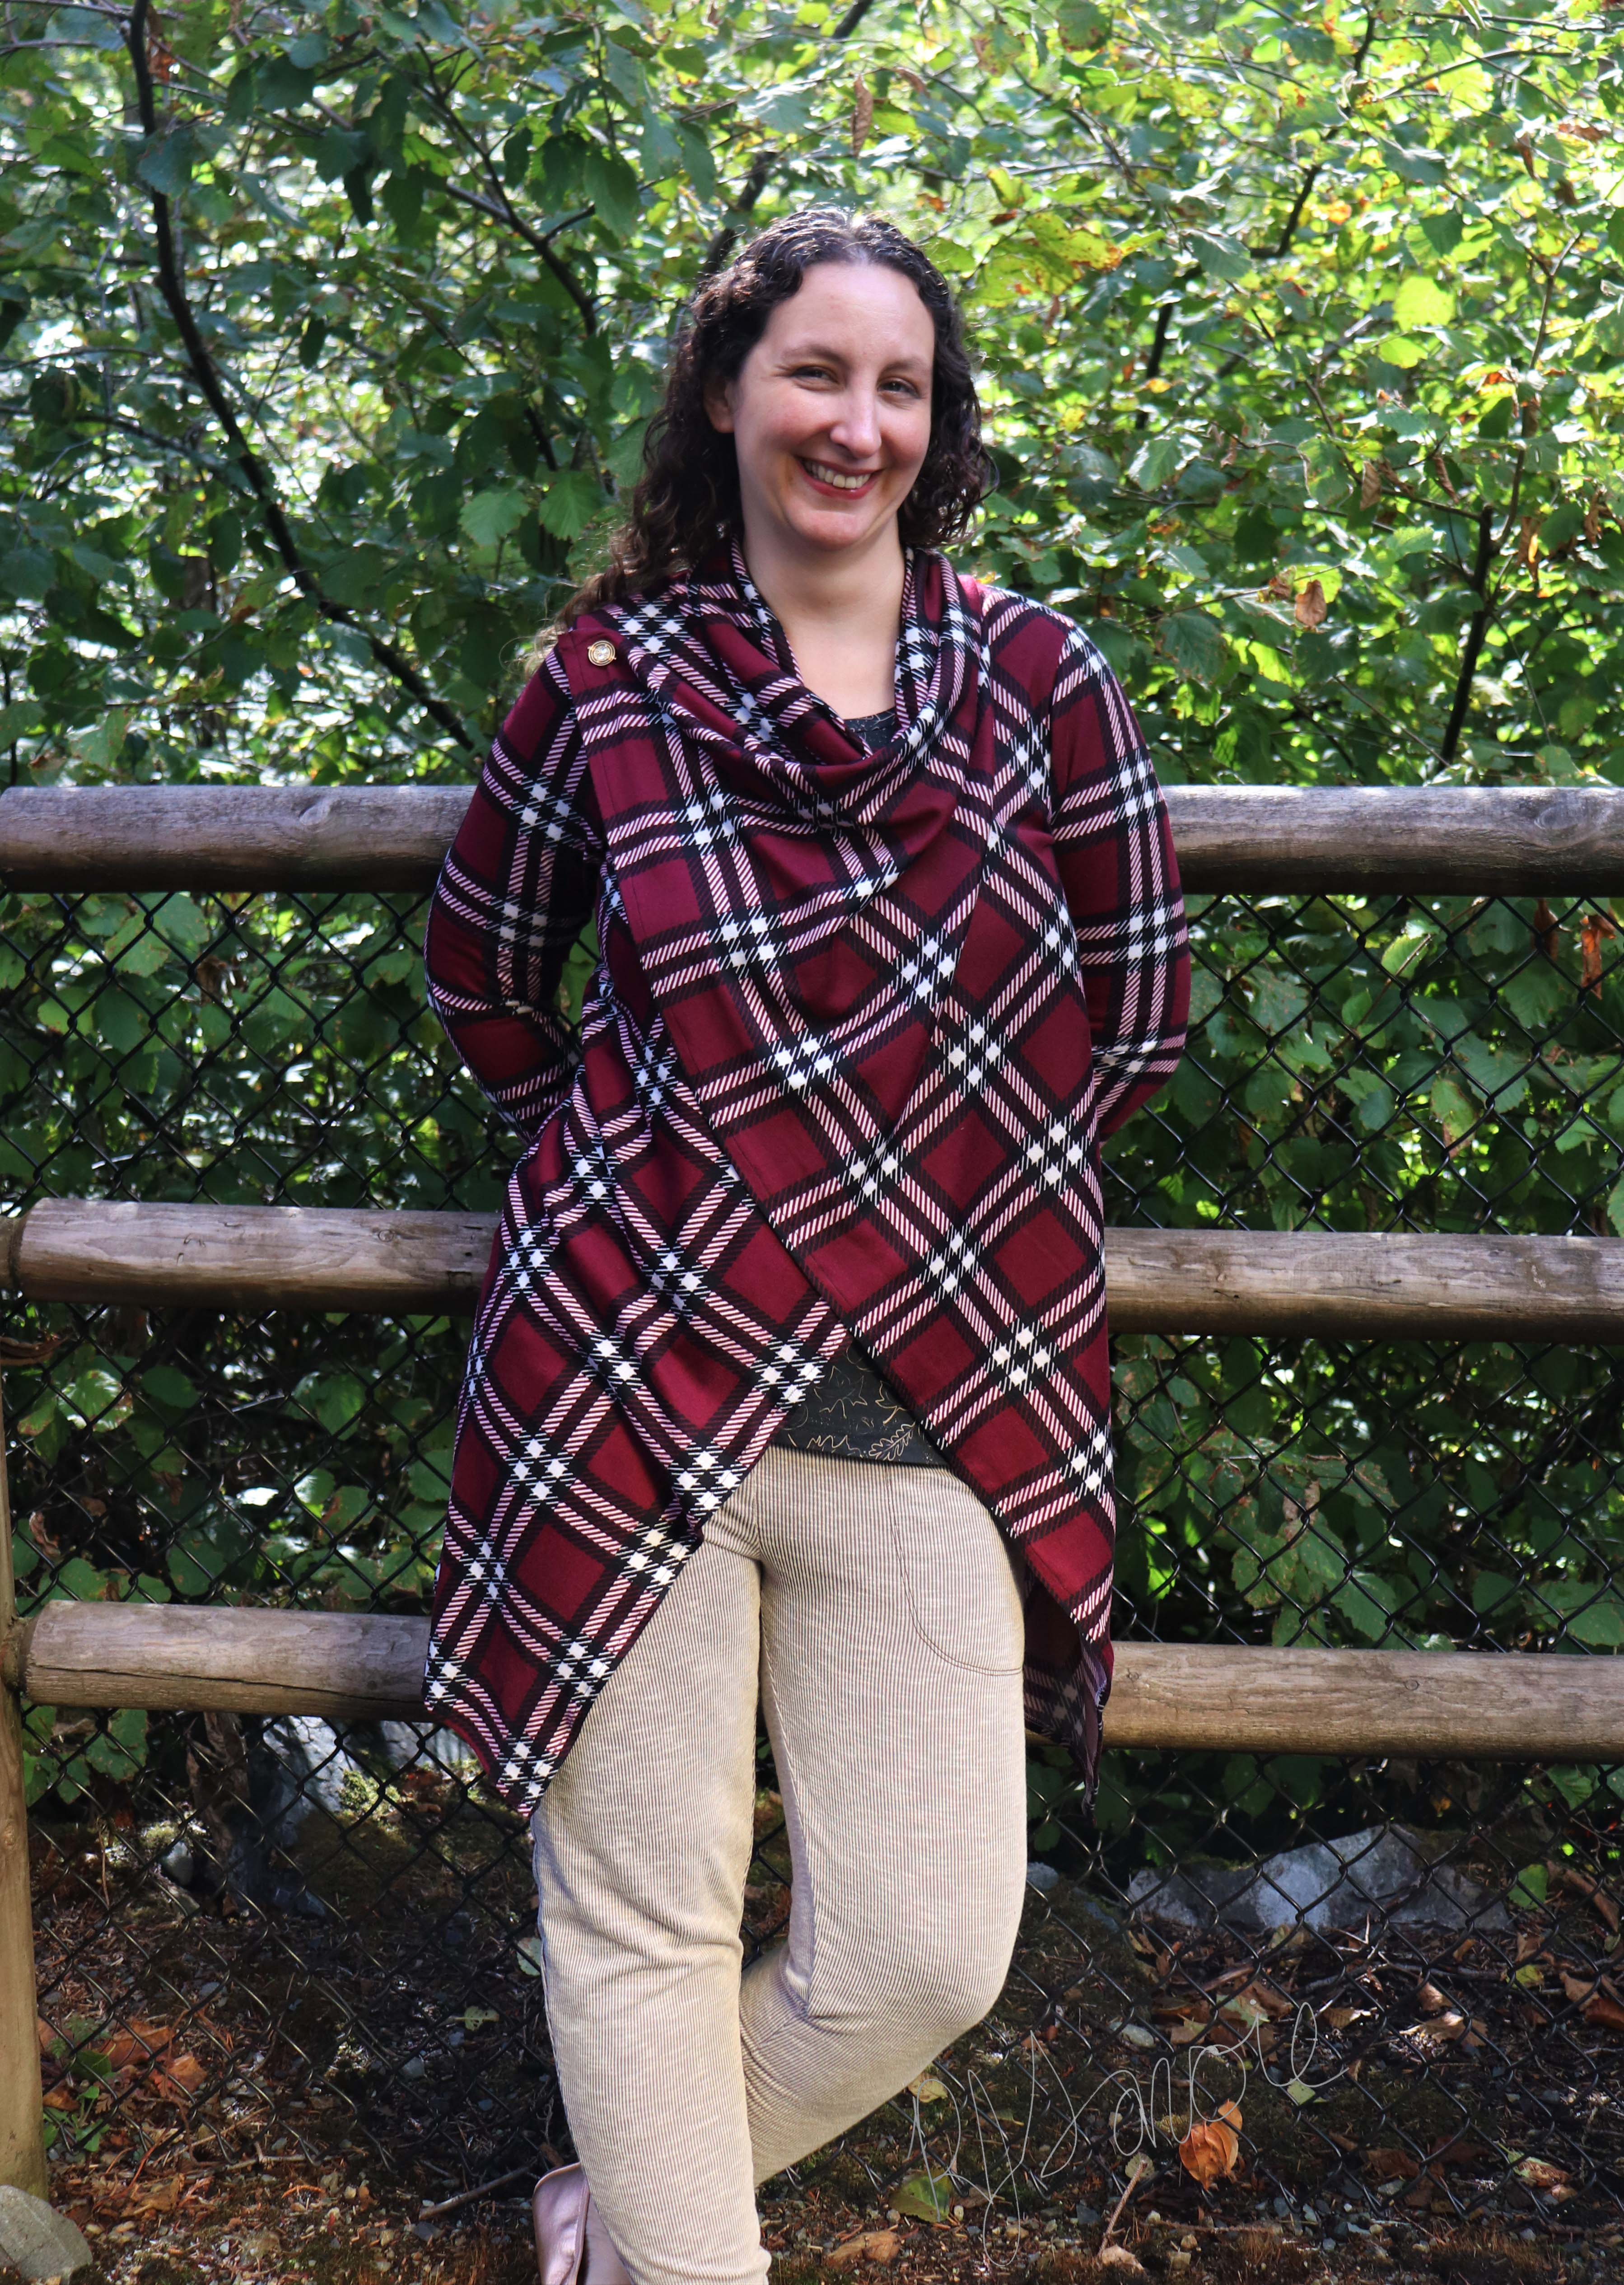
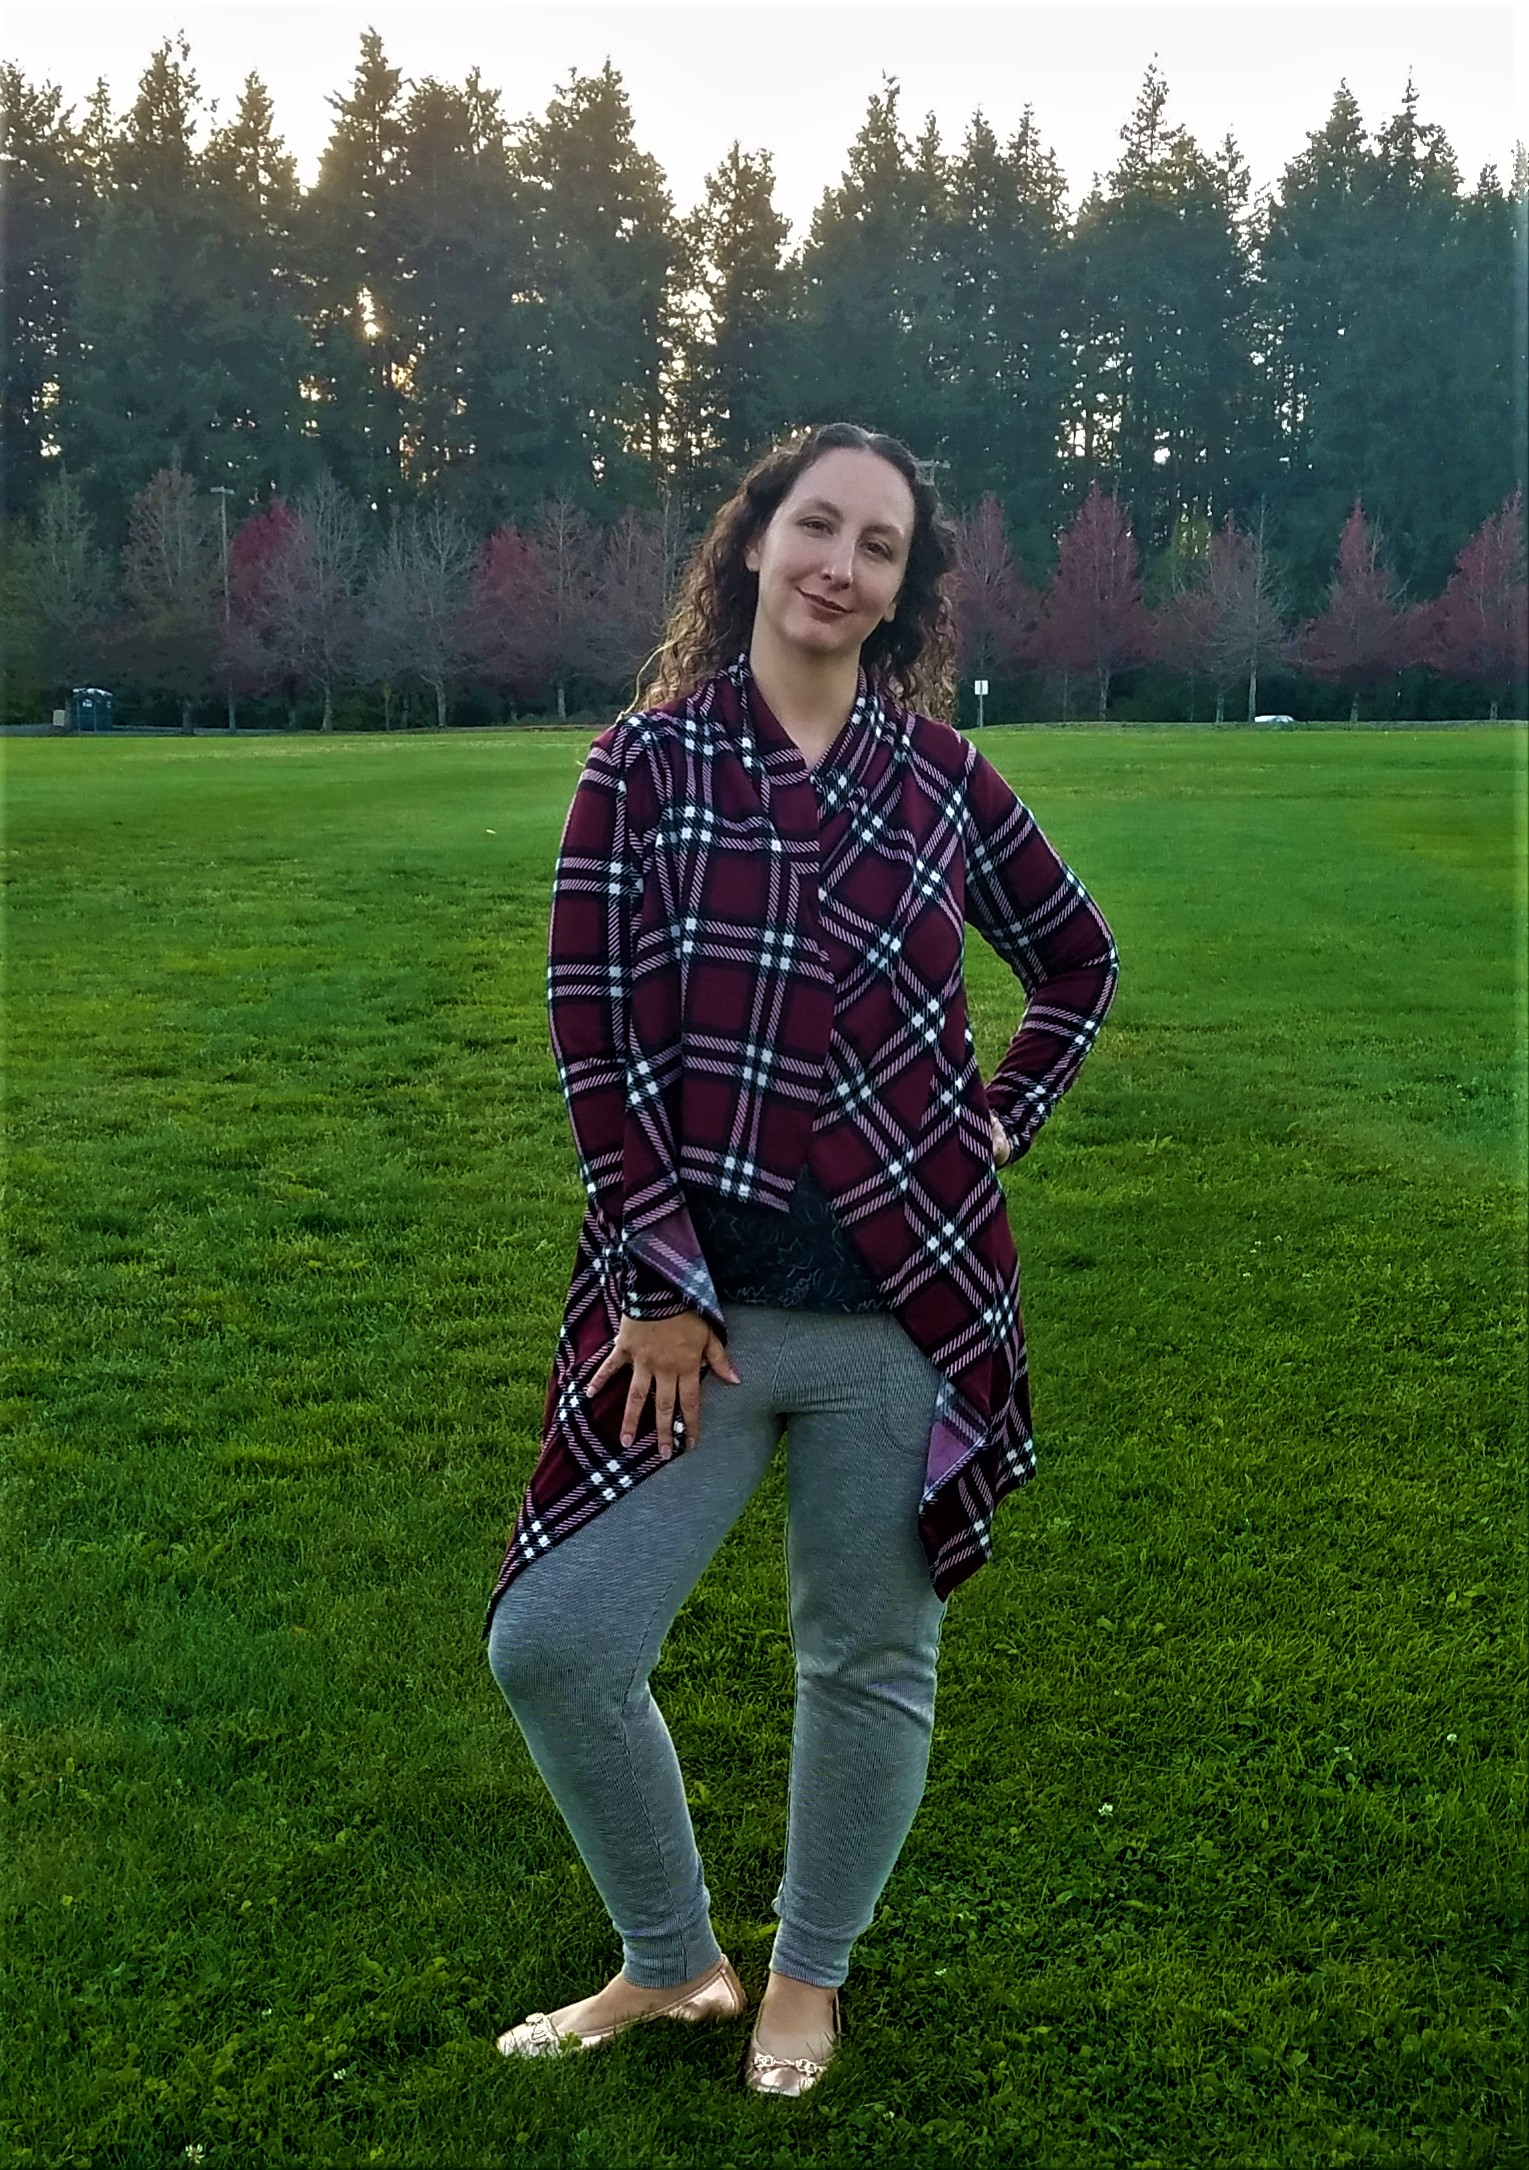
To celebrate Fall, I made a gorgeous Tanacross in this lovely plaid brushed Hacci. A Tanacross is an amazing addition to any wardrobe, and it’s like having two new cardigans, because it looks so different when it’s left draped open or when it’s buttoned closed. I am one of those people who is constantly either too cold or too warm, and I love wearing cardigans so that I can adjust my temperature to exactly what makes me comfortable at any given moment. I can throw it on and leave it open until a rogue breeze comes along, and then close it up and cuddle into my Hacci!
This is my first Tanacross, and it was a wonderfully easy sew. I thought it might be complicated since it has those drapey front folds, but it’s just two fronts, a back, and the sleeves! It goes together very easily, and the instructions are easy to follow. The shoulders were the only slightly tricky part, you sew the shoulder seams together and then across the neck, and I considered just doing it all in one swoop, but there is a corner there and sergers and corners are not best friends. But in two steps it works great! When I hemmed it, I serged the raw edges first and then folded them over and sewed them, and it really helped! That’s the first time I’ve hemmed like that and I got a very even and quick to sew hem.
One of the things I really love about sewing is being able to make pieces that would be practically impossible to find in stores, especially in such beautiful fabric. And I can add my own special touches, like this pin I used for the closure! You can also use a lovely button or a nice snap to close it, and it’s the little touches that really make a garment yours!

The Tanacross is such a great layering piece that of course I had to make something to go under it, and the Dublin Dolman is a fantastic way to use a special yard of fabric! I love that I can choose to emphasize different fabric qualities with the Dublin Dolman, the gathered neckline or back is great to show off a fabric with wonderful drape, or you can do the regular version and let the print speak up! The loose fit is casual and easy to wear. I made mine in bamboo, which is one of my favorite layering fabrics, it’s warm when you’re cool and somehow still cool when you’re warm. I was able to make elbow length sleeves from one yard, which is a perfect transitional length!

And of course, to complete my fall outfit, what better than Caritas in some soft rib knit! I have been practically living in Caritas since the pattern came out, they are perfect for every day, they can be dressy for special events or soft and cozy pajamas!
The secret to making them look like pants and not pajamas is the non-contrasting cuff, by the way. Contrast cuffs almost always read as pajamas to me, and matching ones look like day pants!
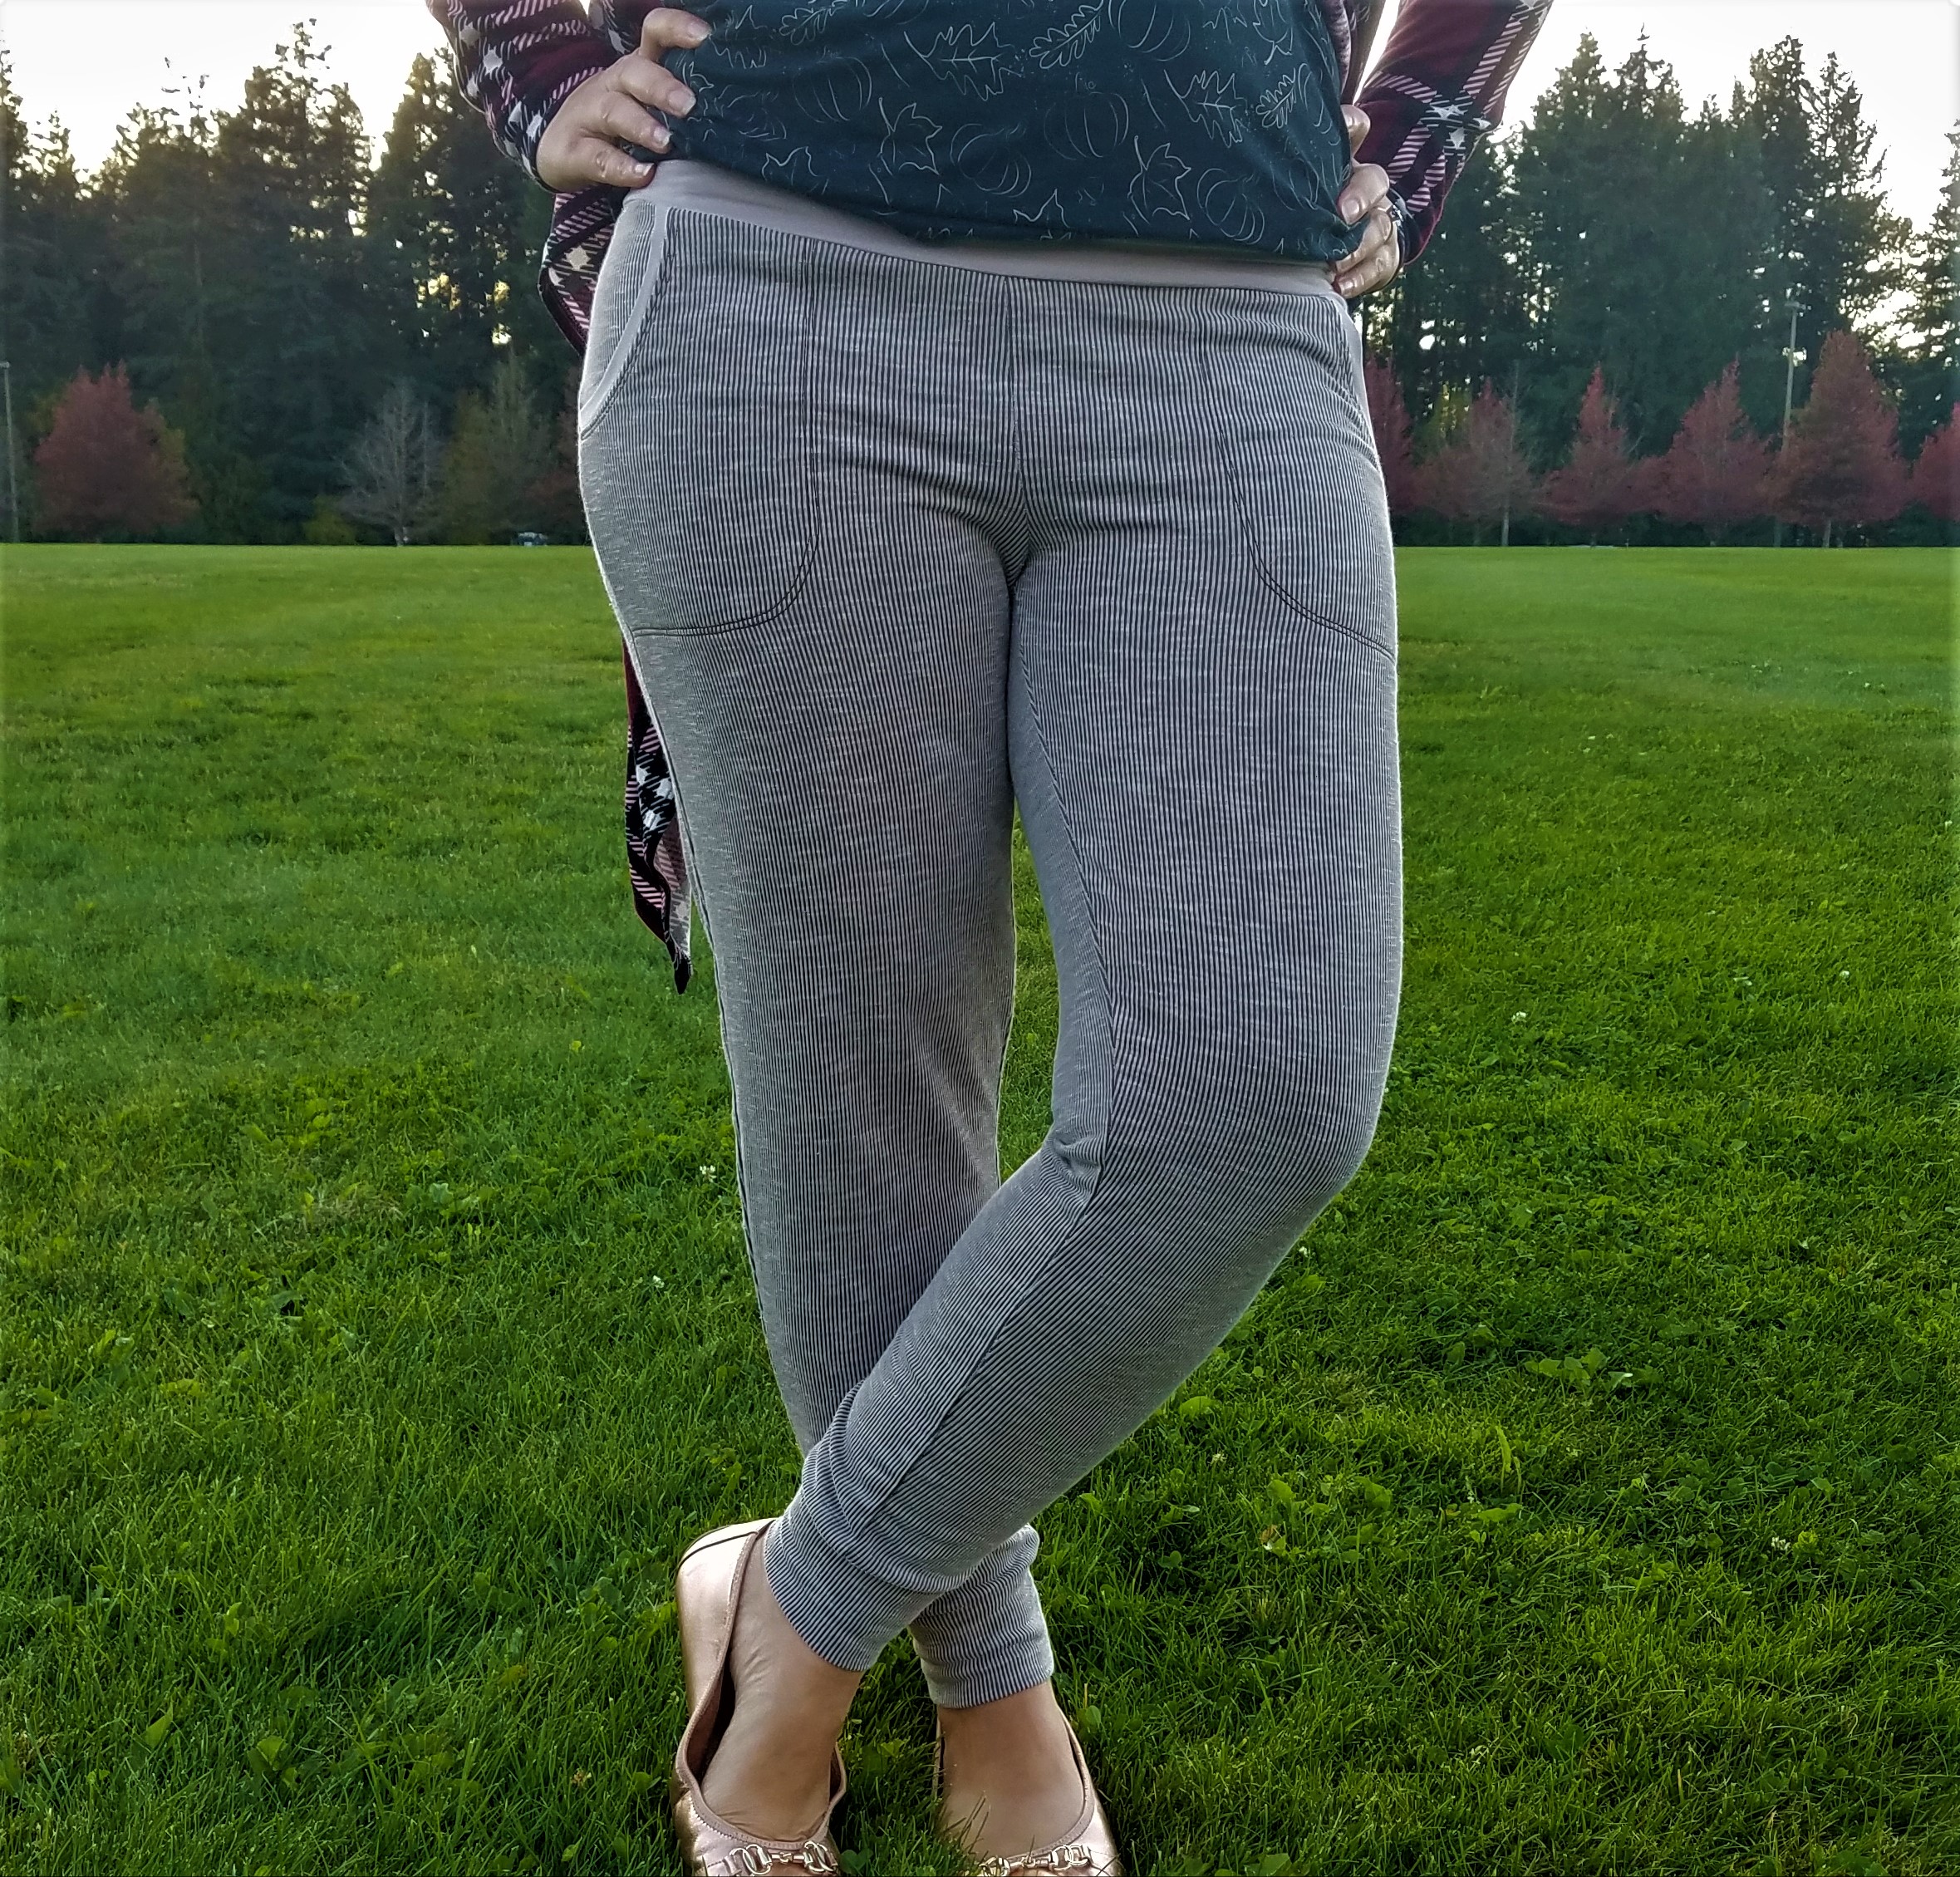
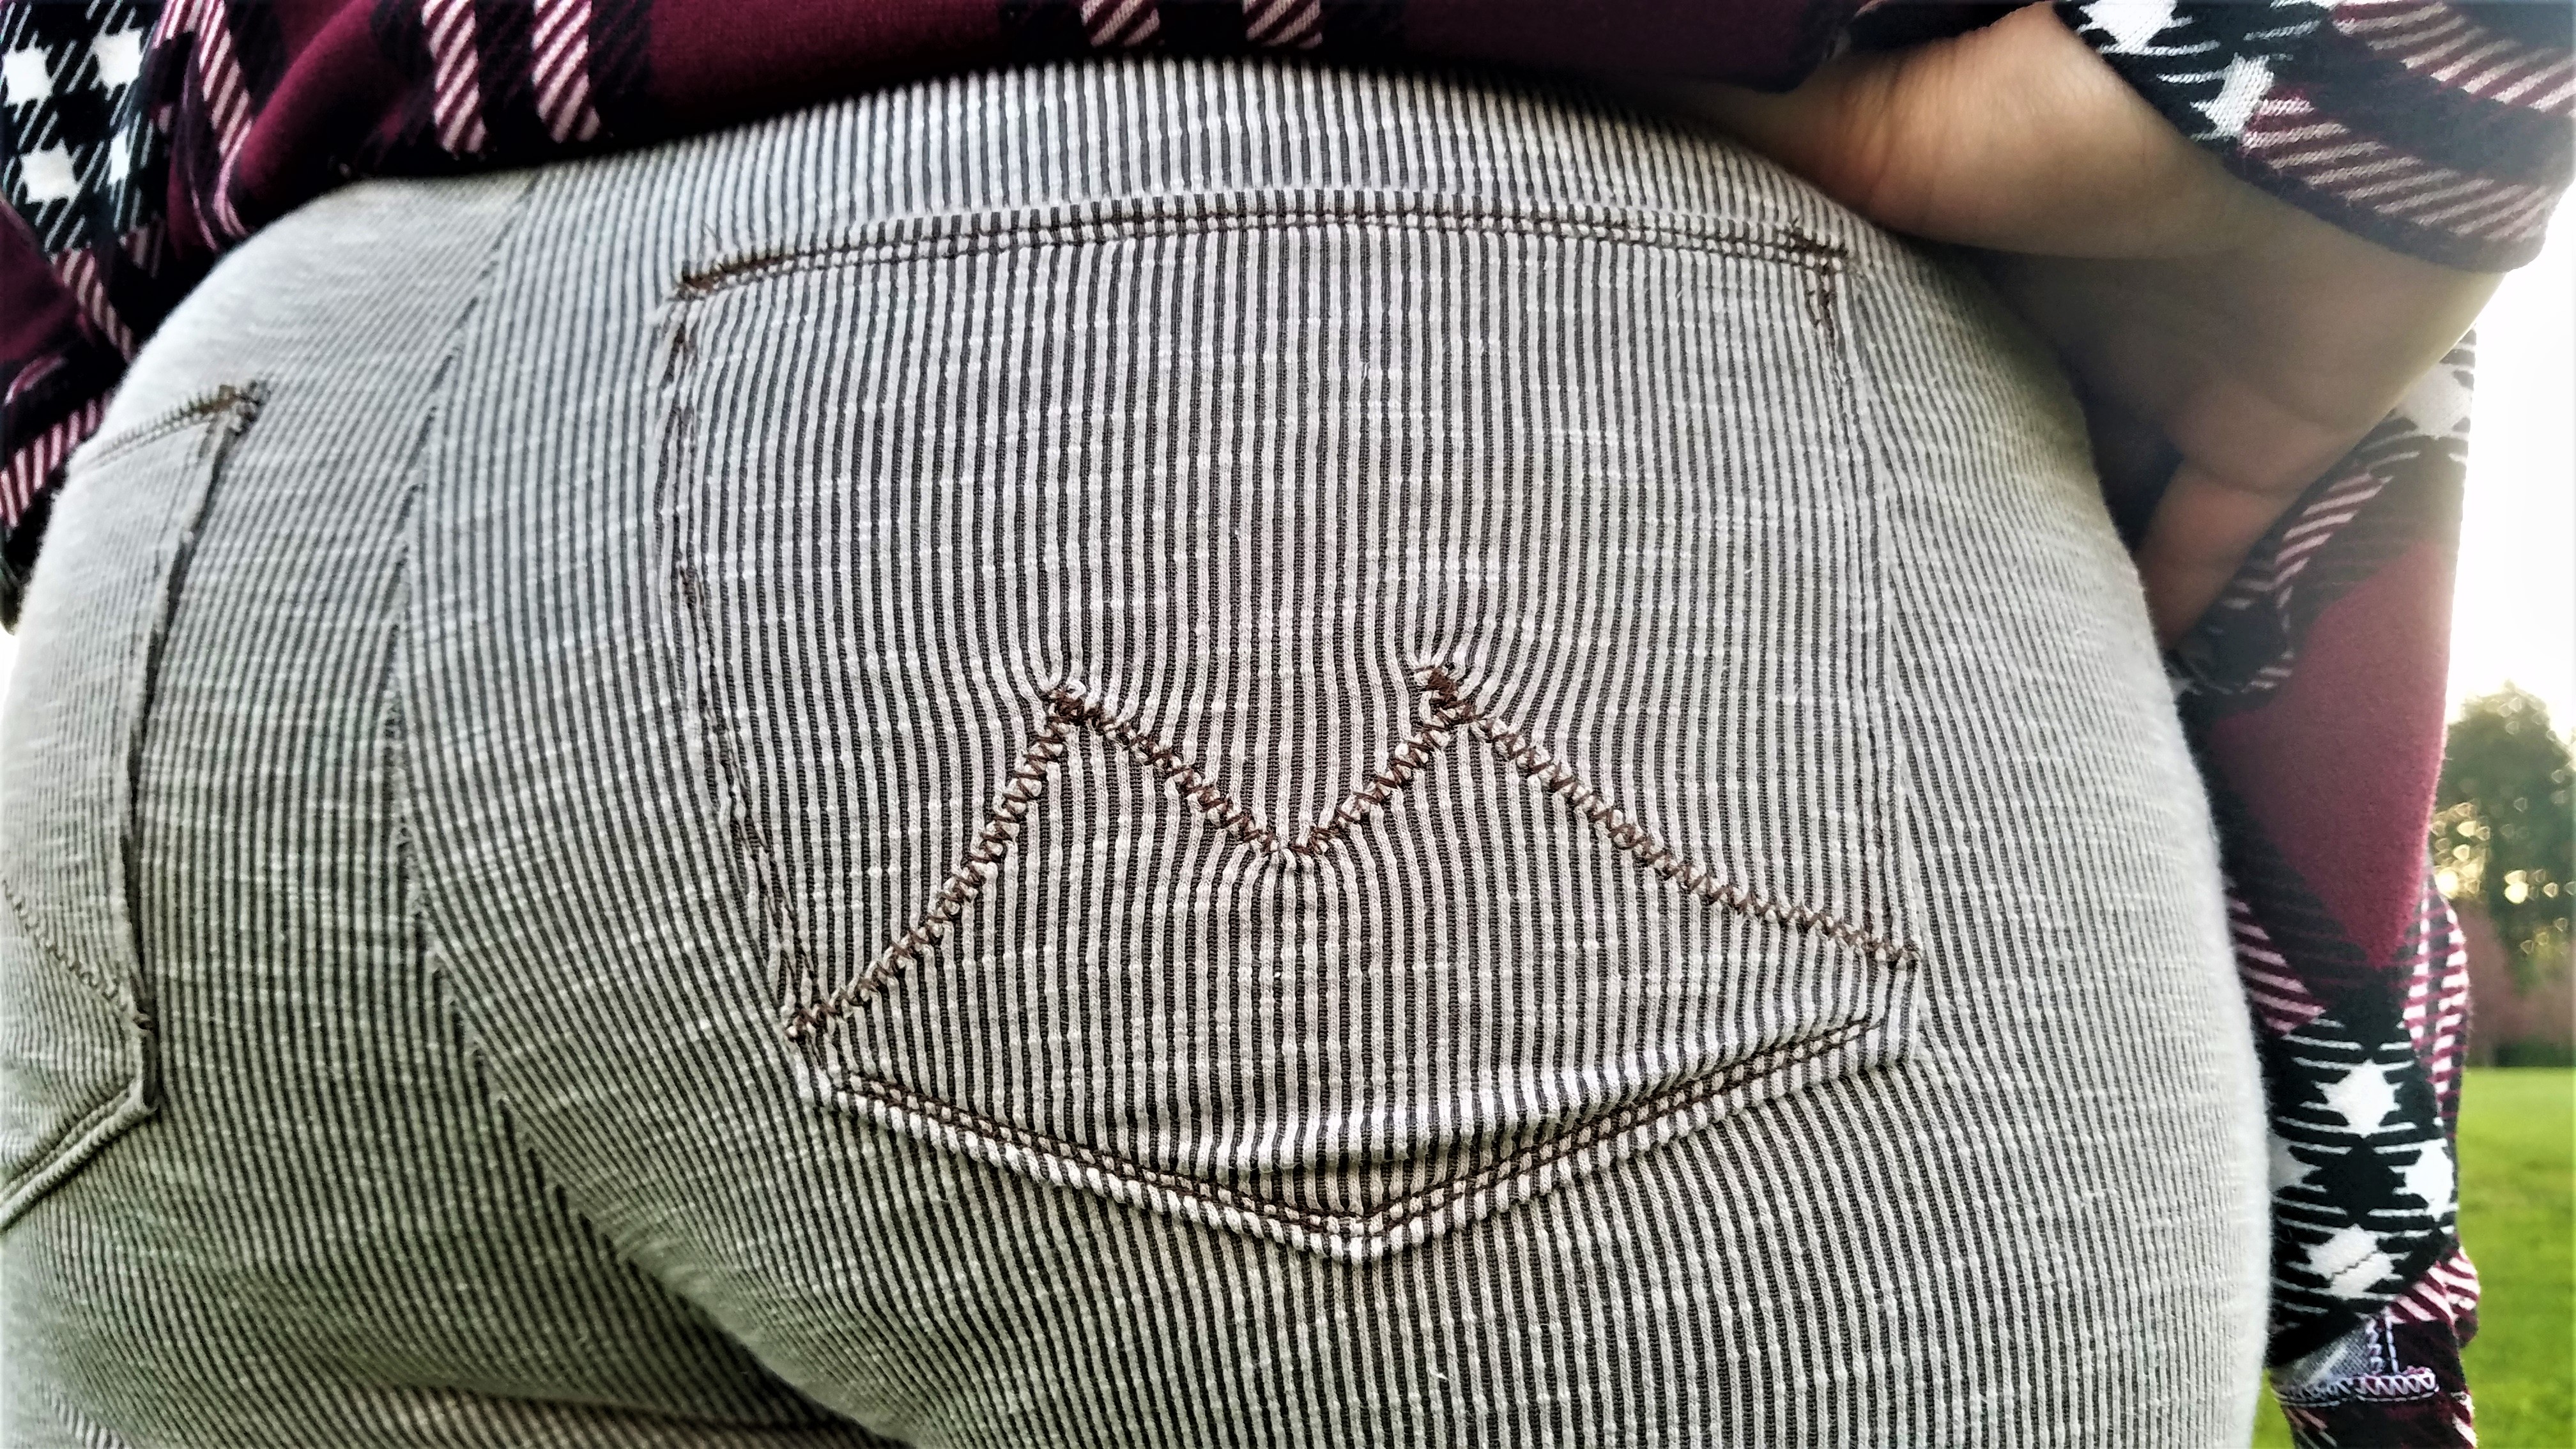
I tend to keep my phone in my back pocket, and so I have been dreaming of Caritas with back pockets, and I made my dream come true with this easy hack!
I took jeans which had nice pockets and traced them, added a seam allowance, and cut the pattern pieces.
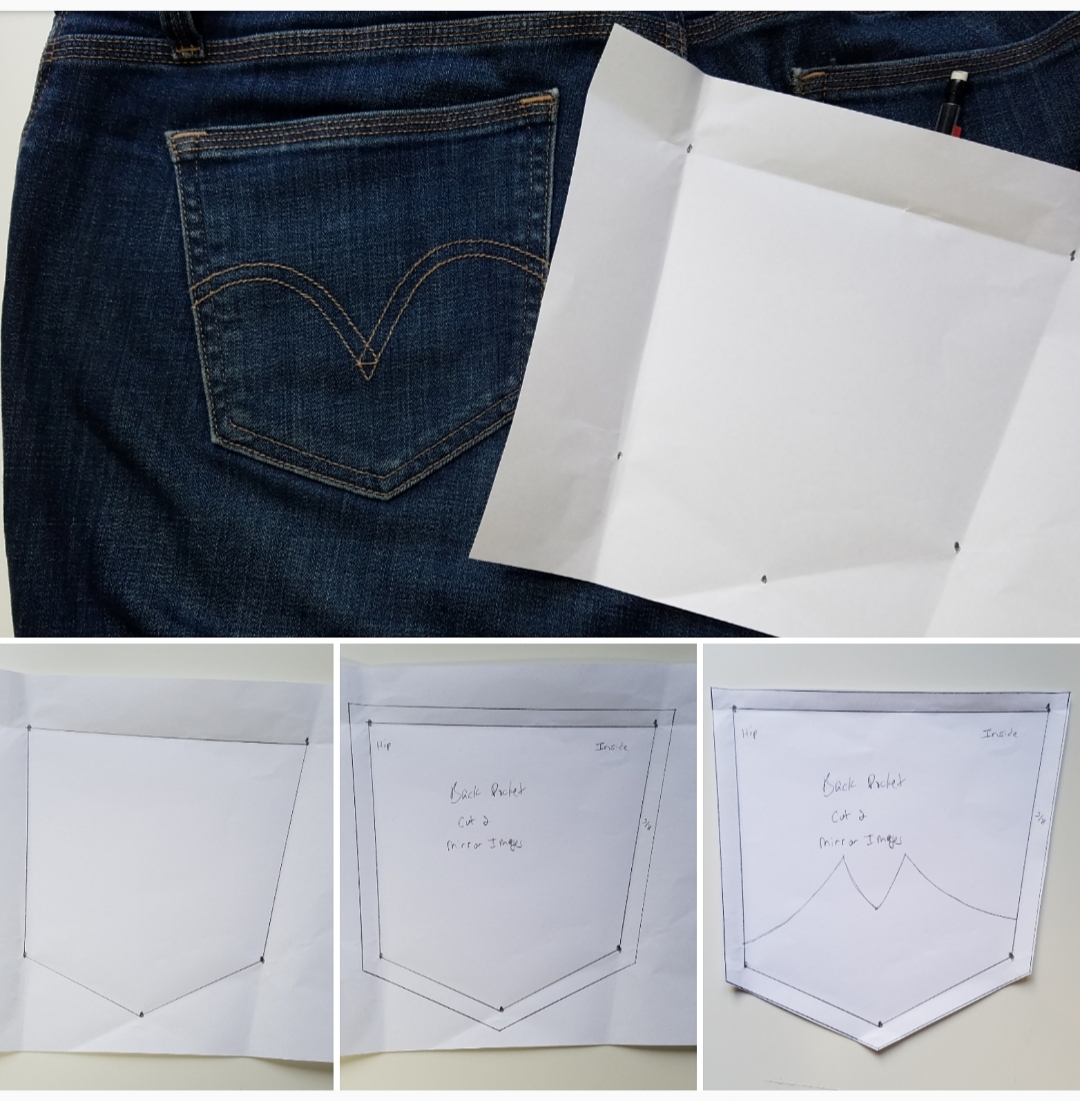
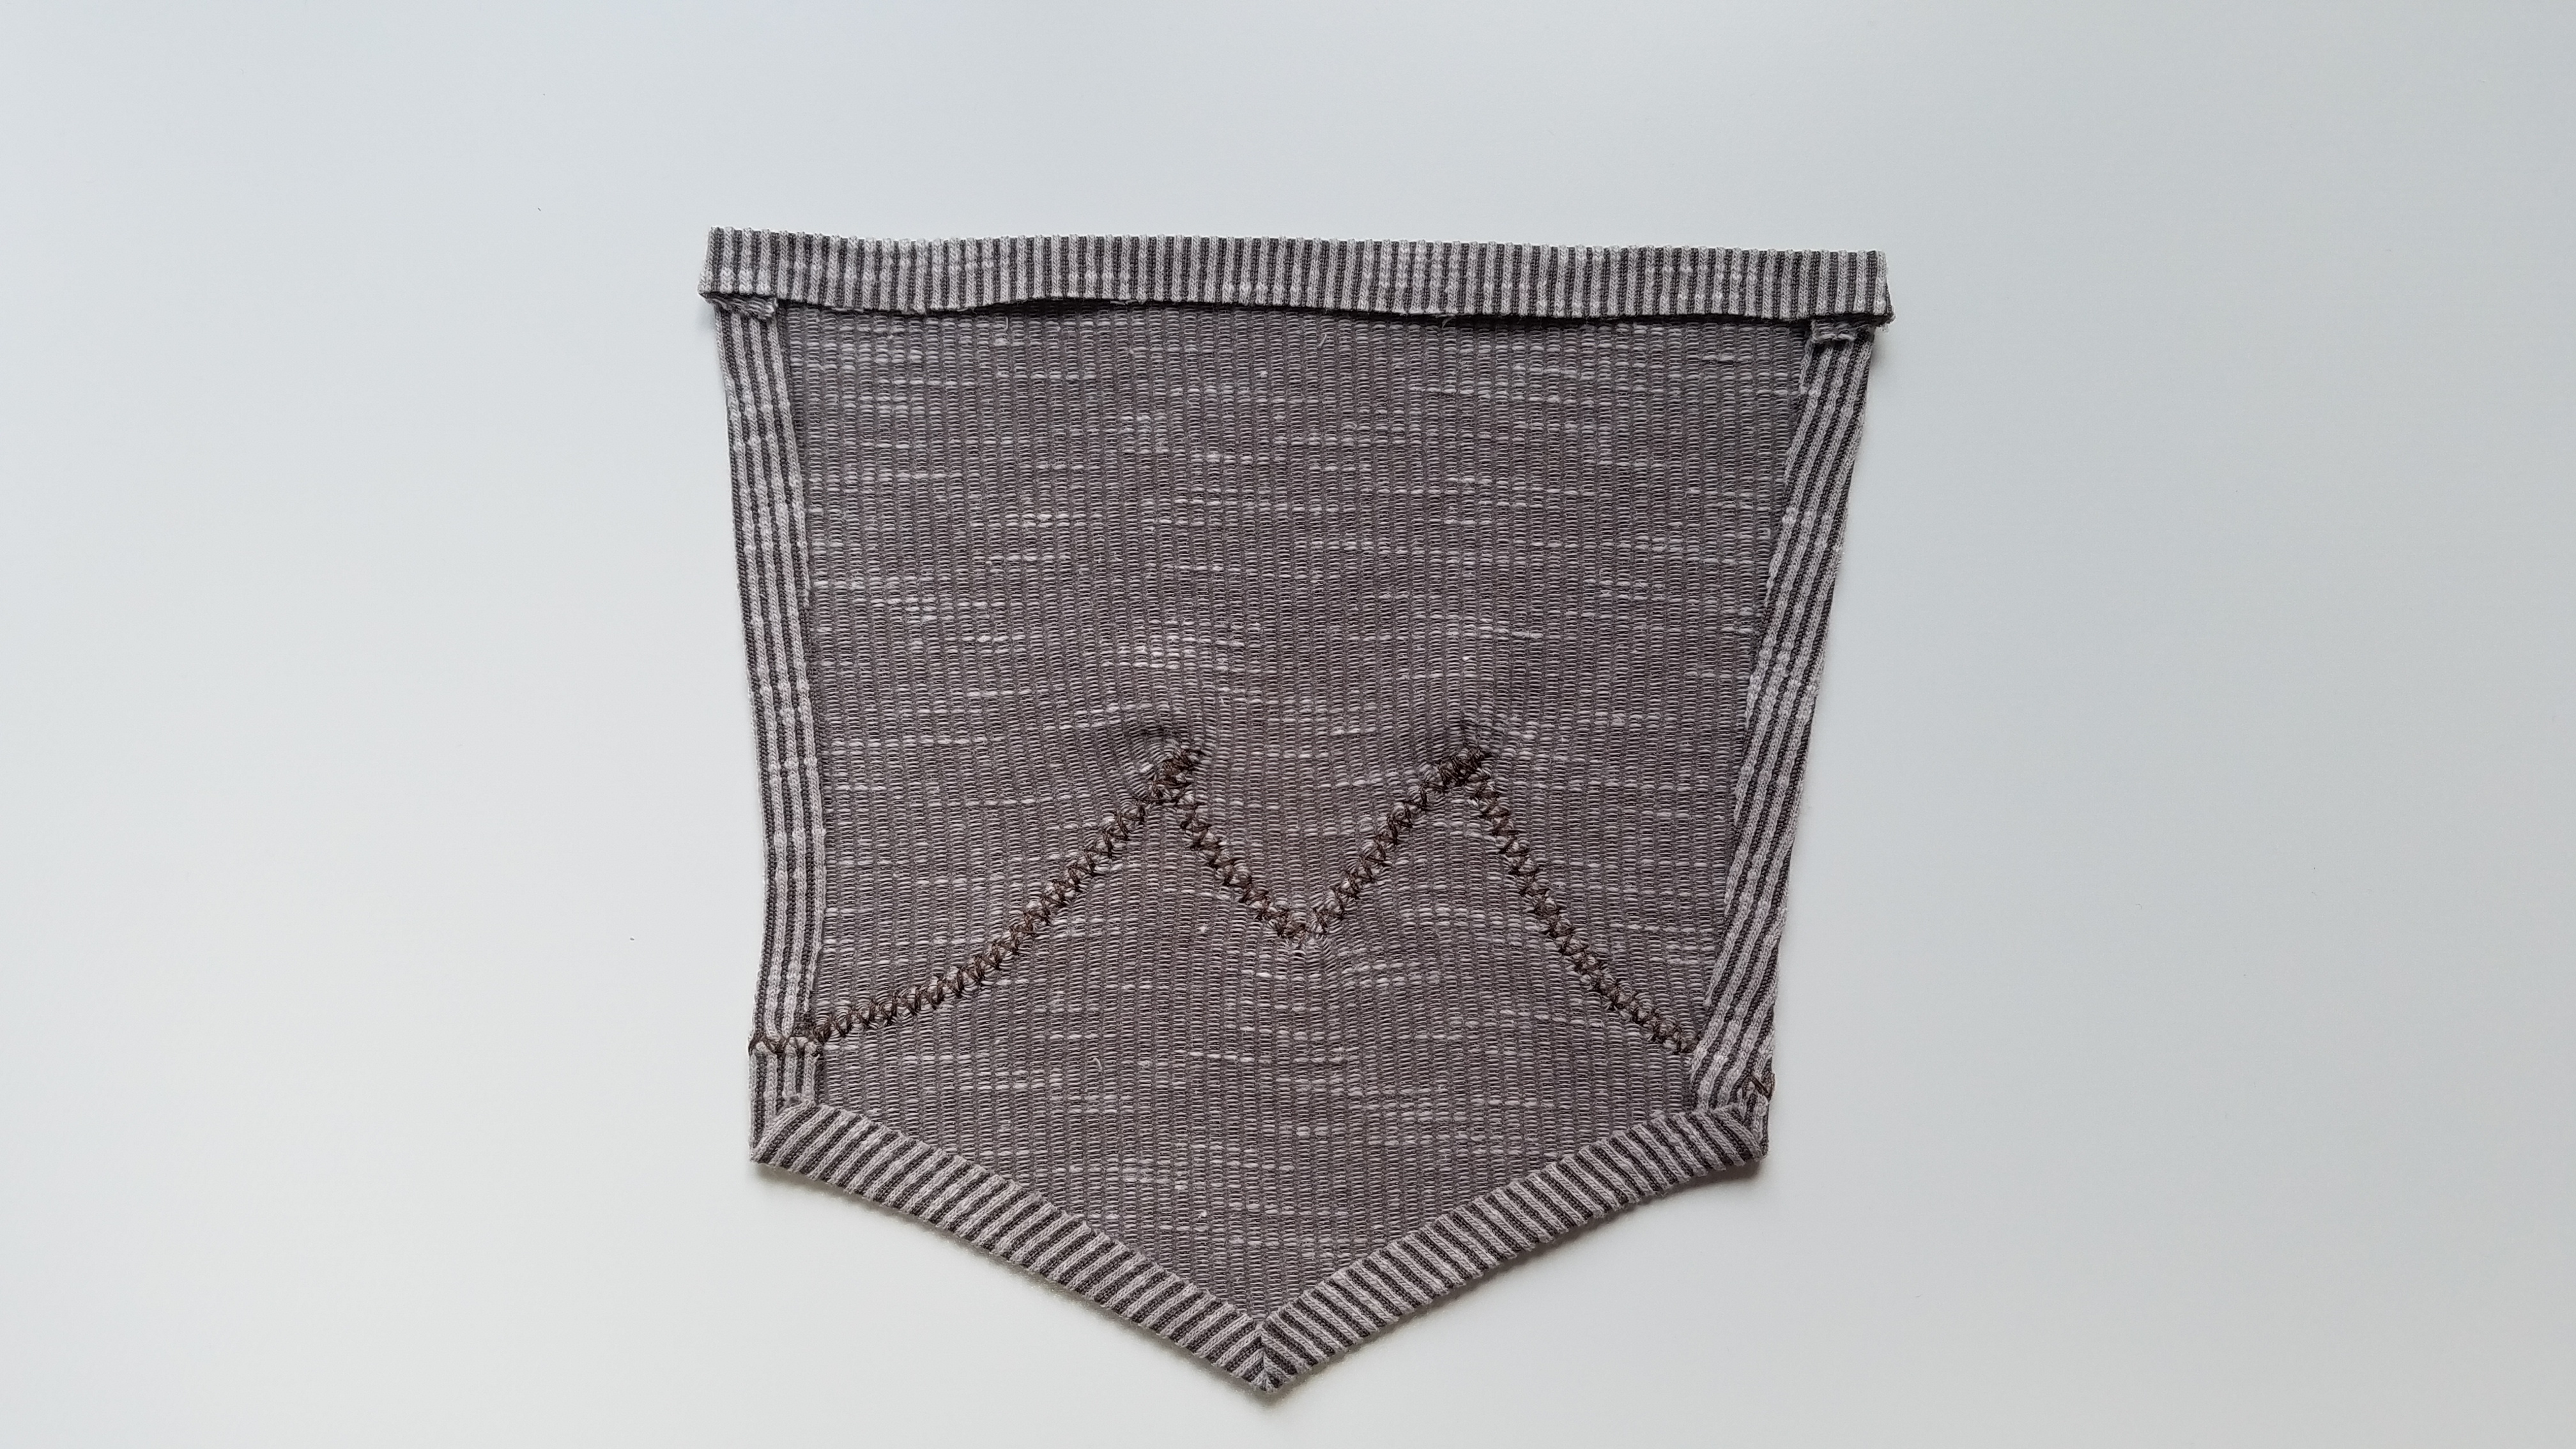
I freehanded my own design on them, my name is Amanda but I go by Manda, so I put Ms on them! Because why not sign your booty!
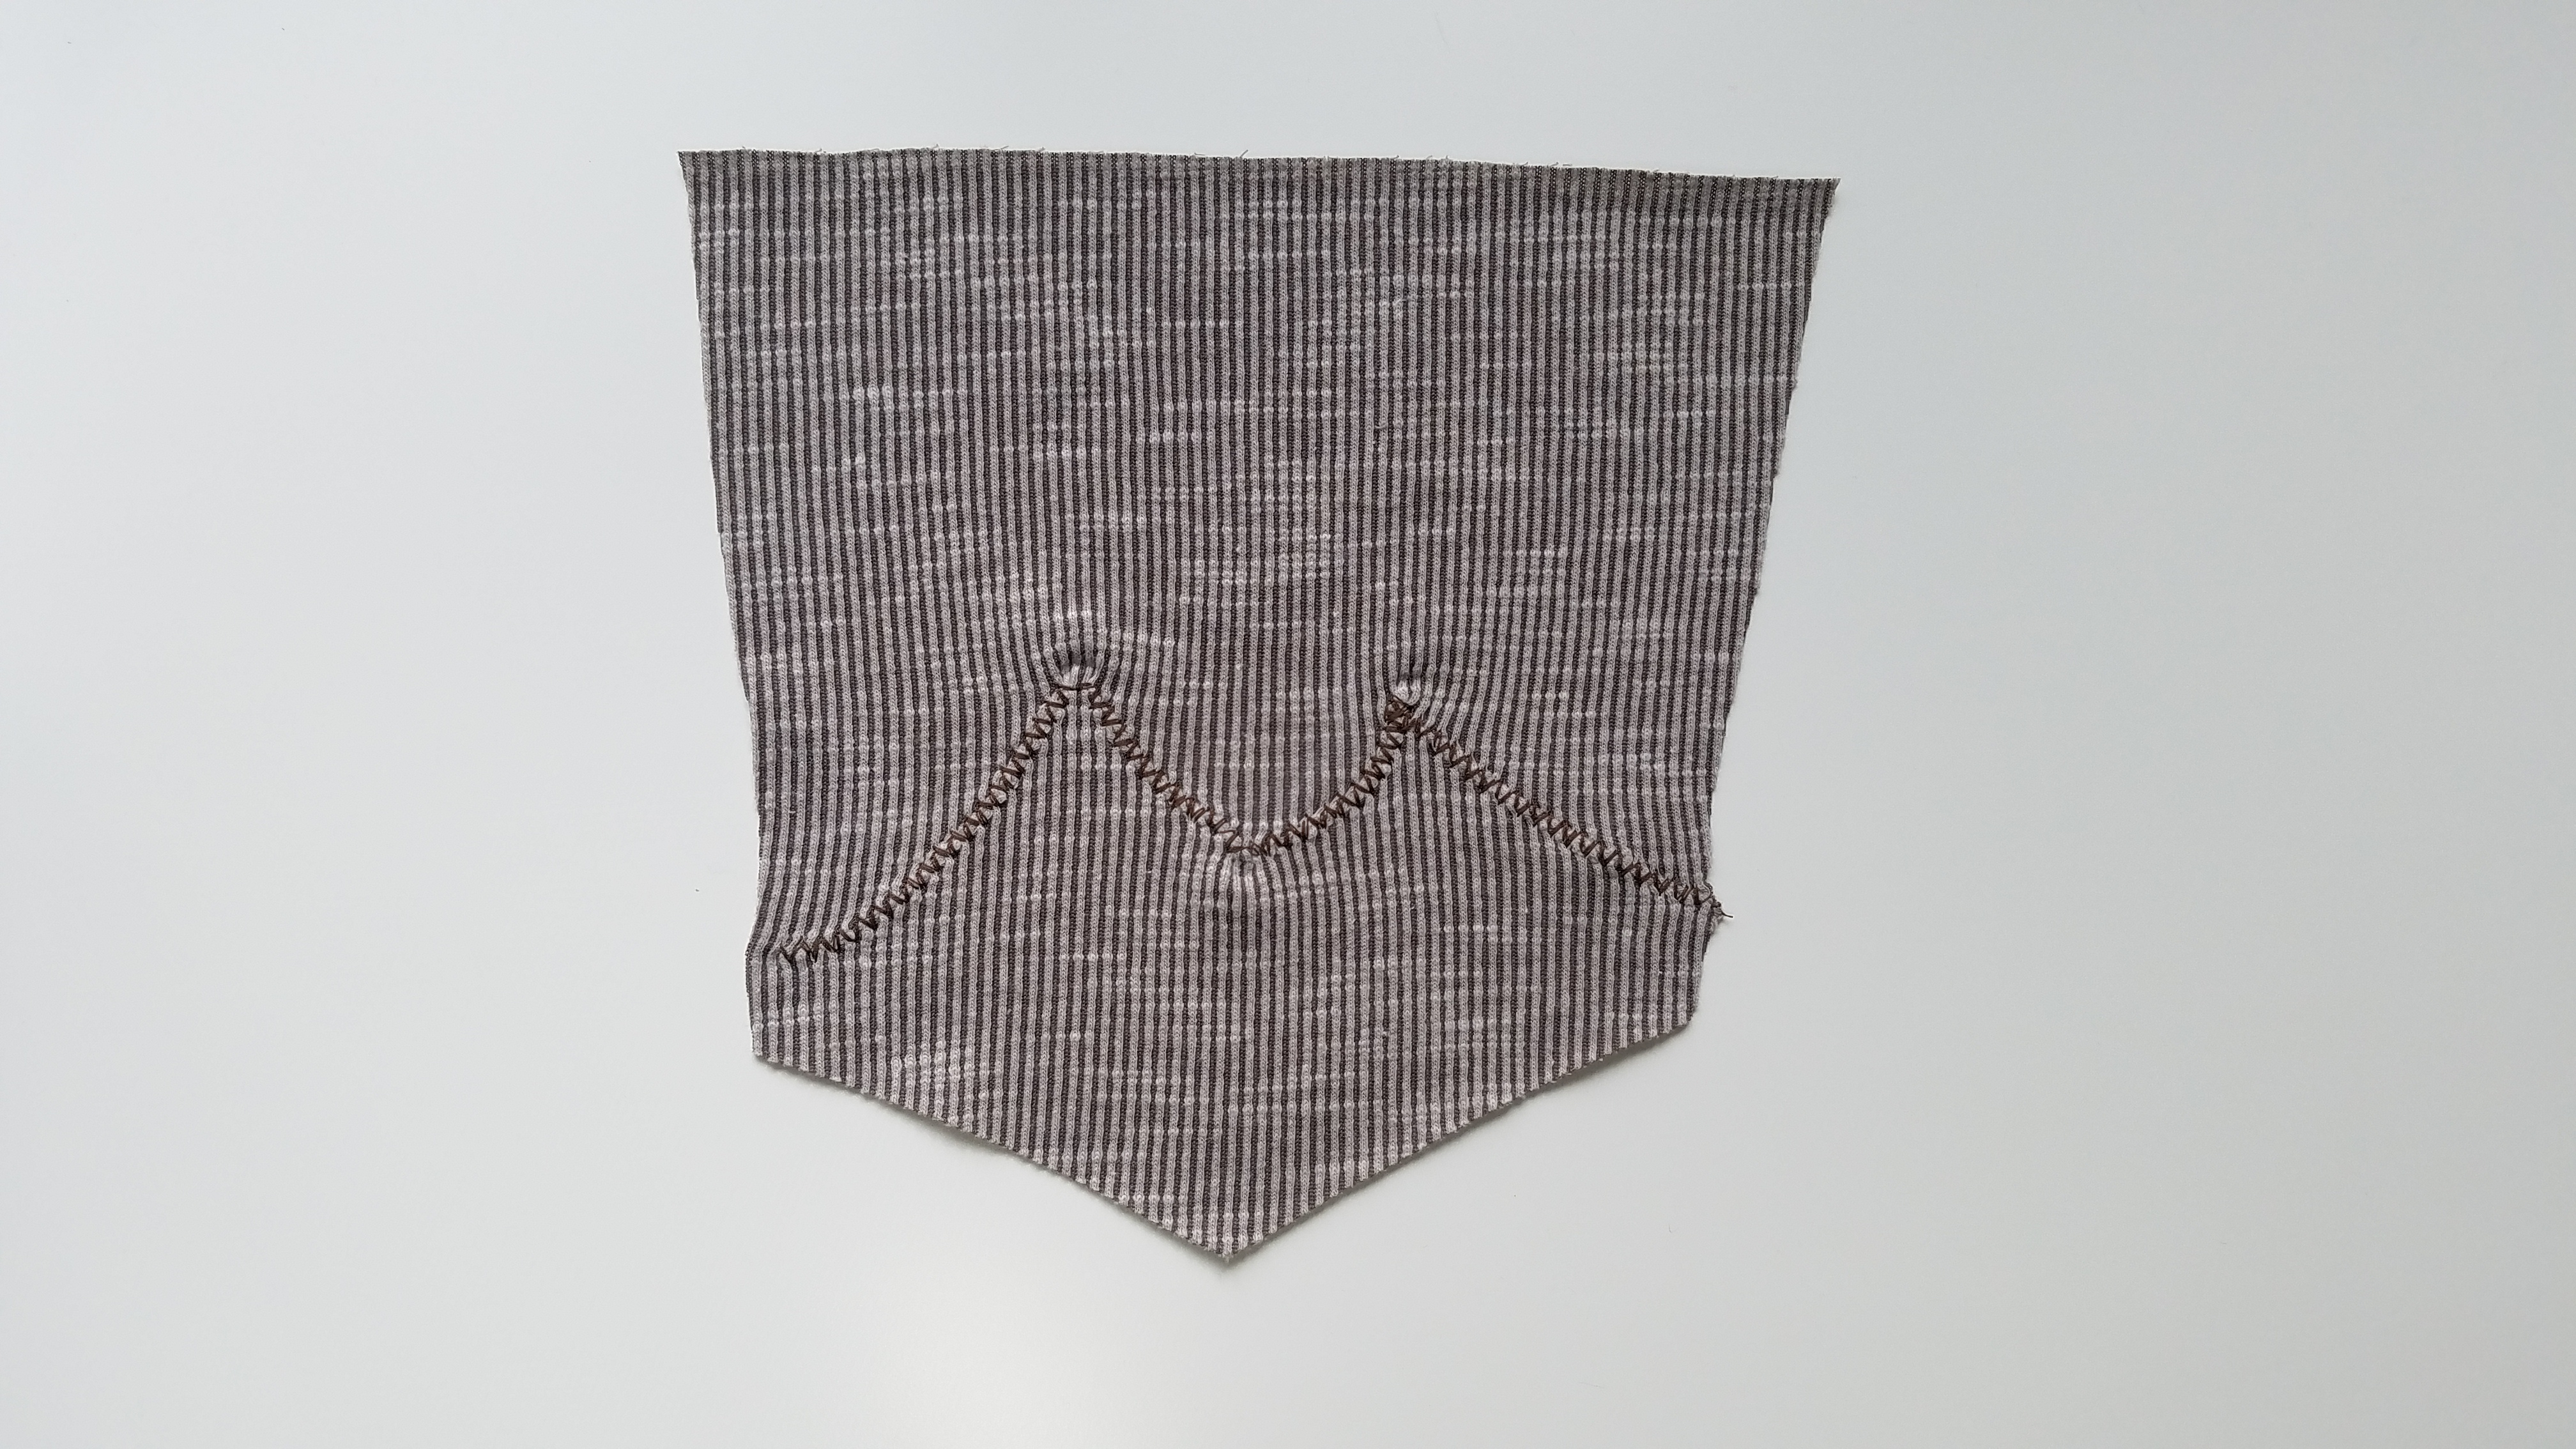
I folded over the seam allowance to the back, sides first, then bottoms, then the top, and hem taped in place.
The placement is the tricky part. You want the tops to be level with the ground when the pants are on, so keep the top of the pocket perpendicular to the edge of the back pattern pieces (I have a full booty adjustment in mine, so they’re longer than usual). You want the bottom of the pocket to end right about or just under where your booty curves in, this prevents long-bottom AKA Mom-butt! This may take some measuring, and if you’re not sure, baste them on and wait until the pants are assembled to finish them!

Hem tape and basting are your best friends here! I hem taped the seam allowance down and then hem taped the pockets to the pants.

I basted the edges to prevent them from sliding while I did the sewing. At each corner of the pocket, draw a chalk line that bisects the angle and put your needle down at that line and pivot the piece to get nice sharp corners.
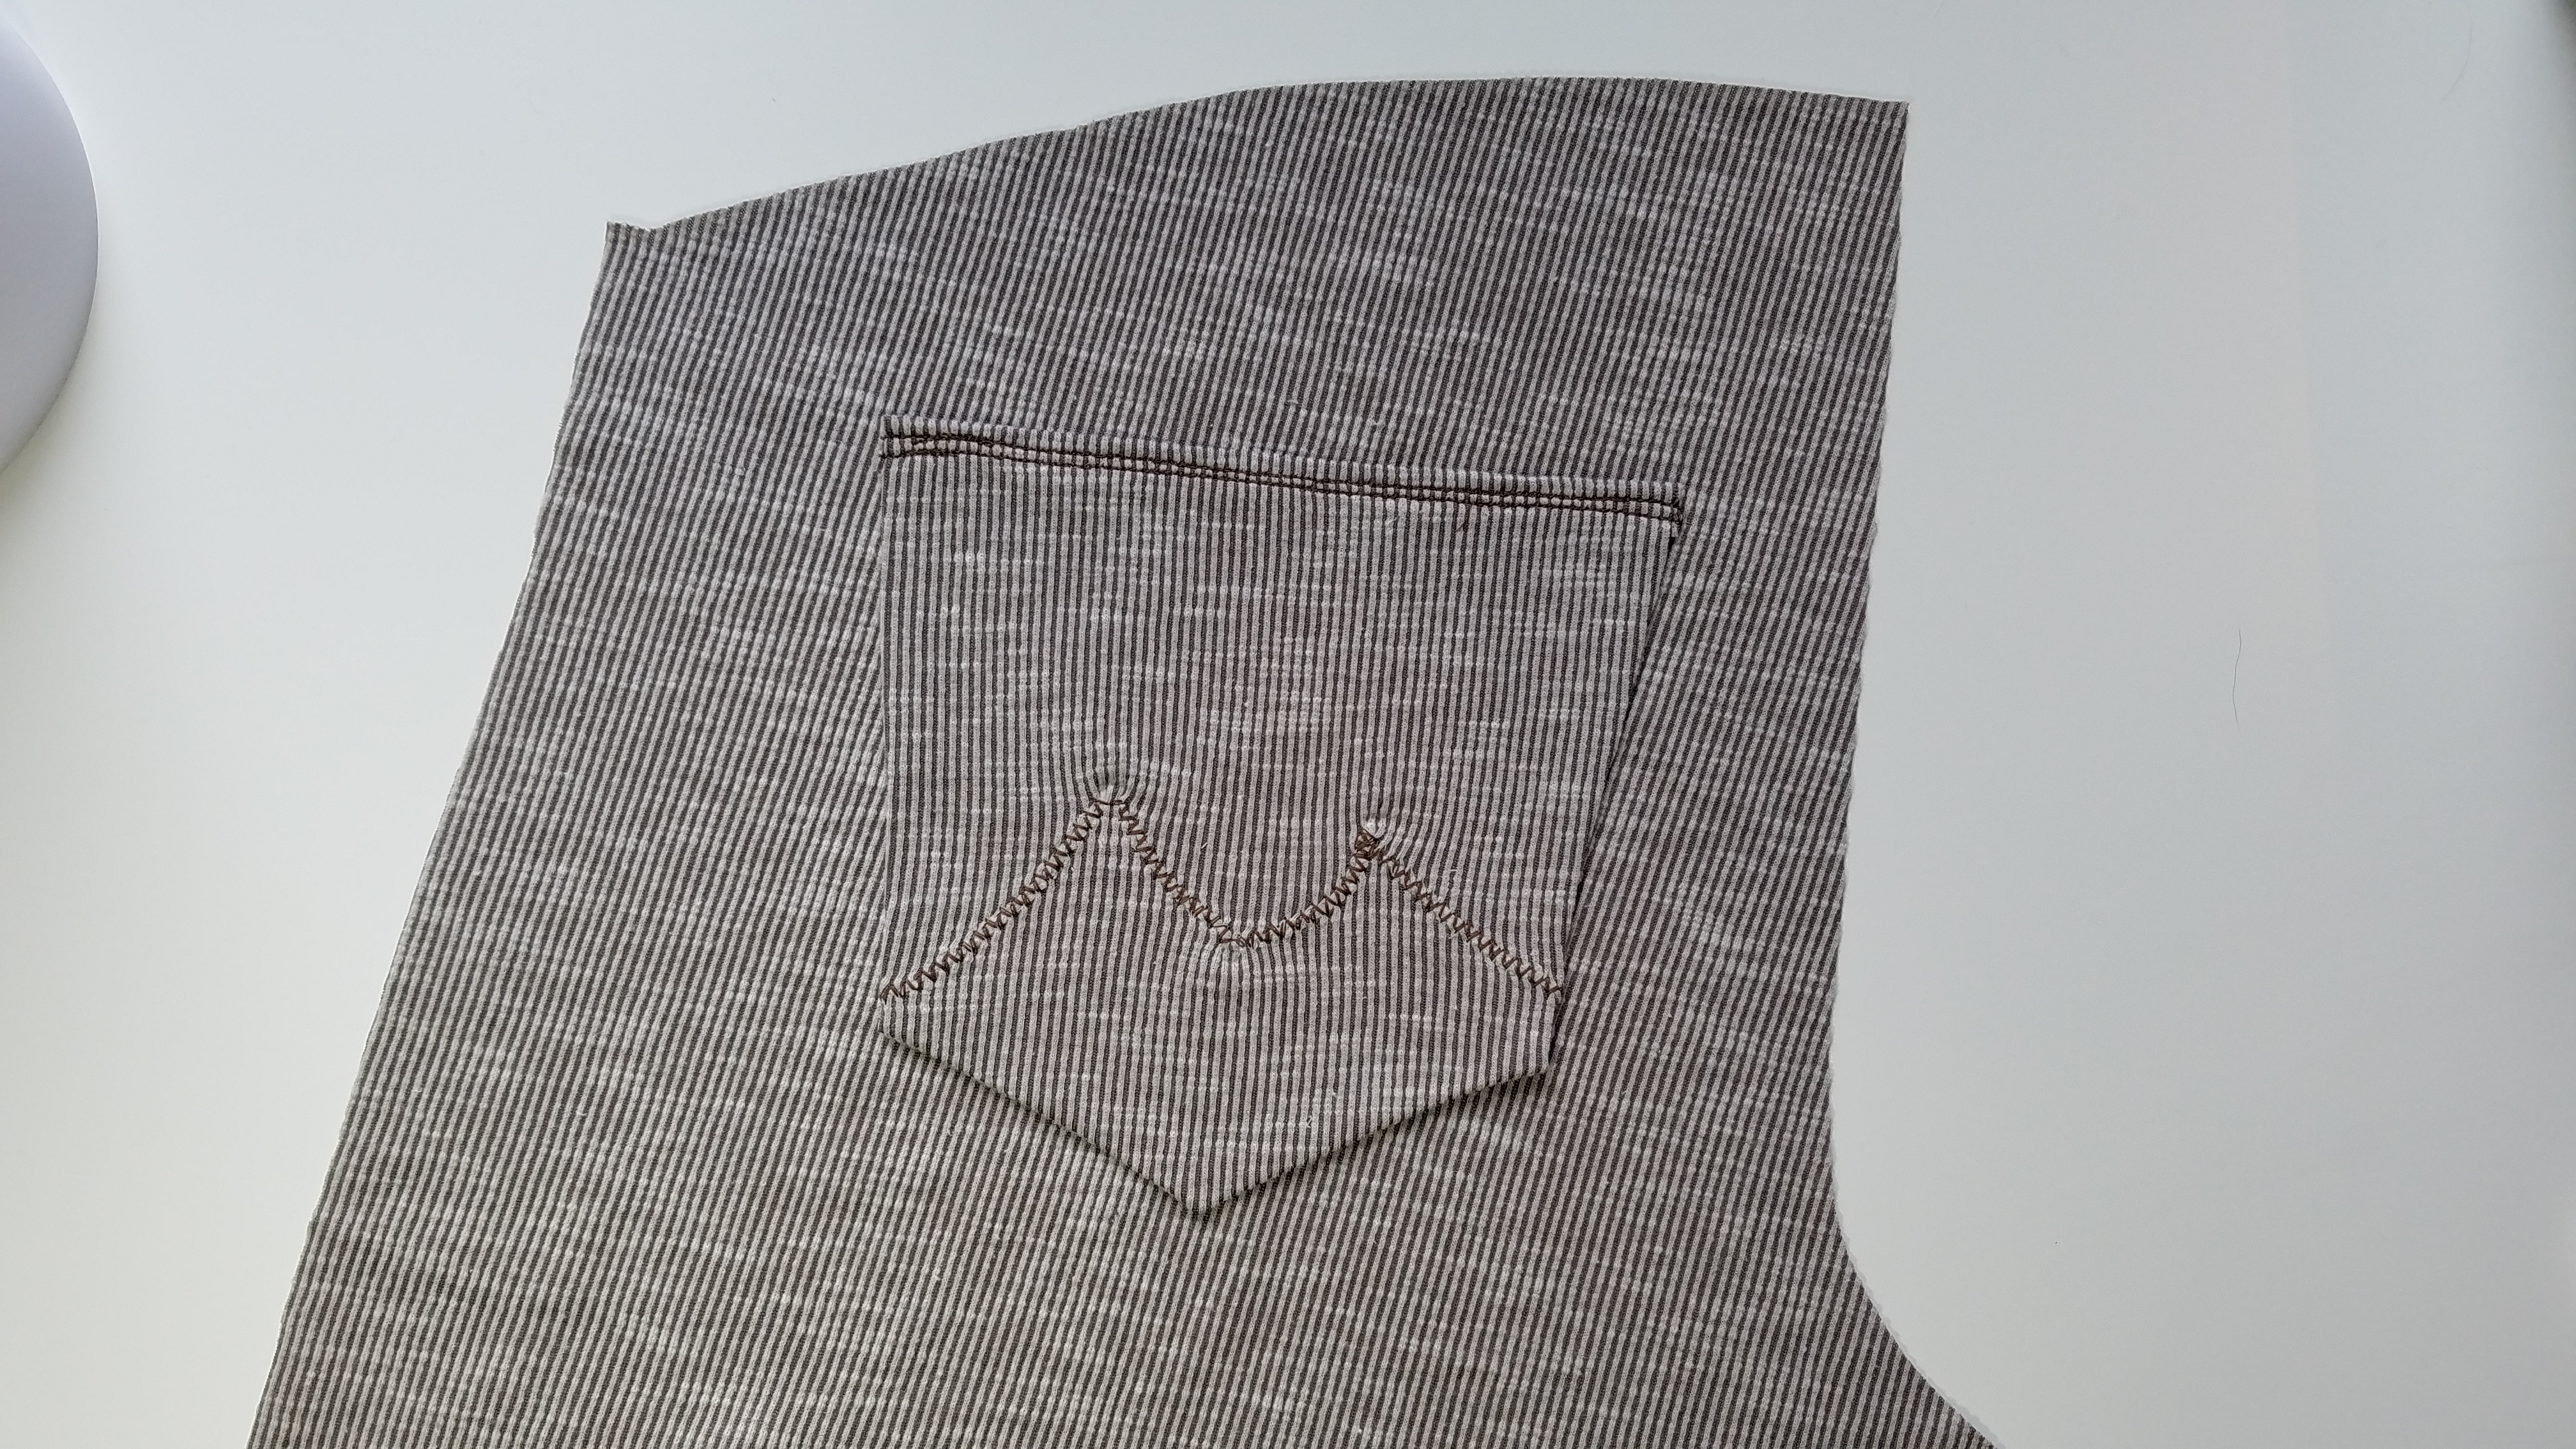
If you intend these to be functional pockets (I keep my phone in mine), I recommend attaching them very securely. I used a double row of the triple stitch on my machine, which takes some time, it’s a rather slow stitch. Reinforce them with a little bar at the top as well. They are worth the time invested though, you’ll have beautiful and useful pockets!
Are you ready for Fall? I hope you are as cozy in your creations as I am!


This Post Has One Comment
Pingback: Favorite Fall Outfit! – Meadow Sews