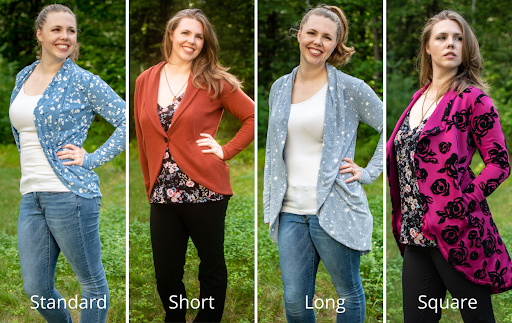
Hello fellow sewers….sewists……awesome creators of textile goods? My name is Marta and I’m so excited to be doing this guest blog post here at New Horizons Designs. Before we begin, let me tell you a bit about myself. I am a high school English teacher in Ontario, Canada and a mom of two. I started sewing about 2.5 years ago near the end of my maternity leave with my daughter, my second child. I felt that my whole existence was about caring for my children and there was no creative outlet for me to feel personal self-worth. I was part of an online mom group with some really talented women who sewed. I was in awe of the things they could make. So, I asked my husband to dust off his late mother’s sewing machine and teach me how to use it. That’s right….he….taught me. The first thing I made was the most horrible head band you ever did see.
But then, through the guidance of some awesome people, I discovered the world of PDF patterns. In the last 2 years I have learned so much from this amazing community. I’ve had the opportunity to work with some fabulous women who have all taught me something new, and I am forever grateful. I still have a million and one things to learn and I’m looking forward to many more years of these continued relationships and honing and extending my skills.
BUT….we all have to start somewhere. So, that’s the topic of today’s blog post; Sewing Terms and Definitions. Every hobby has its own language, and it’s really hard to get anything done if you don’t speak the language. Here are some basic terms that you need to know to get you sewing!
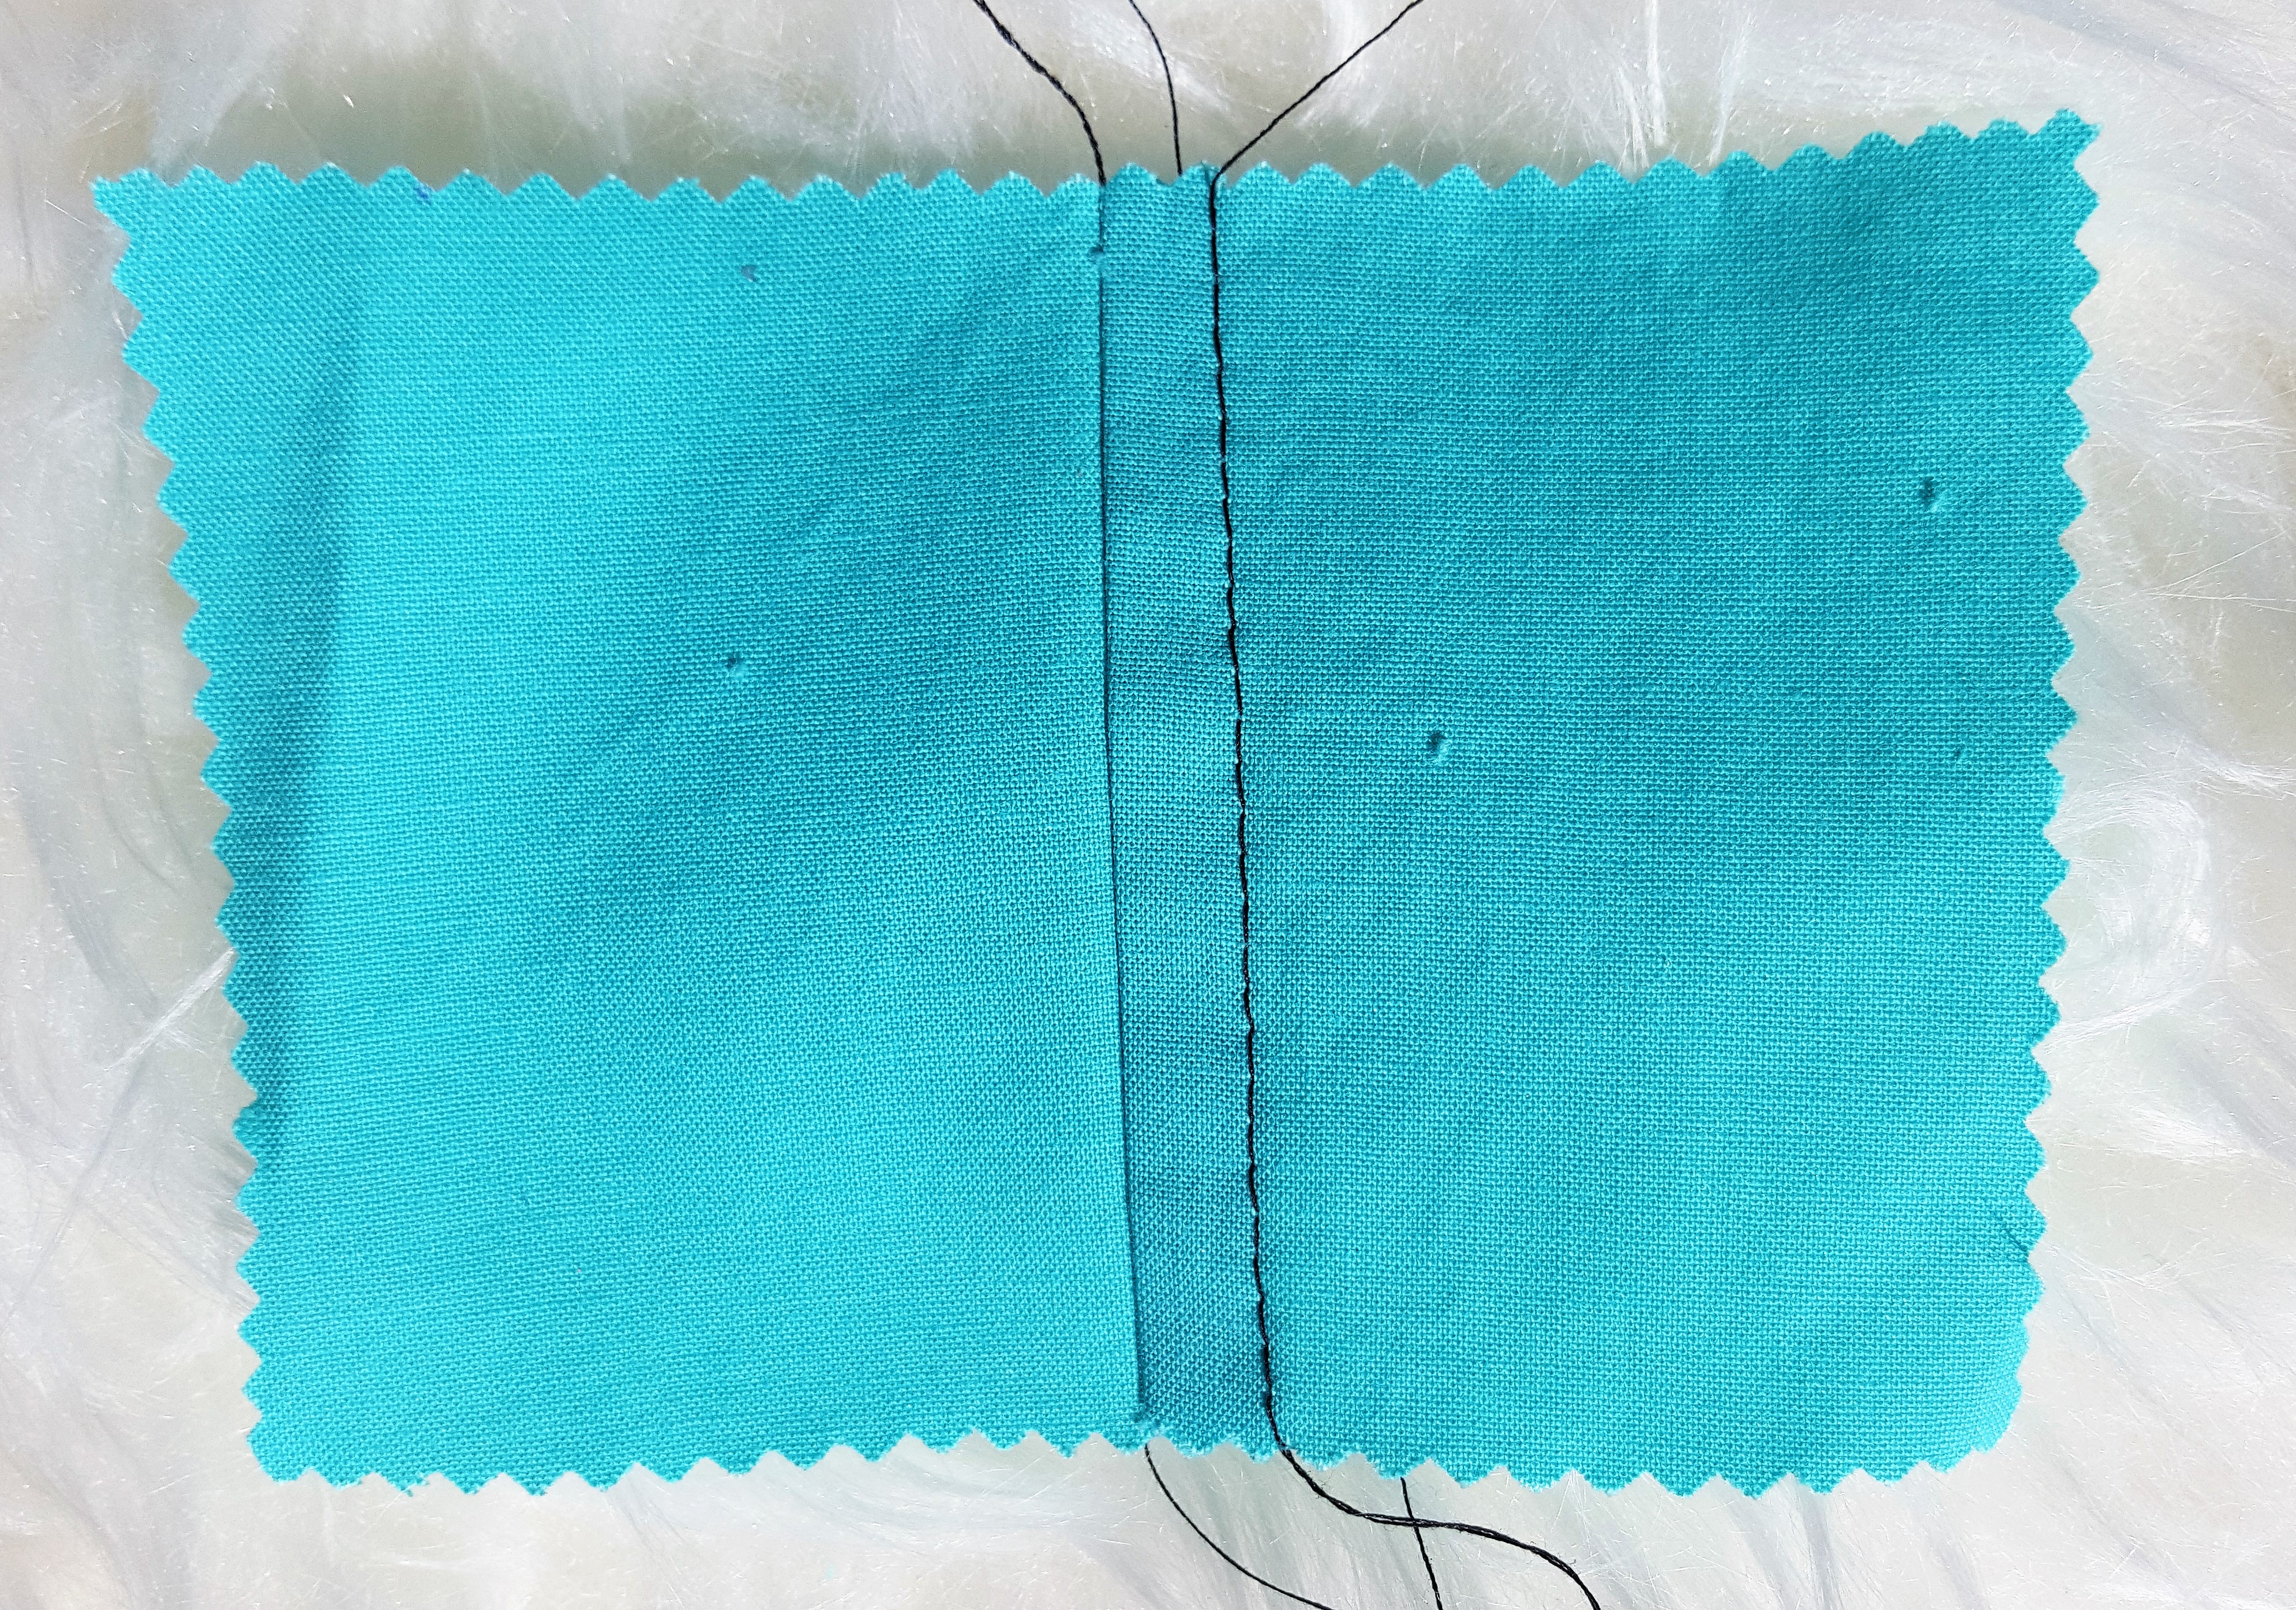
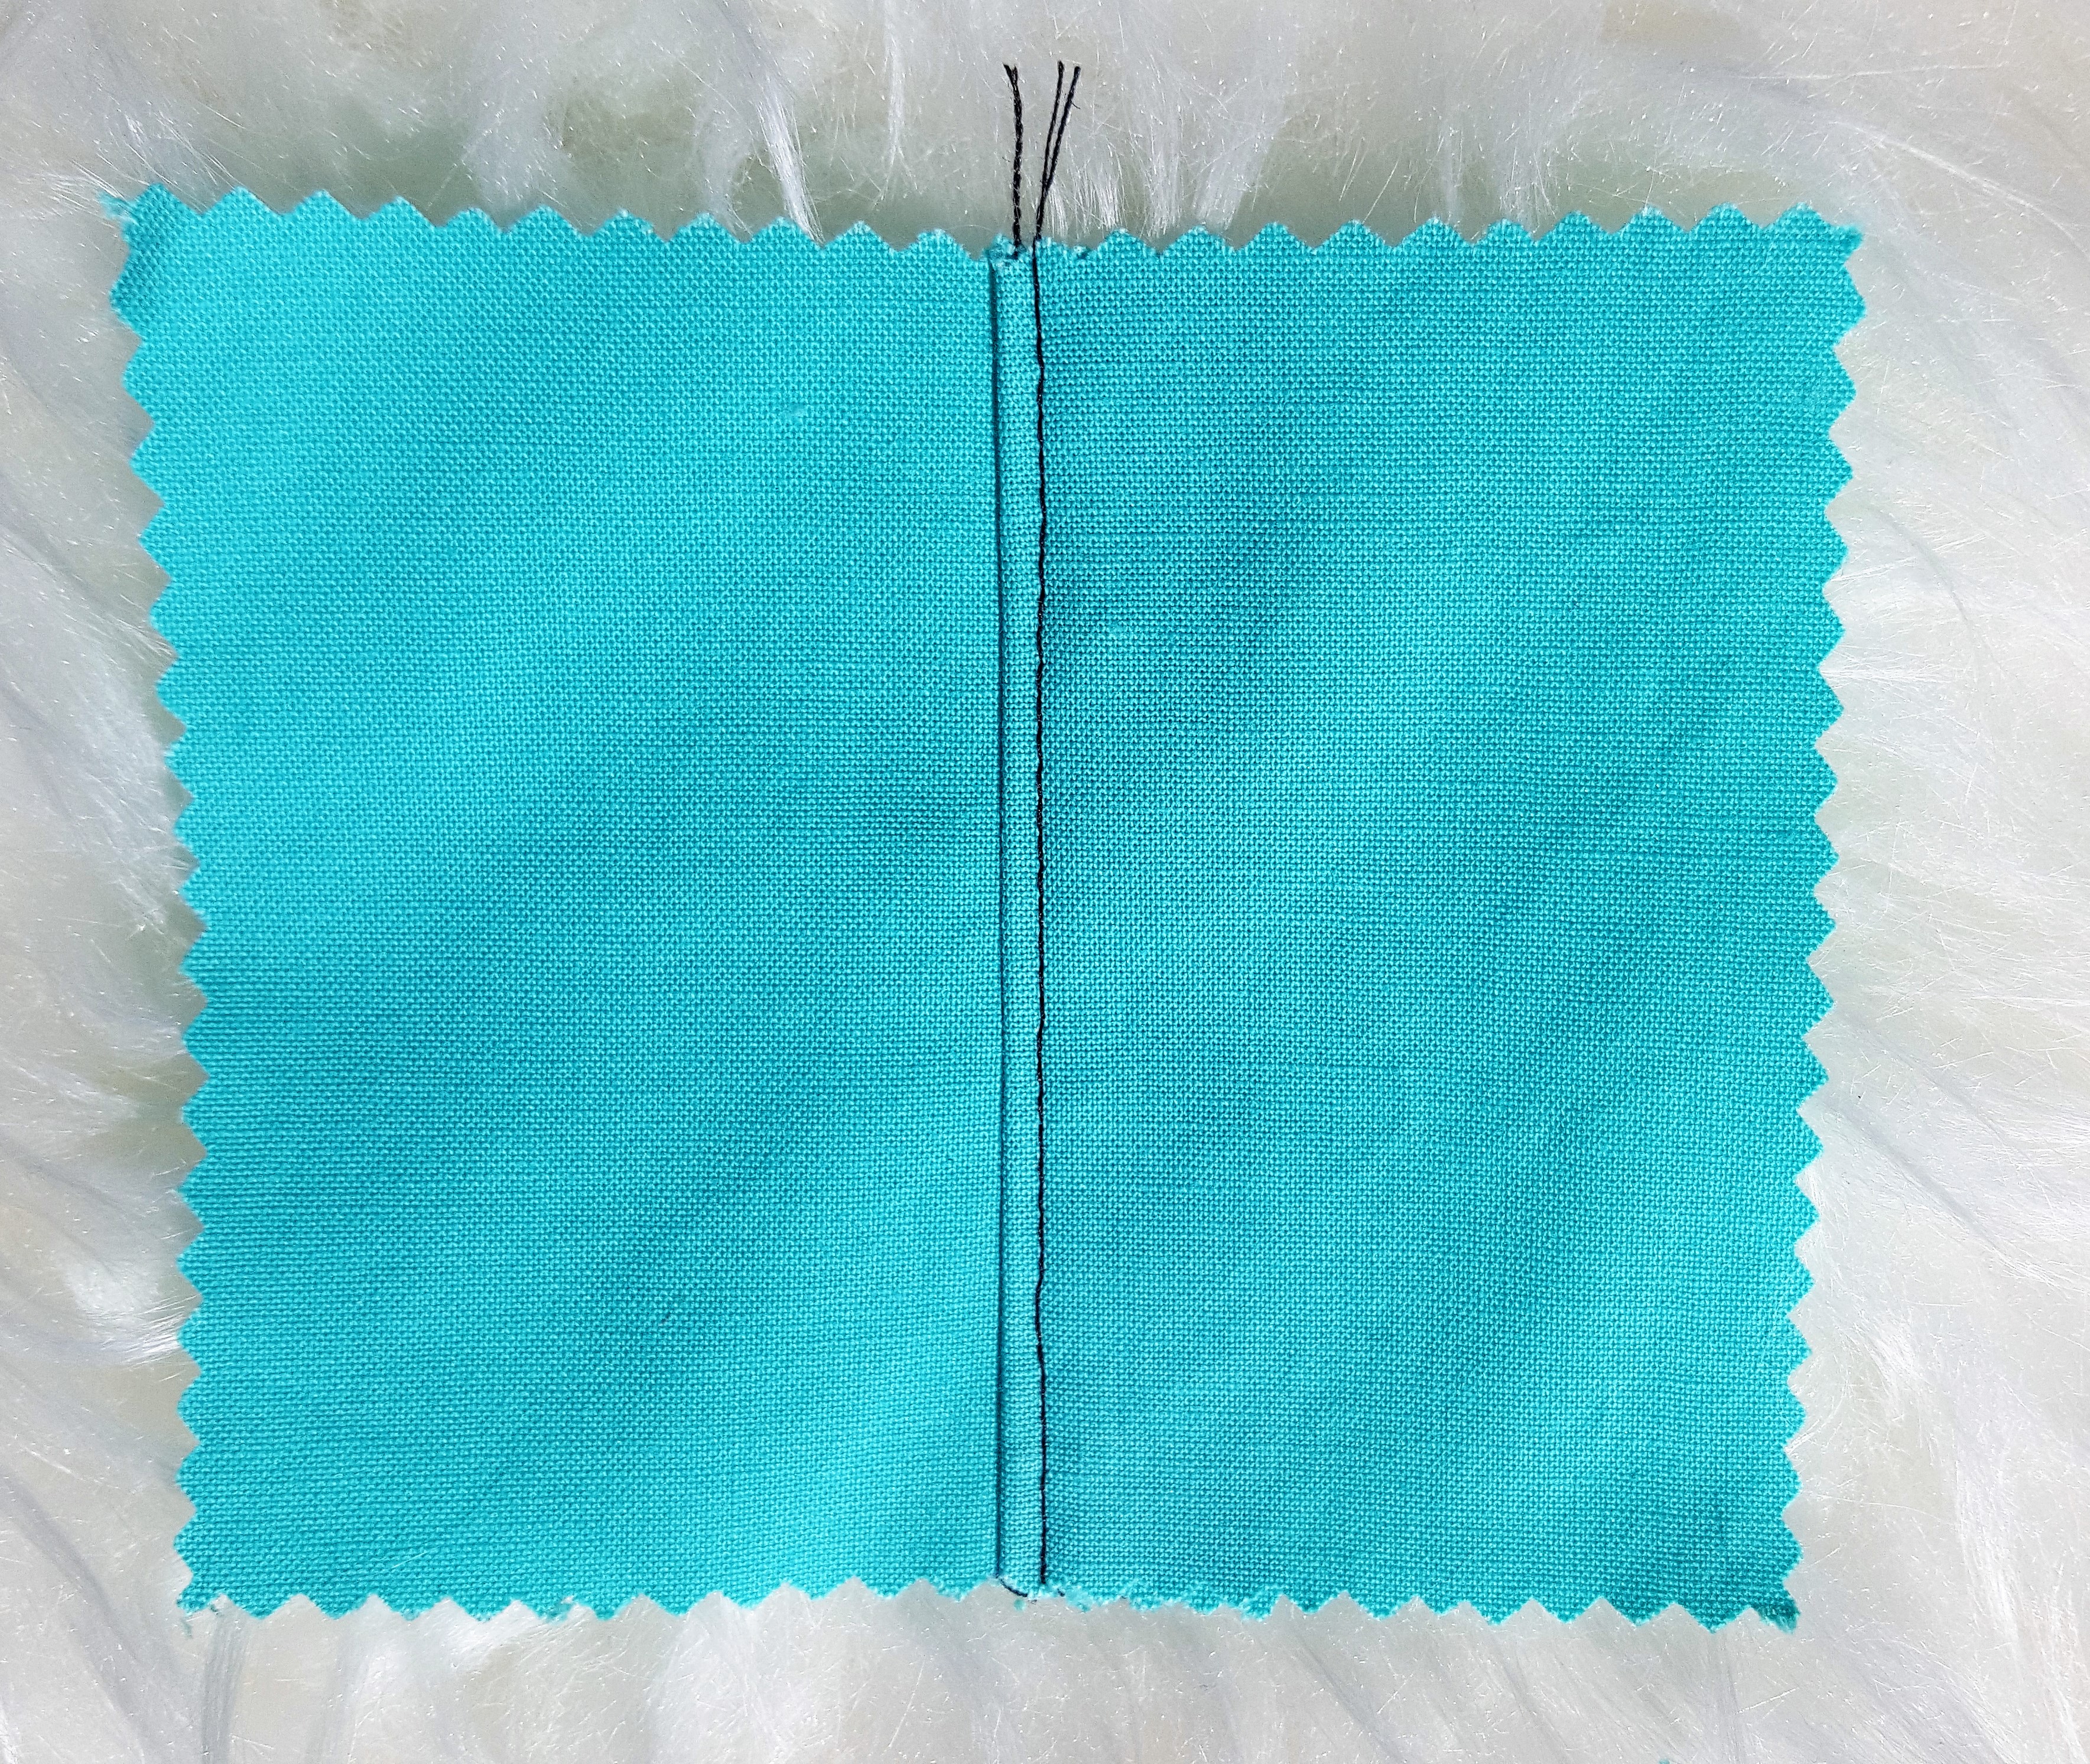
- Backstitch
This is done to secure your line of sewing at the beginning and the end. Rather than tying a knot with your thread you are going to find the reverse button on your machine and go backwards and then forwards about 3 or 4 stitches. This will ensure that your sewing does not come undone while being worn (yikes!) or in the wash.
- Baste
Basting is used to temporarily hold two or more pieces of fabric together. You will do this either by hand or using the longest stitch on your machine. This will be removed once you have sewn your final seam. Basting is especially helpful when using slippery fabrics like swim knit or silk. If you are newer to sewing you may want to, for instance, baste on your neckbands before you serge them on to ensure that they lay flat. Basting is a LOT easier to take out than a serged seam.
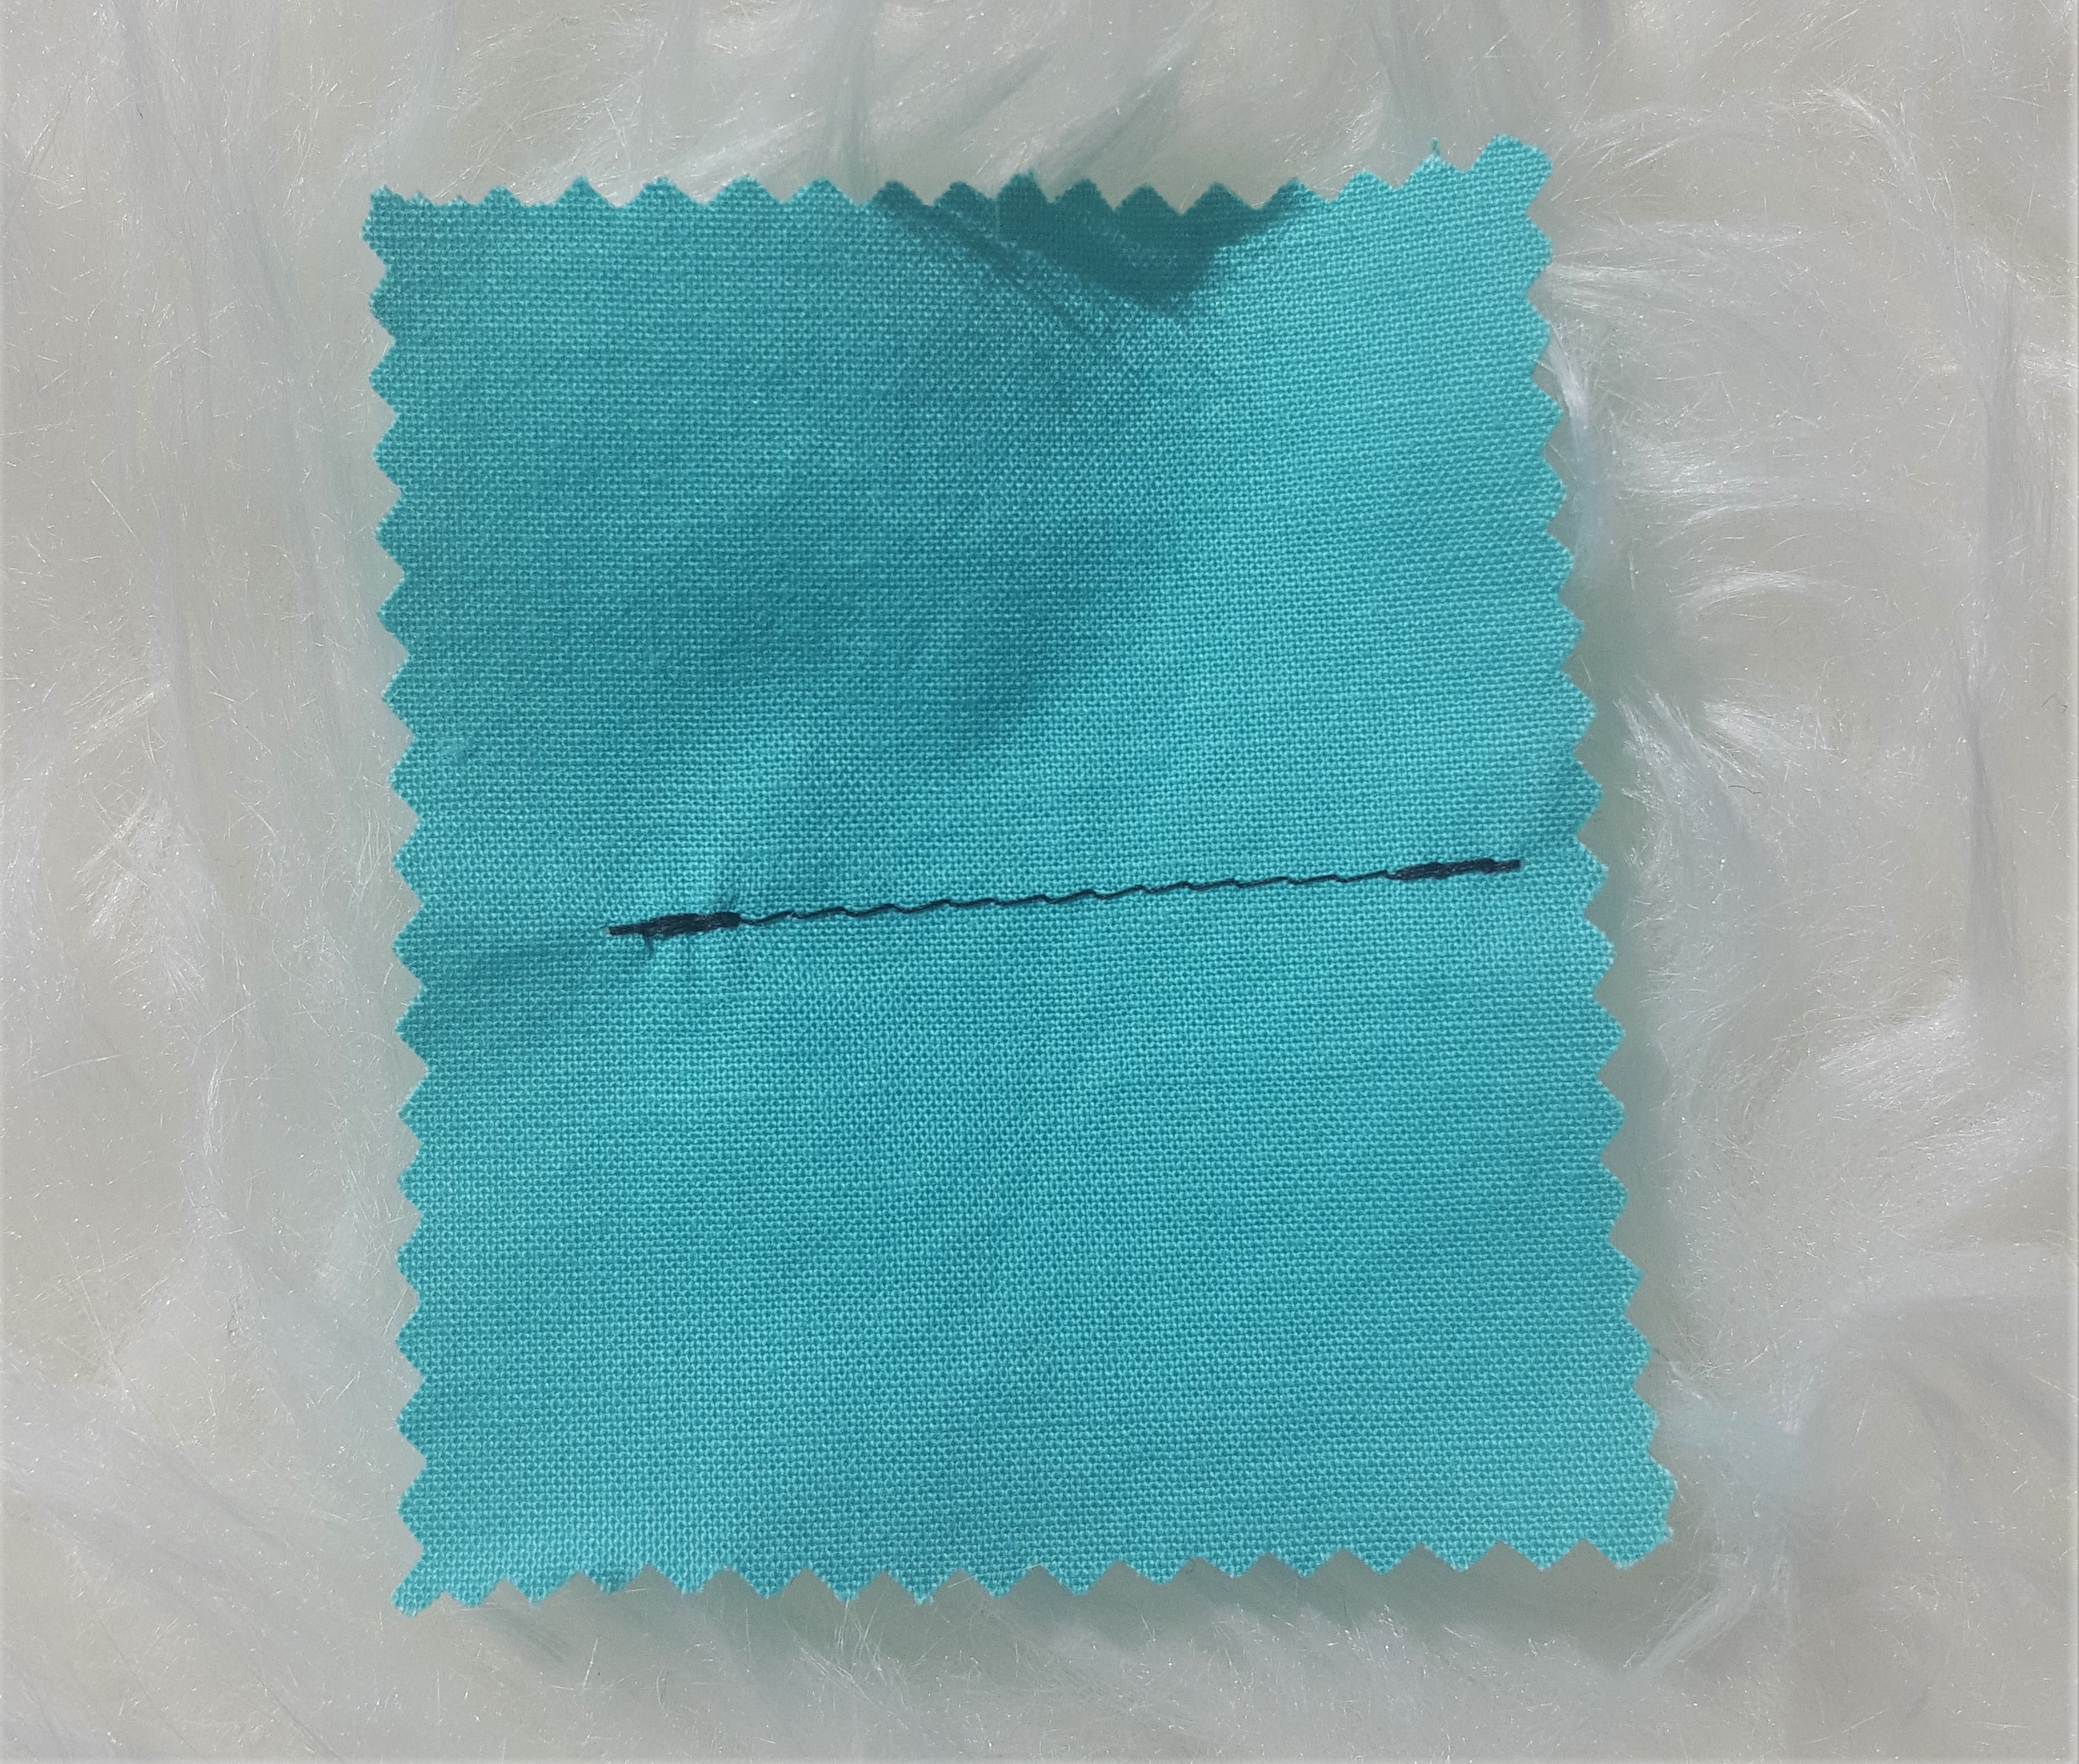
- Top Stitch
This is a line of stitching sewn on the right side of the fabric. It is meant to be seen and adds a clean decorative finish to your work. It also holds the hidden seam allowance in place and helps prevent woven fabric from fraying on the inside.
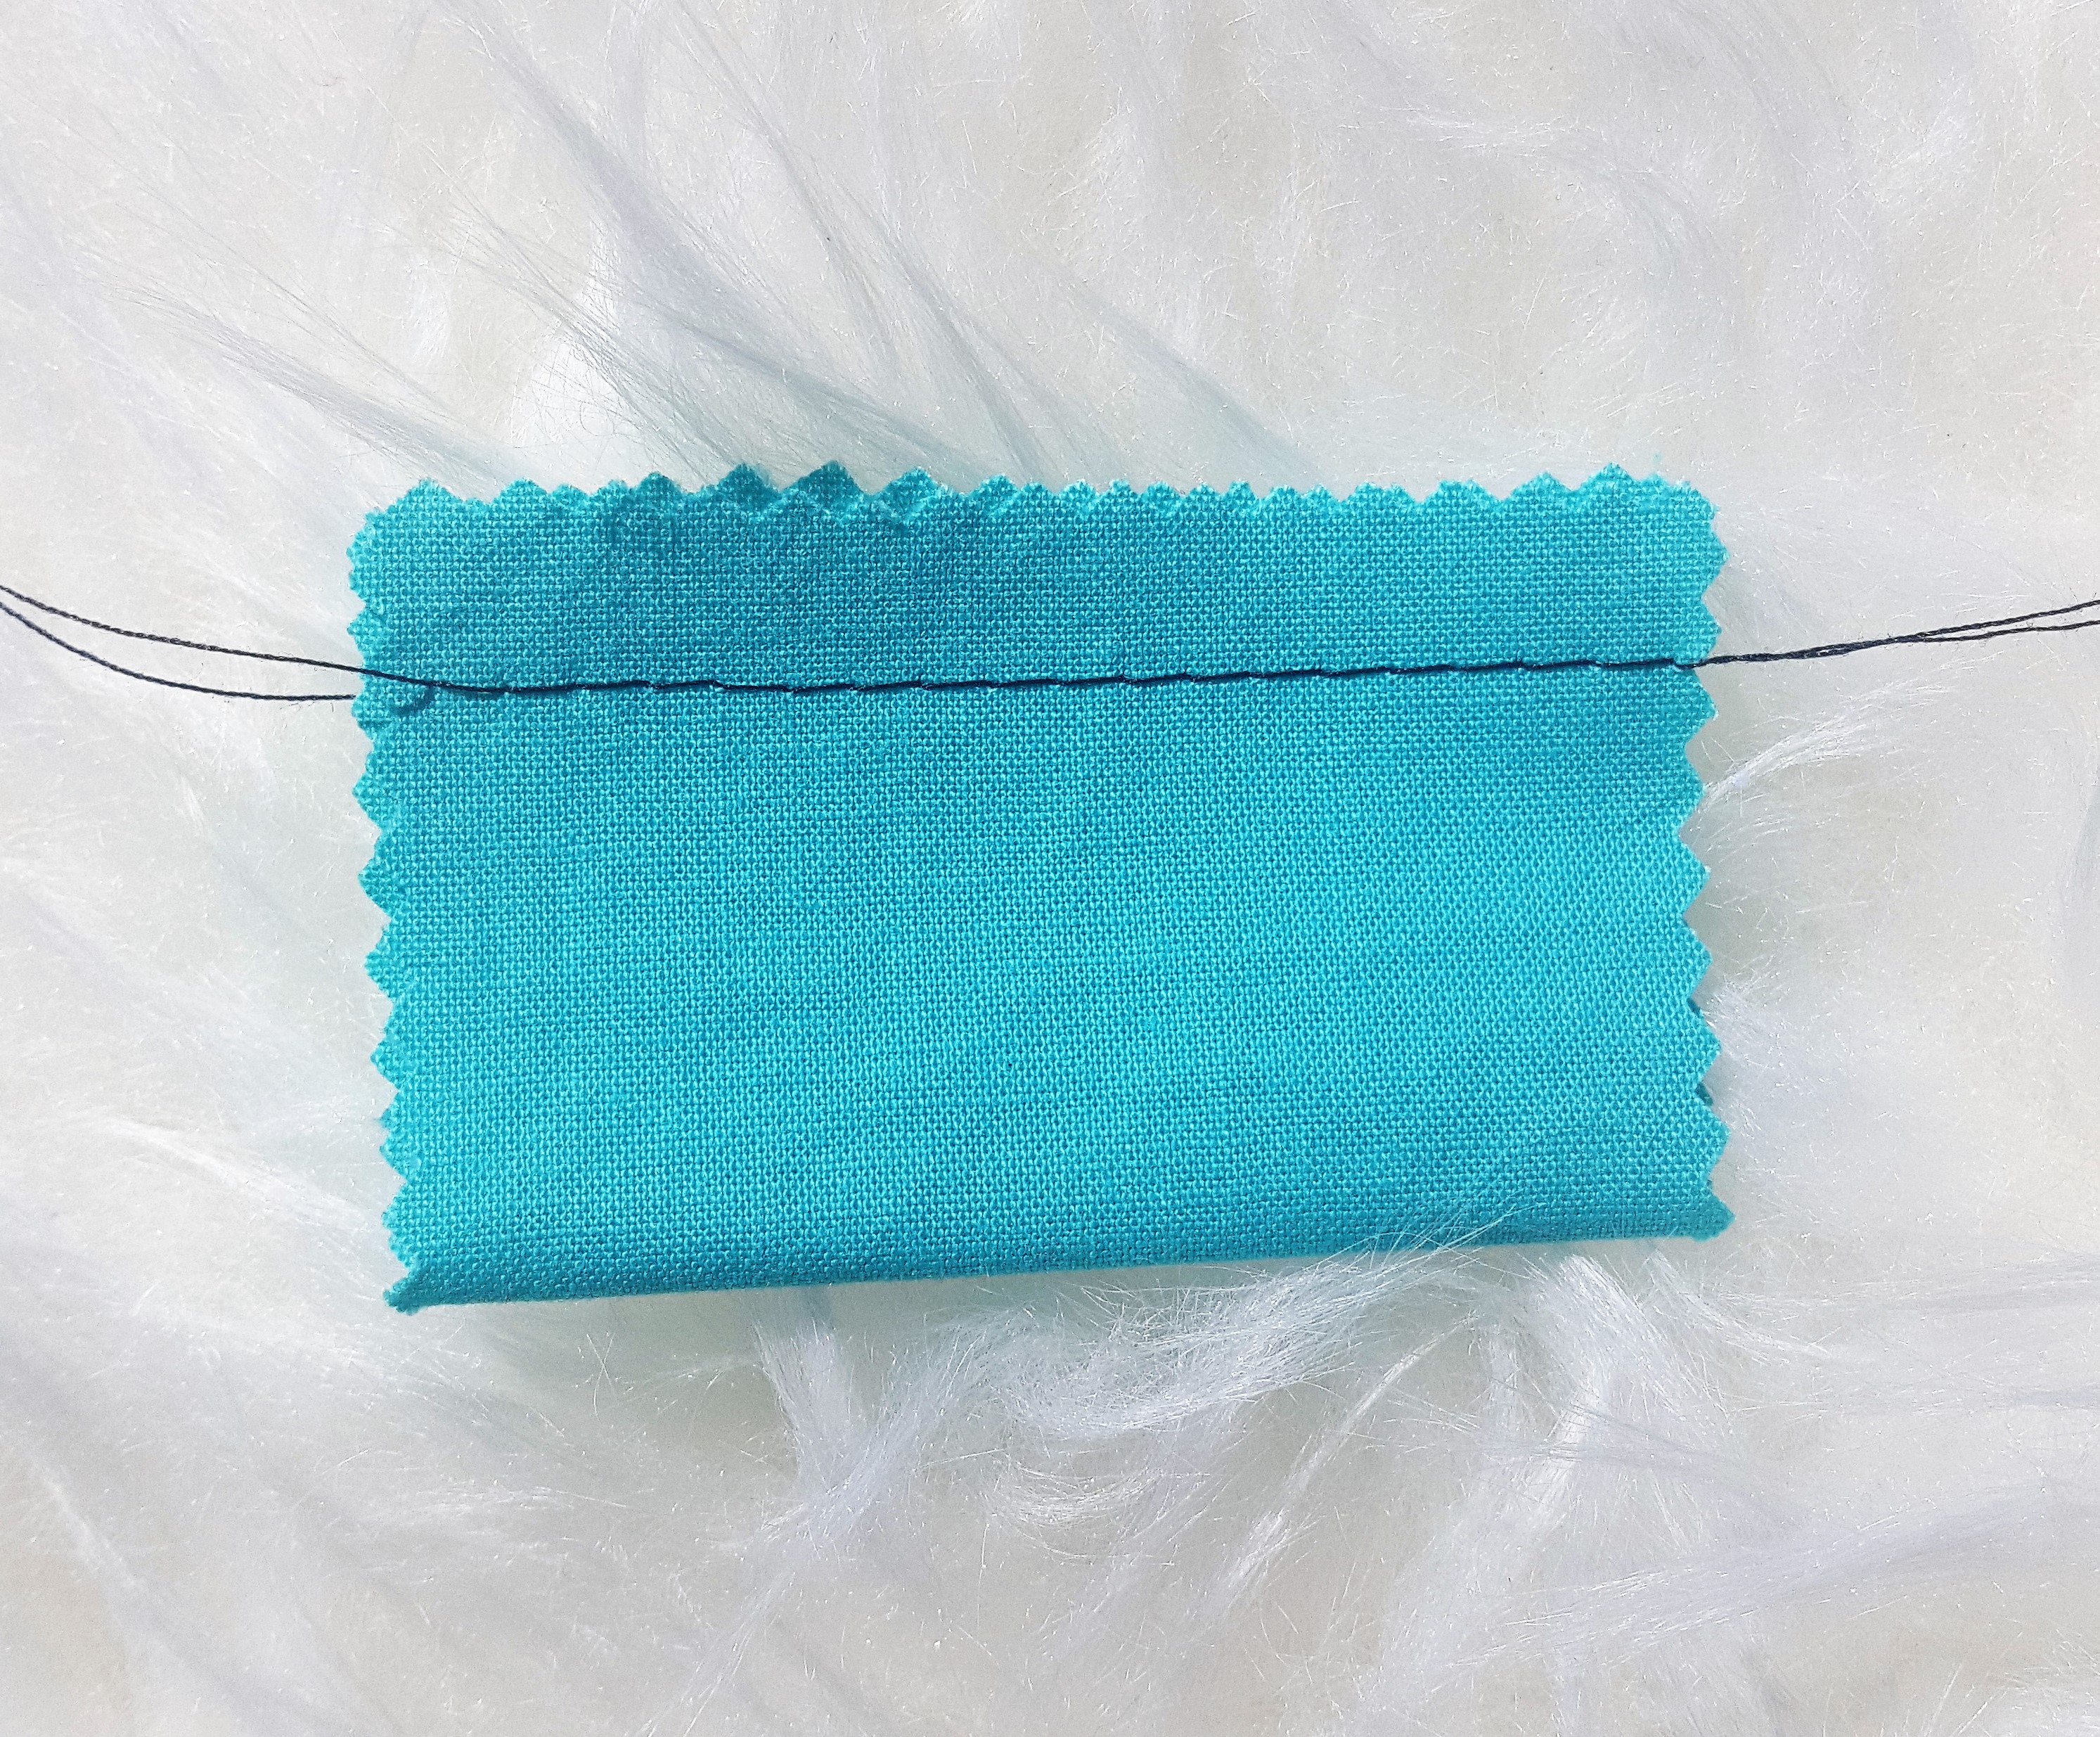
- Edgestitch
This is similar to top stitching but is done very close to an already sewn seam or the edge of a fold. It holds the raw seam allowance (on the wrong side of the fabric or the inside of the garment) in place. It also adds a decorative finish that will make your work look more professional.

- Seam Allowance
This is the space between the raw edge and the stitching line. Most knit patterns have a 3/8” seam allowance and most woven patterns have a ¼” seam allowance. In PDF patterns you will often see SA as a short form for this.
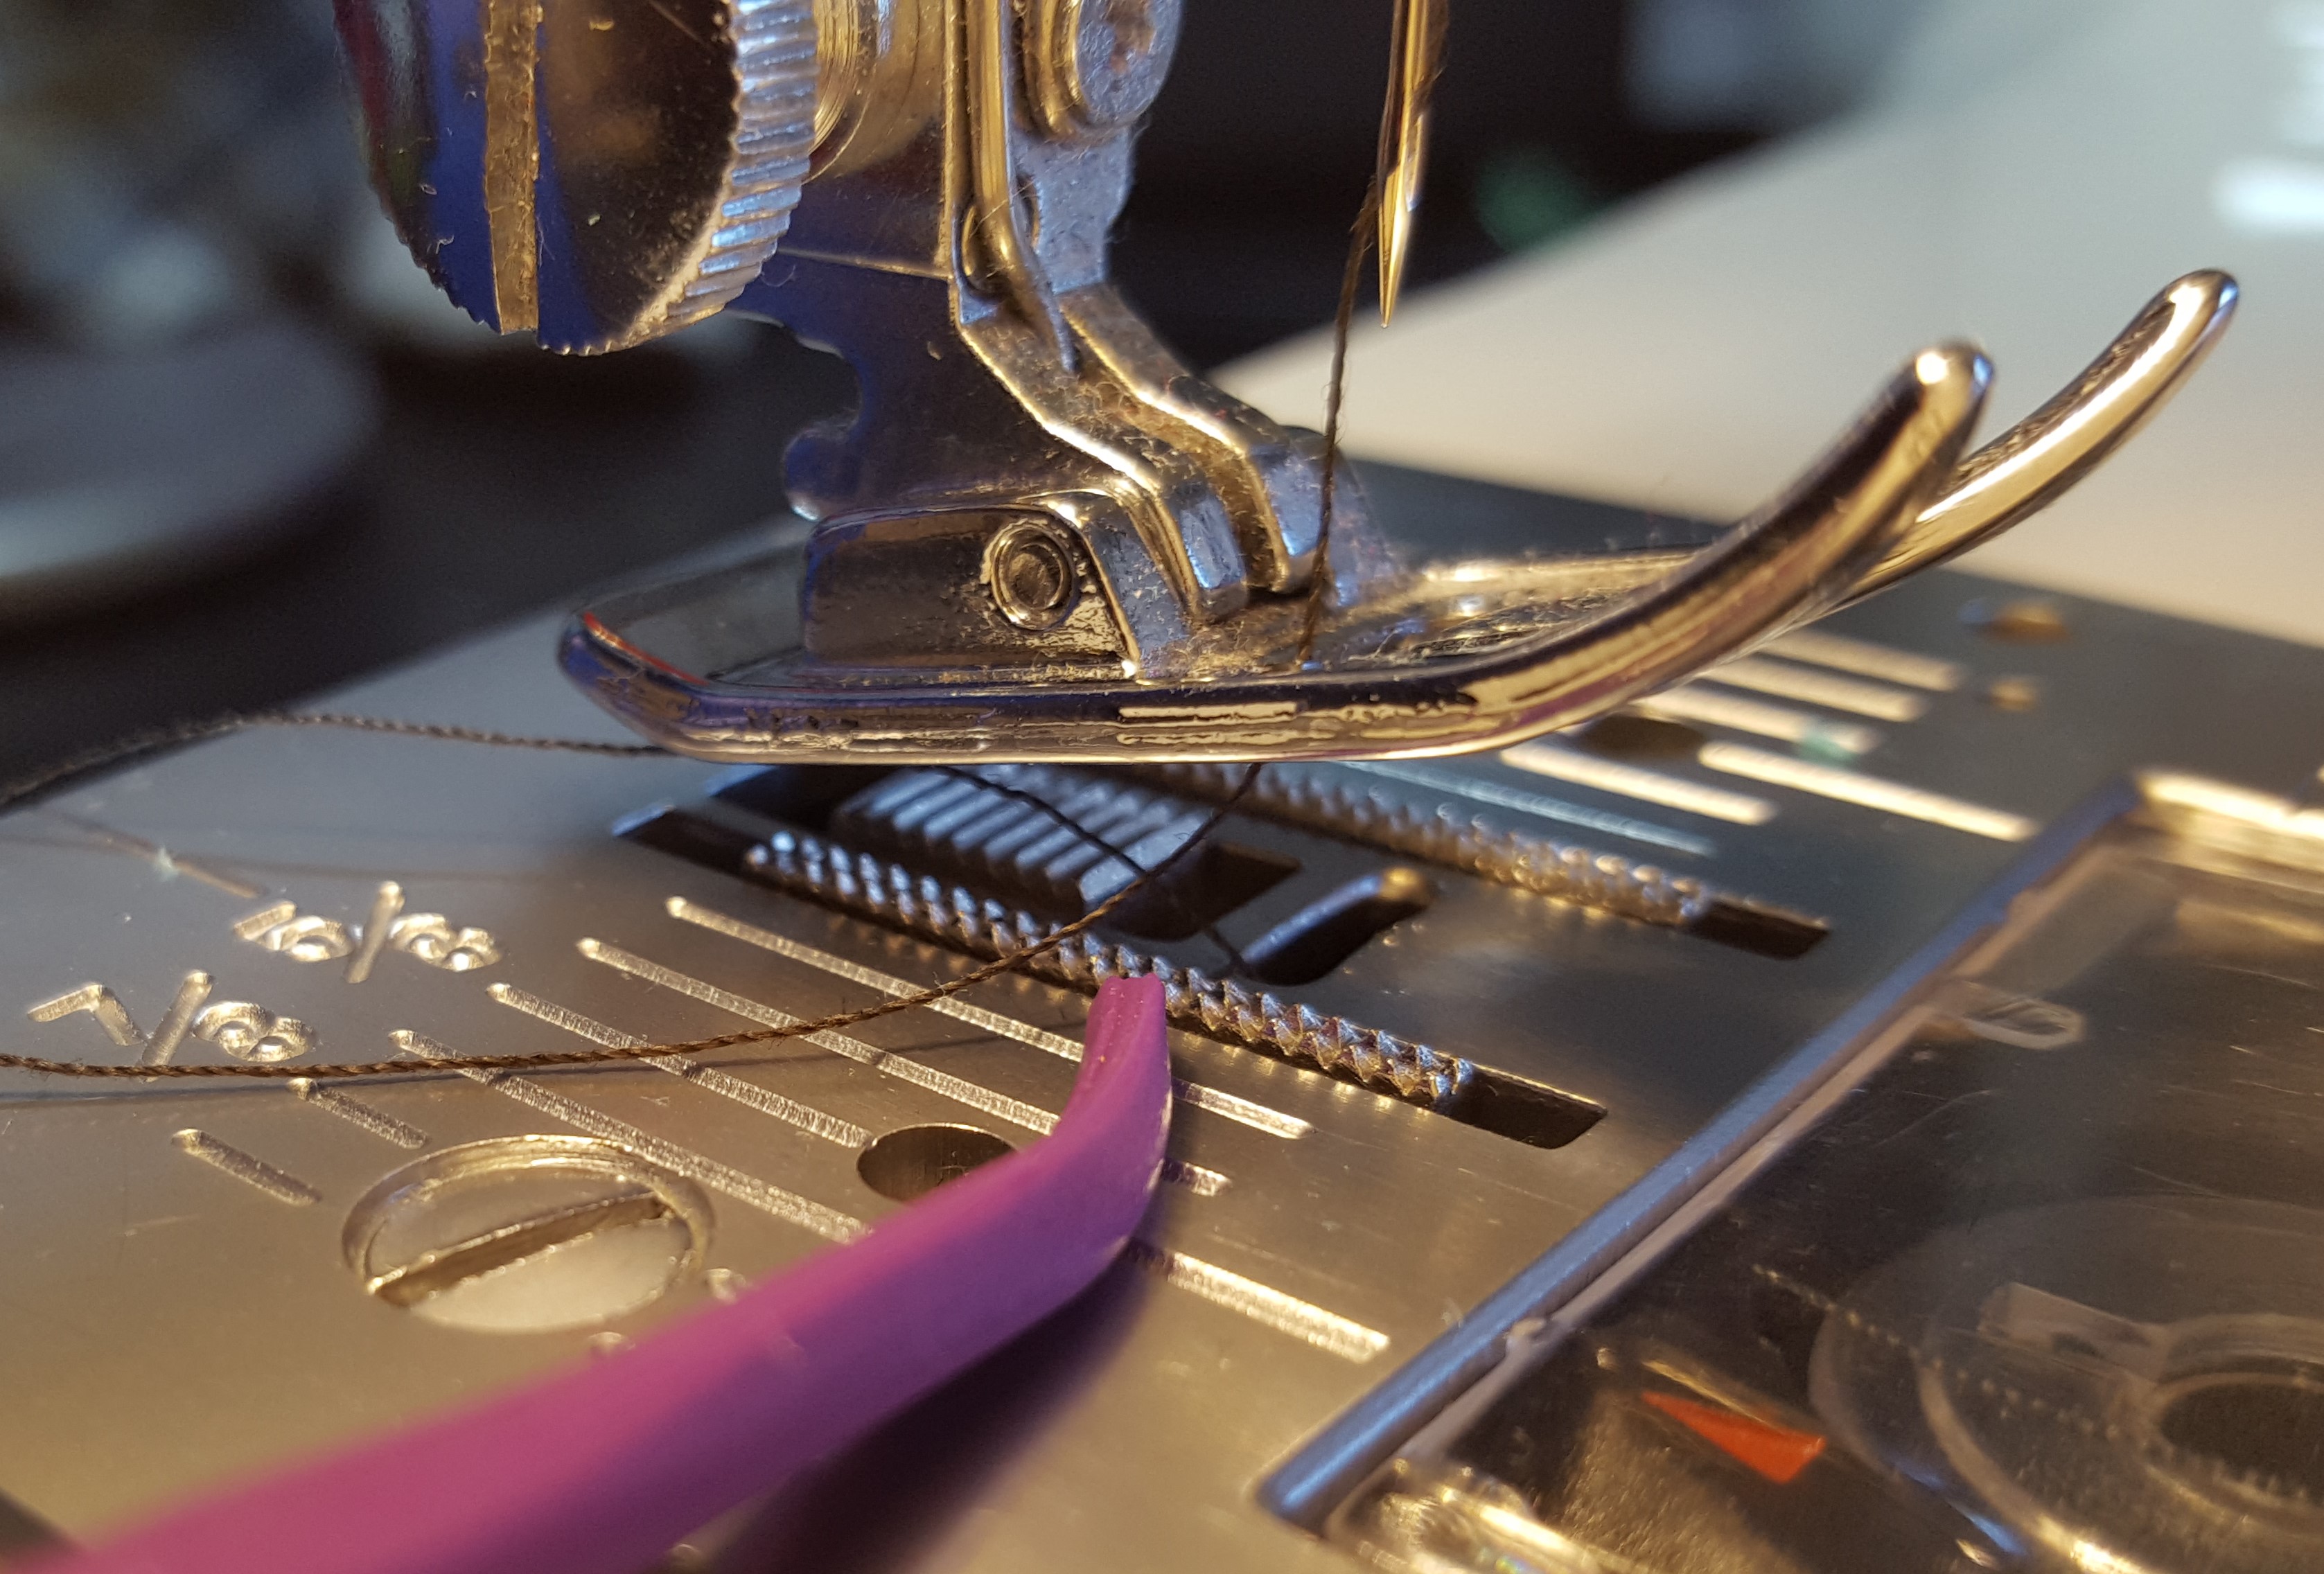
- Feed Dogs
These two or three short thin metal bars are located right under your needle. They have “teeth” on them which allow them to grip the fabric and move it along as you sew. When you handle your fabric you are just guiding it rather than pushing it. The “dogs” do all the work.

- Presser Foot
This is the attachment that goes above your feed dogs and keeps your fabric pressed down while you stitch. There are many different types of presser feet that will help you to achieve your desired result. For instance, if you do not have a serger and are sewing with knits, a knit foot or a walking foot is really helpful. Some machines take generic feet, while others need brand specific ones. Make sure to research what kind your machine takes to avoid disappointment.
- Right Side & Wrong Side of The Fabric
The right side of the fabric is the “good” side. It will show on the outside once the item is completed. The wrong side will be on the inside. Pattern instructions will tell you how to place your two pieces of fabric using the following short forms. WST= Wrong sides together RST=Right sides together. Sometimes it is difficult to tell right from wrong, raw edges of knit fabrics will roll towards the right side.
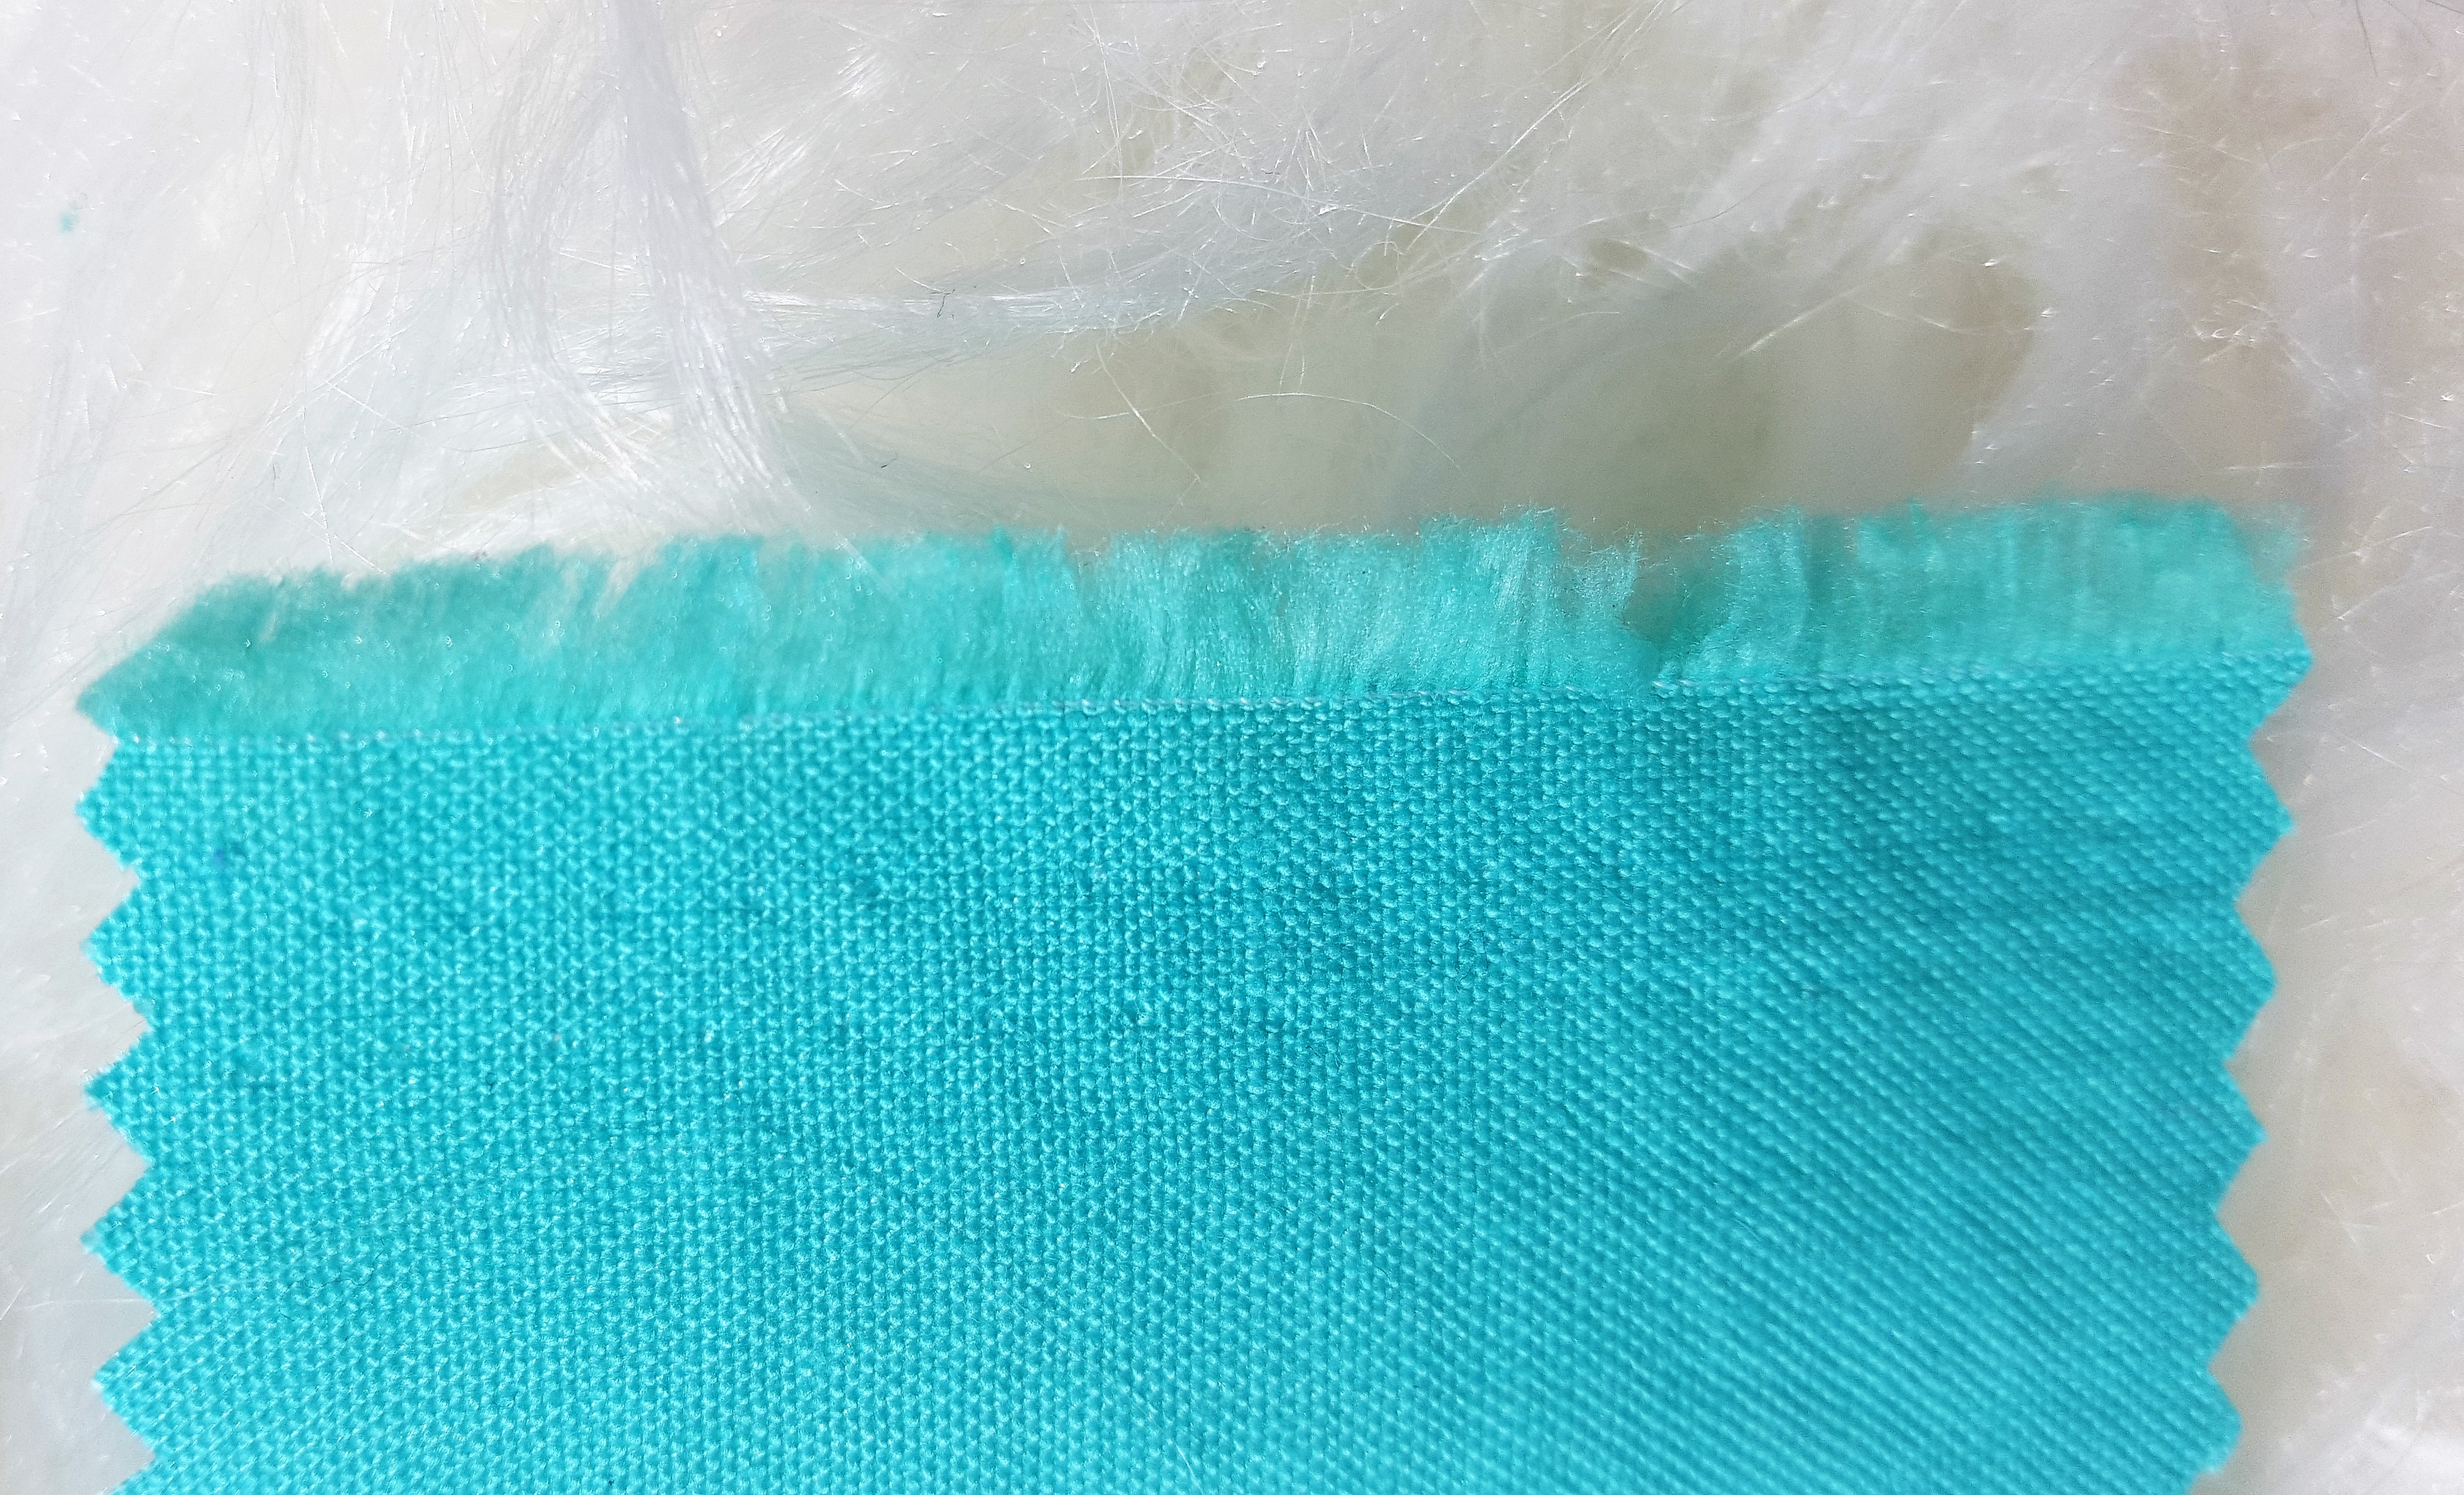
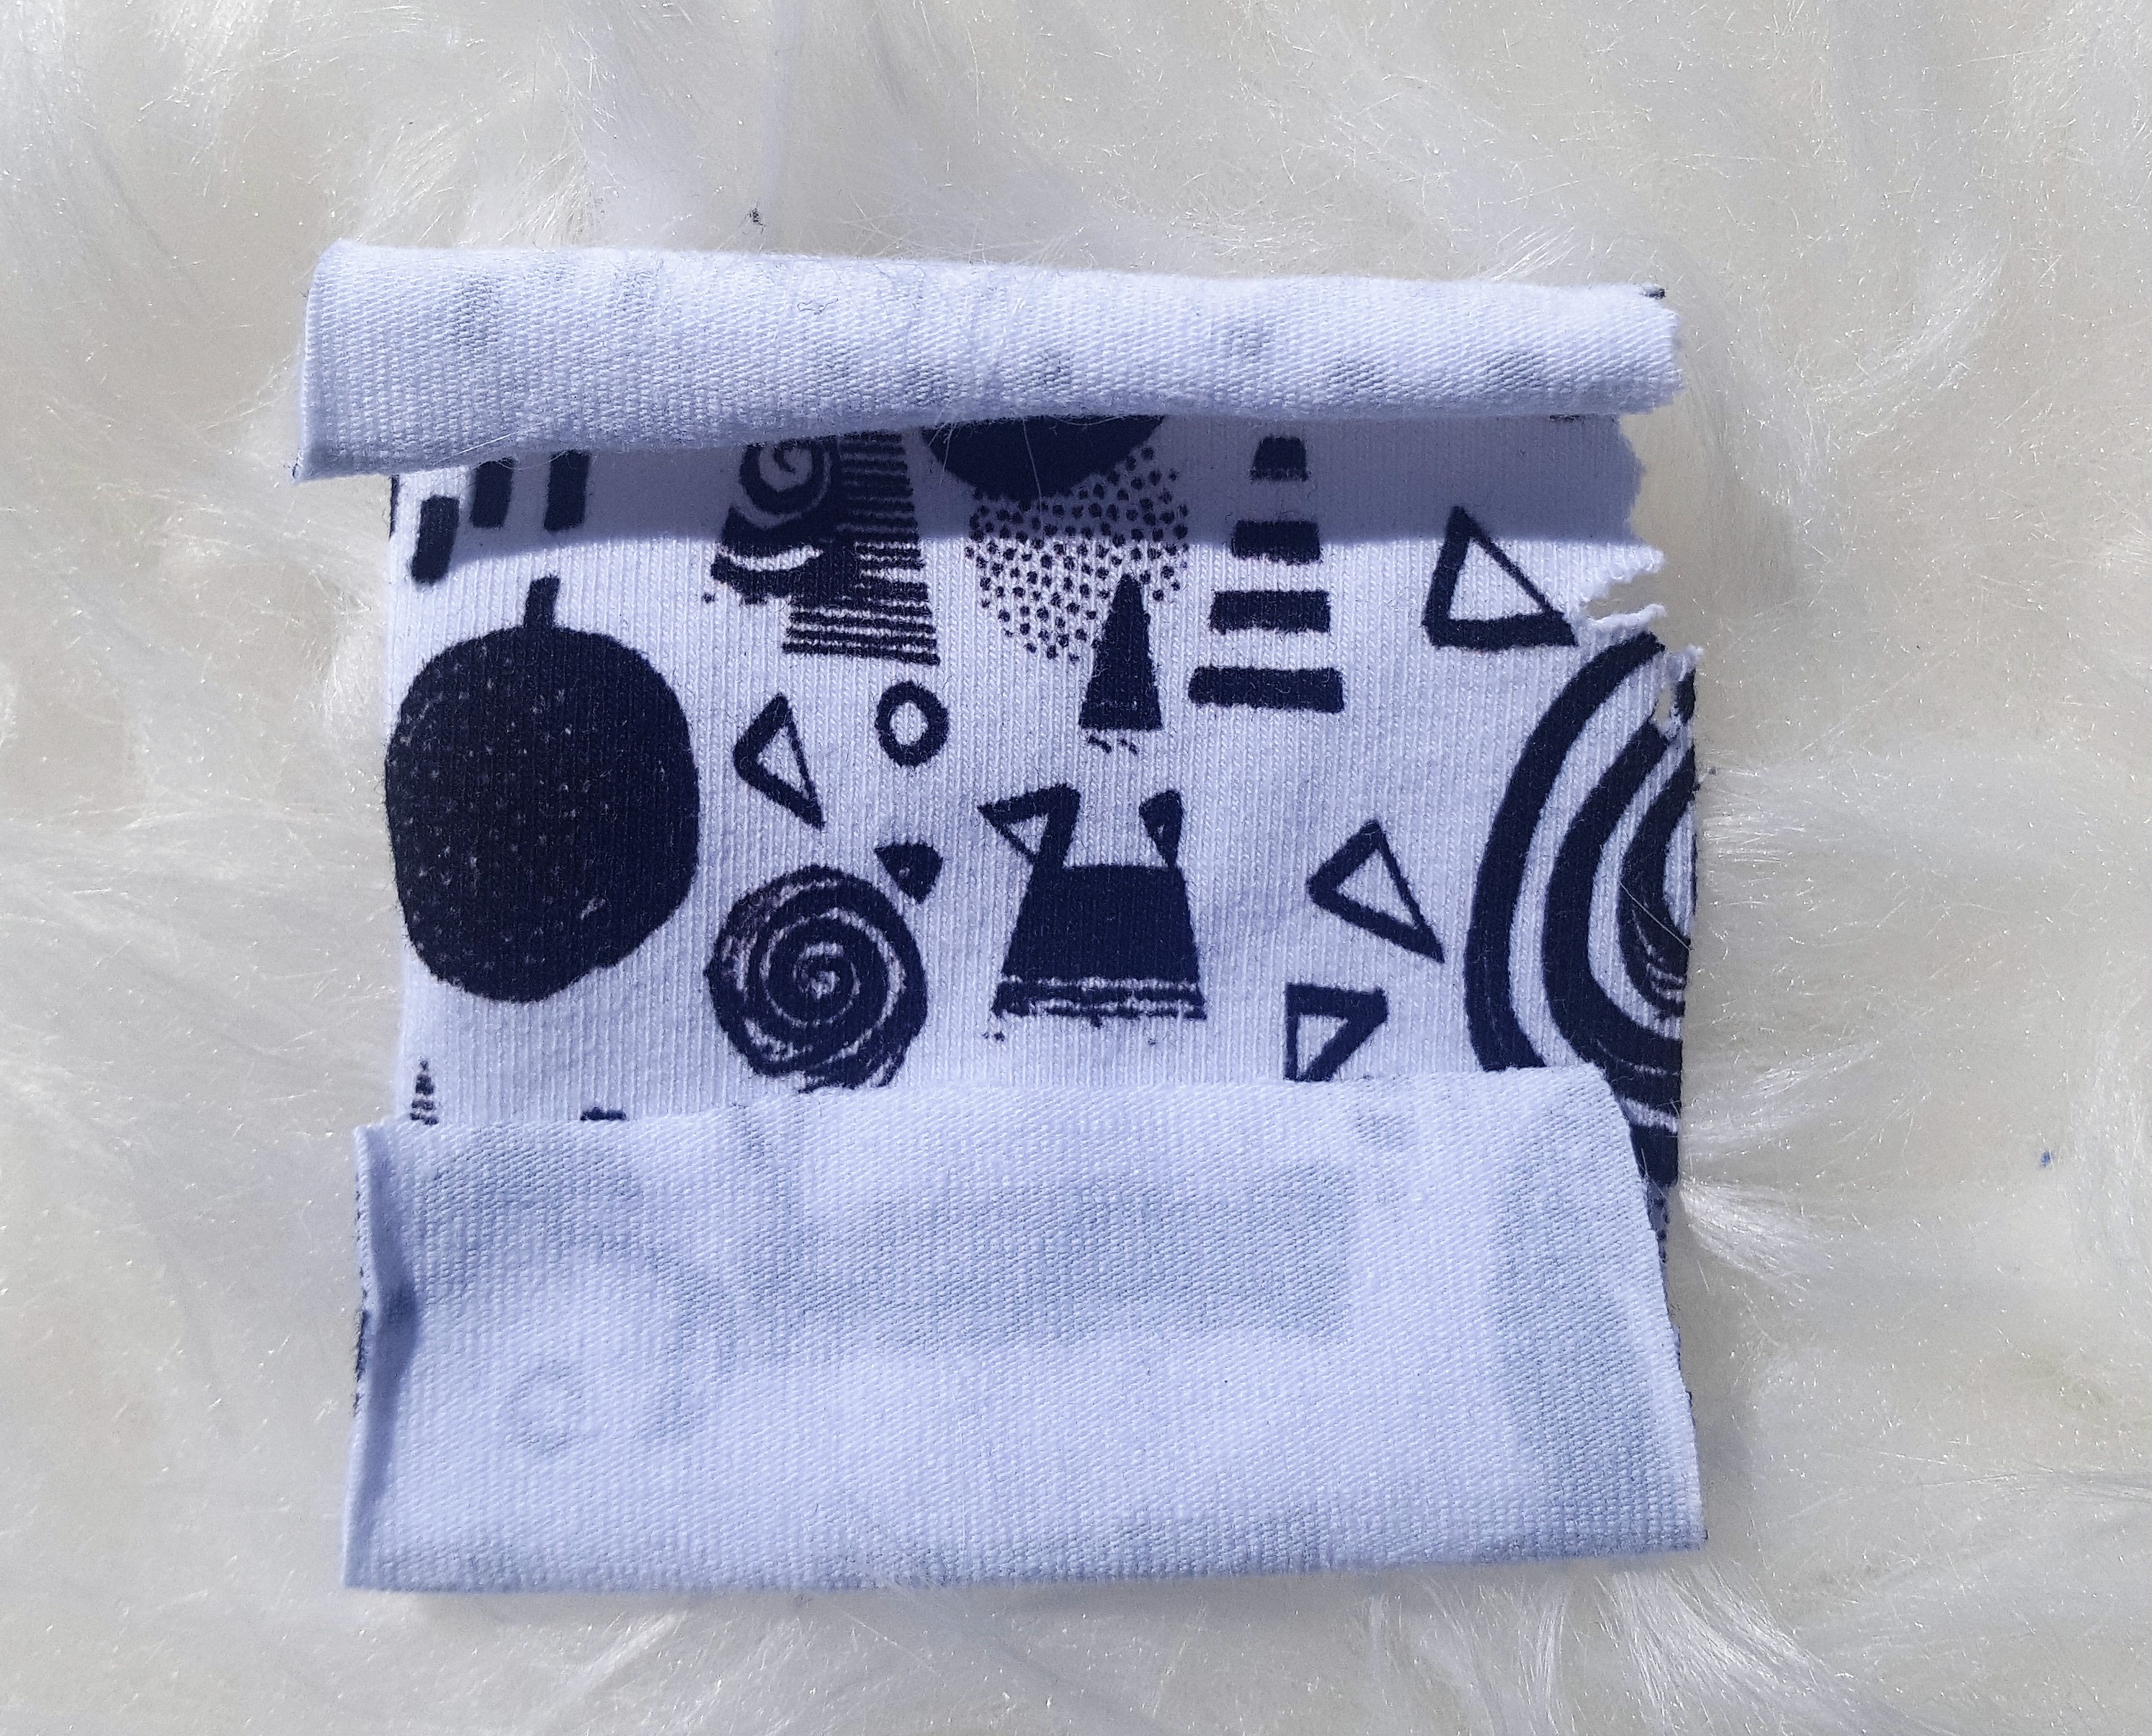
- Selvage
This is the finished edge of your fabric. It will often have tiny little dots in it that are not quite holes. This edge will not fray or unravel as it is created during the weaving process. For knit fabrics with two way stretch you will often find that it goes selvage to selvage.
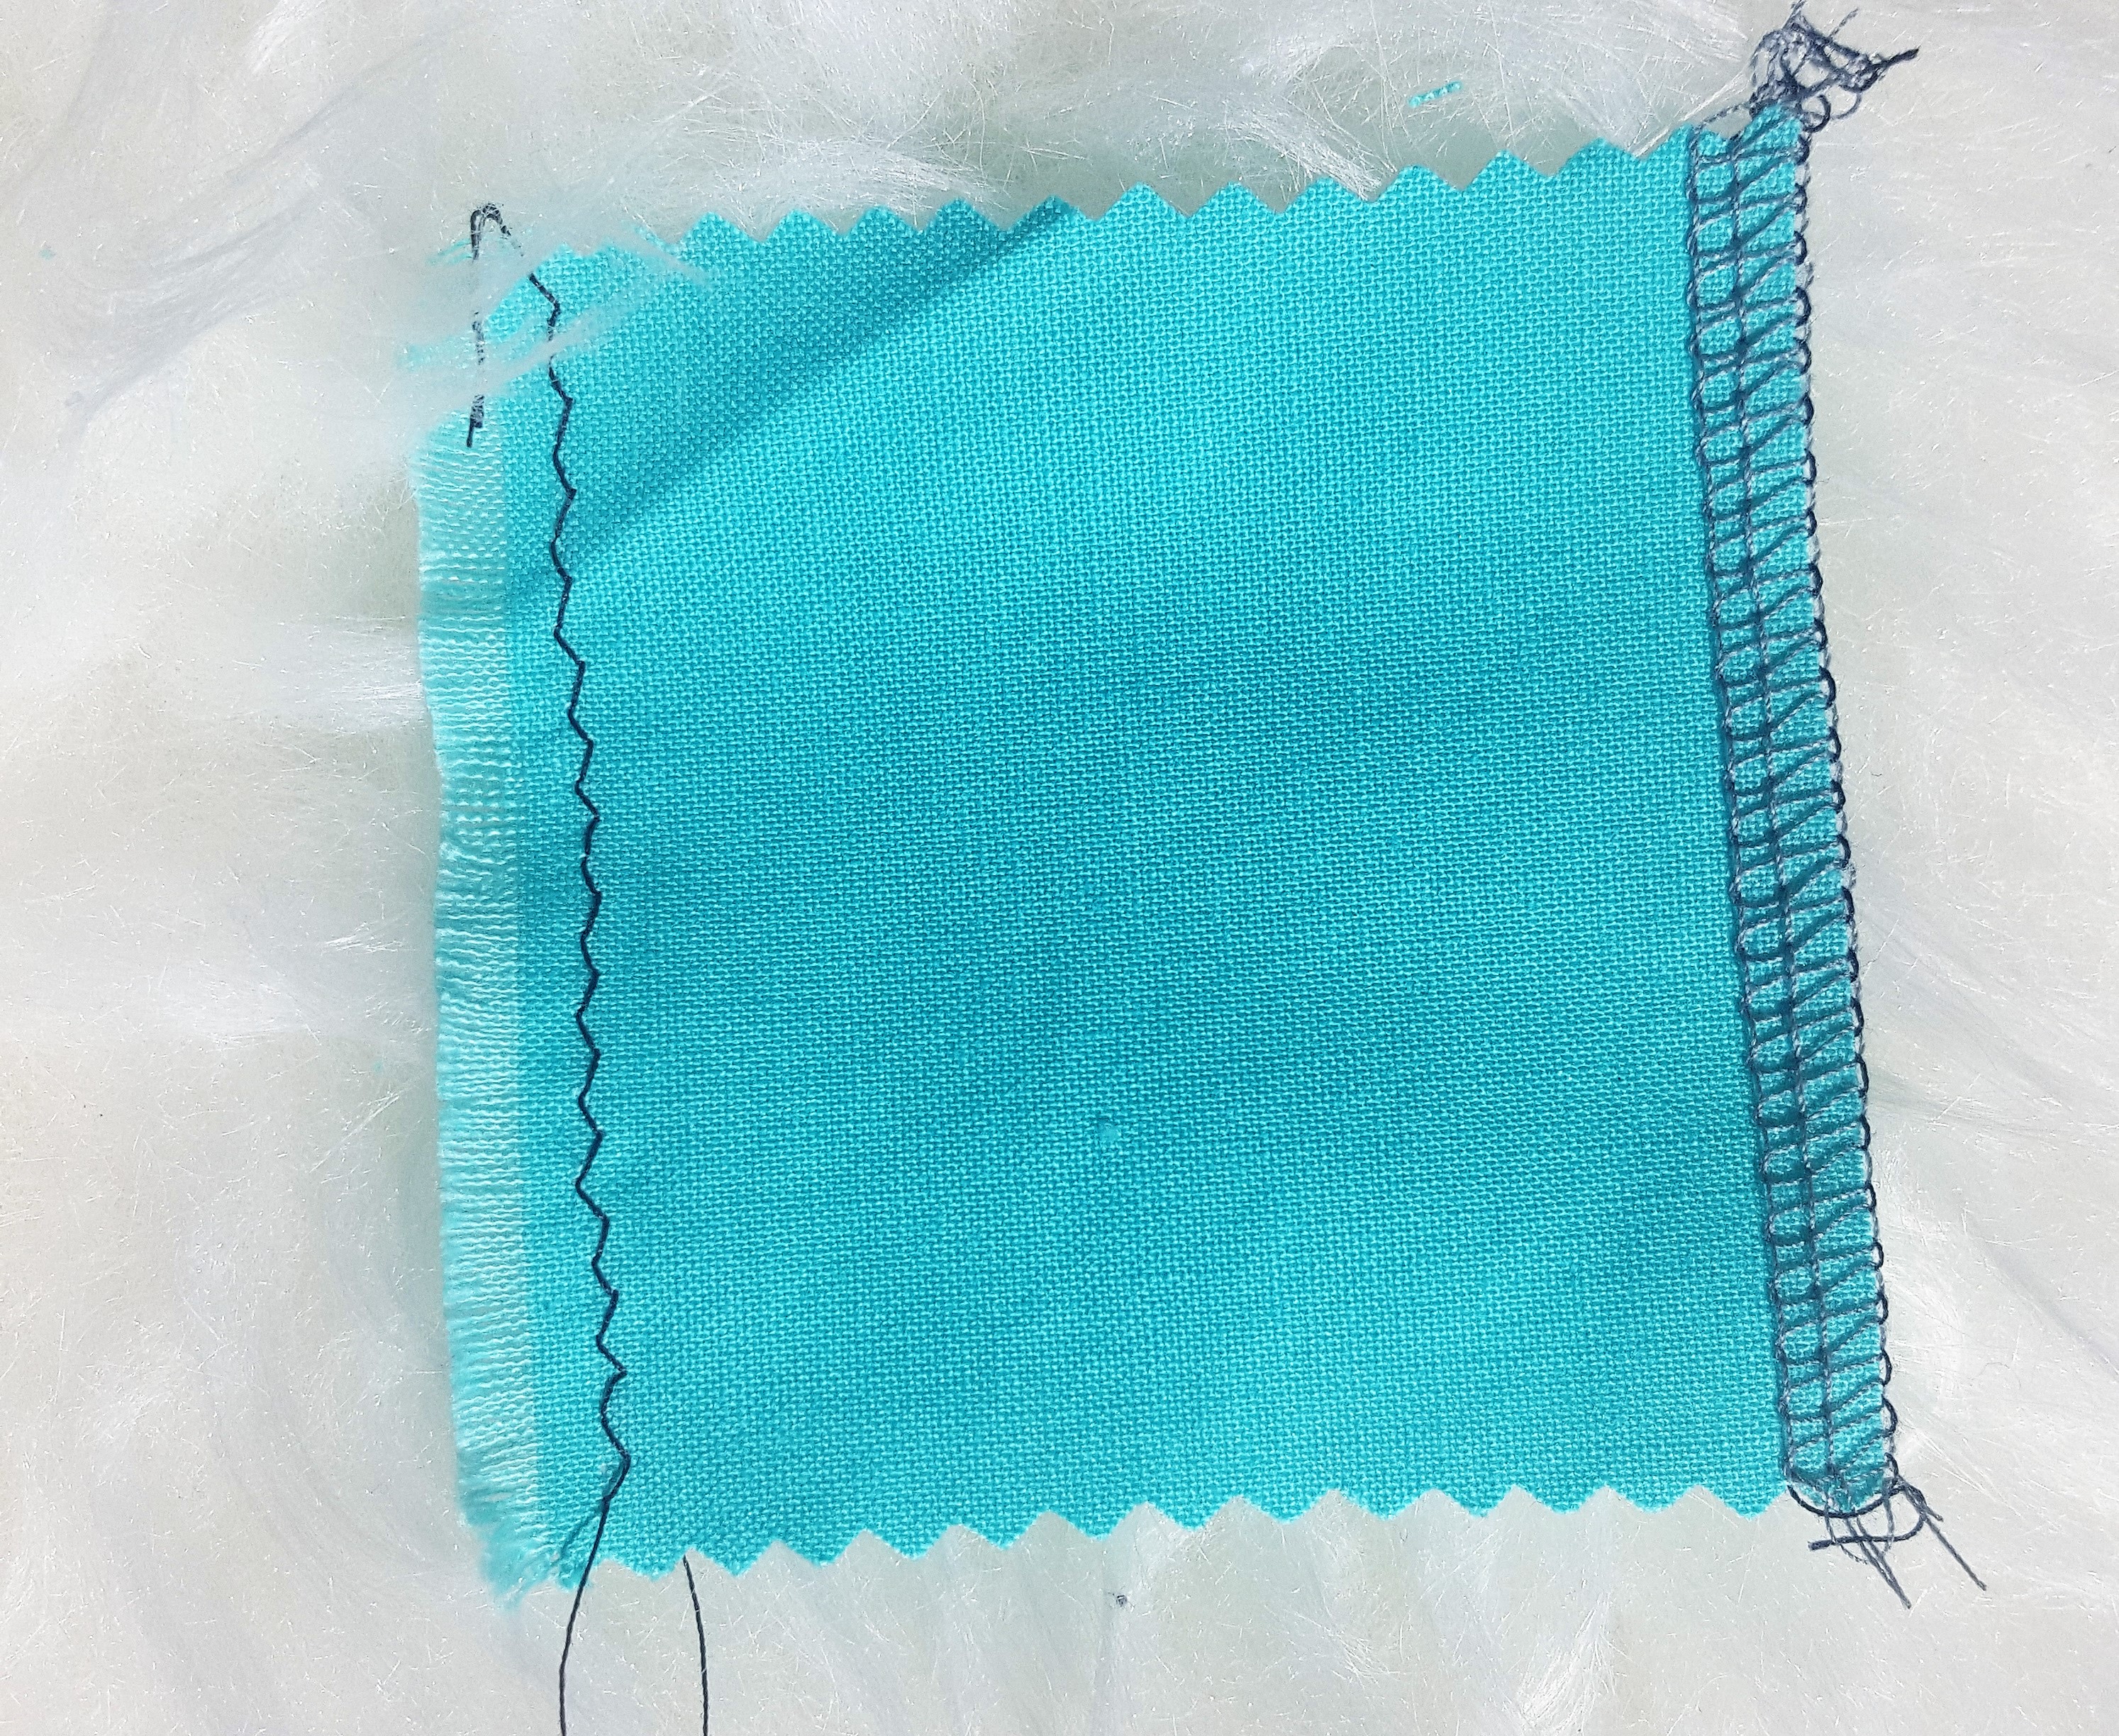
- Raw Edge
This is the unfinished, cut edge of your fabric. With woven fabrics it will fray. If you have a looser weave of fabric it can be a good idea to serge or zigzag your fabric before washing to prevent it from becoming a scary mess in your washing machine.
I hope this little post was helpful! Now you have some of the most used terms and you can get to creating. Thanks so much for reading and make sure you check back in for the next post with more helpful tips and tutorials.
Happy sewing!
Marta