This site contains affiliate links to products. We may receive a commission for purchases made through these links.
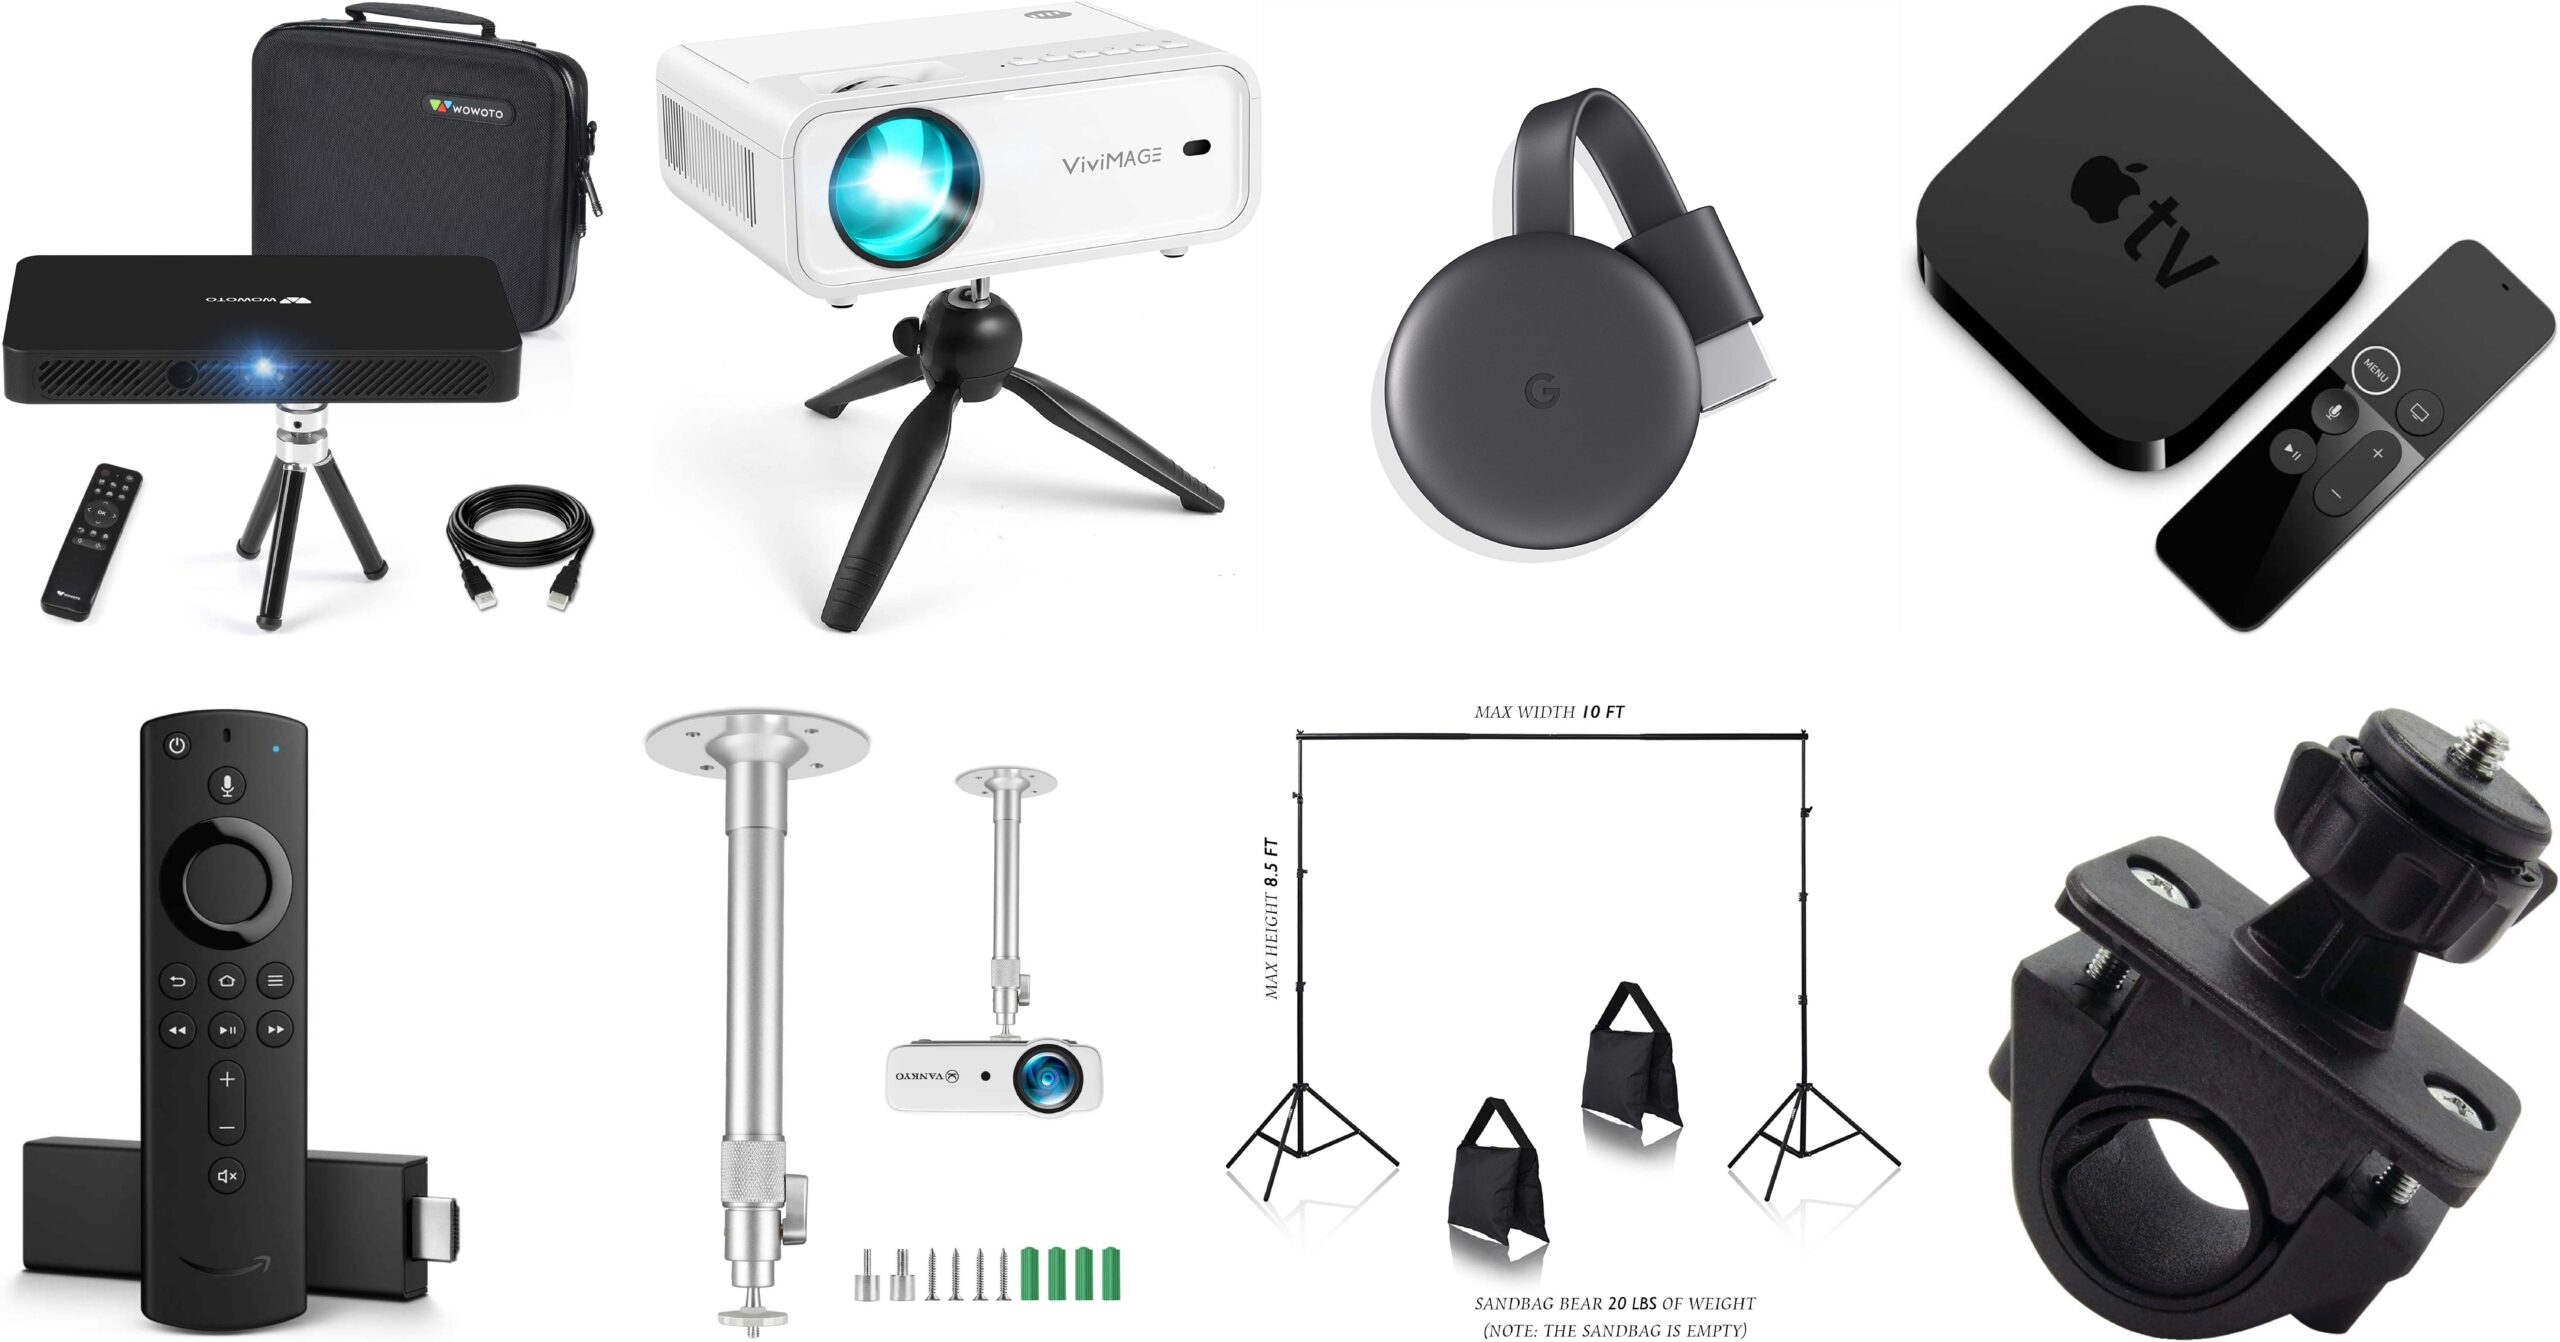
|Wowoto Projector|Vivimage Projector|Google Chromecast|Apple TV
|Fire TV Stick|Ceiling mount|Photo Backdrop Stand|Camera Bike Mount Holder|
Hey there, Jody here to talk with you about the basics of Projector Sewing. So, if you haven’t yet heard, there is some new technology that is creating quite the buzz in the sewing community in regards to a new way to use PDF patterns. Personally, I sometimes dreaded the process of printing out and taping together lots of pages for a pattern. Then I heard about the concept of using a projector for patterns and had to learn more about it. As soon as I saw the benefits of this new idea, I immediately decided I needed to incorporate it into my sewing space. At the time of this post, I have been using my projector for about 8 months. I have sewn dozens and dozens of garments in that time, and even tested a couple patterns, and I haven’t printed a single pattern since setting up my projector. The paper and ink savings as well as the time savings I have incurred are worth the initial investment I made to get a projector into my sewing space.

Types of Projectors
There are countless models of projectors on the market, and can range in cost from less than $100 to several thousand dollars. Figuring out what projector you should get based on your needs, space requirements, and budget might be the most challenging part of the whole process! There are a lot of different factors to consider when exploring projectors, so make sure you do some research and compare several options! There are all kinds of technical sounding terms you will want to know for your particular situation to make sure you are getting the best machine for your needs. When shopping for projectors and reading projector descriptions you will see words like “lumens”, “throw”, “native resolution”, “keystones”, “wifi capable”, etc. I will break down a few of these key terms so that you can better understand what you will need to take into consideration when going about your projector search.
Throw
One of the first words you may come across is “throw”. You will need to know the throw distance your space will allow. This would be the distance between the projector lens and your cutting surface. You can measure from ceiling to table to get a general range of your throw distance, but keep in mind when you mount your projector you will lose about 6-12 inches from that measurement since the projector will be mounted near or on the ceiling and pointed down, therefore the lens is not flush with the ceiling. You also will want to measure the surface of your cutting area to see how much space you can fill with your projected image. The ratio of your throw distance to the projected area is called the “throw ratio”. Knowing the throw distance and throw ratio of your particular space is one of the critical pieces of information for choosing a projector. If your ceilings are too low in your space to accommodate a standard projector, there are devices called “short throw” or even “ultra short throw” that can actually be placed on a table top or on a shelf mounted closer to the cutting surface and these still project a large scale image.

Lumens
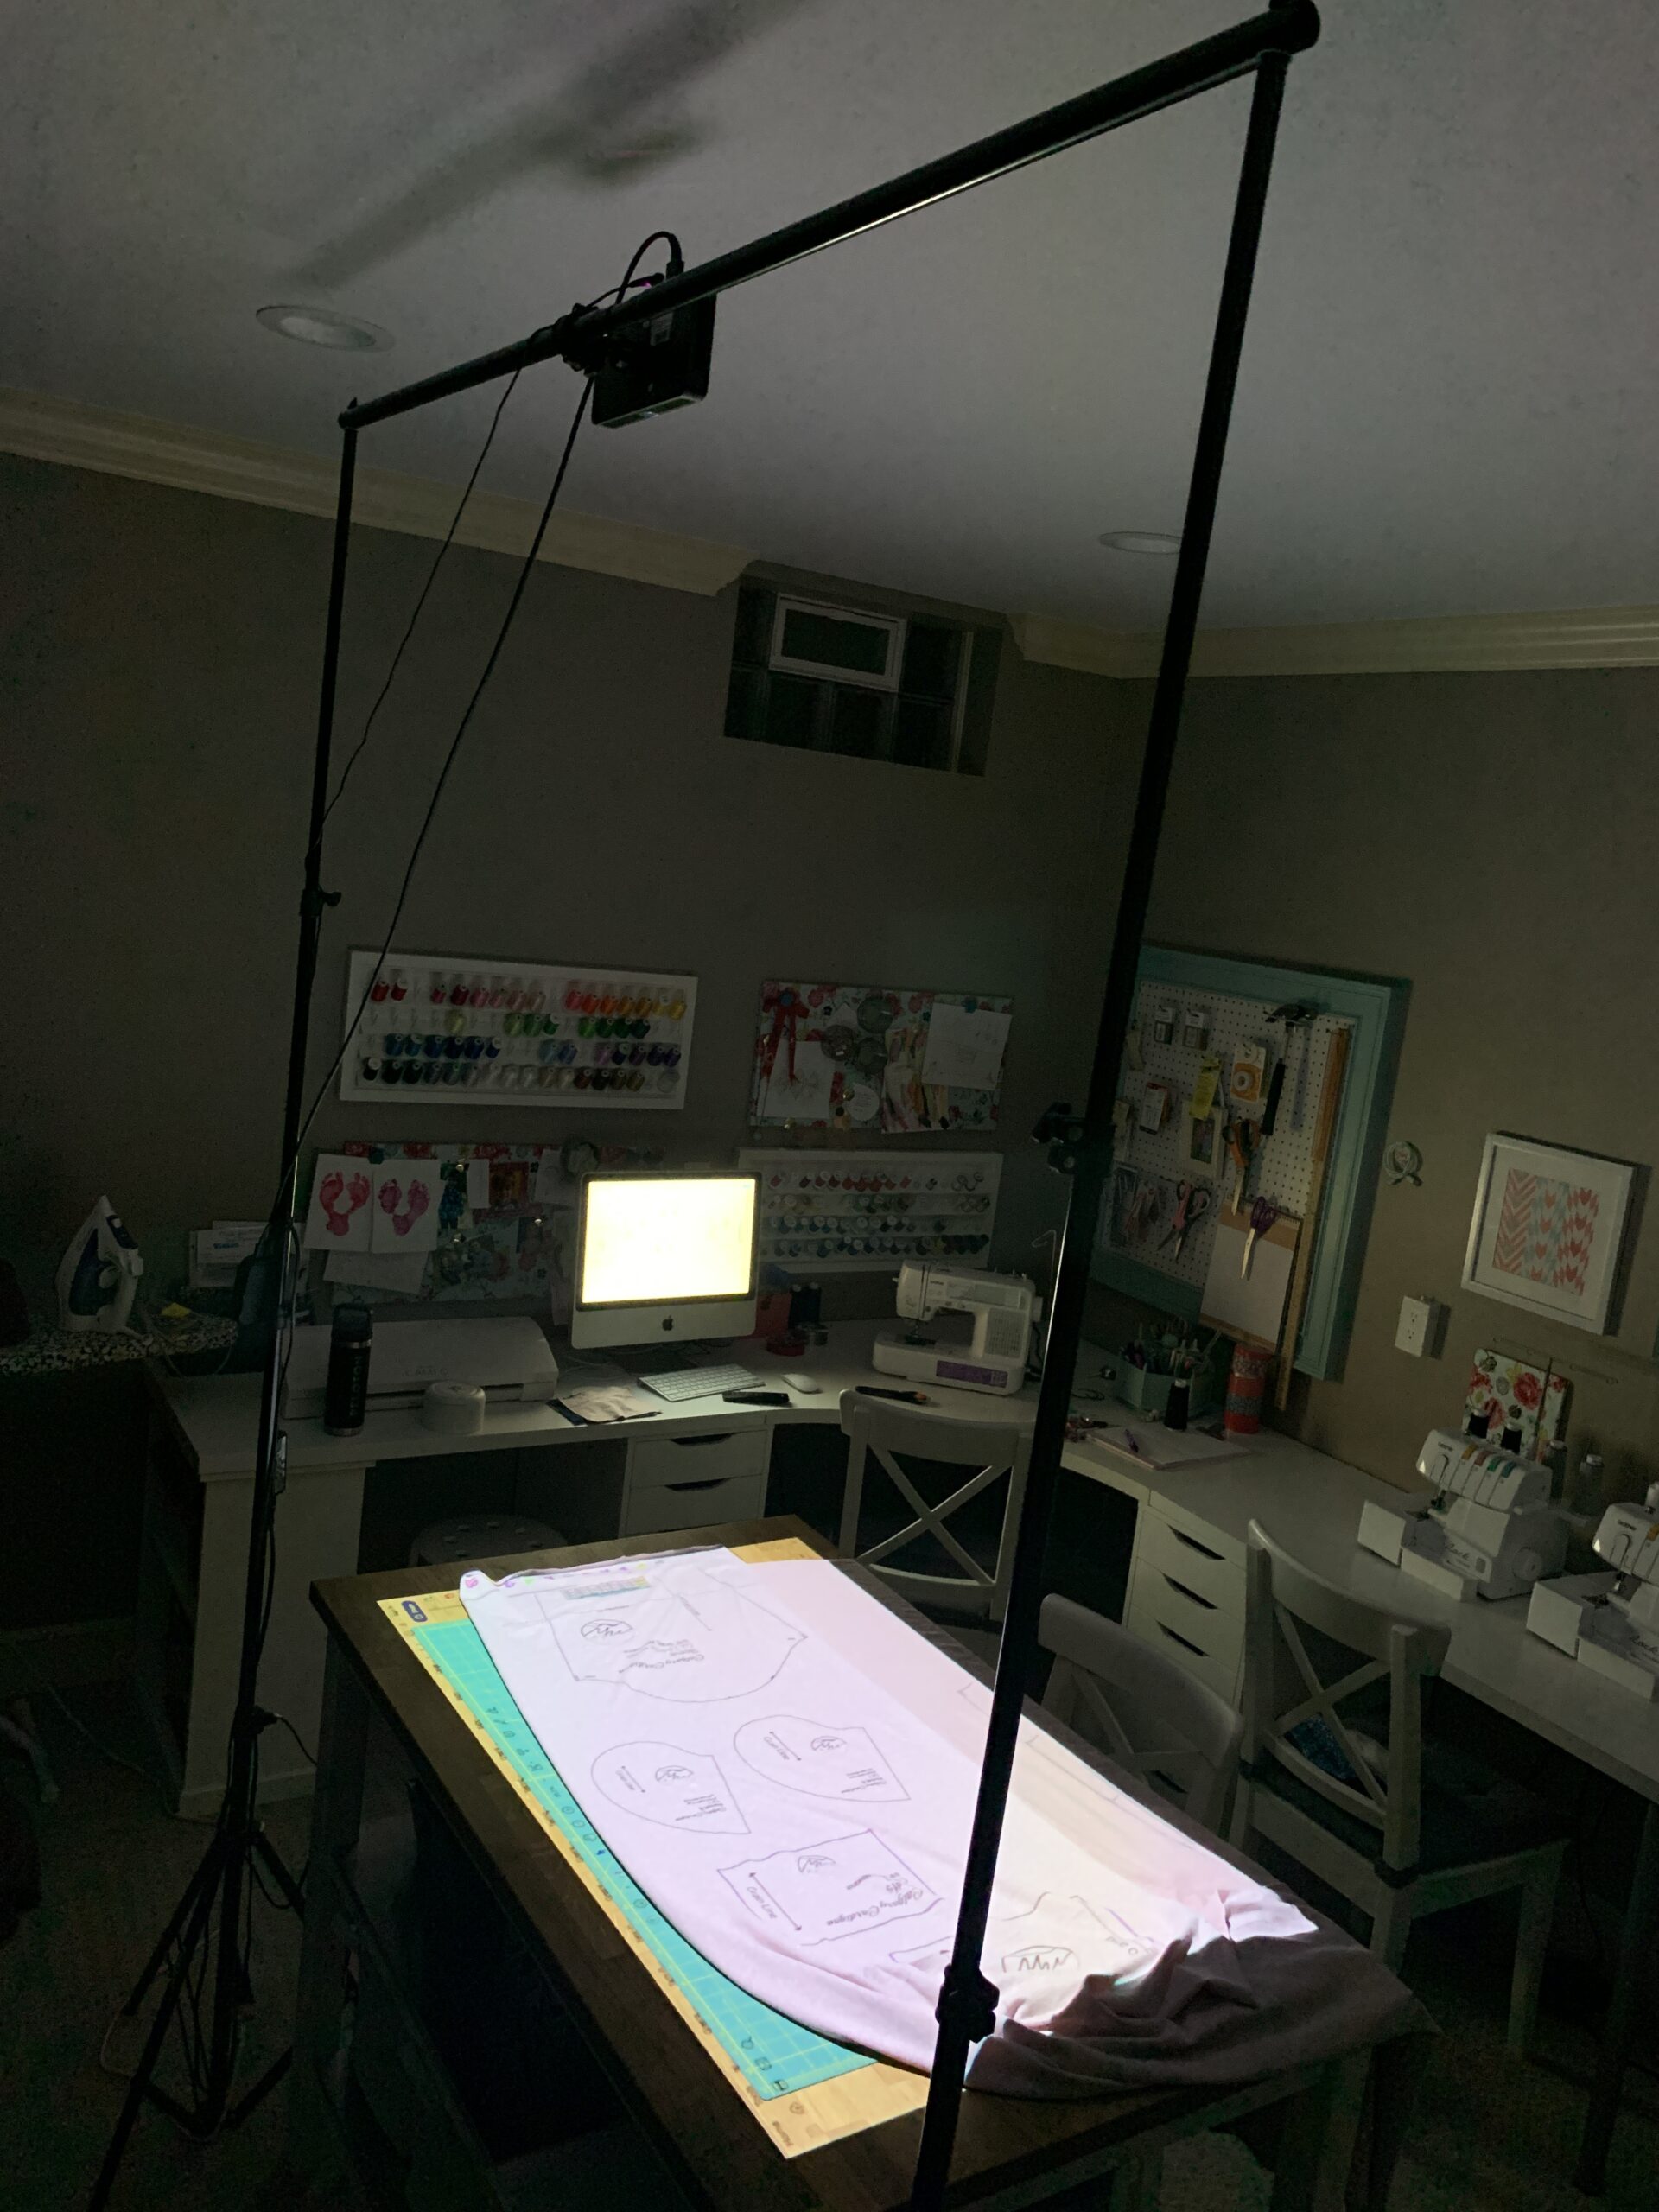
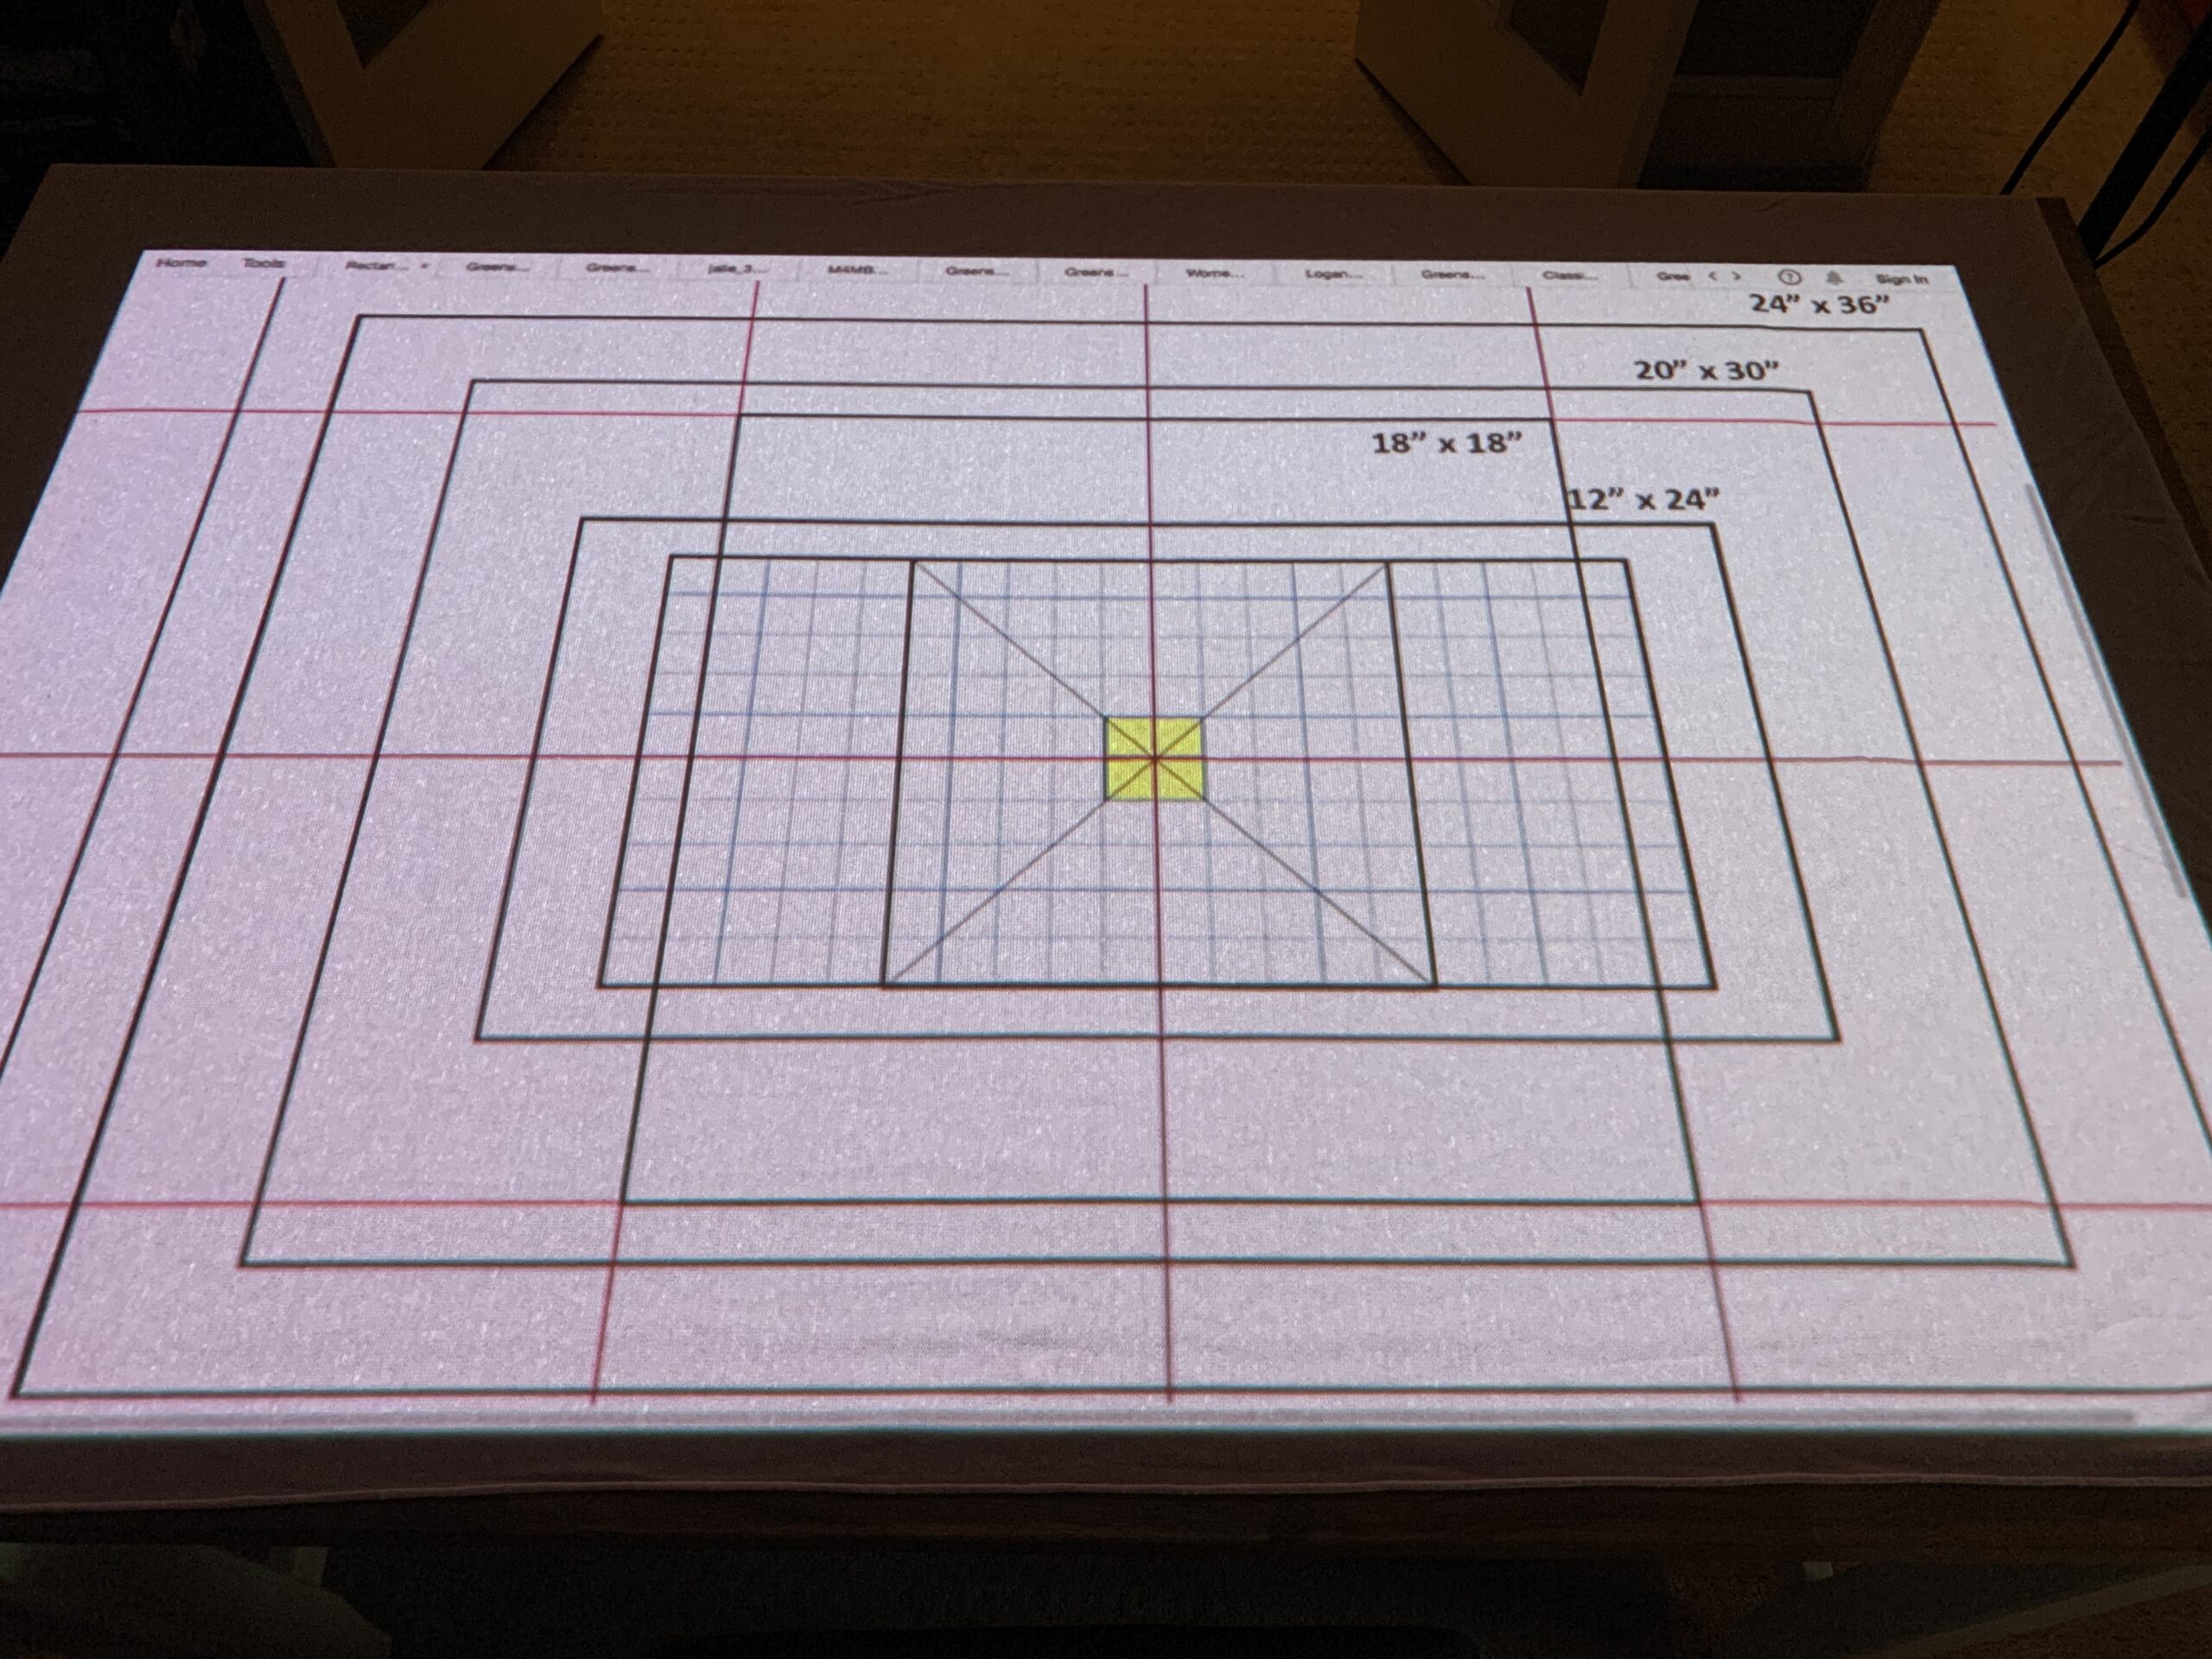
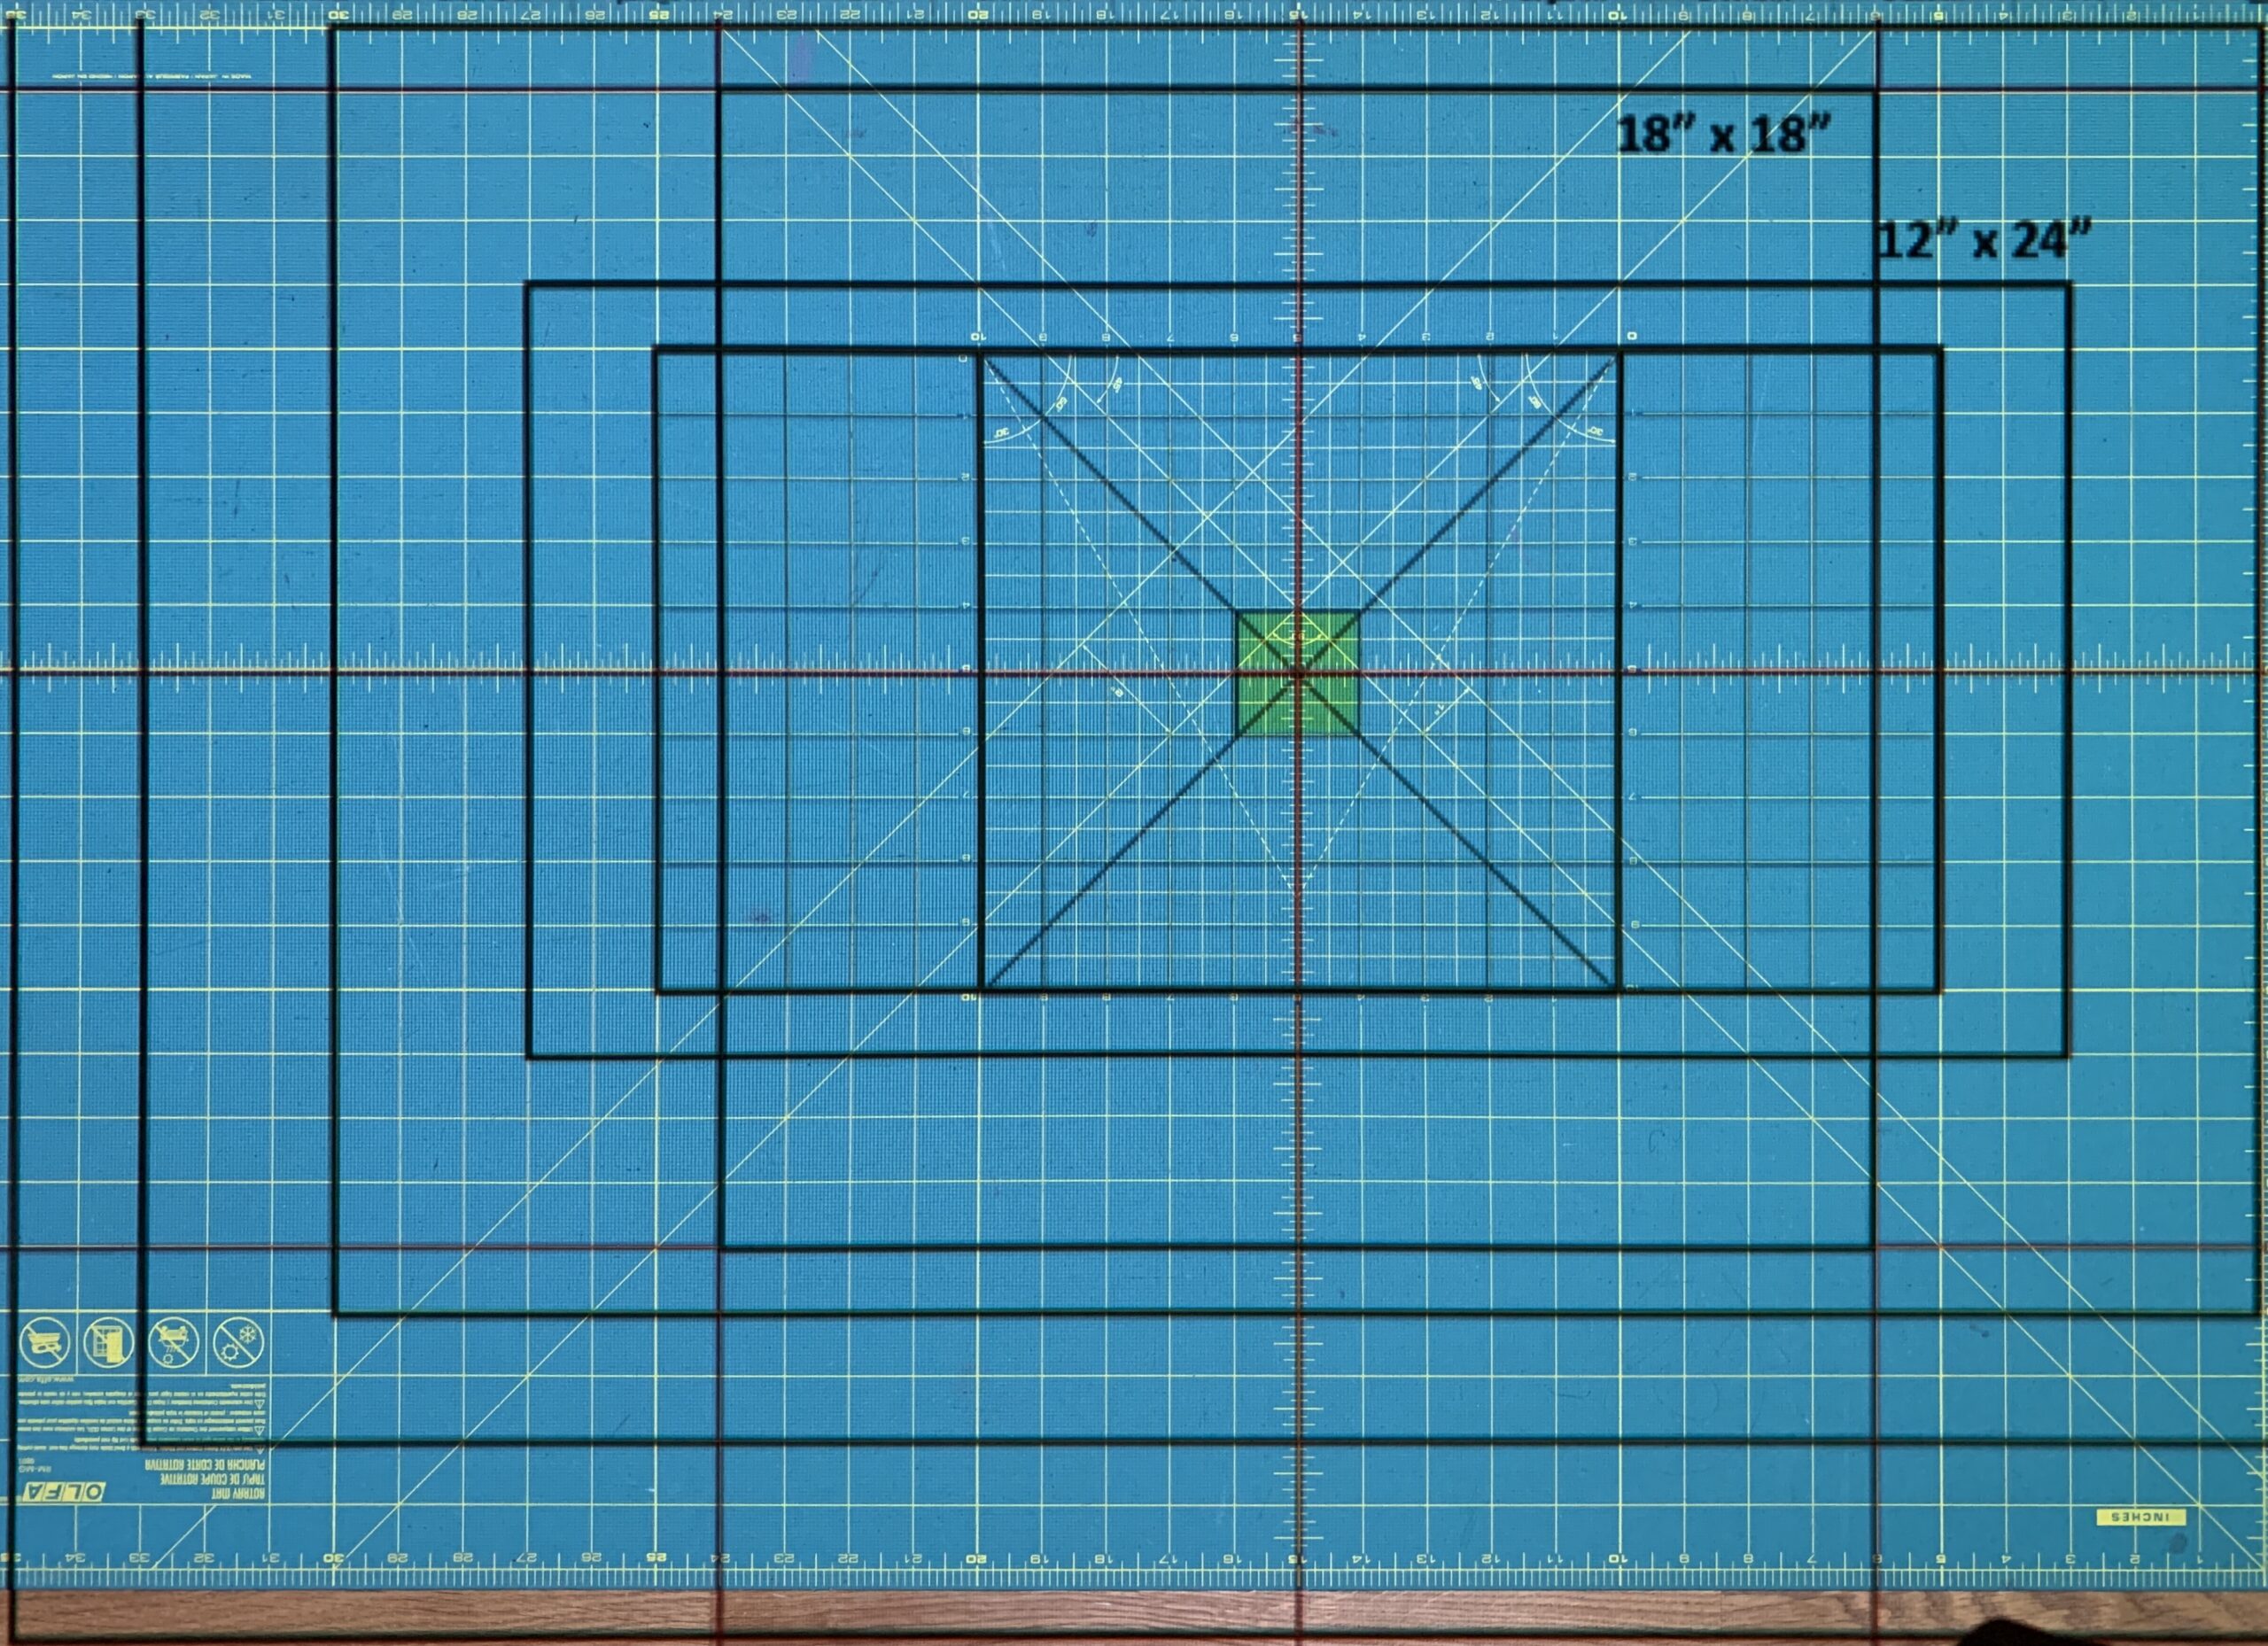
“Lumens” is another word you will see. This relates to the brightness of a projector, kind of like how your standard lightbulbs have different degrees of brightness. How much light there is in your cutting space will determine the necessary lumens your projector needs. A space that can be easily darkened can get away with a lower lumen projector, but keep in mind normally how bright your cutting space naturally is and how bright you need the projected image to be to easily see the cut lines. Below is what my projected image looks like in the daylight with my lights on, and at night, with the lights flipped off.
Native Resolution
Another important word you will come across is “native resolution”. This essentially relates to the quality of the image that will be projected. The better the projector’s native resolution and the closer that resolution number is to the resolution of the image on the computer or tablet you are sending the image from, the crisper and easier to see the image will be on your cutting surface.
Connecting your projector to your device
You will also see terms related to how you will connect your projector to your computer or tablet. Some projectors are wifi compatible and can easily be connected wirelessly to a tablet or computer. Some will need an extra device plugged into it like a Chromecast dongle, Apple TV, or Amazon Firestick to connect wirelessly to your computer or tablet. Some will not have wireless capabilities at all, or maybe your computer or tablet doesn’t have that capability, and it will need to be hardwired using an HDMI cord. As you can see, the variations here are numerous, and everyone’s situations are unique. For example, I purposefully chose a projector with wireless capabilities as I wanted to minimize the number of cords in my space. Unfortunately, I realized during my set up process that my computer I was connecting too is old and unable to connect wirelessly. I was able to sort out a work around and hook up an Apple TV to my projector and use a third party app on my Mac computer to cast my pattern images to the projector. Even though I cannot currently project wirelessly, that capability is available when I am able to upgrade my computer to a newer model.
This brings up another point of what sort of device you will be using for your patterns. A computer or laptop that is able to run Adobe is definitely the preferred type of device. Phones and tablets are also possibilities, but the precision and ease of use are much less with these sorts of devices than with a computer of some sort. If using a phone or tablet, you will need do download a PDF viewing app, such as Xodo PDF Viewer
Calibrating your projector
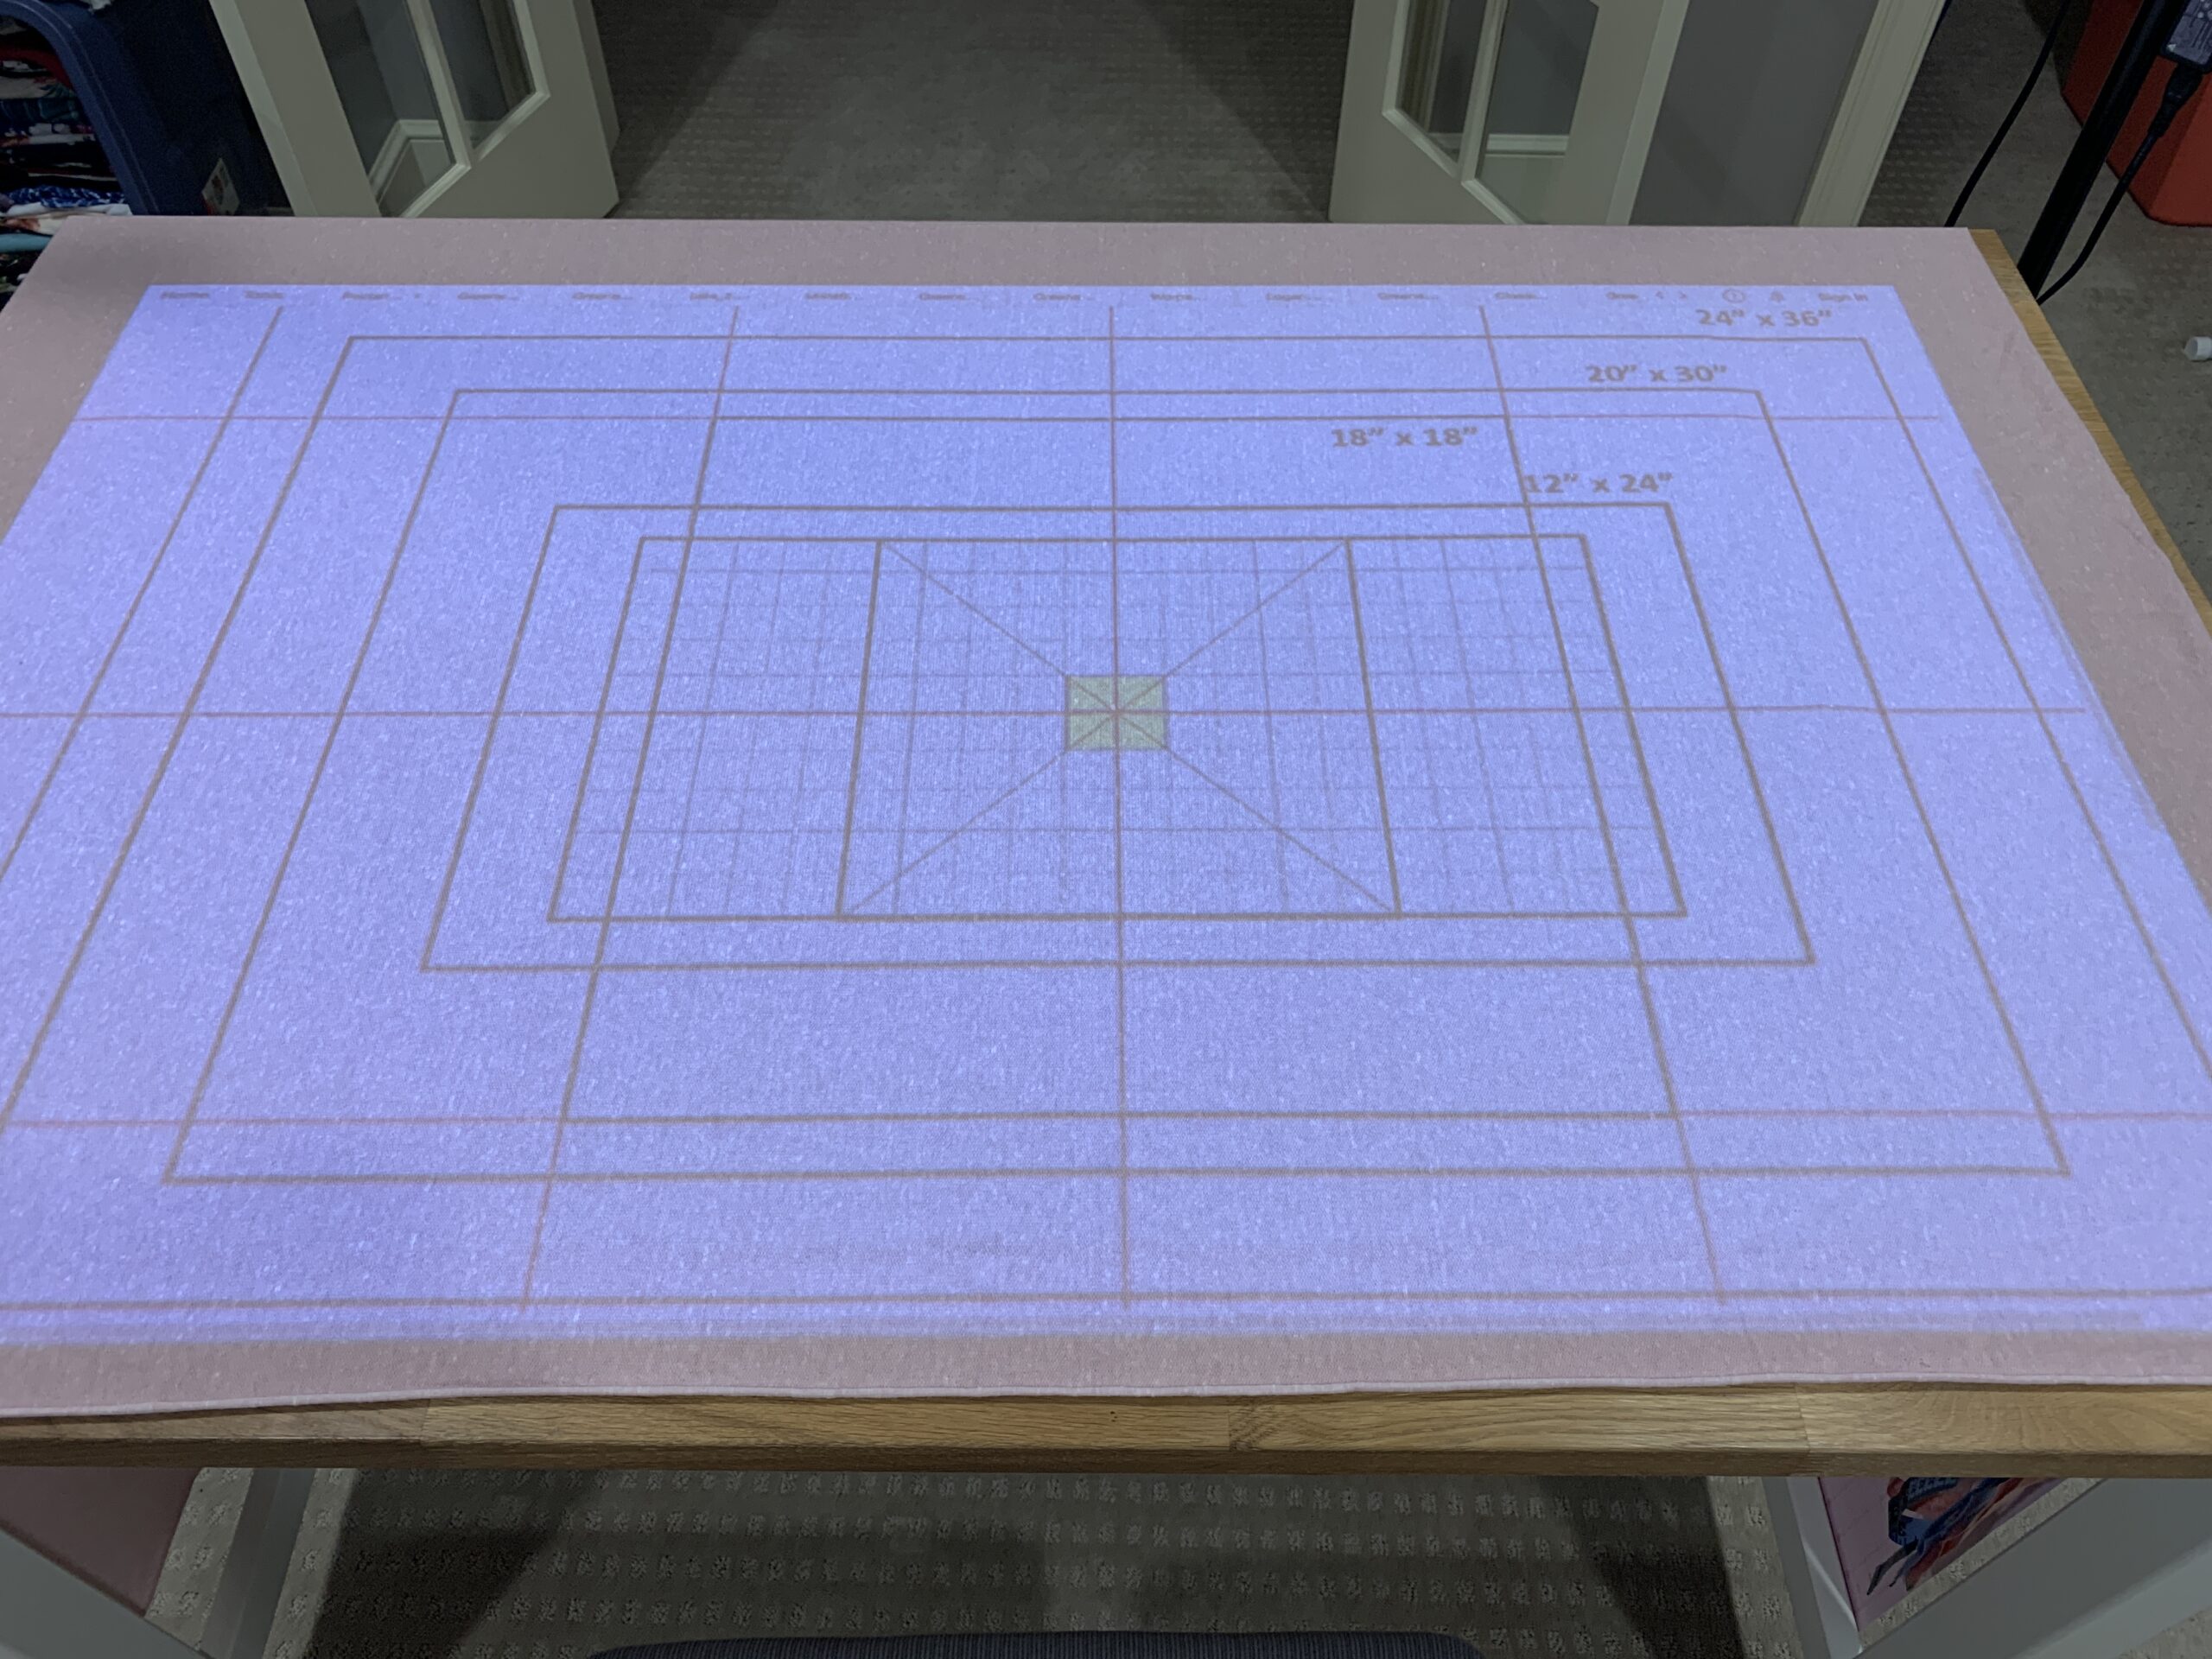
And the last topic I want to discuss is the process of setting up and “calibrating” your projector. This step took me personally less than 30 minutes to do, but some people spend hours perfecting their projectors calibration. Making sure the projector is level and the image it is projecting is completely to scale is obviously critical to making sure the garments you sew after being cut from the projected pattern are also to scale! This step requires careful leveling of both the projector itself and your cutting surface. During calibration you will come across terms like keystone, which is essentially the angle of the image being projected and aspect ratio, which is another measurement of the image. Making sure the aspect ratio of your device matches the aspect ratio of the projector is also crucial. Once you have the image leveled, you will need to play around with the zoom percentage in adobe to get the projected image to scale on your cutting surface. Using a pdf file with various sized grids shown on it and a cutting mat with measurements on it greatly help in this step. I was very quickly able to narrow down my zoom percentage within adobe to be 35.7%, so that when I set my patterns to that zoom, the projected image is 100% accurate. A calibrated projector should result in a grid that is perfectly scaled to your cutting mat.
Mounting your projector
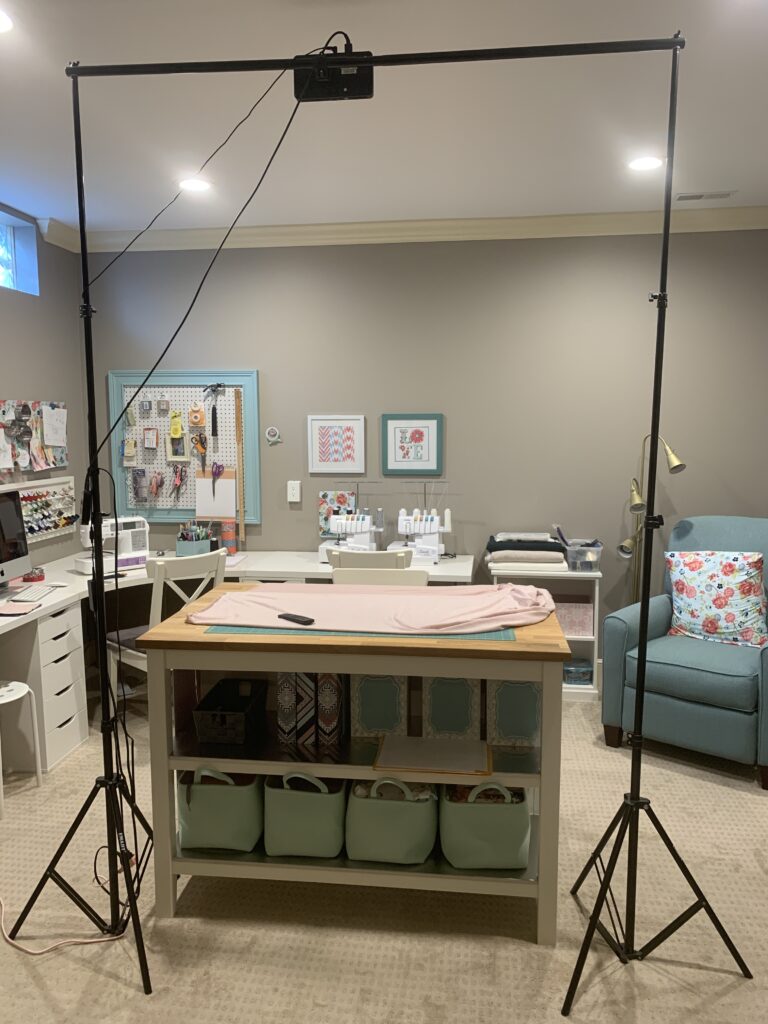
Finally, I should mention there are a lot of different ways to mount your projector. I currently have my projector mounted on a temporary stand (it’s a photography backdrop stand and a go-pro mount). I initially started with this temporary set up because I wanted to see how much I like the concept before having a professional get it mounted and hide the wires for me. Spoiler alert: I will never go back to printing patterns and just need to find the time to have someone come out and mount it permanently for me! Many people will mount them directly to the ceilings themselves or build stands for them, or even use some other sort of boom or stand for other temporary or portable options.
Conclusion

So now that I have thrown numerous technical and confusing terms at you and given a lot of different factors to consider for your space, I hope I have at least inspired you to think about how a projector may assist you in your sewing journey. I know many of us are busy with limited sewing time, so being able to use that sewing time more efficiently is really important! I usually sew after my kids go to bed, so being able to come down to my sewing space, flip on my projector, quickly check that it is still correctly calibrated and then immediately get started cutting a garment to sew up is priceless. Previously, I would have to spend an evening printing and assembling the pattern I wanted to use and not be able to get started cutting and sewing until the next evening. If you think using a projector for sewing would also be beneficial to you I encourage you to spend the necessary time comparing different projector models to find the right one for your space and needs. There are many resources available to help navigate the projector sewing process, one of which is a private facebook group called “Projectors for Sewing”. There are knowledgeable and helpful sewists in this group that can answer questions, help you troubleshoot and share tips and ideas.
While I’ve just gone over some of the basics and background on using a projector for sewing, I haven’t even discussed how this works or what it looks like in action. Stay tuned for another post from me soon about the “how-to’s” of actual projector sewings where I’ll go over how to use the projector for cutting and even how you can do size grading and lengthen/shorten as well!